DrkAngel
1 GW
Unclear from picture ... requires direct observation?
Should have requested 30 min installation manual! ... ?
Should have requested 30 min installation manual! ... ?


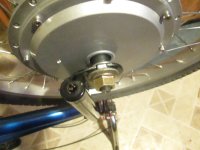
Remove U washer.
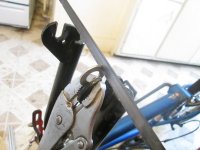
Replace with wrench. - probably a metric size?
Use the slot end of a proper size wrench as your torque arm. (Not the box end!)
Should give plenty of clearance.
Solve 2 problems at once!
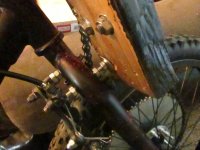
Purpose of torque arm, or wrench, is too keep motor-axle from twisting ... splitting drop out! ... not falling out!latecurtis said:I don't see how the open end will work. boxed end + muffler clamp can stop the axle from coming out of dropout.
As I previously explained, multiple times, 48V controller with ~41V LVC protection keeps 44.4V LiPo nice and safe from your typical abuse. (12s x 3.50V = 42.00V) - nicely protected by 41V LVC! (Automatic protection!)latecurtis said:I ran Dans 10 amp hour Lipo once combined at 44V for about two years without alarms and never dropped below 3.5V.