Hi All!
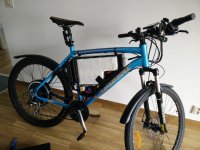
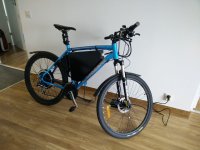
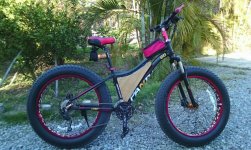
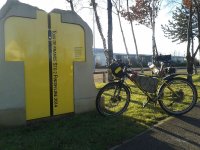
First, my thanks to the many members of ES who gave me the inspiration to construct my first Battery Box, for my first E-bike build! I have like many newbies, been reading ES for a good few months, before buying my first new Fatbikes, for myself and my young daughter. Daughters e-fattie is up and running really well, and now is my turn to convert my bike to E-power..!!
Having researched this and a few other forums on e-bikes, and the fact that my home is in the rice and sugar growing plains of NE Thailand, and the nearest proper hills are a few hundred km's away, I decided on a conversion with a 3000w Hubmotor, and as my nice new Fattie has only a small frame triangle, I soon decided that a custom battery box was essential to my plans.
After detailed measurements of the volume available, I realised I had room to fit either 3 x 4s, or 2 x 6s 16000mah Multistar LiPo packs from HK, or I can squeeze in an 18650 30Q 14s6p em3EV triangle pack into my custom battery box. Either of the options are most suitable for my riding on the mainly hard pack trails through the surrounding farmlands at my home in this rural outpost in Thailand! Also, I am a fit, 65 year old guy, and am quite happy cruising around the trails and local roads at around 30 to 50 kph depending on conditions, and I like to pedal a bit as well, so I think these battery specs will suit me fine.
Originally I had envisaged a made to measure frame bag, but seeing some of the nice creations on these pages, decided a custom built battery enclosure could be a lot more aesthetically pleasing.. I like things to look nice, as well as having good functionality..!
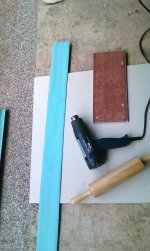
One of the great things I have learned since living in Thailand for the last 12 years is the incredible number of uses that Thai PVC water pipe can have. Having built my home here 8 years ago, and designed and installed all the PVC water and waste pipes myself, I have a great regard for the versatility, availability, strength and ease of working this product exhibits. And it is very inexpensive, and can be hand formed into complex shapes with just a heat gun and bending springs.
Having discarded the ides of 3D printing, because I don't possess a printer, or know anyone in my farming community that does either (plenty of buffaloes, cows, chickens, pigs and rice though,,!) and considering the use of aluminium sheet, my thoughts kept returning to Thai PVC pipe..something of a fetish, you may wonder..!!
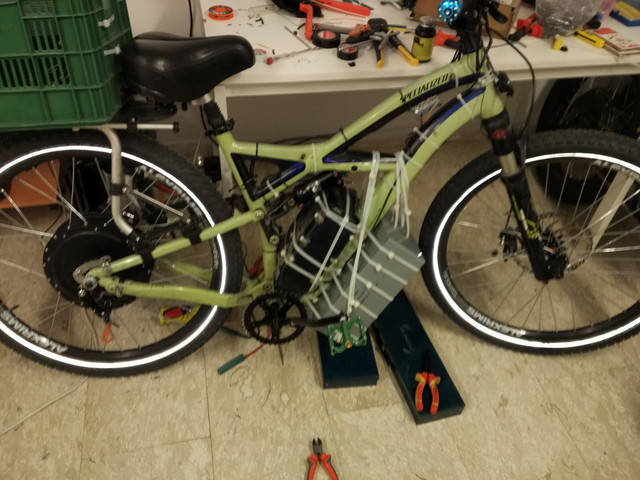
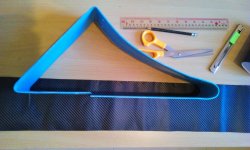
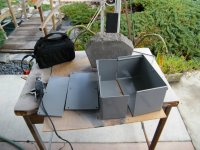
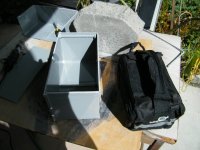
I have lots of PVC pipe in all sizes in my store, and a quick measure up revealed a 2" diameter pipe with 3mm wall thickness, cut in half lengthways, would produce a strip of PVC plastic 90mm wide..exactly the width I had in mind for my battery enclosure to accommodate 74mm wide HK lipo packs, with room for foam padding, and no problem with my bikes 120mm BB spacing.
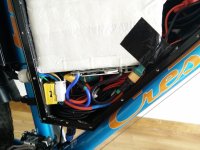
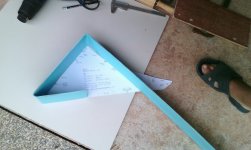
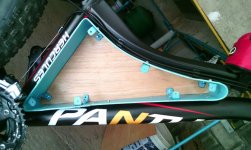
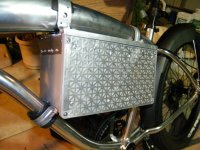
Armed with my heat gun, jigsaw, tools and paper template of my bikes frame triangle, I soon set to work and in a few hours had formed a PVC battery enclosure frame that fitted snugly inside my bikes frame triangle, and was securely fixed in place by the water bottle 5mm bolts. I also will secure the front of the battery enclosure with an additional mount onto the downtube.
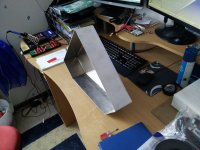
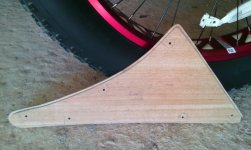
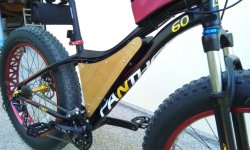
Having completed the outer frame, I was considering either using ABS sheet or plywood for the side plates, when my wife produced a nice sheet of 3mm thick Hardwood veneer board, donated to her by our village Buddhist Temple, which was perfect for cutting out 4 pieces for the laminated side plates I had in mind. Plan was for 1 inner plate to fit snugly inside the PVC frame, and the outer plate to fit the external dimensions of the frame. This would give a strong laminated 6mm thick plate, and improved weather sealing and appearance of the completed enclosure, I hoped!
I drew out the shape of the inner plate using the PVC frame itself as the best template, and jigsawed it to shape. Once both sides were cut and a good fit confirmed, I cut the 2 outer plates 3mm larger all around, check fitted for accuracy, then laminated the 2 pieces each for the left and right sides using PVA adhesive, weighting them down onto a large spare porcelain floor tile and left them overnight to dry nice and flat.
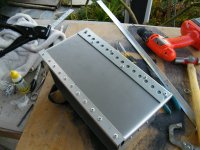
The following day, the sides were laminated nicely and rest fitted a treat into the PVC frame..Mounting brackets were bent up from some more 3mm Flattened PVC sheet, measured up and drilled to fit the frame and attach the side plates. The mounting holes were tapped to accept 5mm bolts, so no nuts are required.
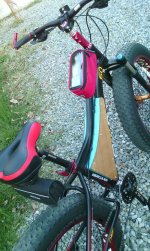
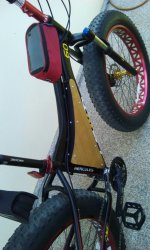
After the side plates were bolted in position, I sanded them to exactly match the shape of the PVC frame, and then gave them a few coats of polyeurathane lacquer until they had a nice, smooth finish.
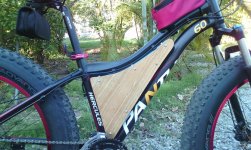
The final job will be to cover the Blue PVC frame with Black Carbon Fiber 3D vinyl adhesive wrap, which I have on order from my supplier in China via Lazada online shopping. My original plan was to also cover the side plates with the Carbon Fiber vinyl wrap as well, but I am really liking the "Woody" look of the varnished side plates, so now I'll wait until the vinyl wrap arrives, cover the PVC frame, and judge the look before deciding to cover or not cover..
What do you think would look best..??!!
Project Costs:
1.3m of 2" x 3 mm PVC water pipe.......0.00 (£1.50 if you needed to purchase)
100cm x 40cm X 3mm Veneer Board...0.00 (maybe £4.00 if purchased)
24 M5 x 10mm Cap Head scews...........£3.00
Laquere and Thinners.……......................£3.00
150cmx60cm Carbon Fiber vinyl wrap..£5.00
My total Cost............…...........................£11.00
I am very happy with the project so far and hope the pictures make everything clear..Now waiting on delivery on 2 x 6s 16000 HK lipo packs, on sale at a very good price and too good to refuse..! Also waiting for all the rest of my electric conversion kit from a store in China via Aliexpress, but I'll keep all that for the later build threads..


.jpg")
.jpg")