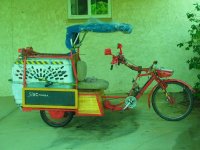
The SB Cruiser : Amberwolf's 2WD Heavy Cargo Trike & Dog Carrier

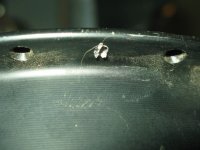
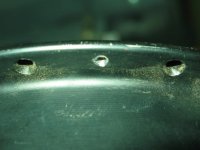
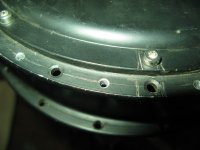
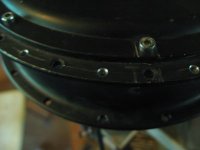
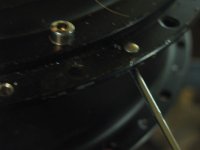
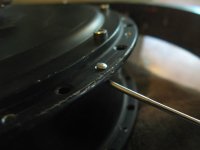
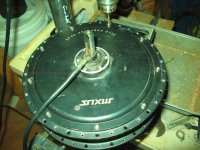
Got all the holes drilled,
img_4375.jpg
img_4361.jpg
View attachment 32
img_4363.jpg
img_4364.jpg
img_4365.jpg
View attachment 28
View attachment 27
img_4373.jpg
img_4374.jpg

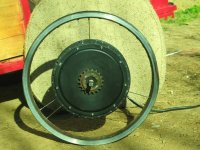
and the test-lacing (in the damaged rim off CB2, saved for stuff like this), using the spare spokes from the SBC's wheels.
img_4388.jpg
img_4389.jpg
View attachment 13
img_4391.jpg
img_4392.jpg
img_4377.jpg
View attachment 23
img_4380.jpg


I made an oops in my assumption that I'd used the 77mm spokes on the 9C (Cuz I didnt' actually go back and read my own posts in this thread :oops:), but when I compared the 77's to the 9c's spokes I found they are a bit long, so it was the 74's I used on it.
View attachment 21
img_4383.jpg


I then tried the 74mm spares (6) on the MXUS plus the ex-Zero rim, and while I can get nipples on them, there's still thread showing when it gets too hard to tighten by hand; perhaps a third of the threaded area on each spoke, arranged in pairs (one for each flange), 120 degrees from the next pair.

The only way to verify if I can lace it fully would be to take the 9C wheel apart, and put the MXUS in there. Since I have to take the 9C out regardless, in order to use the rim for the MXUS, I might as well try it.

But I have a very strong feeling I'll end up having to get a new set of spokes for this motor/wheel, probably 77-79mm 13/14g doublebutted Sapims from Grin.


I don't have enough 77mm spares to test the same way as the 6x 73's, but that 4mm seems to be about what it would take to get all the threads inside the nipple before hand-tightening (no tools) becomes impossible, which is probably about where I want it to be at. So the 77mm would probalby work fine; if not then up to 79mm would probably work.


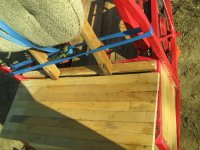
Yesterday at work I had a bit of a failure of the seat; got parked inside and lifted the seat off to get to stuff in the seatbox, and broke the board on the back edge the seatback was screwed thru. No big surprise, but a PITA.
img_4384.jpg

Then on the way home the leftside cover of the seatbox fell out, dumping half the contents of that side of the seatbox on the (thankfully empty) road, so I had to stop and turn around to go back for it before someone would come along and run the stuff over. :(
View attachment 18

I moved the strap that was along the centerline of the seat around the seatbox cover to be perpendicular to the centerline, wrapped around the ends of the seatbox, to prevent that happening again before I'd get home about a mile and a half later. Worked fine, but not a good permanent solution.


So today I went on another long trip, though this one was only about a dozen miles, was windy again (not as bad as last week) and took about 62wh/mile. Picked up some "liquid nails" in a large caulk-gun type tube for cheap (clearance at lowes, as was a jug of a water-sealant/stain sorta like Thompson's). Stopped at the bike shop again but they still don't have the FW tool. Won't need it by the time they do get one, cuz I'll probably have the MXUS laced up.


I sealed up (using hte liquid nails) the rightside end cover, the back and front panels, and the lefthand end cover, as well as most of the bottom of the seatbox, and some of the gaps in hte seatbox top cover itself (at the ends). So now all those parts (except the top cover) are permanently glued to the frame itself, and won't need to worry about them coming off like last night.
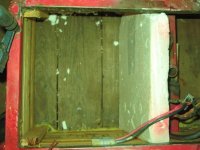
img_4403.jpg
img_4402.jpg


Then I changed the seat mounting so it cant' break the same way (there is *always* a new way of breaking :roll:), so now the seatback's mounting is upside down, bolted to the front edge of the rack. It is stronger and less wiggly, and doesnt' come off with the seatbox lid, making that easier to handle.
View attachment 10
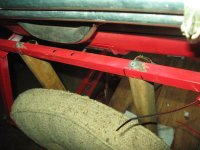
img_4394.jpg

I then screwed the seat directly to the seatbox lid, two screws along it's centerline, which leaves the flexy upwardly curved seatbottom able to still act a bit like a spring (not very good, bu better than nothing).

View attachment 8

Then I added some "gate hinges" to the lid, and attached the other side to the top front frame of the seatbox, to allow the seatbox lid to open forward (becuse it can't open very far rearward, but forward it can open a full 90 degrees. The rearward opening would be even more problematic once the carrier box slat frame is built for the rear end.
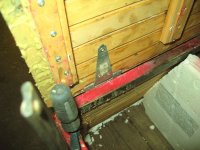
img_4396.jpg
img_4397.jpg
View attachment 5

I still need to carve out recesses for the hinges into the lid's inside, so ti fits flush on the frame, but didn't have time to work out how to do that without a router (figured out a few ways after that). So this is just a test of functionality, which works so far. I'll continue testing it as is before going to the extra work, to see what problems arise that I need to solve first, before all the more permanent details get completed.


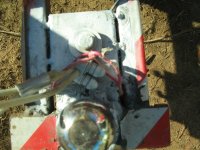
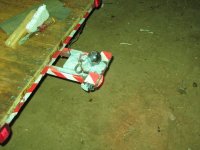
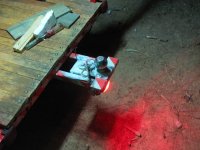
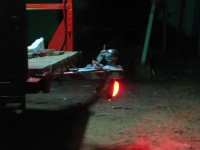
I mvoed the red under-hitch taillgith marker forward a bit so it's all now contained under the hitch, after backing it into a wall that snapped the zipties holding it on, when it stuck out past the hitch. This will protect it a bit while leaving it still just as visible.
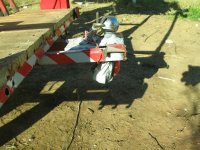
img_4386.jpg
img_4387.jpg
img_4399.jpg
img_4400.jpg
img_4401.jpg/
 
I made a mistake in my mistake above...I did actually use the 77mm spokes on the 9c, but somehow confused myself when comparing spokes and thought I'd used 73mm. It's a good thing they are 77mm, cuz it made the wheel lacing real easy (which is the only thing that went easily today).
img_4407.jpg
img_4408.jpg

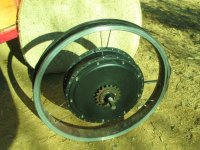
This is the old 9c on the left, delaced from the rim so it could be used on teh MXUS, on the right. Huge difference in motor width (and magnet/stator width inside--the MXUS is almost double the old 9C 2807).
img_4405.jpg
img_4406.jpg


Fully laced and tensioned, not yet trued.
img_4409.jpg

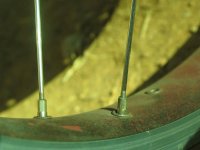
I had a few instances of spokes that didnt' seat properly,
View attachment 7
and had to be really tightneed down to fix that, before letting htem back looser again.
img_4420.jpg
The cause is that on the 9C it was all laced heads in, with spokes bent inward around the flange, to give a good enough bracing angle. On the MXUS the flanges are so wide (wider than the rim) that this isn't needed, and in fact would make the spokes not long enough to lace the wheel (at least not easily). Might even overstress the heads. So I had to reuse the spokes heads-out. Different bend in the elbow...hopefully won't cause a problem, but if it does I guess I'll find out eventually. ;)


Fully detensioned, Kirin stays right there next to me like usual, while Yogi naps elsewhere.
View attachment 19
img_4411.jpg


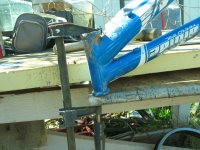
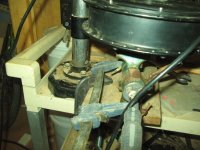
For truing, I couldn't do the usual just sitting the wheel in a frame and brace it, cuz this thing is way too heavy for that. So I drilled a hole for a seatpost-sized tube (a fork steerer in this case) in the workbench, using a goodwill find, of a skil adjustable holesaw. Doesnt' work as well as I'd like but is good enough for this.
img_4412.jpg
img_4413.jpg
View attachment 15

THen I inserted an old fork's steerer thru the hole from underneath, and into the upside-down-frame's seattube, and clamped it in place with the seatclamp.
img_4415.jpg
View attachment 13
Then a bar clamp to hold the headtube down, and the frame is now securely and stiffly held to the very heavy worktable.
img_4417.jpg
img_4418.jpg

Now it holds the wheel stably, so that I can also do the intial motor/wheel testing after truing, without installing it on the trike, so troulbeshooting is easier.
img_4419.jpg
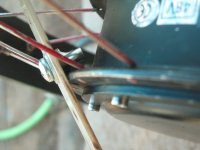
One unexpected problem was that even just the startup torque, unloaded, even with the wrong combo it started with, was enough to do this
img_4460.jpg
which I had to repeatedly fix enough to hold the wheel in place. That is *with* tight nuts and torque washers with tips at the deep end of the dropout, etc. I guess that answers whether I'll get enough torque out of the motor. ;) (this is using just the same old ecrazyman 12fet 40A controller the HSR3548 on CB2 used, temporarily moved to the trike).

For testing, I left it on the fixture, but connected to the trike's controller
img_4422.jpg
img_4423.jpg
img_4424.jpg
I did it like that so that it would be relatively easy to swap wires around to find the rigth combo, becuase I didn't expect it to be the same as the previous motor (and it wasn't).

But when I tried it, there were zero moving combos; which meant there was eitehr a connection problem or a motor problem (the cotnroller works with the HSR3548). Out came the meter, and found that as noted by Neptronix that it might, it had a couple of blown halls (green and blue). They only toggled from 5.4v down to 5.01v. The yellow hall was normal from 4.9v down to 0.4v.

So first up was to dig around and find my spare halls (ordered over three years ago when I was at the apartment with Tiny, and the HSR needed a hall when I blew one when the CA's external shunt plug shorted out hall to battery somehow). That took a while....

Then I had another problem; the magnets in this motor are so strong that I cannot get the stator out of the rotor even by standing on the wheel--my 180lbs is not enough to force it all the way out of the rotor!

So I dug out the 3-jaw puller, knowing it is not long enough jaws, but also with an idea to modify it to fix that (actually making it adjustable) with only a few minutes of modification. I welded on some very thick pre-drilled strips of steel to the back of the jaws, and used some screws with butterfly nuts as new jaw ends (that can be moved between the holes for various diameter stuff).

Worked like a charm first try:
img_4425.jpg
img_4426.jpg

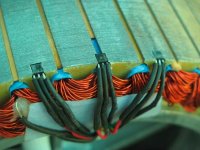
Unfortuantely even with this, themagnets are still so strong that I couldn't risk taking the stator completely out, as I might break something trying to get it back in (or remove fingers). So I left it in there but pulled most fo the way out to access the halls on the stator laminations easily.
img_4427.jpg

At this point my tummy said it was lunchtime, and Yogi and Kirin agreed.
img_4428.jpg


.
 
After lunch it was hall replacement time. This I had to do inside, because someone in the area decided it was a great time to turn their car stereo up to 11, with the bass on 111. Still bad even in the house, but impossible to deal with outside--was actually so loud the dogs were scared to go out, and shook the windows of the house even with us inside. I heard sirens from an emergency vehicle of some type a street or less away, around an hour and a half after it started, and shortly after that it stopped and didnt' come back, whether or not the events had anythign to do with each other I don't care....


The halls were thankfully not glued in place, just friction-fit (whcih was hard enough to get out)
img_4435.jpg
img_4437.jpg

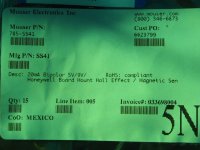
Picked two new ones from the bag
img_4436.jpg

inserted them in the slots
img_4438.jpg

cut the dead ones off (one at a time) and slid the heatshrink off the old leads
View attachment 13
img_4444.jpg

and cut them into the small-diameter and large-diameter sections
img_4439.jpg
so I could reuse tehm, as I don't have any this small, and some sort of insulator is needed.
img_4440.jpg
img_4441.jpg
img_4442.jpg
img_4445.jpg
img_4446.jpg

Finally completed that work, got the wheel reassembled and tested the new halls ok passing a magnet past them,
img_4447.jpg

then covers back on and installed on the trike for a test after finding the right combo finally
img_4448.jpg
img_4450.jpg
img_4452.jpg

There was a scraping sound from inside the motor, which I didn't know what it could be, because I'd been very careful to tie anything down that I thought might reach teh cover, on the side I was working on (hadn't taken the cover off the other side, but assumed it should be ok since it had been repaired for the wire issue before Neptronix's sale).

I ignored it for long enough to do a bit of testing around the block...but even in the yard at low speed I could *EASILY* tell this thing is much higher torque than any other hubmotor I've ever had, even though it's still just using an ancient repaired ecrazyman 12FET 40A controller, same one that runs the HSR3548 on CrazyBike2 (temporarily had been on SBC till this motor was laced up).

Acceleration is much better; takes over a second off the time needed to reach 20MPH from a complete stop! (might even be two!).


Braking is better, too, presumably for the same reason as acceleration.


Mmmm...now I wish I had some more of these motors, and controllers to drive them with "real" power. :lol: The controllers I will have at some point, once I get all my parts dug out and get started on the Lebowskis....


The bad part is that it takes a lot more power just for idle no-load spinning than any of the other motors I have. GUess that's the penalty for the wider magnets/stator. :/ Trike will be less efficient with this on there--but if it gets me started up quicker, especially wiht a load or a dog in the back or on the trailer, I'm ok with that.


After the test I took the wheel off and opened up the other side cover (the wire exit, that I hadn't yet taken off), and found the problem:
img_4454.jpg
img_4455.jpg


The phase wires where they connect to the windings were so thick on one wire that it was rubbing on the cover, and had worn thru and was arcing to the cover. None of these were tied down, which seems odd, but was easily fixed by tying it down and adding some justincase insulation between stator and wiring. Now no more noise.
img_4456.jpg
img_4457.jpg
img_4458.jpg


Should be interesting to see how it works on my work commute tomorrow.
.
 
Worked very well on the commute, Wh/mile not noticeably different (~60wh/mile).


Repeatedly tested the 0-20MPH time, and it is down to 4.5-5 seconds.

Probably cut the time in half, from the 9C 2807 + X5304 combo, to now with the MXUS 3K + X5304 combo. (still just on regular 12FET unmodded controllers 40A on MXUS and 33-35A on X5304).

Braking is more even, too, since now just the regen braking on the MXUS (with the wider magnets/stator and the slightly higher A controller) is nearly equal to the active braking on the X5304's controller. So it doesn't pull hard to the right like it used to. Still a tiny bit of rightward pull, barely noticeable.

Might be interesting to try the active braking controller on the MXUS. Except that it would pull me into traffic and probably pretty hard, edjamacated guess based on x5304 response.


I rechecked the no-load usage on teh MXUS, and after I fixed the phase wire short inside the case, it went down to the 50-80w range, vs 300w+ :shock: from testing before that.

So it isn't any worse efficiency than the other motors (and might even be better, because of it's thinner laminations?).


I've been getting a lot of positive comments on the new look for the trike; I guess it's a hit. More cars than usual slow way down as they pass, and at night I can see the light on celphone cameras as people record it as they go by.


Since I didn't have the dog carrier on there, just the empty cargo area, I didn't have the SMV sign on it either. I've found that this sign makes a difference as to people going around me in another lane earlier, before they get up behind me and then realize I'm not going over 20MPH and am going to slow them down, then roar over into the other lane and around me gunnign their engines. With the SMV sign, this happens a lot less.

So I rigged it on there (hanging below the "light bar", at the rear of the rack) for today's commute, and it had the expected difference (both at night and daytime).


Yesterday I had also reinstalled the last segment of the pedal chain to the wheel, so I also tested that (didnt' have time last night for more than verifying it worked and didnt' jam). Even without the halflink, it fits perfectly, just a hair of slack, because this axle is thicker and so sits in teh dropouts differently than the HSR3548, whcih made the chain so tight I thought it was gonna break.

No problems with the wheel backdriving the pedal chain.


No spoke or tension problems; wheel is still true. gonna recheck again each day this week, after taht it'll be broken in pretty well (I ride it pretty hard around corners; if that sideloading doesn't cause problems, not much else I do with it will).
 
Ok, so the rightside tire going flat wasnt'a fluke caused by the 90-degree valve stem adapter. I took that off after reinflating it for my test rides the other day, and it has gone low over a couple of days till it was flat again today before I went to work. Reinflating it still works and it held pressure well enough for the to-work ride and sitting a few hours then the ride home, but it'll probably be low again enough tomorrow to notice, and the day after be flat if I don't air it up again first.

Will have to take the wheel off, then teh tire and tube off the wheel, to see if anything is detectable for why / where it is leaking, and if it's fixable.

Before I do that I'll just swap out the valve core, as that is the easiest to do, but it is probalby not what is wrong.

I'd completley forgotten until my ride home tonight, but last week I hit an unavoidable chunk of a car (or truck or whatever) that was almost all the way across the lane while I was boxed in in traffic and couldn't slow, stop, or dodge it. I managed to only hit it hard with the rightside tire, but this thing was twisted hard metal and the size of a 2x4 or bigger, and made quite the bang/bump when I went over it. I got off teh road and checked the tire and wheel and saw no problems, as soon as I could get out of traffic, but obviously there's some damage somewhere even if very minor.


I guess the good news is that it *only* has minor damage; if I was still running bicycle tires back there it'd probably have ripped the tire and tube apart and damaged or destroyed the rim too. :shock: It really was a huge chunk of debris.


The rest of the trike seems to be holding up fine, except that the CAv2 small screen is still not saving data correctly every time it shuts down. Seems random as to when it will or won't. I'd guess there's somethign wrong with the capacitor in it, but since there's two controllers' worth of capacitance to go with it, I don't know why it wouldn't have enough power to save it anyway. I'm more inclined to think there's something a bit wonky with the MPUs flash memory or something, where it simply doesnt' accept a write sequence now and then.


Anyhow, because of this I can't do reliable multi-ride testing, like long range tests with multiple stops, or doing a rundown range-check test of a pack over several days, because it doesn't save all the data everytime (some of it *does* save...but I cant' tell for sure what is and isnt' correct each time, because it seems to be different each time it happens).

So I'm pulling hte large-screen v2 off CrazyBike2 to put on the trike, and I'll just put the v2ss on CB2 in case I need to ride it and monitor usage. The install of the CAv2LS on SBC will be done asap (tomorrow before work) but the CAv2SS on CB2 will wait until my next day off (sometime next week), when I put the HSR3548 and a 12FET (probably the lower-amp sensorless-only that used to be on SBC's left wheel) back on CB2, along with the old ammocan EIG pack.
 
STill have the random ridiculously-high speed issue in the maxspeed data, so it's probably teh sensor itself (didnt' mvoe that over fromt eh bike, so will do that tomorrow).

I made sure to set the Rshunt to the 1.000mohm that the new shunt is (same on both CAs) and verified the wheel size is the same, but I get significantly different data with the CAv2LS than I did with the CAv2SS. I suspect there's something else wrong with one of the two, but I don't know which one. I'm going to see if I can find my wattsUP or the Turnigy watt meter, and put SB50s on it if it doesnt' alreayd ahve them, then use that in series at the battery to see which one has closer data to it.

For instance, the Wh/mile is around 52 for the LS, but 62 for the SS. Same mileage is read, so the difference is in current sensing. They are using the same shunt, so either the voltage from the shunt is not correctly reaching one or the other, or one of them is not reading that voltage correctly, or is doing some calculation differently.

I already know the SS CA reads main pack voltage wrong, I forget by exactly how much.

Full data from today's ride, on the LS CA:
58.0vstart
56.1vrest
19.0vmin (this is probably from when I started to power the system off, but changed my mind to test something, before the CA shut down; I know the battery never went that low)
4.800miles
522.mph max (I know this is wrong)
15.4mph avg
18m38s total triptime
2106 total odo
4.628Ah
53.0wh/mile
254.1wh
13.1Amin
101.0Amax

A list of posts in this thread with stats
https://endless-sphere.com/forums/search.php?keywords=cargotrike+triptime&terms=all&author=amberwolf&sc=1&sf=all&sk=t&sd=d&sr=posts&st=0&ch=-1&t=0&submit=Search
for comparison; I think tha't snot all the stats I noted down, but can't find any more than that. Lower wh/mile makes more sense based on those, but all the lower wh/mile stuff is on the LS CA, and the SS CA is inconsistent.

I think that whatever repairs I did to the CA to bring it back to life just aren't enough to fully fix it. :(


Anyway, since hte LS CA at least always correctly saves the data it gathers, I'm starting a rundown test on teh pack, and not charging it each night when I get home. I'm going to start carrying a second pack (the original EIG ammocan) with me after the first few days, in case the present pack doesn't have the capacity it should. I know it will have at least enough for a few days, because of how mcuh I was able to pull from it on my long trips so far. There should be 40Ah avaialble, which ought to be enough for at least 8 full work commutes with some left over.


Side note, the total odo for CB2 before I reset the CA to the SBC's total was 12521miles.
 
Just about the same type of stats today, though closer to 54wh/mile. Something like 9Ah (of 40 theoretical) used so far on the rundown test.
 
I screwed up last night and left the system on overnight, so the Ah/Wh used and the Wh/mile stats are now useless for a rundown/efficiency test. Recharging it to full and then will restart the rundown test again.

This time it will also have the Turnigy Watt Meter at the battery output to compare readings to, to see if the LS or SS CA stats are closer, or if all three are different, as I dont' at this point know which one I can trust (since the LS and SS CAs both give very different readings using the same standalone 1.000mohm shunt with the same RShunt value programmed in to the CA).
 
There is a definite discrepancy between the TWM and the LS CA. I still don't know which is right, as neither matches what the SS CA read before. :roll:

LSCA for trip to work
2.147Ah
101.9Amax
TWM
2.083Ah
70.42Amax

I didn't note the exact numbers on them for the trip home, but it's about 4.4Ah on the LSCA, and 4.1Ah on the TWM.


I suspect the LSCA is the most accurate of all these devices, but I just don't have a way I can tell for sure, at least not that I can figure out.
 
I've added a circuit breaker to both the traction and lighting packs, and a fuse to the traction pack as well, using some salvaged stuff off old powerchair equipment.
img_4461.jpg
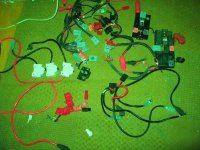
Most of the wires on these are 8 or 10G.
img_4468.jpg


This is a 63A breaker just about the same as the one on CrazyBike2.
img_4463.jpg
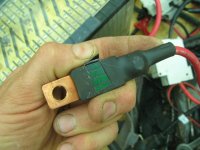
It came with two long cables terminated in rings,
View attachment 15
but because of the experimental nature of my stuff it's easier to use if I replace that with Andersons--SB50 in this case. The simplest way without modifying my other wiring is to just add one at each end, with the negative wire passing straight thru from one SB50 to the other, and the positive wire thru the breaker.
img_4477.jpg


Some of the harness bits had contacts crimped on both ends of a wire, so I used one of those for the negative, and two already short-cut wires with contacts already on them for the positives, and clamped the bare ends into/with the breaker's terminal screws.

Then this breaker unit goes between the battery output and the trike input.

img_4485a.jpg
If anything goes wrong with the breaker itself, I can easily disconnect it and plug the battery straight in. Unlikely, but it's untested, and I don't wanna mess with this for hours on the side of the road, so.... ;)
img_4478.jpg


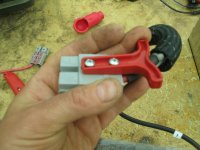
Some of the other harness bits included T-handles for pulling the connectors off each other,
View attachment 17
so I used one of those
img_4476.jpg
and another premade connector/contacts that had ring terminals plus a 125A fuse bolted to it and heatshrunk over, at the positive terminal end,
img_4473.jpg
img_4475.jpg


to replace the existing old (and worn) SB50/wires I was using on the traction pack.
img_4471.jpg


The fuse is the real protection, as the breaker is really a kill switch for working on stuff.


The breaker used on the lighting pack is a little 15A pushbutton style; it's only rated 7A for DC use but that's ok, I don't usually pull more than 5-6A constantly (with the car headlight), though there are bursts of more during turn signalling and braking.
img_4486.jpg
I used a breaker just like this back when I had this pack on CB2 but I removed it for reasons I don't remember when putting it on SBC. Might've been because of limited space, but was dumb because if I'd had it on there I'd never have had the first wiring fire, much less the second. ;)

img_4487a.jpg

Kirin and Yogi kept coming over to help, of course.
 

Attachments

  • img_4480.jpg
    img_4480.jpg
    52.1 KB · Views: 4,213
  • img_4479.jpg
    img_4479.jpg
    52.2 KB · Views: 4,213
  • img_4482.jpg
    img_4482.jpg
    69.4 KB · Views: 4,213
  • img_4481.jpg
    img_4481.jpg
    52.6 KB · Views: 4,213
  • img_4488.jpg
    img_4488.jpg
    61.9 KB · Views: 4,213
  • img_4484.jpg
    img_4484.jpg
    27.5 KB · Views: 4,213
So the whole current measurement thing is driving me batty, but at least now it is relatively consistent between CA and Satiator (if not exact).

I reset the CA after my work commute, where the CA said I used about 7Ah or so (because I accidentally left it on the whole time I was at work). Then I charged using the Satiator, via the port that lets the CA monitor the charging.

The Satiator said about 7.6Ah used to charge.

The CA then read -4.6Ah, but again it was still "on" the whole time, so the current draw from the CA itself plus the two controllers would be added to that for the several hours between start of charge and me getting up in the morning to check it. That ought to be about 3Ah based on what I saw from work usage, but naturally I forgot to check the actual readout for "Fwd" vs "regen" Ah before I cleared it. Have to recheck tomorrow.

Then when I am sure enough of the accuracy of the CA readout for road usage, I can begin the "rundown test" of the pack to see how far it will go, and get a more accurate Wh/mile usage for it as the voltage drops during use (rather than just the top few percent of the pack before recharging it, whcih is all i've got data for right now).
 
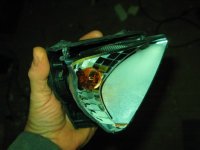
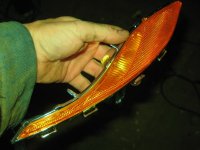
As I was leaving work on Saturday night, I saw a complete headlight/turnsignal assembly off a car (turned out to be a Kia sedan, as I saw one just like it on a parked car the next day). It had obviously been thru a collision of some type, and ripped off the car, but was relatively intact except for the mounting points and the clear lens over te whole thing, and still had it's bulbs in it.

Being almost as large as a 30lb dog's body, it isn't suitable as a whole part for use on the trike, but it's mostly plastic and so can be easily cut apart, and the headlight (with a much better illumination and horizon-cutoff than my existing halogen car headlight) is then not much larger than the existing one.

It's only "problem" is that it is just a rightside headlight, and as such is slanted toward the left, so even though most of the light still goes forward, there is still a fair bit that leaks to the right and upward. Tilting the housing somewhat, plus adding a cover similar to what's already on there for the existing headlight, will solve that issue without blocking any of the forward light.

It also has a "high beam" that bypasses the horizon-cutoff, though I generally wouldn't need lighting of that nature.

I think it's an H4 halogen bulb.


Mounting the light securely is not as easy as it was with my old headlight, which has a steel holder and was easy to just weld to the frame. I'll have to work out a mount, made from metal I can weld or bolt to the frame, that the headlight can bolt to. (preferably using it's adjusting screws just like it was to the plastic housing).

But when it's done, I'll have significantly better road lighting.

I may simply add this light to the existing one, for testing; have to see what I can come up with tomorrow.


Since the dogs are laying on my legs, I can't get to the camera to upload the pics, so I tried to find an online pic of the same module, but couldn't. I think I saw every other possible version except this one; even the comparison charts I found don't show this one, but it is definitely from a Kia. :/
 
Pics of the pieces; probably won't use antyhing but the headlight itself:
 

Attachments

  • img_4502.jpg
    img_4502.jpg
    45.2 KB · Views: 4,159
  • img_4503.jpg
    img_4503.jpg
    47.3 KB · Views: 4,159
  • img_4504.jpg
    img_4504.jpg
    52.4 KB · Views: 4,159
  • img_4505.jpg
    img_4505.jpg
    50 KB · Views: 4,159
  • img_4507.jpg
    img_4507.jpg
    26 KB · Views: 4,159
  • img_4508.jpg
    img_4508.jpg
    28.9 KB · Views: 4,159
  • img_4509.jpg
    img_4509.jpg
    40.8 KB · Views: 4,159
So far I've got 1.7kwh out of the pack, over 30Ah (I forget exactly the total) for over 30 miles, at about 52wh/mile, on my work commutes.

It's not too bad an efficiency given all the stops and starts, plus the windy day today (basically like riding at 30-40mph with teh 10mph+ wind and 20mph+ gusts we had on my way to work and back home.

Still got the leaky tire on the right wheel I need to fix, but it seems to last a couple days before it's really critically low, since I'm only riding around 20 minutes a day.

Supposed to rain tomorrow, so we'll probably get to see how well the compartments hold up against the water, given they're nto finished yet. And the rest of the wiring up front, which I still havent' had time to cover up.
 
Great road kill headlight find. I've been using various road kill mirrors for years. Hope you can get it to switch from low to high beam and back again. That might provide better illumination when you need it and eliminate some of the side lighting, which is only really useful for seeing creatures (or possibly pedestrians) coming at you right before they become fresh road kill themselves. 8)
 
low-high is easy, its' two separate filaments powered by two separate wires, common ground (like all the halogen car headlights with hi/low I've seen so far).

Mounting it is the hard part, which I haven't got determined yet.

Then there's rain-proofing it, to be sure water can't hit the hot bulb and KAPOW.


In other news, the 40Ah 14s2p EIG pack has at least 40Ah in it, assuming the CA shunt is actually the 1.0mohm it states on it, and that the LSCA2.3 is working as it should.

All cells in it are at 3.50v, except the most positive pair which is at 3.31v, and the most negative which is at 3.49v. So I might need to swap the most positive pair out and retest.

It's recharging via the Satiator now, which will take a little while. :)


Today was a windy gusty day (10-15mph constant, 20mph+ gusts) both on teh way to work and the way home. Was over 1200w just to cruise at 18mph***, often up to 1500w in gusty bits. :/ Brought the wh/mile up to almost 55, from the about 52 it had been.

Stats from rundown test over 7 days of work commuting (2.4miles each way for work itself, plus some detours here and there a few times):
57.9vstart
48.8vrest
43.1vmin
2hrs34m5s total ride time
2160miles total odo
37.13miles total ride distance
434mph max (at beginning of rundown; i think i have the speedo sensor fixed now ******)
14.4mph avg
40.04Ah
105.4amax
-18.7amin
2031.4wh
54.7wh/mile
40.197fwd ah
0.1479regen ah
0.3%regen


The trike worked just fine in the rain, which was not coming down straight due ot the winds, and though it wasn't heavy it was definite rain, rather than sprinkles, and the streets were frequently lakes and rivers on teh way home (not so mcuh on the way to work several hours before that). No electrical or other issues, with the exception that it took much harder squeezing of the brake levers to get the pads to engage at all, even with the koolstop salmon pads on there (they might actually be the Sinz clones; can't remember). I need to see about cleaning the rims and pad surfaces, in case it's contaminants causing that, cuz they usually work better than that in the rain. Once the pads *did* begin to bite in, they did it less well than usual, too. the trike is not enough heavier to account for that.

I'd forgotten to put the plastic bag over the cloth "roof" but water didn't get thru that anyway; it beaded up on it and some soaked in but nothing dripped on my head, which surprised me. Maybe on a longer ride it would. Probably.

Trike body itself was pretty soaked, but seat stayed dry enough with me covering most of it, me in my rain gear I stayed dry except my face due to the wind blowing the rain under the canopy.

Since I still haven't gotten time to sand down and seal the wood, there was white wherever I'd glued things together and gotten any outside the seams.

Compartments under the seat stayed dry, though, as did the controllers under teh deck, despite all the splashing and deep puddles. Or maybe they just dried off in the airflow before I stopped and checked.


***(I ride a bit slower when the road is wet, usually, so 15mph on really wet roads that I can't see all of, and maybe up to 18mph on just wet surfaces, depending on area and traffic. If traffic is bad I'll often end up "pushed" to 20mph anyway, because when it is raining, the passing cars are often going a lot faster than normal (faster than speed limit for sure), and are less likely to give the room they should even under normal conditions, much less rainy ones with reduced visibility and worse braking conditions; it's stupid but that's how people drive, as if they were somehow going to get wet if they didnt' hurry up faster and faster).


****** I never realized it, but I had a double magnet on the wheel, using an old namebadge holder, one at each end about an inch and a half away from each other. Speedo sensor itself had it's pickup about between them, so sometimes it'd get multiple triggers, I think. Also, there was a wire splice I hadn't soldered, so I fixed that too. I havent' seen the crazy (or zero) speed indications while riding yet since then, though I hadnt' reset the CA to clear the silly max speed cuz I was doing the range test; it hasn't changed that max since I fixed the sensor.
 
Pack took in 37.36Ah, with the first four cells at 4.13v, the next several at 4.14, then the last six at 4.13v, except for the most positive at 4.03v. Gonna try manually charging that one up to match, for the trip today, then maybe when I get back do a swap out of those cells.
 
trip today downtown to meet Ions82 to pickup the broken Stromer wheelmotor/display went ok.

unfortunately just about as soon as I got home, the assholes down the street started their shake-the-neighborhood bass, and despite repeated requests to not do that, they just keep doing it. It's going to go on all night, probably thru tomorrow since it's a holiday, and the police will never do anything about it, so I just have to sit here and suffer whole-body migraines from it as there is nothing I can do (legally) to get them to stop.

BOOOM THRUUUUUUUMMMM BOM BOM BOOOOOM THRUUUUUMMMMM shaking the floor, walls, windows, my body, head, limbs, over and over and over. It's been going on for getting near two hours now, louder and louder.

Just as a test I turned up my own sound system here in the "music studio" to the max it will go, and I can STILL feel their crap over it.

Since I can't handle that either, I just unplugged it all and am laying here wishing someone would do something to them that would stop them from ever doing it again.


I can't even think to post what I would like to about the day, over their assault on the neighborhood.
 
Ok, tehy actually stopped a few hours back, and my head's been feeling better for a bit, between the quiet and trying to read/help elsewhere on ES I think I can recall much of what I meant to post.

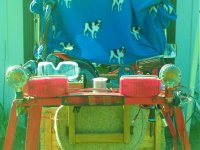
today's configuration
img_4524.jpg

img_4525.jpg


The trip itself was mostly uneventful, lots of potholes so the new (and old) wheel got a good workout.

Lots of wind, rain blowing in under and from teh side of the canopy. Rain gear held up well.

Got sunny and hot many times, in between clouds and rain and cold (most of the trip).

Got lost downtown a couple of times :oops: cuz things have changed since I was last down there, and each person I asked directions from had a completely different answer, all of which were wrong. Eventually I got lucky and found my destination (a bicycle race at the Capitol building area) by following the blocked off streets, which I mostly ahd to ride on sidewalks to do, becuse of the blocked off part street itself and the many oneway streets which were always going the wrong way. :/

Took about 5-6 miles extra out of the way doing all that.

Plenty of range left even when I got home.

Race itself was interesting to watch; was handcycle trikes, couple of regular 'bent trikes too, since Ions82 was in the race I watched till it was over then headed over to meet him and pickup the stromer wheel/display, which I'll see if I can fix up and use on Bill's bike.

I'll make a separate thread for that project, and link it here

when I do. Mostly Ill use GCinDC's stromer thread as a reference, it seems to have more info than any other single thread around here about these things.


total trip data:
58.1v start
51.0v rest
45.9v min
25.81 miles
21.2mph max (down a "fun" hill on the over-freeway bridge downtown)
14.4avg speed (woulde been higher but for allthe sidewalk crawling downtown)
1h46m41s triptime
27.69ah
1435.4wh
55.8wh/mile
27.78ah fwd
0.0812ah regen
0.2% regen
100.2amax
-16.8amin
2185miles total odo


trip out data only
58.1v start
52.8v rest
48.2v min
15.12 miles
21.2mph max (down a "fun" hill on the over-freeway bridge downtown)
14.1avg speed (woulde been higher but for allthe sidewalk crawling downtown)
1h3m58s triptime
15.39ah
822.64wh
54.7wh/mile
15.455ah fwd
0.0548ah regen
0.3% regen
97.18amax
-16.8amin
2175miles total odo


efficiency wh/mile worse than work commute, expect it's due to the winds, this thing is not exactly aero. ;) i also had the dog crate on there cuz i wanted a lockable containment for the motor wheel if i had to stop and go in somewhere for food or restroom/ etc. (didnt, but it also kept the wheel / display dry in the rain on the way back).

pics below
 

Attachments

  • img_4531.jpg
    img_4531.jpg
    52.2 KB · Views: 4,123
Thanks! :)

I did a bit more in the "looking better" department, though it didn't start that way in the plans.

The turn signals in hte rear stick out just in the way of the mirrors to see back a ways behind the trike. I can see around them by moving my head, but this takes time away from looking forward, instead of just glancing at the mirrors.

Moving them to point up vertically from the ends of the light bar will fix that, but requires moving the taillights inward a bit, which also means the brake light won't fit where it is either.

So first I took it all off, then moved the turn signals in, by welding new brackets for them to bolt thru at the ends of the light bar.
img_4545.jpg
img_4547.jpg
Once those were mounted, I drilled a new hole in each of the taillight brackets and bolted them on, and then I added a new bracket for the brake light to bolt to (previously it was only ziptied in place, pending determination of usefulness/durability). The brake light is now just below / between teh taillights, rather than centered between them, and sticks out the back a bit, where previously it had actualy been recessed some, sitting on top of the light bar.
img_4546.jpg


Changes the look of it all, but it all still does it's job.
img_4550.jpg
View attachment 10
img_4548.jpg

While I was permanentizificationing things that had been ziptied on, I also moved the cane holder from the upright just behind my left shoulder, where it interferes with both the suitcase trunk and the dog crate, and welded new bolt-on brackets to the side of the rack on the left edge, for the cane holder to bolt to from underneath/to the side of the rack.
img_4553.jpg
img_4554.jpg
Then it won't interfere with any of the things I normally put on the rakc or the deck, and I can still get the cane in and out easily while seated on the trike or standing next to it.

I just took a couple of short leftover bits of square tubing, welded them by the end edges to the rack, and then drillled a 1/4" hole thru from top to bottom (so I could see what I was doing for the next step). Next, I took some endcaps out of some other 1" square tubing; these caps have 1/4"-20 "nuts" buitl into them and are all steel. Then I trimmed the edges off two sides so the caps would go *inside* the tube, and lined them up with the holes, so that the "nuts" would be just inside the hole on the bottom, for a screw to come up thru and thread into. Last step was to weld the ends of those to the tube ends at the bottom edge. Now no need to hold the nuts while tightening screws/etc.


Then I drilled a little 1/4" hole all the way thru both sides of the cane holder, lined up with the holes in the tubes above. Then on the "bottom" side of the holder, I drilled those out to just larger than the washer I was going to use on the screws to spread the load on the plastic holder, so I could pass it thru from outside the holder into the still-1/4" hole on the "top" side, without fiddling around trying to get something way down in the holder to deal with that.
img_4555.jpg

Worked fine, and I could then just use a phillips screwdriver to put the screw/lockwasher/washer set up thru the holder, into it's small hole, and then into the "nut" in the bracket tube above it. Voila, new cane holder mount.

Looks better/cleaner, too (even before the touchup paint to cover the old ziptie lines).
img_4552.jpg
View attachment 3

I had to add those brackets where they are, rather than just using the rack itself, becuase unless it was out to the side a bit, it'd interfere with the dog crate. Too far out to the side, and it interferese with the mirror view just like the turn signals...hence, those brackets. :)


Since I also had a bunch of other household stuff to get done, I didnt' get to any of the other things planned, like the tire/tube chekcout/fix, cell swapout, or the fender panels on the inboard sides in the deck area, etc. Maybe next weekend, since none of them are critical.


About all I did get done is reduce the imbalance on the top cell from 4.06v (vs 4.13-4.14v for rest of them) by leaving it to charge at a few hundred mA for several hours while I did the above. Probably put another Ah or so in that cell pair, to get it up to 4.11v. Didn't measure with wattmeter, though, but it was at around 380mA for most of the time I was working on the trike, then faded down to about 11mA around the last hour or so. Over almost 3 hours that should be around an Ah. To get it to max out the current, I'd had to adjust the little 750mA max Sorenson lab PSU to it's max voltage, though the voltage seen at the battery cells themselves was only the actual cell voltage at the time. The current dropped pretty quick from around 550mA down to the 380mA, then stayed around that for most of the time.

I'd like to finish balancing with the bigger Sorenson which is more precise and higher current/voltage, but at present it can only be used right on top of the dryer in the utility room, and I have too many things to do to just stay in there for what would probably be hours, monitoring the pack since it has nothing to cut off charge if anything should rise too high. What I should do is find my plugs and change the Sorenson's plug to match the welder's, so I can use the welding extension cord for the 220/240v, and then I could run it into at least teh kitchen, or outside in back, to monitor it while I did some other stuff. Yet another project for another day.
 
The cane holder works fine, other than when I hit a bunch of potholes in a row, or bumpy areas, it can shimmy forward out of the holder, even with the rag that's ziptied to it that "corks" it into the holder. This only happened on the way to work, not on the way home.

Not sure what to do about it yet. Most of the things I could do would also prevent me from just pulling it out or sliding it in, without undoing catches, etc. No extra steps or fiddling is a requirement. ;)


Ever since hitting that debris with the right wheel, it's had that slow leak; still just dealing with it via pumping it up every ride, no issue there other than the annoyance.

But it also bent the axle on the inboard side, I think, because it tilted the wheel toward the outboard side at teh top. I hadn't investigated it because it wasn't a big deal, but it had been rubbing a bit of the tire on each rotation, and this got worse on that long trip Sunday, with lots more potholes. By the end of that, for today's ride to work, it was a constant rubbing.

So when I got to work, I loosened the bolt on the inboard clamping dropout, then moved the axle downward a tad, and tightened the clamp back; this fixed the problem, and it hasnt' come back as of the ride home.

It also reduced power usage by about 200w, so we'll see how that affects wh/mile in the next few days.


Having the turn signals out of the wya of the mirrors is very helpful...I'm still a bit confused on how I ended up with them in the way in the first place, since I kept checking where they were when I was reconfiguring things in the most recent rebuild, with moving the seat up, rack up, etc., but it's fixed now anyway. :)
 
Wh/mile is still in the 52 range, even though it hasn't been windy, and tire pressure is good, no more rubbing, etc. Since it was in that range *with* the problems above, and should have a bit lower just without the big gusty winds, and should also be lower becuase there is about 200w less power being used without the rubbing of tire on frame, I *should* see some improvement in efficiency...but I don't.

And I am not sure why; unless the CA shunt is somehow reading wrong in a different way now..but that wouldn't make sense because it wouldn't show the power reduction either.

I just don't know.

My brain hurts trying to think of possible reasons, cuz nothing I can imagine makes sense given the other things/readings/etc.


The cane thing is annoying--I am not sure what to do about it yet, haven't thought of anything easily implementable that is also easy to use without fiddling around each time it goes in or out of the holder.
 
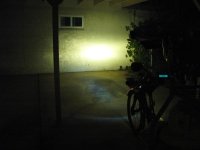
Got the Kia headlight rigged up for testing today; works a lot better than the older sealed-beam 70's technology I was using up to now. Pics are at the end of the post, including beam shots (none of it on road because every time I was setting up to take pics, strings of cars kept roaring thru; eventually it got too cold for my joints and I had to just put the trike away and go in. )

Took a little adjusting, but got it aimed so that with the trike stopped in the street, parallel with the streetsign in my front yard's corner, it lights just the road surface just down to the next corner. I don't recall the distance on that, and didn't measure it, but it's quite a bit better than what I get out of the old headlight. They're the same wattage, but totally different beam patterns, and the light itself is brighter in the new bulb style.

I think the new bulb itself is an H2? have to look at it again. I'm actually using one of the pair of Sylvania bulbs that I got at goodwill some while back, but couldn't use because they were too hot for the one plastic housing I had that would fit them, and none of the various housings I had could produce a good beam pattern with them in any of the jury-rigged mounts I could make. But these bulbs are identical to the one that came in this Kia module.

Which is a good thing...because during my fitting and fiddling with it, I had to unplug the connector a couple times, and the second time somehow it pulled off at an angle, breaking off one of the tabs on teh bulb. It's repairable, but not whlie my hands are hurting like right now (weather changes, gonna rain in the next day or so I think). So I used one of the replacments for now; it appears to have all the same characteristics as teh original; looks identical, etc.


It's just ziptied in place, because when I tried to attach it to the prototype mounting plate I was making, the screw points came off the plastic housing. :/

I'll make a better mount at some point, but will test it out like this a bit first.

Since rain could splatter off the reflector and onto the hot bulb, I used a plastic bag to cover the front opening, and then used part of the old plastic cover/housing of the light assembly to secure that bag to the main housing/reflector, and I used the original lightshade I'd made for the old headlight to cover over the top of this one in a similar manner, though the new light is so large it cant' actually cover all of it.

Once I find my salvaged clear plastic sheet I know I have somewhere, I'll make a more permanent front "glass" for the headlight. Then I can use some more non-clear sheet to make a new top cover (which is mainly a light shield to keep as much of the headlight shielded from shining on antyhing other than road surface in front of me).


The shunt thing...appears to be correctly calibrated, within reason: I've charged via teh Satiator several times now, directly to the pack with nothing else connected, and it is within a tenth or two of an Ah. 4.1Ah on Satiator, 4.25Ah on CA, for example. Close enough to call it good for now, if not perfect.


No joy on a caneholder solution yet. I think I can do it if I make a cone-shaped soft rubber plug that fits tightly over the cane, perhaps is even screwed into position, at a point where I can just slip the cane into teh holder and then squish it in by pushing harder. To remove just pull it out. I just have to come up with something that will work to make the plug. Perhaps several layers of soft foam rubber, glued together except at the outer edges?


.
 

Attachments

  • img_4557.jpg
    img_4557.jpg
    67.8 KB · Views: 4,061
  • img_4559.jpg
    img_4559.jpg
    63.3 KB · Views: 4,061
  • img_4560.jpg
    img_4560.jpg
    62 KB · Views: 4,061
  • img_4561.jpg
    img_4561.jpg
    56.8 KB · Views: 4,061
  • img_4562.jpg
    img_4562.jpg
    59.9 KB · Views: 4,061
  • img_4564.jpg
    img_4564.jpg
    49.4 KB · Views: 4,061
  • img_4566.jpg
    img_4566.jpg
    15.3 KB · Views: 4,061
  • img_4567.jpg
    img_4567.jpg
    8.1 KB · Views: 4,061
  • img_4568.jpg
    img_4568.jpg
    6.2 KB · Views: 4,061
  • img_4572.jpg
    img_4572.jpg
    16.9 KB · Views: 4,061
  • img_4573.jpg
    img_4573.jpg
    16.4 KB · Views: 4,060
  • img_4574.jpg
    img_4574.jpg
    19.9 KB · Views: 4,060
  • img_4575.jpg
    img_4575.jpg
    20.3 KB · Views: 4,060
  • img_4576.jpg
    img_4576.jpg
    10.3 KB · Views: 4,060
  • img_4577.jpg
    img_4577.jpg
    46.4 KB · Views: 4,060
  • img_4583.jpg
    img_4583.jpg
    27.1 KB · Views: 4,061
Grocery run today, and rainy.

Had to use the dog kennel to secure the coolers and keep all the other stuff dry, and found that despite careful measurements to be sure the cane holder would clear the crate, it doesn't.

The crate pushes against the holder and pushes it outward, and pins the cane against the frame at the front vertical rack support. :/ I can use main strength to get the cane in and out but it's really hard.

So I need to fix that...and unfortunately I can't really mvoe the holder out further, or it gets in the way of the mirror or else the cane won't clear that front support.

I could move it up to the top side of the rack...but that will put it in the way of the mirror, too, and would be in the way of the suitcase trunk whenever I need to use that.

I could potentially use springy clips to hold it in place, mounted on the underside edge of the canopy, but they'd have to be pretty strong to keep it from bouncing out, but shaped so it inserts easily.

More pondering....


The wh/mile was back up to 62, not unexpected given the many stops/starts, the windy weather, and the grocery cargo load (which filled the kennel).


But the odd thing is that it was actually a bit higher on the first leg (empty) than the second (full); best guess is the wind died down a bit for the return trip but not enough for me to be able to tell.


Headlight wasn't needed as it was all daytime, but I ran it anyway because it helps others see me in the dimmer cloudy day. Didn't fall off ;) so we'll see how it works on the nighttime rides home this week from work.


Oh, and the power peaks are consistently just over 100A, with min voltages in the 52-54v range when fully charged, which means 5200w-5400w battery output. I don't know how much is actually making it to the ground, but most of it must be thru the MXUS 3K, as the X5304 still has the old 30-ish A controller, which peaks around maybe 35A IIRC.

Am still going thru my parts as I find them for the Lebowski controller builds, but I should have enough stuff to start putting them together "soon". Maybe by this time next year (at the rate I'm going) I'll be at the point of talking to Lebowski about the chips themselves. ;)
 
Back
Top