Turnigy HXT Powered Custom Cruiser Worklog

So you just bought 2 good infineons you're not going to use ???
Will you be able to salvage your existing box if you stick with the RC gear ?

Tell the truth, you felt like too much of a frock motor user didn't you :p
 
Hyena said:
So you just bought 2 good infineons you're not going to use ???
Will you be able to salvage your existing box if you stick with the RC gear ?

Bought 2 yes, only got the one...

Yes can use the same box if i stay with rc.

When HK get the Turnigys back in stock i will buy a 180kv. When i have two motors here i might
look into the hall sensors again until then though with no back motor i am not risking
this motor messing about fitting hall sensors or buying yet another Infineon after todays
efforts.

KiM
 
I'm the reason he hasn't got the other 12-FET yet. :(

I've been a major slacker on preping it for him. Swapped in IRF4110's, and replaced the crap silicone pad with Kapton. Bought special 8awg wire, drilled the end plates for the bigger wire and fitted grommets. Fitted a set of 6mm gold barrel contacts. Practicing getting a CNC engraved Jester holding the Aussie flag pattern to look decent to carve in the case (still looks like a damn relief map mess more than a diagram everytime I test it in wood.).

Wanted to make the baddest infinion for the baddest custom bike build for KiM. I've been taking way too much time though. I'm sorry KiM!

-Luke
 
AussieJester said:
Hyena said:
So you just bought 2 good infineons you're not going to use ???
Will you be able to salvage your existing box if you stick with the RC gear ?

Bought 2 yes, only got the one...

Yes can use the same box if i stay with rc.

When HK get the Turnigys back in stock i will buy a 180kv. When i have two motors here i might
look into the hall sensors again until then though with no back motor i am not risking
this motor messing about fitting hall sensors or buying yet another Infineon after todays
efforts.

KiM

Hi KiM,
Why dont you use the external setup for the halls, I know your not to keen on the look but once fitted the small metal case would be easy to fab with just a pair of tin snips to enclose them, maybe tincan thickness stainless steel this can then be polished up and will defo not look out of place. then you will not have to worry about opening your exsiting motor. You can then give your exsiting controller a shot as it is on the bench.
 
I am glad to see the cruiser about to take off! This is cool. :)

I agree the sensored setup is best for those who must have 0 rpm tractability. I mean, with twin 3220s on my trikes, there is so much startup torque, there is no startup kicking. It just motors! Not sure how well Kim's bike will take off with the HV110. But, heck, he has it, might as well run it for now. I do think he will move to sensorless soon enough.

TBH, I think this build will be one of the best examples of sensorless startup available because of all the traction available and the fact that Kim cannot pedal to start, thus clouding his results. I think it will run fine. But, I also think, in time, he will move to the sensors. :wink:

Matt
 
recumpence said:
I think it will run fine. But, I also think, in time, he will move to the sensors. :wink:

Sums it up beautifully Matt, it is exactly what will happen in the future, how far into the future
i don't know will depend on HobbyCity and the availability of the 180kv motors :?

I decided to go back to the paint shop today this time with a sample of the powdercoat the
frame is done in, after literally checking every car and motorcycle colour chart for a match
we gave up, the powdercoat isn't a 'standard' colour that can be mixed by using colour codes
of a chart, the paint my friend and I picked up few days ago was to purple, the powdercoat
is a very blue, the very closest we could get was candy apply blue, so i forked out
another 35 bucks for this :: sigh :: I did forget to get another tin of primer filler
i require one maybe two more coats and final 1200 grit wet and dry sand before i apply
colour, i have a mate picking up a can of primer filler after work so i cant get the prepped finished
tonight and spray the candy apply blue and clear coats tomorrow.

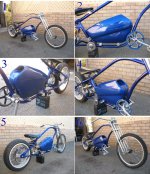
Here's a few pics of the stage its at now-->

Battery_enclosure_series_primedd.jpg


I decided to take more time on it than initially planned as i have 75 bucks in paint into
it now a 'quick' spray job would be a waste of those $$$... Should have it finished and mounted
tomorrow, unfortunately no sign of the last 2 lipo packs ordered and sitting in local post office
since last Thursday, if they arrive today the bike will be running this weekend, likely be running
whether they arrive or not just with less packs

Back soon

KiM

EDIT: oh and the scooter wheel, i got one :: sigh :: i saw two pictued in the ebay add asuuunmed it was for 2..ordered another last night to match this one...
 
Who'd have thought the colour would be so hard to match :|
I guess you'll never get it exactly the same being metal, fibreglass, 2 pac and powder coat
 
Hyena said:
Who'd have thought the colour would be so hard to match :|
I guess you'll never get it exactly the same being metal, fibreglass, 2 pac and powder coat

Oh it can be matched, just not at a 'shop' that sells tinned paint,
my mate (panel beater/spray painter for 20 years)
who was going to paint it originally said he could match it no probs, it needs to
be a custom mix. When you gotto the paint store you pic the colour from
the chart and it has a code, this one is '505' IIRC Lamboghini Candy Apple Blue
Then the guy will check the code and it gives him the exact measurements of
the colour mix needed to make that particular paint colour.

I have the last coat of primer filler on it too shall leave it all overnight and spray the candy blue
tomorrow morning when it warms up.

KiM

EDIT:

couple more pics

primer_enclosure_pic.jpg
 
Hey Kim,
Looks great man!! I love the brown!! :wink:

Enclosure suggestions:
-slide out lid for extra cooling on hot days and easy access.
-bottom mounted controller with fins down on outside of box for cooling
-maybe use those puffed cells to power a fan for cooling
- arching blue spark across the top for super slick EV awareness :mrgreen:

I love your work here man, your constant pursuit of perfection and top notch presentation is always refreshing. I can completely relate to the utter mind numbing effect electronics can have on your soul, it often puts me to sleep and makes me want to retire to the medicinal comforts we enjoy legally here in California. :lol: But in the end it's for my own knowledge and progression, it's hard here especially amongst all the brilliant minds that seems to absorb electronic engineering like sponges. But if you wanted to give in and fake the easy route you woulda just put a frock motor on huh?? :D
 
etard said:
But if you wanted to give in and fake the easy route you woulda just put a frock motor on huh?? :D

Yup...right before i slipped on a little black dress and shot myself in the head :mrgreen:

KiM
 
I finished the final clear coats on the battery enclosure this afternoon, it
will need to sit overnight and harden up before i can wet sand it with 1600
grit wet and dry and polish it. It came up pretty good for a aerosol can paint
job-->

Battery_enclosure_series_candy_apple_blue.jpg

^^^We have 2 coats of candy apple blue and 6 coats of clear gloss...

I wet sanded it before the final coat of clear gloss it came up nice and flat
so after final sand tomorrow and a polish it will be near mirror finish
i believe. The paint doesn't match exactly but it is as mentioned
in previous posts it was as close as i could get with a catalogue mixed paint.


Shall be back tomorrow arvo with final pics of the enclosure cut and polished.

ciao for now chaps

KiM
 
Damn KiM! It's so beautiful! You built a chopper that even I would ride, and you know I'm all about the streetbikes. :)

You got a high-res for folks to use as a desktop or a slide-show screensaver?
 
Nifty. Where's mine? :lol: Seriously, that's a sweet looking ride.

If it makes any difference, it might look interesting if you could trim the crank chainring's guard in blue, as well as part of the rays from the crank itself.

I did a crappy photochop:
Battery_enclosure_series_candy_apple_blue-6.jpg
 
Looking great AJ. We have to race for pinks now, since you painted it my favorite color already. My only drawback is that I'd have to wash it regularly. 16 months of daily running and my blue bike has never been even rinsed off. IOW it still has sand and salt from Luke's beach escapade along with Dec 2008 road grime. You'll have come visit CR and teach me how to do some bling once I start a respectable looking bike.

John
 
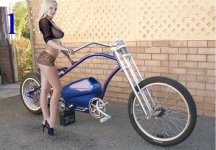
Hey AJ looks freaking fantastic!!! Its only missing one little thing and I'm sure you can take care of that mate!

I made ya a little preview...

AJsgirl.jpg

Congratulations, you are one hell of a fabricator my friend!
 
That is stunningly good, Kim, really great work.

I can do the engineering, but I fall woefully short of your eye for the aesthetics. I take my hat off to you.

I'm absolutely certain that you could turn your skills into a profitable custom built bike business, and I've no doubt that it would be a great success,

Jeremy
 
Unbelievably awesome, Kim. I too had no idea how smooth you were able to get the box, until I saw the primer shots. The finished unit is stunning.

So, you are sticking with 12s, for now, but probably going to 18s in the future? We finally got the BMS bugs worked out, so I will be PM'ing you with some options.

-- Gary
 
liveforphysics said:
Damn KiM! It's so beautiful! You built a chopper that even I would ride, and you know I'm all about the streetbikes. :)

You got a high-res for folks to use as a desktop or a slide-show screensaver?

Thanks mate, i will have some hi res pics available when i have the bike fully completed will do a nice shoot of it
with 'appropriate' back drop and 'accessories' :: wink ::


amberwolf said:
If it makes any difference, it might look interesting if you could trim the crank chainring's guard in blue, as well as part of the rays from the crank itself.

Nice chop there amber, the whole 'colour coding' is a bit out dated for my liking, i also only have a few squirts of blue left that i will use in future for any chips etc, i sprayed a lil on the underside of the stabiliser to see the colour match and its near impossible to tell the difference in colours! I also need a lil for the head badge i have for the front, tiz the old Shwinn stingray job that i have extensively modified, no longer supports the words Schwinn Stingray or quality <-- (that MUST be a case of false advertising suuurely :p) just the flames and the star remain now, tiz black anodised aluminium, will soon be polished aluminium with candy apple blue and HOPEFULLY if enoobs mate gets his shit together with the cnc laser, the Jester you see in my avatar with the Aussie flag, will be positioned in the center of the badge surrounded by the flames enooooooob?!?!!?

michaelplogue said:
This has come together beautifully! Truly inspiring - fantastic work there Kim. A ride to be very proud of!


Cheers mate is coming together as planned, still a lil wayz togo but definitely on the downhill to the finish :)

Hyena said:
Wow that coat of paint makes all the difference.
Looking very sharp mate, good work 8)

Well... I offered to make you one for cost of materials (less than a 100 bucks) but nooooo you went with a store bought frame duct tape and a frock motor didn't you, silly lady :mrgreen: cheers mate :)

FrankG said:
So any idea what you've got into this project Dollar wise Vs Time wise?

Too much time and way to much money LoL...I honestly couldnt tell you Frank, suffice to say it would of been ALOT more without the generous support of Matt.S, Matt.P and GGoodrum At a guess it would owe me in parts alone in the vicinity of $AU1500 no idea the hours though, some days i do nothing on it others a few hours. If I had the funds available and parts at hand i could knock one out in a week or two though, much of the delays are financial and then waiting for parts to be shipped, apart from the frame and enclosure not alot of the bike has parts from Australia on it they are all ex-USA.

1000w said:
Nice work Kim, looking very sweet with that colour on the enclosure.
Cheers,
Matt.P.

Thanks Matt :) I wonder if it is possible to mix powdercoat with lacquer and paint it on? Something i meant to ask
last we spoke. You have to drop up too mate grab your Infineon i have here for you while i try some more to talk you out of a frock motor and into a Recumpence drive rc setup :mrgreen: pssst:- my sister has second hand shop can get you a nice new wardrobe
of dressess to go with your new ride :mrgreen: hehehee...How is it coming BTW haven't seenz me an update in awhile?

John in CR said:
You'll have come visit CR and teach me how to do some bling once I start a respectable looking bike.

John

hehee yeah good luck with that buddy, if i ever can make it to Cr all of our time will be spent in bars/beach picking out 'ladies' for me to
be 'friends' with :mrgreen:

dequinox said:
Hey AJ looks freaking fantastic!!! Its only missing one little thing and I'm sure you can take care of that mate!

I made ya a little preview...

View attachment 3

Congratulations, you are one hell of a fabricator my friend!

BWAHAHAHAHAA ^^ that is now my desktop wallpaper!! I shall journey to the local watering hole
when the bike is complete there's always a bevy of beauties wearing not alot prancing around 1/2 cut that would be willing
to drape themselves over the cruiser for a pic...more to come on that :: wink ::

tritonwow said:
Sweet ride AJ.

Cheers mate :)

gwhy! said:
What a beauty ... all of it.

Thx GWhy, might not have the best start off but it will at least look respectable when its going hehe

Jeremy Harris said:
That is stunningly good, Kim, really great work.

I can do the engineering, but I fall woefully short of your eye for the aesthetics. I take my hat off to you.

I'm absolutely certain that you could turn your skills into a profitable custom built bike business, and I've no doubt that it would be a great success,

Jeremy

Thankyou Jeremy, don't think i would want to do this on a 'fulltime' basis though, its fun because i can do it when i feel like it
its a hobby not a job, if i have to do it when i'm not feeling well or have little interest things wouldn't turn out as
well as they have. I wish i had half your engineering abilities mate i would be UNSTOPPABLE muahaha [/evil take over the world laugh] cheers mate :)

markobetti said:
box for batt. is a beauty !

Thankyou markobetti, i hope others might see this and have a crack at some custom enclosures themselves, fiberglass is very easy medium to use, if you follow a few simple steps its quite easy to get some professional looking results and great thing is
its so damn cheap too!

GGoodrum said:
Unbelievably awesome, Kim. I too had no idea how smooth you were able to get the box, until I saw the primer shots. The finished unit is stunning.

So, you are sticking with 12s, for now, but probably going to 18s in the future? We finally got the BMS bugs worked out, so I will be PM'ing you with some options.

-- Gary

HUGE thanks to you Gary, i have replied to your pm with my proffered setup option :)

To bring everyone up to speed on this, i have chosen to go with parallel adapter boards (new versions)
Garys custom charge controller thats used in conjunction with the meanwell PSU and a modified Battery Medic
This means i will only need to run two boards inside the box the rest is left at home int he workshop used
only when charging, with the Zippy/Turnigy packs staying so well in balance it isn't necessary to balance EVERY charge
hell i don't think Hyena has ever balanced his main pack? This will allow more room for LIPOs.

The new parallel board, charge controller and modified battery medic.
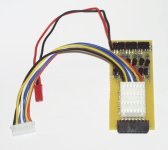
6s LVC-HVC-01.jpg

Simplified Charge Controller-v.4.0.6-02.jpg


Soon as these are readily available from Garys wedbsite TPPacks.com i shall link to them again in my sig for others interested in getting
hassle free BMS for Lithium Polymer, i know alot of you have pmed and asked me when they will be available
well the wait is nearly over and it will have been worth the wait, BIG thanks to Gary and i think
Mr Fecther also? may have had a helping hand in the process, this will make it ALOT easier for dunderheads
like me to use the lithium polymer chemistry.

Thanks to all for the positive feedback much appreciated, i will likely not have an update
today hence i am posting now rather than this evening, legs playing up a little today so its feet up
and medicated, will do the enclosure good having another day in the sun before a polish Monday
morning.

Hope you all have a great weekend...back soon peoplez :)

KiM
.
 
Back
Top