
You are using an out of date browser. It may not display this or other websites correctly.
You should upgrade or use an alternative browser.
You should upgrade or use an alternative browser.
Your Creation's Before & After Pics
- Thread starter xyster
- Start date


Kingfish
100 MW
Bluefang, that looks really impressive with nice retro styling. Can you give us a bit more detail about that front fork please? From one of your earlier threads I gathered that it came from a light motorcycle. What is the diameter of the mating neck tube?
Well done, KF")
Well done, KF
electricridefl
1 kW
- Joined
- Jan 5, 2008
- Messages
- 374
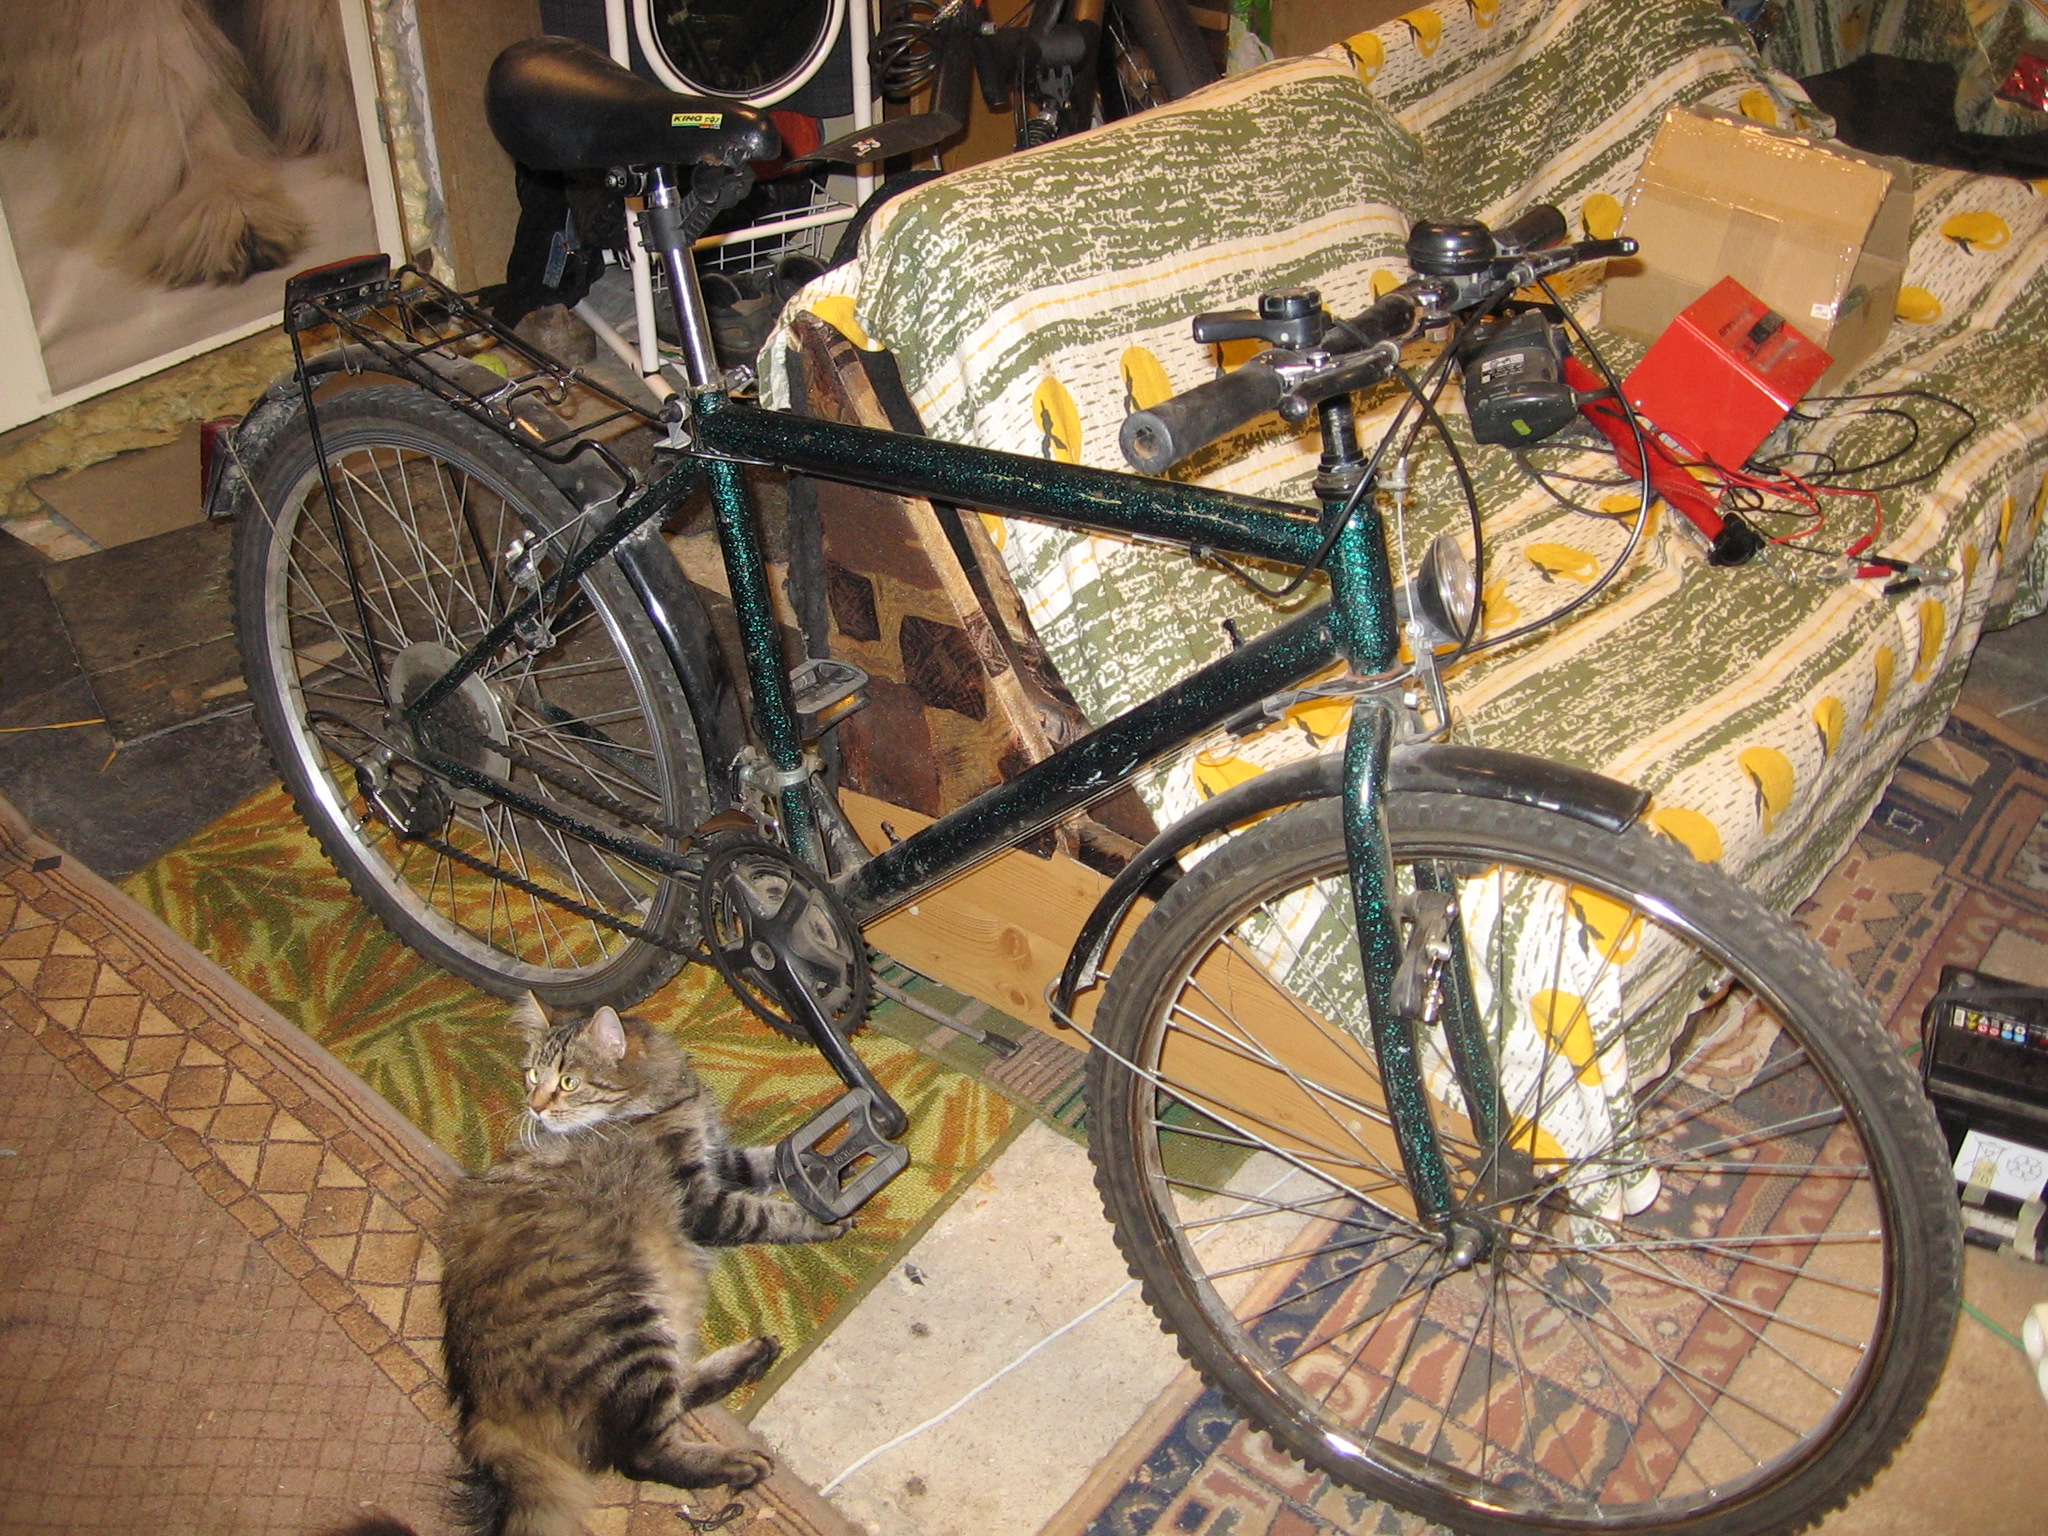
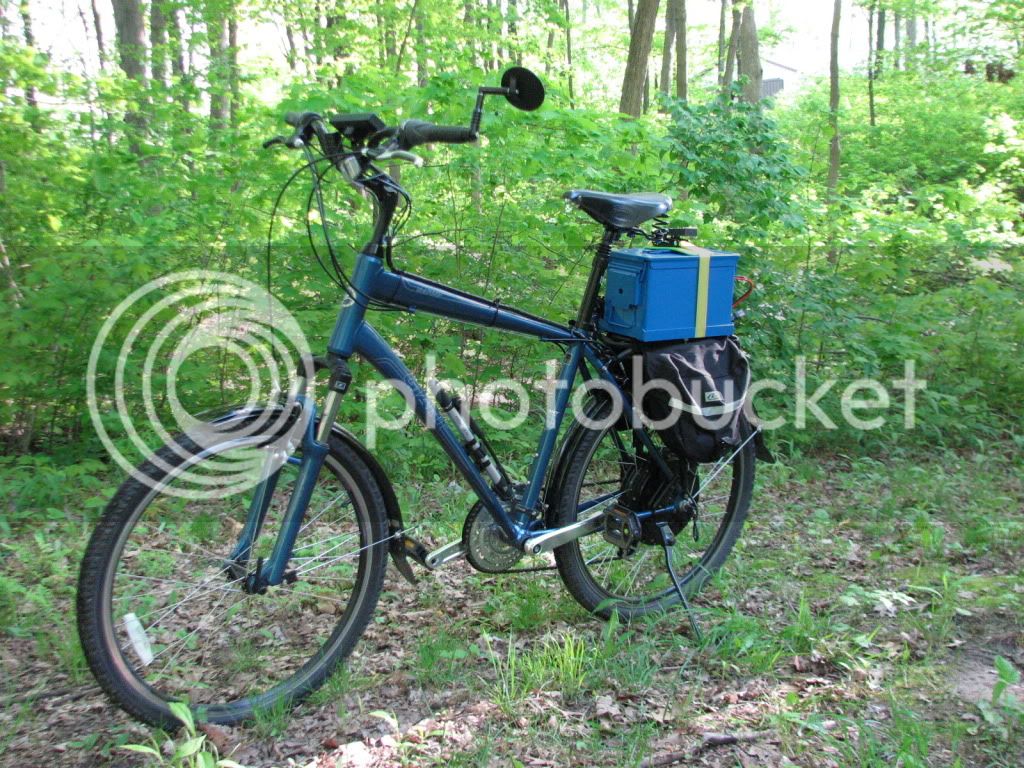
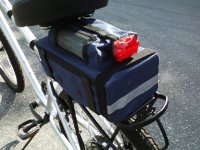
Hear is my 96volt machine. I've been riding the bike for 5 years now. Its always exciting though, when one gets a new battery. I pedal along at 35mph. 409 motor. battery contain 12 rc 7.2v nimh packs. good for 5-6 miles. marathon xr rear tire, hydraulic front brake, 48-11 gearing. And fenders, and basket, and mirror, and even lights. attachment=0]DSCF0007.JPG[/attachment]
Bluefang
10 kW
Hey Kingfish, its a standard triple T fork from a chinese pitbike, the neck tube was same as the bikes been i think 1", i was able to reuse the bearings that came with the forks. I had to shorten the neck on the bike by like 10mm from 140mm to 130 to get it to fit ok. Its pretty heavy tho, i would say the forks alone are about 6kg or more with the wheel i used been over 10kg With brakes thats like 20kg just in the front end with the rest of the bike including motor weighing less then that 
If i do it again for the look i think i ll just modify a push bike hub to fit rather then use motorbike stuff, its a 21" motorbike wheel. Its actually on ebay atm so i ll find out soon if people like the look of it, 7days left on the auction with 8 watchers and a large number of emails already You can get a fork setup for like $80 and the brakes would be under $100 for a twin piston 240mm disc too. So alot cheaper then normal bike stuff and a million times stronger, but alot heavier.
Something like http://www.pccmotor.com/inverted-forks-12quot-wheel-xr50-crf50-xr-crf-50-p12505050.html would be great, just relace the hub with a bicycle rim and your good to go.
With brakes thats like 20kg just in the front end with the rest of the bike including motor weighing less then that If i do it again for the look i think i ll just modify a push bike hub to fit rather then use motorbike stuff, its a 21" motorbike wheel. Its actually on ebay atm so i ll find out soon if people like the look of it, 7days left on the auction with 8 watchers and a large number of emails already
Something like http://www.pccmotor.com/inverted-forks-12quot-wheel-xr50-crf50-xr-crf-50-p12505050.html would be great, just relace the hub with a bicycle rim and your good to go.
adrian_sm
1 MW
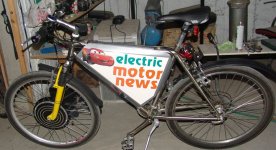
Before:
x408, 48V10Ah LiFePo4, <1000W, ~30kg

After:
Commuter Booster Friction Drive, 5s20Ah LiPo, ~2000W, ~18kg.
Oops, this photo doesn't have the phase extension wires connecting the drive to ESC.
x408, 48V10Ah LiFePo4, <1000W, ~30kg
After:
Commuter Booster Friction Drive, 5s20Ah LiPo, ~2000W, ~18kg.
Oops, this photo doesn't have the phase extension wires connecting the drive to ESC.
adrian_sm
1 MW
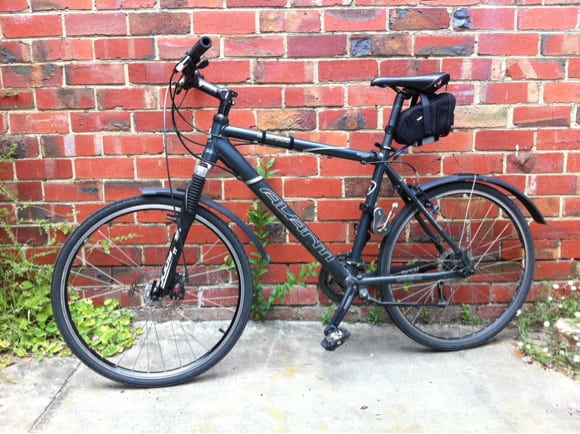
Before:
Avanti Giro Road Bike: 9.4 kg

After:
Commuter Booster Friction Drive (5065 motor), 5s20Ah LiPo
~1000w, 13.5kg 8)

Avanti Giro Road Bike: 9.4 kg
After:
Commuter Booster Friction Drive (5065 motor), 5s20Ah LiPo
~1000w, 13.5kg 8)
motornews
1 W
gtadmin
10 kW
Hi, you wouldn't have a link to the full sized picture your avatar is based on, do you?
Cheers,
GT
Cheers,
GT
Olivettibakebean
10 W
Now I have it running I thought I would add my project.


http://endless-sphere.com/forums/viewtopic.php?f=6&t=25932 My Build Page!
http://endless-sphere.com/forums/viewtopic.php?f=6&t=25932 My Build Page!
xmasta
10 W
Hello sphere guyze!
Here's mine, before and after.
Contains: Ping custom-size battery 48v10ah, e-bikekit.com rear dd hubmotor, turnigy wattmeter.
before:
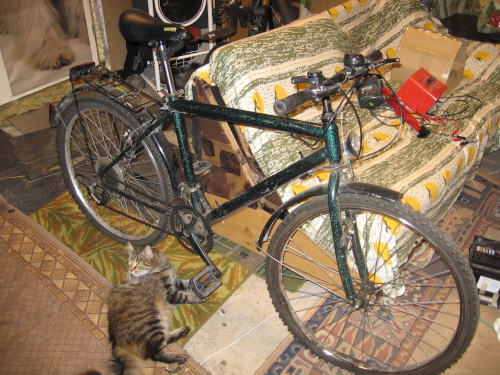
after:
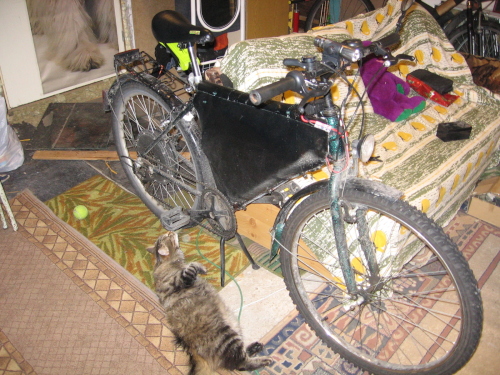
( it is winter to spring atm here, so it is liek very shty everywhere and it really likes to hop on my bike, hard to keep clean atm )
cat smells something funny too.
here's 32 hours of making in 10minute video:
http://www.youtube.com/watch?v=DVFHgrAI2ug
here's one minute overview (in estonian):
http://www.youtube.com/watch?v=fF3o-qYEB2A
and here's the build thread in an estonian forum, use google translate for sht and giggles
http://www.zev.ee/foorum/viewtopic.php?f=11&t=177
it doesnt look too pretty i know, my first fiberglass work, will do better next time
peace!
Here's mine, before and after.
Contains: Ping custom-size battery 48v10ah, e-bikekit.com rear dd hubmotor, turnigy wattmeter.
before:
after:

( it is winter to spring atm here, so it is liek very shty everywhere and it really likes to hop on my bike, hard to keep clean atm )
cat smells something funny too.
here's 32 hours of making in 10minute video:
http://www.youtube.com/watch?v=DVFHgrAI2ug
here's one minute overview (in estonian):
http://www.youtube.com/watch?v=fF3o-qYEB2A
and here's the build thread in an estonian forum, use google translate for sht and giggles
http://www.zev.ee/foorum/viewtopic.php?f=11&t=177
it doesnt look too pretty i know, my first fiberglass work, will do better next time
peace!


unklegrumpknee
1 W
I don't really have before pictures. But here is what I put together and it's cost.
GT Palomar Purchased from the son of a friend. $100.00
Tune up of bike at LBS $100.00
Wilderness energy front hub motor , tire and rear rack $140.00
Crystalyte pedal first controller & Anderson connectors $120.00
& throttle (thumb)
48 volt 7.5 Amp-hr batteries Salvaged ( 2 sets) 0.00
new stop leak filled tube $10.00
Seat $20.00
Moose Zipperless Tank Saddlebags X2 (made for ATV's) $40.00
Charger 24v $20.00
Set of spokes $20.00
Spare GT bike non electrified $45.00
Mirror $10.00
Basket 0.00
Grand total Less some tool purchase $625.00
Comments : Used the battery bag that sat on top of rear rack at first. Found the Moose bags at an ATV shop. They have a Neoprene Harness which acts as a suspension. They lower the center of gravity as well and make the bike much more stable and comfortable to ride. So far around 100 miles or so. Everybody I let ride it comes back with a grin.
Thank you to all the members of this forum . I couldn't have done it without you.
I am proud of the fact that very little new material went into the cobbling together of this project. The motor was part of a kit that was cannabilized at the LBS. The bikes, controller, charger and batteries are used.
Attachments

Golden Motor Canada
100 W
My CCM Build
Went to Canadian tire one day for a seat and ended up picking up a new CCM downhill Bike at half price. Added two Magic Pies and the battery is in the trailor. Some of the pictures still show the battery on the back before I moved it to the trailor. I added a second throttle to the right upright bar so I can operate it from either position. I also added a third brake lever to the left upright that operates regen plus the the rear disk brake. The two regular brake levers operate the front disk and the rear center pull brake. So yes, I have 3 brake levers and two throttles.
Gary
Sorry no before pictures but here is a link to the bike on the Canadian tire website so you can see what I started with
http://www.canadiantire.ca/browse/product_detail.jsp?PRODUCT%3C%3Eprd_id=845524443324981&FOLDER%3C%3Efolder_id=1408474396672192&bmUID=1301967914931
Here are the results!
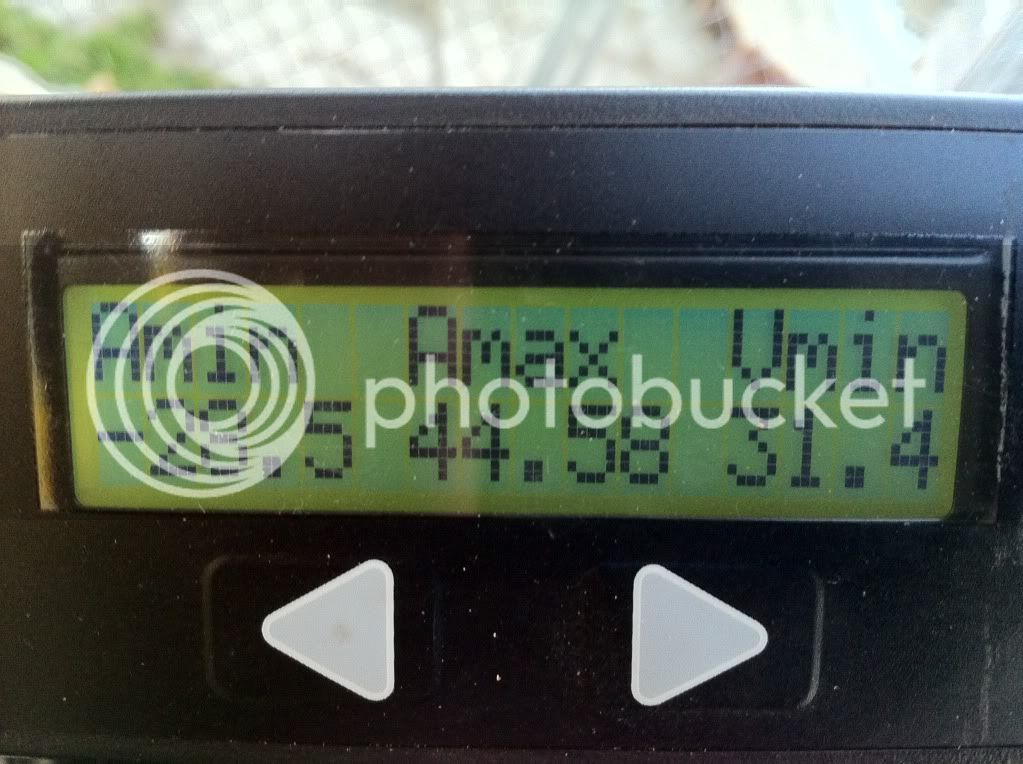
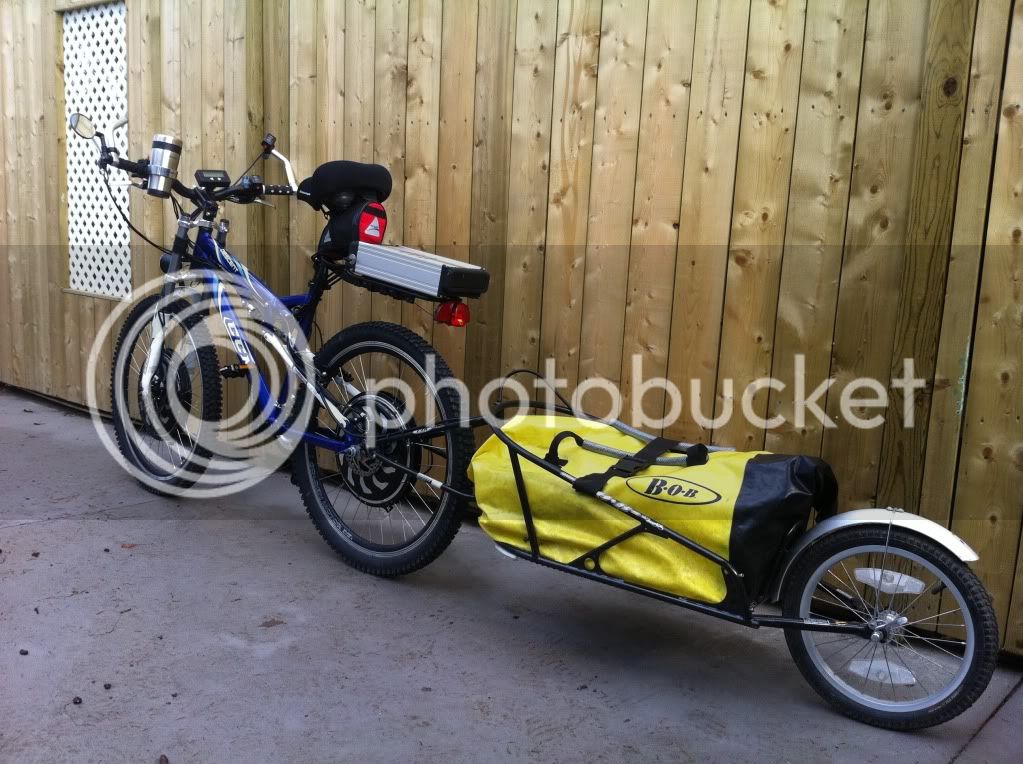
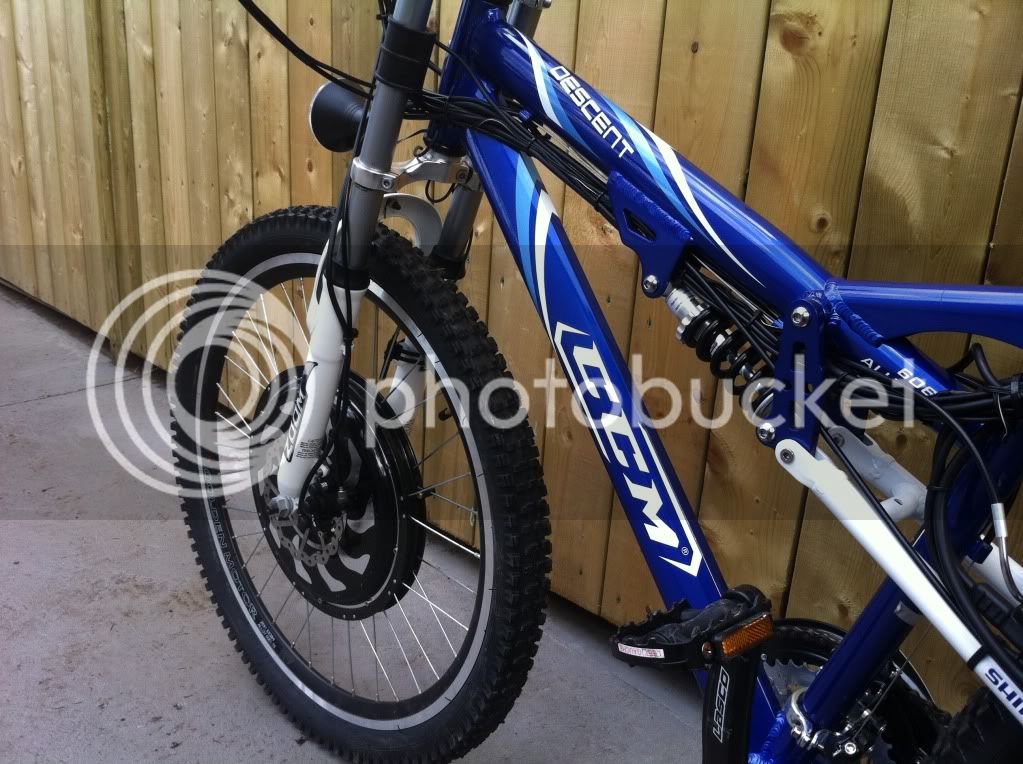
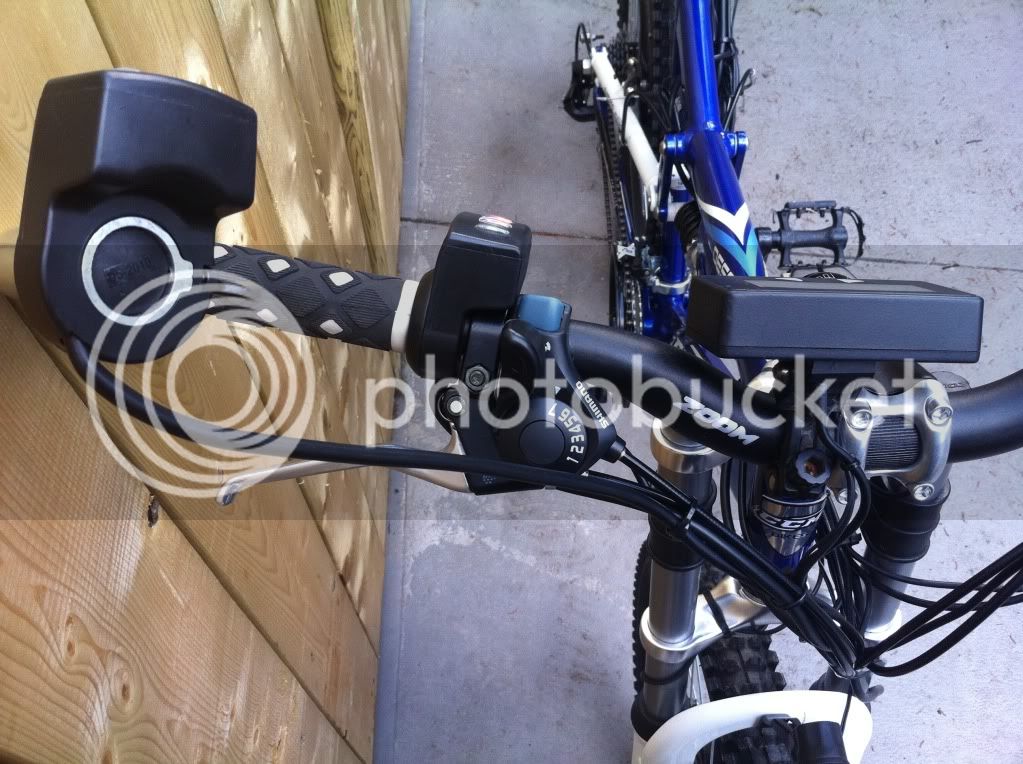
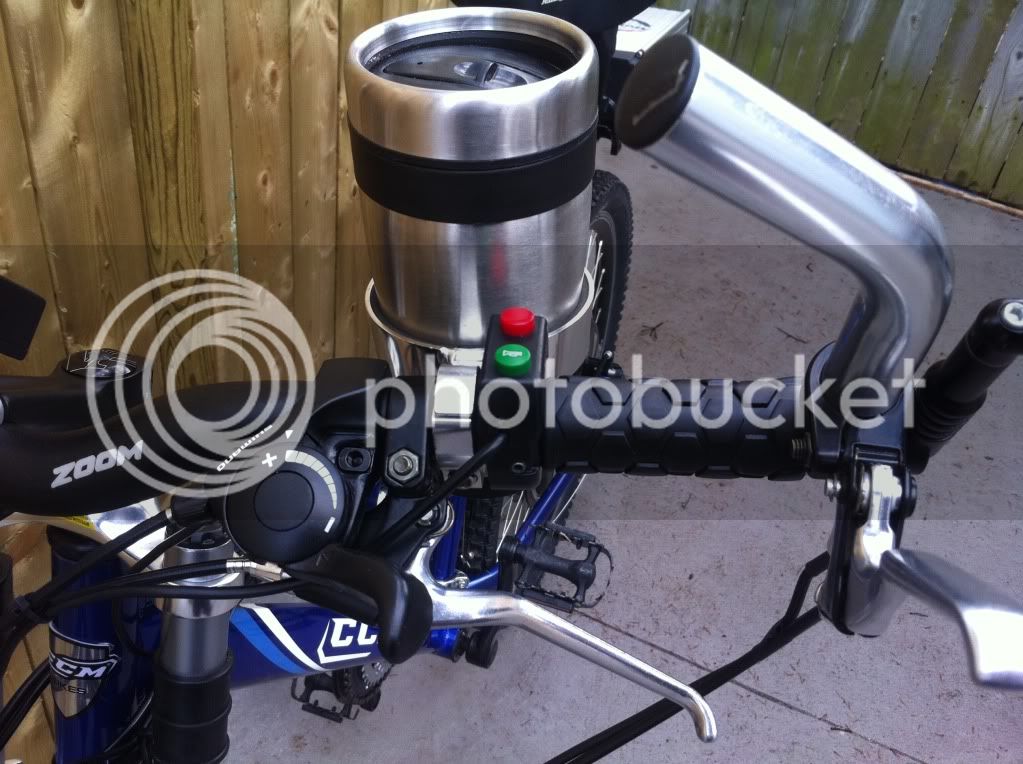
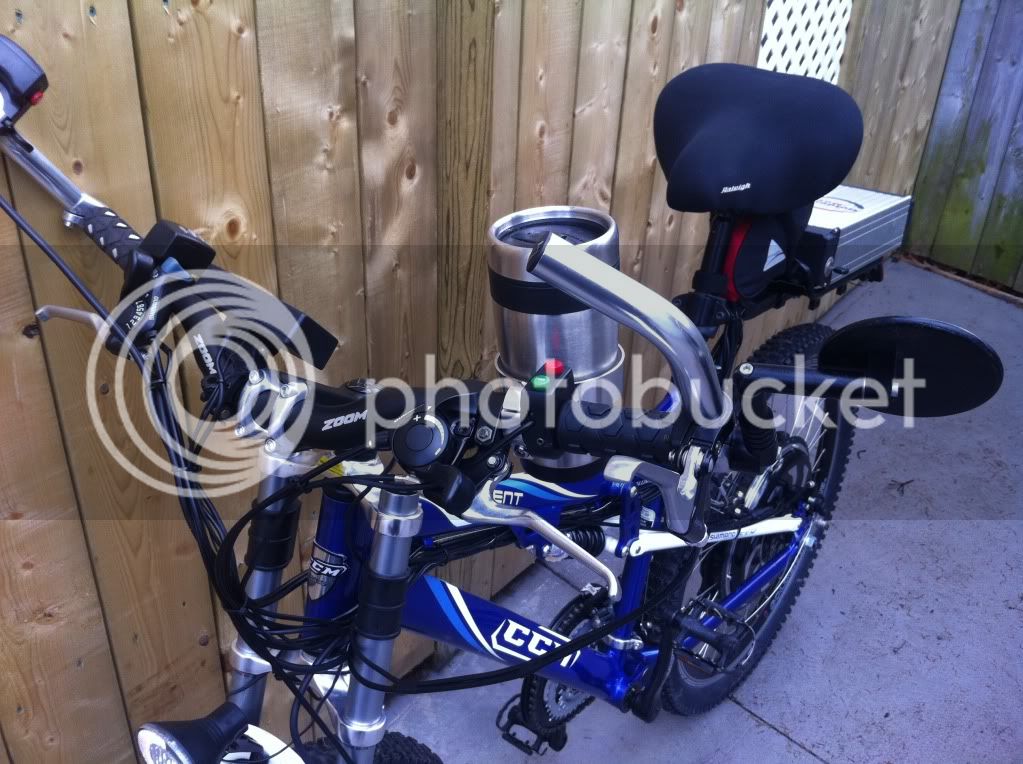
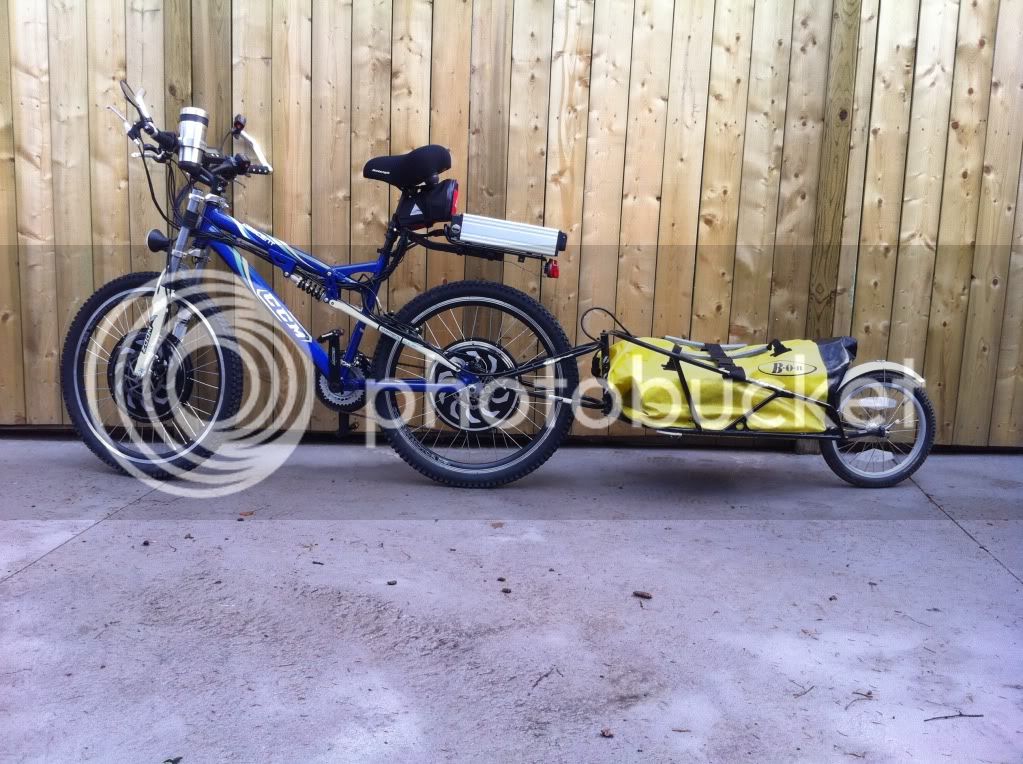
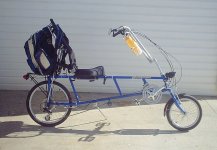
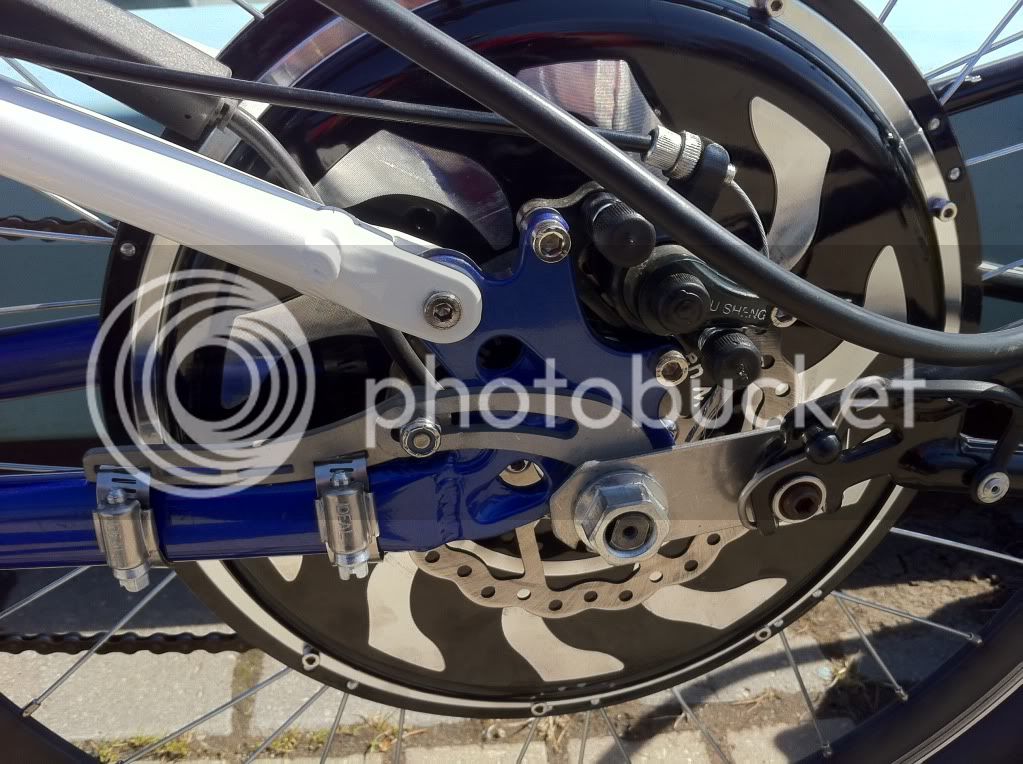
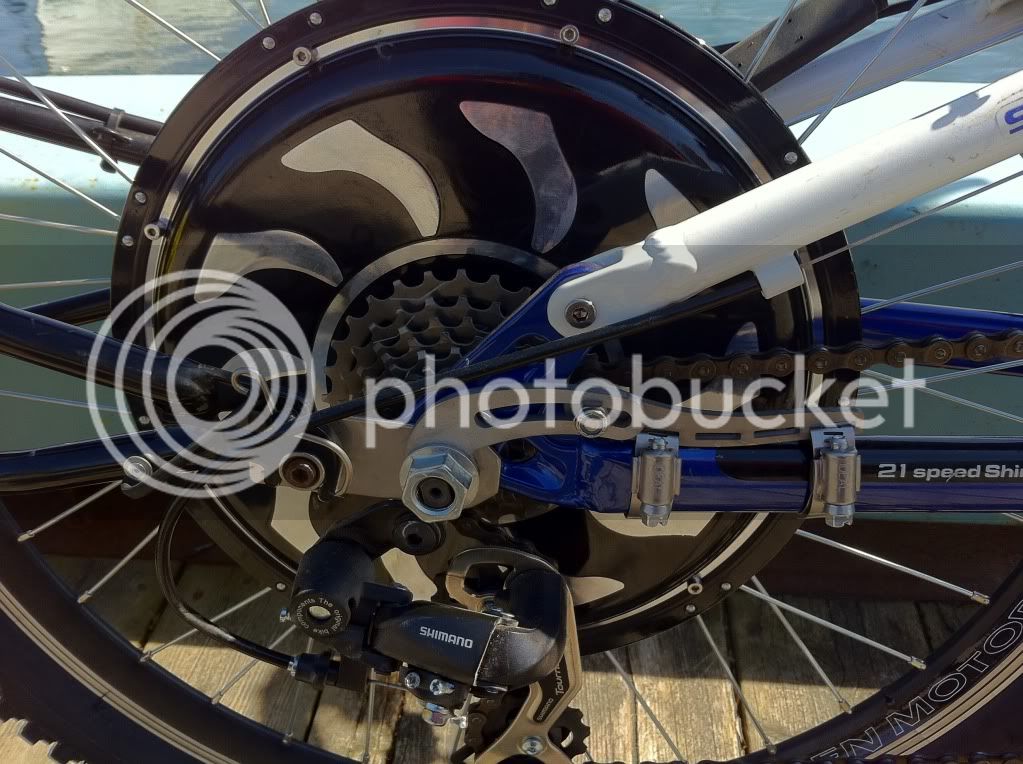
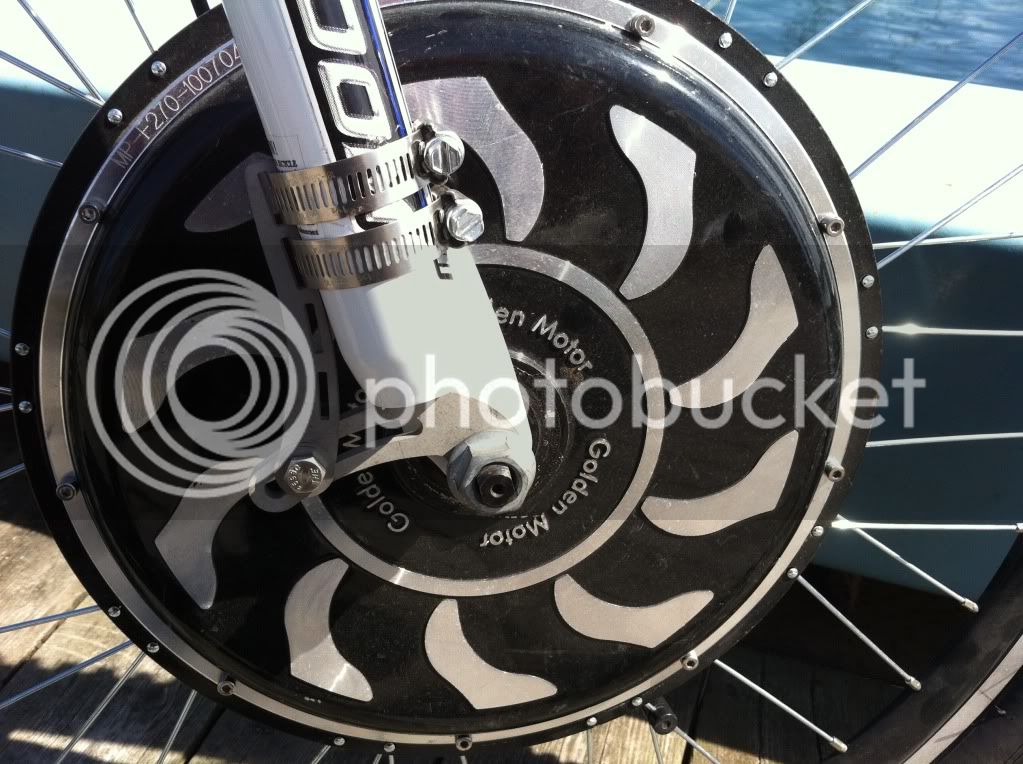
Hi, GMC
Thanks for displaying your intriguing 2-piece torque arms with your pics.
I can find the torque arm sets on your site, but I can't find the adapter piece that mounts the BOB NUTX about 2" aft of the axle out of the way. Do you sell pairs of these adapters also or are they custom? These adapters would allow a standard BOB bike connector fork to work with a 29er. They would also allow for a further aft pivot point which, I understand would make for a less squirrelly pusher trailer setup.
Golden Motor Canada
100 W
Hello Lemlux,
Sorry for the delay getting back to you. I wanted to wait until i had the time to take off one of my arms to show you what it looks like under the nut
Anyway, they are custom made. I made them from stainless steel. Originally I was going to make an oval hole that fit perfectly over the oval shapped GM axle. But this was to difficult so I just made a round axle hole. At first they used to slide down with the weight of the trailor. Then I the cut an angled notch in the bottom and the the GM lock nut fits in to hold it in place. Nothing moves now and they are strong and secure.
Gary
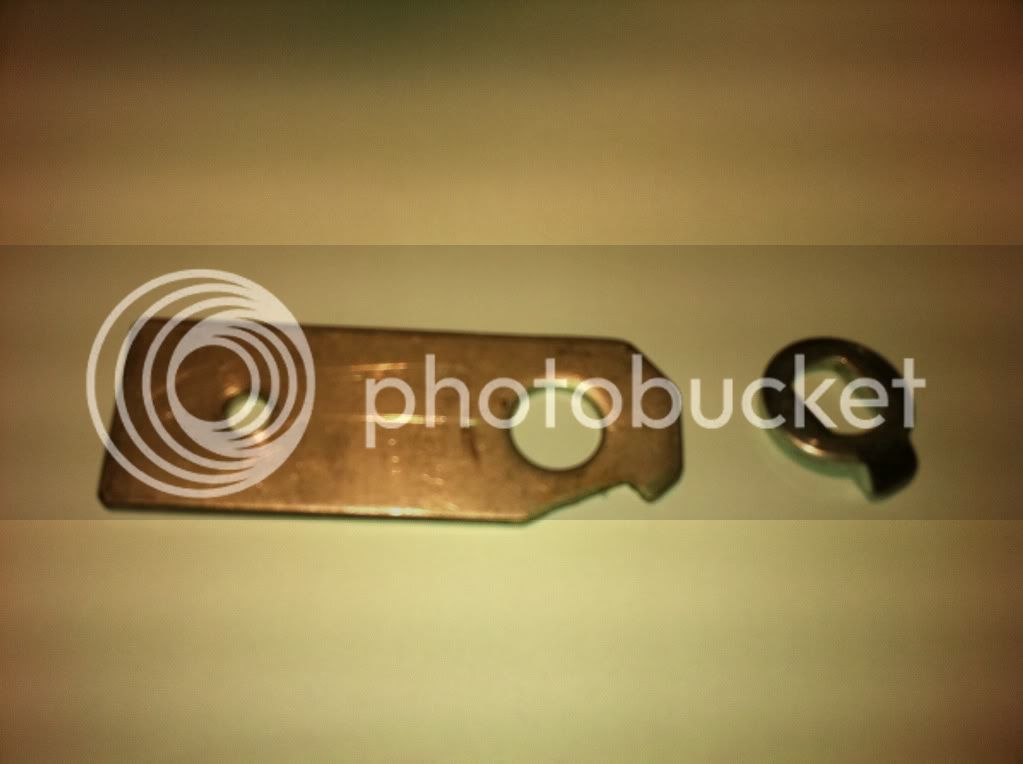
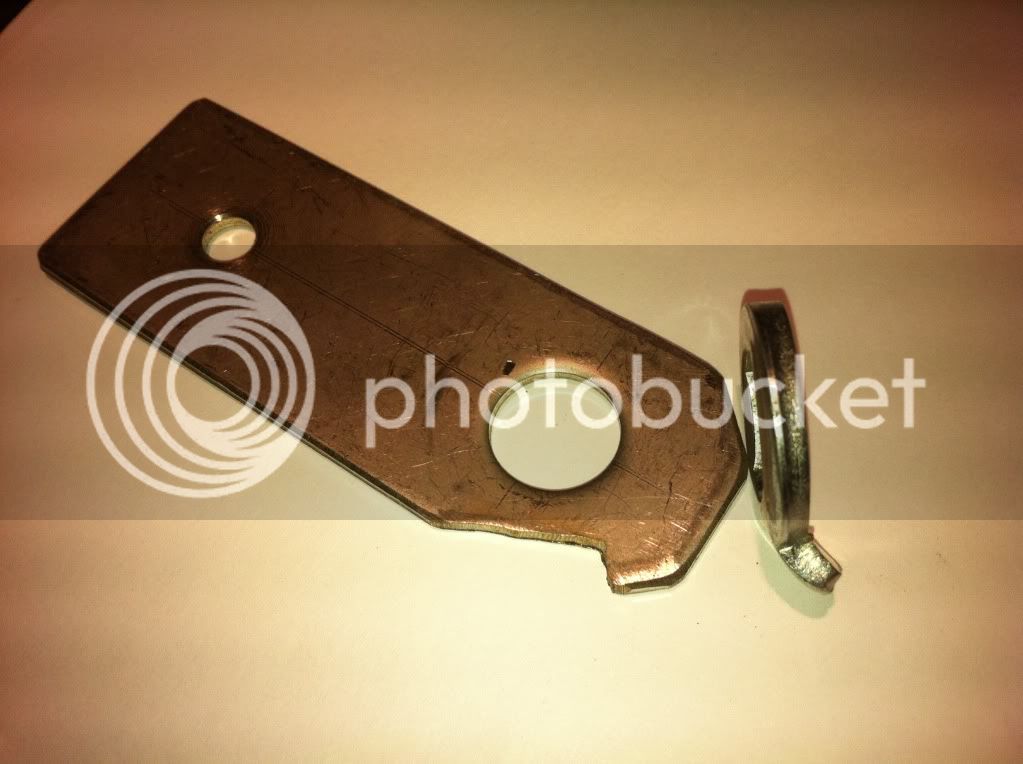
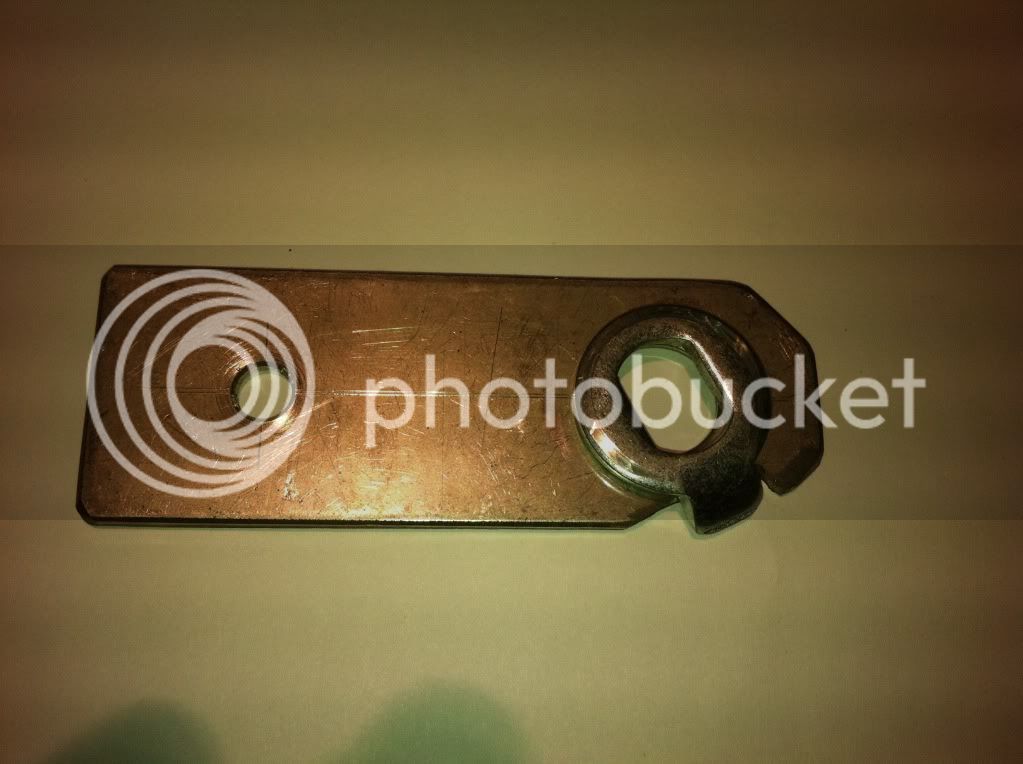
Jethro56
100 W
Well version 1.0 is finally done


Heres what I did to a Schwinn Landmark.. You can see my writeup and more photos here.http://endless-sphere.com/forums/viewtopic.php?f=6&t=27847#p402313
Lessss
1 MW
friedwires
100 W
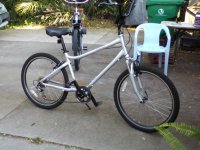
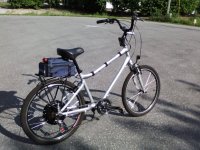
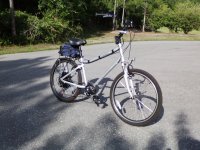
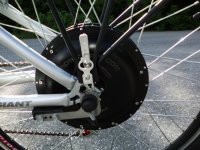
i just put this one together over the weekend. its an amped dd rear sla kit on a new giant suede comfort cruiser. its a little slow for my taste at a top speed of 23mph,but still its a nice ride.
Attachments
Timma2500
1 kW


StudEbiker
100 kW
Your build is one of my all time favorites Paul! Would love to be able to do what you did to that bike. Must be a great ride!
Red_Liner740
100 W
- Joined
- Apr 22, 2011
- Messages
- 109
God damn, that bike is sexy!!! such a clean design!!


Similar threads
- Replies
- 5
- Views
- 3,246
- Replies
- 2
- Views
- 6,656