
I meant "lowers" and dropouts not staying parallel under load, for some reason. My former fork did that I suppose, because whenever I brake or lean the bike, there was some brake disk rubbing. It had axle nuts though, not QR so I don't know how it would affect a QR system.

-
Hello ES! We could use some help to get us past the finish line on building the new knowledgebase for the forum.
Can you donate? Please see our fundraising page. Thank you!
You are using an out of date browser. It may not display this or other websites correctly.
You should upgrade or use an alternative browser.
You should upgrade or use an alternative browser.
The SB Cruiser : Amberwolf's 2WD Heavy Cargo Trike & Dog Carrier
- Thread starter amberwolf
- Start date

Yeah, the threaded end of the skewer is visibly bent.
EDIT: for some reason posts above didn't load when I wrote this.
Not a chance. It's far thicker than a spoke, and far shorter relative to OD. It won't straighten on such a short section just from the clamp pressure. Trash the skewer and get a straight one. It's a far too important component for safety to risk anything like that (including trying to straighten) here.
EDIT: for some reason posts above didn't load when I wrote this.
but I would expect it to be like a spoke--wehn tensioned, it wouldn't matter...but it would take a lot of tension to straighten something this thick, so...dunno
Not a chance. It's far thicker than a spoke, and far shorter relative to OD. It won't straighten on such a short section just from the clamp pressure. Trash the skewer and get a straight one. It's a far too important component for safety to risk anything like that (including trying to straighten) here.

It's been so hot I keep putting off digging out the other two or three QR wheels I have from the back of the shed; isn't going to cool off much, if at all, for the forseeable future so I guess I'll just go ahead and do it tomorrow to replace the bent skewer on the one on the trike now.
In the meantime I've been poking around at battery modules again, since GreenTecAuto posted this thread

 endless-sphere.com
and added some test data showing these would probably be good enough for my purposes (not sure they're quite as good as the EIG cells I have, for consistency / matching of properties, but can probably deliver current better given the age of what I have now).
endless-sphere.com
and added some test data showing these would probably be good enough for my purposes (not sure they're quite as good as the EIG cells I have, for consistency / matching of properties, but can probably deliver current better given the age of what I have now).

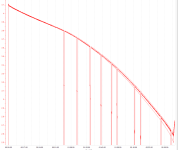
and am considering one of them, linked and data below,

 www.greentecauto.com
 www.greentecauto.com
Both modules can work, but I need 14s / 52v nominal, so to use the enerdel option I have to reconfigure it as 1p instead of 2p, halving it's current capability and capacity, and doubling it's voltage sag, so I can move two of the cells into series. I can then use the rest for lighting and/or spare cells, but...I'd realistically probably have to order two modules, one first to verify they'll do what I need, the other later to improve performance.
The second option, from the Volvo, is more than enough voltage to start with, though it would not be easy to reconfigure if I did have to; looks like welded tabs instead of bolted together. It's 16s, a couple cells higher than what I use now, and AFAICR the Phaserunners can handle that fine, and my wallwart-DC-DC can, but my charger does not go tthat high (58.8v max I think), so either I'd never be charging the pack to full, or I'd have to reconfigure it down to 14s, or I'd have to series another meanwell with the one I have on there, assuming the 12v one I have and the 58v one can be adjusted down to do the right voltage.
In the meantime I've been poking around at battery modules again, since GreenTecAuto posted this thread
Enerdel High Current 48V 32Ah 1.4kWh Used Battery Module 95% SoH $150 Free Shipping to Lower 48 States
We have these Enerdel modules that can handle some serious current. Each module has terminals under two side covers that can be unscrewed. It is possible to completely remove the ribbon cable and install your own voltage harness with ring terminals to make wiring a BMS easier. Battery is built...
endless-sphere.com
and am considering one of them, linked and data below,
Enerdel 12s2p 48V 32Ah battery module 1.4kWh | Greentec Auto
Enerdel Moxie+ battery module. Each module is 1.4kWh. Perfect for all of your DIY and energy storage needs.
www.greentecauto.com
or one of theseEnerdel NMC 48V 32Ah 1.4kWh Used Battery Module
$250.00 Original price was: $250.00.$150.00
48V 1.4kWh Enerdel Moxie+ battery energy module that removed from a hybrid bus.
Price per kWh: $178/kWh $107/kWh!!
Year: 2020
Shipping: Free Ground
Warranty: 6 Months, Extendable
Each module has terminals under two side covers that can be unscrewed. It is possible to completely remove the ribbon cable and install your own voltage harness with ring terminals to make wiring a BMS easier. Battery is built in a 12s2p configuration. You can also break the module down and rearrange it to whatever voltage you would prefer with little modification. These modules are used, they were removed from hybrid busses. Battery terminals are on top and very easy to connect to, fins are on the opposite side of the terminals and are for heat dissipation, if the modules get warm, you can blow air over them for accelerated cooling.
We have cycle tested several modules and have found they come back as 30-31Ah, nearly full health.
Module Specifications:
1.4kWh
Length: 7.85 inches
Width: 6.7 Inches
Height:10.6 inches
Weight: 33lb
Max Cont. Discharge: 160A
Max Pulse Discharge: 480A 10 seconds
Max Charge: 160A
Max Regen Charge: 320A 10 seconds
CELL SPECIFICATIONS
Cell Configuration:12s2p
Max Voltage: 49.2V
Nom Voltage: 43.2V
Min Voltage: 30V
Cell Voltage spec:
– Max: 4.1V
– Nom: 3.6V
– Min: 2.5V
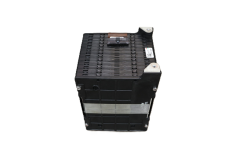
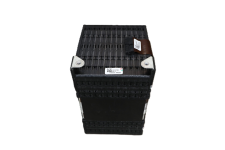


Volvo XC90 60V 32Ah Lithium Battery Module
2016-2022 Volvo XC90 60V 32Ah 2kWh 16S lithium battery module for sale at only $65/kWh. Comes with 3 month extendable warranty plus free ground shipping.
www.greentecauto.com
$170.00 Original price was: $170.00.$130.00
Price per kWh: $85/kWh $65/kWh
Years: 2016-2022
Shipping: Free Ground
Warranty: 6 Months, Extendable
Volvo XC90 battery module that has been on the road for a few years. This module is very similar to the Chrysler Pacifica module, with a few significant changes.
Liquid cooling is integrated into the module, no need for a cooling plate or heat sink. The cooling fins connect to the coolant ports along the bottom of the battery module. They are designed to connect with the next module in the chain. If you decide to use the cooling system, you would need to figure out how to hook up a coolant hose to one side, and block the other side so the coolant travels through the actual cell. The module is already compressed which helps with handling and moving it around. The module is 16S1P, the voltage taps can be seen on top leading into the center plug. The connector that fits into the middle is mounted to a BMS board, im afraid It wont be available because it is not a working BMS. You can solder your BMS connections right onto the tabs leading into the center of the battery for 15 of the connections, and use ring terminals for the C0 and C16 voltage tap. The solder points are circled in the last picture. Please verify polarity before you begin soldering your connections, the modules look very similar from both point of views. The battery module will come with a cover for the terminals, and you can see there are two temperature sensors, we have not done any testing on them to determine what kind they are.
Specifications:
Nominal Module Energy: 2kWh
Nominal Cell Capacity: 32 Ah
Module Configuration: 1p16s
Max Module Voltage: 67.2V
Nominal Module Voltage: 59.2V
Min Module Voltage: 52.8V
Max Cell Voltage: 4.2V
Nominal Cell Voltage: 3.7V
Min Cell Voltage: 3V
Length: 6 7/8″
Length with Wide Base: 7 1/2″
Width: 5 3/4″
Width with Cooling: 6 3/4″
Height: 11 1/4″
Height with Studs: 12″
Weight: 26.45 lbs.
Peak Discharge Current: 240A
Nominal Discharge Current: 100A
Nominal Charge Current: 13A


Both modules can work, but I need 14s / 52v nominal, so to use the enerdel option I have to reconfigure it as 1p instead of 2p, halving it's current capability and capacity, and doubling it's voltage sag, so I can move two of the cells into series. I can then use the rest for lighting and/or spare cells, but...I'd realistically probably have to order two modules, one first to verify they'll do what I need, the other later to improve performance.
The second option, from the Volvo, is more than enough voltage to start with, though it would not be easy to reconfigure if I did have to; looks like welded tabs instead of bolted together. It's 16s, a couple cells higher than what I use now, and AFAICR the Phaserunners can handle that fine, and my wallwart-DC-DC
can, but my charger does not go tthat high (58.8v max I think), so either I'd never be charging the pack to full, or I'd have to reconfigure it down to 14s, or I'd have to series another meanwell with the one I have on there, assuming the 12v one I have and the 58v one can be adjusted down to do the right voltage.
No problems so far since replacing the skewer (keep forgetting to get a pic of it), but it is a randomly intermittent problem, so can't tell if it's cured until it keeps not failing.
No problesm with the new skewer yet, sitll forgot to get a pic of it when Ichanged out the BB7's brakepads last weekend (worn down enough to squeal at every application from metal contact  )
)
But today, after I got home, I managed to screw up the leftside motor.
There are a number of feral cats in the area, and they often sleep in the shady areas under trees. Not usually a problem. Today, one of them that was under the tree next to the gate decided to panic after I opened the gate and started slowly riding thru the gate. Instead of simply going behind me (since it was laying at a spot I'd already passed, it ran forward and then across *right* in front of me then around my right side and to be sure I didn't run over it I stopped pedalling and swung the front wheel to the left to just barely miss it as it ran past.
It's a tight fit thru the gate, so that leftward swing even though I'd already stopped pushed the left axle wiring into a bolt on a gate hinge, which was just enough to tear into the outer jacket and damage the insulation on one phase wire and one hall wire, with the expected result of a dead hall. :/ (it may also have damaged the controller hall input, but I haven't tested that yet; I forgot in the ensuing mess).
It's still very hot out there, being summer, but thankfully today it was cloudy most of the day, and was still cloudy when I got home from work (around 530pm). So it was only 96F when I first got home, and it dropped several degrees during the process below over the next couple of hours.
First thing was to disconnect power to that controller, then ride around to the back porch to park it in the shade udner the porch trees, prop up the left side to get that wheel offground, and disconnect power to the rightside controller so I could do testing without engaging the wheel that's still on the ground. Then I got out the tools and opened up the cable jacket; the damage is on the motor side of the L1019 connector, about 1cm from the start of the connector housing. So I removed all the jacket for a few cm from that point toward the mtoor, and all of the jacket and some of the connector housing plastic, to be able to get to and repair the wires.
The hall wire is actually severed, and the phase wire is just exposed with a few strands broken. I forgot to take pics until after I'd already squeezed all the conductors in the phase wire back together and wrapped some electrical tape there as temporary protection against shorting to anything else. Since the hall is severed, I had to use another piece of wire to bridge the gap. When I did, and then tested throttle on this motor, it jerked around and then began spinning, as the Phaserunner V1(2? old anyway) attempted to run with halls then did fallback to sensorless.
Voltmeter on the hall signal (using main battery ground as reference so I dind't have to damage the hall ground to do the test) shows about 0.2-0.3v (fluctuating) as I rotate the wheel by hand. Disconnecting the bridging wire across the gap, and measuring just the signal wire to the controller reads 5v, so the pullup is sitll working. So the hall is dead, and will ahve to be replaced.
These Ultramotors don't have removable covers, you have to unlace half the wheel then pull half the motor off to get to the guts, so it has to wait at least until I am on a week off to do this. Oddly coincidentally I have a week off next week, and it's too hot to do outside stuff so I could probably get this done on one or two of those days...but I have to be *sure* that I can do the work in time or I won't have anything to ride back to work when time off is over.
Anyway, I still have to work the rest of this week first, and I don't want to damage something from the motor jerking (pretty hard!) back and forth before starting up in sensorless, so I thought I'd just get the old Vista laptop out that I've used to setup the CA and Satiator, etc., and thought I'd used to setup the PRs, and turn off sensored mode entirely to go full sensorless for now. And so my adventure began, my two hour tour...a two hour tour....
The laptop fired up fine (on AC, it's battery is very old and doesn't run it long enough to be useful), but it didn't have the PR suite on it, whcih seemed strange...but then I loked at the dates on the last files saved on there in the documents folder, and it was almost 5 years ago. Turns out I'd used my regular laptop (my everyday computer) to do the PR setup, and it did have the files on there. But that laptop has seen better days with various things failing on it over time so I don't like moving it; it's a risk of it not working at all afterward. So...I copied the PR stuff to a usb stick to take out to the Vista machine, and copoied from that to it's harddisk and ran it...and got file missing errors for stuff for DirectX. After a long drawn out process of trying to download and install that and other fixes, I established that there's just no way to get the PR suite, even the most ancient versions I have (1.something), on Vista. Not really a surprise, but unhlepful.
So after two hours of fighting this losing battle, I brought the main laptop out and ten minutes later I had the leftside PR / motor running sensorless, and as good as it's going to get utnil I can repalce the hall.
) But today, after I got home, I managed to screw up the leftside motor.
There are a number of feral cats in the area, and they often sleep in the shady areas under trees. Not usually a problem. Today, one of them that was under the tree next to the gate decided to panic after I opened the gate and started slowly riding thru the gate. Instead of simply going behind me (since it was laying at a spot I'd already passed, it ran forward and then across *right* in front of me then around my right side and to be sure I didn't run over it I stopped pedalling and swung the front wheel to the left to just barely miss it as it ran past.
It's a tight fit thru the gate, so that leftward swing even though I'd already stopped pushed the left axle wiring into a bolt on a gate hinge, which was just enough to tear into the outer jacket and damage the insulation on one phase wire and one hall wire, with the expected result of a dead hall. :/ (it may also have damaged the controller hall input, but I haven't tested that yet; I forgot in the ensuing mess).
It's still very hot out there, being summer, but thankfully today it was cloudy most of the day, and was still cloudy when I got home from work (around 530pm). So it was only 96F when I first got home, and it dropped several degrees during the process below over the next couple of hours.
First thing was to disconnect power to that controller, then ride around to the back porch to park it in the shade udner the porch trees, prop up the left side to get that wheel offground, and disconnect power to the rightside controller so I could do testing without engaging the wheel that's still on the ground. Then I got out the tools and opened up the cable jacket; the damage is on the motor side of the L1019 connector, about 1cm from the start of the connector housing. So I removed all the jacket for a few cm from that point toward the mtoor, and all of the jacket and some of the connector housing plastic, to be able to get to and repair the wires.
The hall wire is actually severed, and the phase wire is just exposed with a few strands broken. I forgot to take pics until after I'd already squeezed all the conductors in the phase wire back together and wrapped some electrical tape there as temporary protection against shorting to anything else. Since the hall is severed, I had to use another piece of wire to bridge the gap. When I did, and then tested throttle on this motor, it jerked around and then began spinning, as the Phaserunner V1(2? old anyway) attempted to run with halls then did fallback to sensorless.
Voltmeter on the hall signal (using main battery ground as reference so I dind't have to damage the hall ground to do the test) shows about 0.2-0.3v (fluctuating) as I rotate the wheel by hand. Disconnecting the bridging wire across the gap, and measuring just the signal wire to the controller reads 5v, so the pullup is sitll working. So the hall is dead, and will ahve to be replaced.
These Ultramotors don't have removable covers, you have to unlace half the wheel then pull half the motor off to get to the guts, so it has to wait at least until I am on a week off to do this. Oddly coincidentally I have a week off next week, and it's too hot to do outside stuff so I could probably get this done on one or two of those days...but I have to be *sure* that I can do the work in time or I won't have anything to ride back to work when time off is over.
Anyway, I still have to work the rest of this week first, and I don't want to damage something from the motor jerking (pretty hard!) back and forth before starting up in sensorless, so I thought I'd just get the old Vista laptop out that I've used to setup the CA and Satiator, etc., and thought I'd used to setup the PRs, and turn off sensored mode entirely to go full sensorless for now. And so my adventure began, my two hour tour...a two hour tour....
The laptop fired up fine (on AC, it's battery is very old and doesn't run it long enough to be useful), but it didn't have the PR suite on it, whcih seemed strange...but then I loked at the dates on the last files saved on there in the documents folder, and it was almost 5 years ago.
Turns out I'd used my regular laptop (my everyday computer) to do the PR setup, and it did have the files on there. But that laptop has seen better days with various things failing on it over time so I don't like moving it; it's a risk of it not working at all afterward. So...I copied the PR stuff to a usb stick to take out to the Vista machine, and copoied from that to it's harddisk and ran it...and got file missing errors for stuff for DirectX. After a long drawn out process of trying to download and install that and other fixes, I established that there's just no way to get the PR suite, even the most ancient versions I have (1.something), on Vista. Not really a surprise, but unhlepful.So after two hours of fighting this losing battle, I brought the main laptop out and ten minutes later I had the leftside PR / motor running sensorless, and as good as it's going to get utnil I can repalce the hall.
I started this thread
endless-sphere.com
for troubleshooting the above startup problem. No solutions yet, so if y'all have any ideas....
ATM I'm considering a long-term workaround:
Phaserunner v1(?) sensorless startup jerkiness
Possibly related to this thread https://endless-sphere.com/sphere/threads/phaserunner-startup-issues-v6-and-v1-each-running-an-ultramotor.122921/ (at minimum, that thread has technical details helpers in this thread may need). I think the main problem is that the Ultramotor is a low-pole-count...
endless-sphere.com
ATM I'm considering a long-term workaround:
For now I'm considering just using a button on the bars to momentarily disable the leftside motor / PRv1(?) just for the startup process, then let go as soon as I'm moving. Have to figure out how to wire that up; most likely I'd just use a NC momentary button to interrupt the throttle signal out of the CAv3 to just that PRv1, as that's the simplest signal to deal with.
But I would need to use a relay to do this, as wiring the throttle signal all the way back up to the bars and then back down (some 20 feet of wire, I'd guess) would provide too many opportunities for problems. So the swithc on the bars would just control power (or more likely, ground) to the relay coil, and the relay would sit right there next to the PRv1 on it's heatsink plate, interrupting the throttle wiring directly inline with no detours or extra wire lengths.
While it's added complexity, it's much simpler than unlacing the motor, opening it, and replacing the hall. Or futzing around with all the PRv1's settings and possibly screwing up it's ability to run normally (or even breaking it).
Still no solution on the above; was hoping for help in the linked thread but didn't get any, just suggestions on how to change the system in other ways that haven't anything to do wiht the problem, or would be more complicated and more troubl e time and moeny than *real* solutions to the problem that i'd already posted as undesirable or would have to be delayed becayse if the arowrokr requiredasa. .
anwyay... unrelated:
I thought I'd posted this already, but I guess I forgot to.
This past weekend, I needed to make a tirp to the store on the last couple days of my week off. I'd charged up the traction batery when i got home the last day of work the week before, and had charged the lightinb attery not more than a day or two before that. But...I somehow accidentally left my speaker bar plugge dinthe whole time, and even though it's "off" it is a soft-0off so it still has a small drain. over a week of that was enough to drain most of what was left in the lighting battery, not to dead, but pretty low. Recharging the 40Ah pack (taht is more like 30Ah nowadays, with >15yearold cells) took 29Ah. :/
I've meant to permanently wire the speaker power into the lighting system instead of hte hack I did that connects it directly to the battery a few years back when i put it on there, and neve rgot to do9ing it. Since i could end up leaving myself wiht no lights if i did this again but longer, or at the wrong time / soc of pack, i decided to fix this, and while i was at it, finally install the soc meter I bought off aliexpress (or amazon?) a year or so ago.
this is an amzon link for essentialy the same meter, not where i bought it though
you can set it for a bunch of preset batteyr types and voltages, or you can manually set the lwo and high ends of the meter. only displays temp in C like the CA, no F option.
pics of it temporarily ziptied to the CA. i put a switch on it too, so tht i can turn off it's tiny drain on the lighting pack when not acutally using it. i used the old switch that used to turn my handlebar downlighting on/off since id on't have that lighting on there anyhmore.


the speakers i wired in via the old light connector for the "deck light" that i used to have on the rail above/around the cargo box area. so the controls for that control the speake rpower. pic jus tshows the pseaker bar; wiring is all hidden.

anwyay... unrelated:
I thought I'd posted this already, but I guess I forgot to.
This past weekend, I needed to make a tirp to the store on the last couple days of my week off. I'd charged up the traction batery when i got home the last day of work the week before, and had charged the lightinb attery not more than a day or two before that. But...I somehow accidentally left my speaker bar plugge dinthe whole time, and even though it's "off" it is a soft-0off so it still has a small drain. over a week of that was enough to drain most of what was left in the lighting battery, not to dead, but pretty low. Recharging the 40Ah pack (taht is more like 30Ah nowadays, with >15yearold cells) took 29Ah. :/
I've meant to permanently wire the speaker power into the lighting system instead of hte hack I did that connects it directly to the battery a few years back when i put it on there, and neve rgot to do9ing it. Since i could end up leaving myself wiht no lights if i did this again but longer, or at the wrong time / soc of pack, i decided to fix this, and while i was at it, finally install the soc meter I bought off aliexpress (or amazon?) a year or so ago.
this is an amzon link for essentialy the same meter, not where i bought it though
you can set it for a bunch of preset batteyr types and voltages, or you can manually set the lwo and high ends of the meter. only displays temp in C like the CA, no F option.
pics of it temporarily ziptied to the CA. i put a switch on it too, so tht i can turn off it's tiny drain on the lighting pack when not acutally using it. i used the old switch that used to turn my handlebar downlighting on/off since id on't have that lighting on there anyhmore.
the speakers i wired in via the old light connector for the "deck light" that i used to have on the rail above/around the cargo box area. so the controls for that control the speake rpower. pic jus tshows the pseaker bar; wiring is all hidden.
Even with the new skewer, the problem has happened again: While riding, straight line, normal 20mph cruising speed, most of a half mile from the last braking point, and another eighth mile more htan that from the last turn, I could just suddenly feel the front wheel being loose.
Glided to a stop, and could see the skewer lever was not fully engaged, but it wasn't flopped down. Could easily wiggle the front wheel in the fork. Closed the lever and it was normal again. Finished work commute ok, and the ride home later, then yesterday (day afterward) took the wheel off to examine the fork and the hub an skewer.
Skewer is fine, no bends, no stripped threads, no crushing of the curved seating washer, no bending / wear of the lever's pivot pin, etc.
Fork is fine, no dropout spreading / deformation, etc.
Since the problem skewer was swapped out, I have added thick washers filed to fit the axle at the center and the lawyerlips on the fork on the outside, so the axle can't move vertically unless the skewer is actually manually unthreaded from the nut far enough to let those washers clear the lips. Since that wouldn't happen before I noticed the wheel looseness if the skewer did come undone, it would at least prevent me from a crash from the axle coming out of the dropouts...
Unscrewed teh axle nuts from one end of hte axle, took it out, and verified the bearings and cones are fine, and the axle threads and cone threads are fine, etc.
Cleaned all the grease off the cups, and can clearly see circumferential lines on the hub itself where the cups seem to have backed off, moved inward, which would cause the problem. I didn't see this before, when I regreased everything, so either it wasn't there yet or I just plain missed it. There isn't a spacer tube between the cups, so nothing to keep them apart under the pressure of the skewer, and the hub probably doesn't have lips or anything behind them either. (i'll check that when I am about to rebuild the wheel and post pics because I'm curious...if I can get one cup out without damaging anything I can even *install* a spacer tube to fix it and keep using the wheel as-is).
Either way, it means this hub is screwed.
I have an identical hub somewhere I could relace this wheel with using hte same spokes/rim, but don't know where it is and don't have time to look for it *and* lace up the wheel before I have to go back to work tomorrow, so I pulled out the only ohter complete 26" disc-compatible front wheel I have laying around. It's not a great wheel, off a generic ebike front wheel, but it will have to do until I can build a better one. The axle nuts are rusted into place on the axle so I can't currently get them off to regrease the bearings, so I just used oil soaked down in there for now. (it might also loosen the nuts enough to get them off to regrease it, eventually).
So I moved the tire, tube, and disc rotor over to this wheel, and glued three magnets to the spokes for the speedo, and verified it's working on the trike. Will see how well it performs tomorrow on the commute.
For the speedo magnets, on hte original wheel I used one clamp-on magnet from a Grin sensor set, and two old badge-magnet-strips ziptied to the spoke crossing, and they work ok but occasinally vibrate out of place just enough to cause wrong speed readings. Gluing the magnets in place on the new wheel's spokes with foaming gorilla glue will prevent that from happening, and looks a bit less janky too.
Photodump below. The painted / anodized old hub is the failing one. the unpainted aluminum one is the new wheel.
Glided to a stop, and could see the skewer lever was not fully engaged, but it wasn't flopped down. Could easily wiggle the front wheel in the fork. Closed the lever and it was normal again. Finished work commute ok, and the ride home later, then yesterday (day afterward) took the wheel off to examine the fork and the hub an skewer.
Skewer is fine, no bends, no stripped threads, no crushing of the curved seating washer, no bending / wear of the lever's pivot pin, etc.
Fork is fine, no dropout spreading / deformation, etc.
Since the problem skewer was swapped out, I have added thick washers filed to fit the axle at the center and the lawyerlips on the fork on the outside, so the axle can't move vertically unless the skewer is actually manually unthreaded from the nut far enough to let those washers clear the lips. Since that wouldn't happen before I noticed the wheel looseness if the skewer did come undone, it would at least prevent me from a crash from the axle coming out of the dropouts...
Unscrewed teh axle nuts from one end of hte axle, took it out, and verified the bearings and cones are fine, and the axle threads and cone threads are fine, etc.
Cleaned all the grease off the cups, and can clearly see circumferential lines on the hub itself where the cups seem to have backed off, moved inward, which would cause the problem. I didn't see this before, when I regreased everything, so either it wasn't there yet or I just plain missed it. There isn't a spacer tube between the cups, so nothing to keep them apart under the pressure of the skewer, and the hub probably doesn't have lips or anything behind them either. (i'll check that when I am about to rebuild the wheel and post pics because I'm curious...if I can get one cup out without damaging anything I can even *install* a spacer tube to fix it and keep using the wheel as-is).
Either way, it means this hub is screwed.
I have an identical hub somewhere I could relace this wheel with using hte same spokes/rim, but don't know where it is and don't have time to look for it *and* lace up the wheel before I have to go back to work tomorrow, so I pulled out the only ohter complete 26" disc-compatible front wheel I have laying around. It's not a great wheel, off a generic ebike front wheel, but it will have to do until I can build a better one. The axle nuts are rusted into place on the axle so I can't currently get them off to regrease the bearings, so I just used oil soaked down in there for now. (it might also loosen the nuts enough to get them off to regrease it, eventually).
So I moved the tire, tube, and disc rotor over to this wheel, and glued three magnets to the spokes for the speedo, and verified it's working on the trike. Will see how well it performs tomorrow on the commute.
For the speedo magnets, on hte original wheel I used one clamp-on magnet from a Grin sensor set, and two old badge-magnet-strips ziptied to the spoke crossing, and they work ok but occasinally vibrate out of place just enough to cause wrong speed readings. Gluing the magnets in place on the new wheel's spokes with foaming gorilla glue will prevent that from happening, and looks a bit less janky too.
Photodump below. The painted / anodized old hub is the failing one. the unpainted aluminum one is the new wheel.
Attachments
-
 20250928_170656.jpg4 MB · Views: 10
 -
 20250928_173706.jpg1.3 MB · Views: 9
 -
 20250928_173742.jpg4 MB · Views: 9
 -
 20250928_173656.jpg894.3 KB · Views: 10
 -
 20250928_173652.jpg1.3 MB · Views: 10
 -
 20250928_170700.jpg825.6 KB · Views: 10
 -
 20250928_162136.jpg470.6 KB · Views: 9
 -
 20250928_162131.jpg904.8 KB · Views: 9
 -
 20250928_162128.jpg1.1 MB · Views: 8
 -
 20250928_162116.jpg514.1 KB · Views: 8
 -
 20250928_162108.jpg854 KB · Views: 9
 -
 20250928_162104.jpg575.6 KB · Views: 9
Seems I mentioned inspecting the hub's internals back in post 1222. Had you measured across the jam nuts verifying 100mm, and the wheel still feels sloppy loose on the axle, it points directly at failed bearings and/or defective hub. No matter, at lease you're on it now and should be fine. Maybe it's time to consider a sealed bearing hub.
Yeah, I thought I had done the measurement / test when i took the wheel off, disassembled axle/bearings, regreased...but I don't see a post for it, or for the regreasing/etc, that I did at the time I changed to the new skewer, which there also ins't a post for. :/ Guess I forgot to post those.
But anyway, Id idn't see this problem then, and installing the wheel was always a friction fit into the dropouts, implying that the jam nuts were staying at the correct distance--but it was *not* a friction fit this time. I suspect it wasn't bad enough for me to tell, and that the cups slipped much farther in this time (from sideloading vs skewer tension?).
Anyway, as you say at least it's dealt with now.
If I had a sealed-bearing hub I'd use that (actually the one I am using now could be, can't tell under the "covers" it has beneath the jamnuts; they're not the usual rubber grommets).
I was looking thru my salvaged sealed-bearing collection yesterday when doing this stuff to see if I had any that I could swap out for the cups in the hub already in my wheel, but there werent' any of hte right OD. I'm still considering it, after i look thru some of the things I have that I don't use that have such bearings to see if there are some that fit that are easily removed, or any I can find online. Gotta measure the hub ID.
Still have to heat up the hub to expand it and knock out the cups for curiosity, then I can see how the inside is made, and if it has lips to keep the bearings in place or if I'll need a spacer tube on the outer race as well as the inner race (required to keep the skewer from putting tension across the balls/races like a sideload). I'll measure the ID then.
New wheel still working fine; haven't even had to readjust the disc caliper / pads.
Might have a lead on a cure for the PR's sensorless starttup issue on the leftside system; the baserunner v6 manual covers stuff that deals specifically with this kind of issue. Looks like this is also in hte PRv6 manual rev2, but I don't remember seeing it before; don't know when it was added or if it was there in rev1 and I just missed it?
Anyway, copy/paste of the relevant section for my own reference when I next get teh chance to take the laptop out there and try retuning the PR.

Might have a lead on a cure for the PR's sensorless starttup issue on the leftside system; the baserunner v6 manual covers stuff that deals specifically with this kind of issue. Looks like this is also in hte PRv6 manual rev2, but I don't remember seeing it before; don't know when it was added or if it was there in rev1 and I just missed it?
Anyway, copy/paste of the relevant section for my own reference when I next get teh chance to take the laptop out there and try retuning the PR.
7.3 Tuning the Sensorless Self StartAdvanced Setup tabIf you are running a motor without hall sensors in sensorless mode, then you mayneed to tweak the sensorless self start behaviour.When a brushless motor is runsensorless and started from acomplete stop, the motor controllerattempts to ramp up the motor’s rpmto a minimum speed so that it canlatch onto the rotation (closed loop).It does this by first injecting a static current into the phase windings toorient the motor into a known position
The controller then rotates this field faster and faster until reaching the “AutostartMax RPM” value.As initial values, set
the “Autostart Injection Current” to 50-80% of your maximumphase current, an “Autostart Max RPM” between 5% to 10% of the running motorrpm, and an “Autostart Spinup Time” from 300 to 1500 milliseconds, dependingon how easily the motor can propel the bike up to speed.On bikes that you pedal to help get you underway, a short 200 to 300 millisecondramp will often work best, while a much longer ramp is required if you need tostart moving without pedaling.If you feel the motor repeatedly trying to start when applying throttle, the“Autostart Spinup Time” may be too short, the “Autostart Injection Current” maybe insufficient, or the “Autostart Max RPM” may be too low. You may alsogenerate faults such as “Instantaneous Phase Overcurrent.” To correct thisparticular fault, try increasing the “Current Regulator Bandwidth” and/or adjustthe “PLL Bandwidth”. These parameters are found under “Feedback BandwidthTuning” on the “Basic Setup” tab.
a few doze/wakes later, had to go out with the schmoo anyway to disocnnect the trrike from the charging cord to teh ac outlet, so i went ahead and made some fairly extreme changes to the sensorless startup settings (nothing else).
it was orignally 40A autostart injection current, lowered to 5A (so it can't jerk things around)
orignally 1000ms autorstart spinup time, lowered to 200ms
oritgnally 90rpm autoastart max rpm, lowerd to 8rpm. was trying to lower to maybe 40 or 50 but it won't actually use the up/down arrows at all, and theonly digit it will acdept in the field is an 8, from either numpad or numrow on key section fo keyboard. wierd. so i can have 88 or 8, and 88 is nearly 90 so useless.
anyway, now it will not fight me trying to get going with the pedasl or the other motor, and it kicks in normally just like usual once i'm past teh couple mph or so that it jerks around at.
so at least that is fixed, until i someday feel like disassembling the wheel to open the motor to fix the blown hall.


it was orignally 40A autostart injection current, lowered to 5A (so it can't jerk things around)
orignally 1000ms autorstart spinup time, lowered to 200ms
oritgnally 90rpm autoastart max rpm, lowerd to 8rpm. was trying to lower to maybe 40 or 50 but it won't actually use the up/down arrows at all, and theonly digit it will acdept in the field is an 8, from either numpad or numrow on key section fo keyboard. wierd. so i can have 88 or 8, and 88 is nearly 90 so useless.
anyway, now it will not fight me trying to get going with the pedasl or the other motor, and it kicks in normally just like usual once i'm past teh couple mph or so that it jerks around at.
so at least that is fixed, until i someday feel like disassembling the wheel to open the motor to fix the blown hall.
Attachments
well it wokrs great this way, as far as rideablity and not stressing out the axles, frame, etc, not being able to jerk the whole trike back and forth.
but the pr (at least the old v1 or 2, whatever it is) is really frocking retarded.
t doesn't change a thing about the problem the pr has trying to figure out which way to spin, everytimt speed drops below the 1-2mph or so point, it begins jerking back and forth trying to figure that out, eeven though it's being dragged forward continuoulsy by the other motor, .
no controller should be so frocking stupid that it does that, but i guess it just can't detect the magnets passing the coils in the rotor once speed rops below trhat point.
the problem i have with it is that it can still read two of the halls so it can certainly still tell what direction the rotor is turning, and that it is turning, so it ought to be smart enough to realize that if it was already working and it's still turning the same direction and hasn't been commanded to reverse it doesn't need to figure out what direction to turn just because speed dropped.
it should also be smart enough to "know" what direction forward is, no matter what, and just always drive it that way unless i'ts commanded to do otherwise. but if you put it up in the air for instance, it'll jerk bacn and forth and it might eventually decide to spin in eitherdirection, it ddoesn't haveaany idea waht forward is.
it should.
it should have a way to tell it to only ever spin in one direction, and not to try to spin the other way.
but it doesn't, and that's just wrong.
oh welll, tha'ts the way it is, i'm just grumpy because my head hurts from the fumes form the floorwaxing at work.
and i am always frustrated and exasperated by stuff like this where things don't have to be made to be hard, engineers and designers of hardware and software just don't usually even realize there are wasy to maek things easy or even that they should look for them, and many of them simply don't care; whenever i try to communicate this problem to any of htem they always just tell me that';s the way it is, and won't try to fix it becuase they don't trhink anything is broken.
but the pr (at least the old v1 or 2, whatever it is) is really frocking retarded.
t doesn't change a thing about the problem the pr has trying to figure out which way to spin, everytimt speed drops below the 1-2mph or so point, it begins jerking back and forth trying to figure that out, eeven though it's being dragged forward continuoulsy by the other motor, .
no controller should be so frocking stupid that it does that, but i guess it just can't detect the magnets passing the coils in the rotor once speed rops below trhat point.
the problem i have with it is that it can still read two of the halls so it can certainly still tell what direction the rotor is turning, and that it is turning, so it ought to be smart enough to realize that if it was already working and it's still turning the same direction and hasn't been commanded to reverse it doesn't need to figure out what direction to turn just because speed dropped.
it should also be smart enough to "know" what direction forward is, no matter what, and just always drive it that way unless i'ts commanded to do otherwise. but if you put it up in the air for instance, it'll jerk bacn and forth and it might eventually decide to spin in eitherdirection, it ddoesn't haveaany idea waht forward is.
it should.
it should have a way to tell it to only ever spin in one direction, and not to try to spin the other way.
but it doesn't, and that's just wrong.
oh welll, tha'ts the way it is, i'm just grumpy because my head hurts from the fumes form the floorwaxing at work.
and i am always frustrated and exasperated by stuff like this where things don't have to be made to be hard, engineers and designers of hardware and software just don't usually even realize there are wasy to maek things easy or even that they should look for them, and many of them simply don't care; whenever i try to communicate this problem to any of htem they always just tell me that';s the way it is, and won't try to fix it becuase they don't trhink anything is broken.
hillslayer@
Regular
Just put a sensorless controller on it those phase runners are old school.
Why would I want a controller that has even MORE problems trying to start by itself from a stop with a heavy load?
hillslayer@
Regular
I replaced my controller with a sinewave controller that also does sensorless, in sinewave the takeoff with a load is super smooth and if my halls fail it still works in squarewave.Why would I want a controller that has even MORE problems trying to start by itself from a stop with a heavy load?
Why would I want to change to that?
I already have one that works in sensored or sensorless in sinewave and never has to change to trap (square).
I already have one that works in sensored or sensorless in sinewave and never has to change to trap (square).
hillslayer@
Regular
You said it wasn't workingWhy would I want to change to that?
I already have one that works in sensored or sensorless in sinewave and never has to change to trap (square).
No, I didn't. You should probably read the posts fully.
The "fix" previously noted has done what I wanted (preventing the jerking back and forth at startup); been working fine since then. Slightly less takeoff power than before the cable damage and hall failure, but that's expected with this motor not contributing until it gets past that 1-2mph switchover point, but at least it isn't fighting the other motor anymore, so eveyrhing is nice and smooth like before the failure.
Randomly, some pics of the GMAC wheel in it's present condition.
EDIT: Wierd, the pics won't attach as jpg or png or even a zip file. I get different errors randomly. If I use the attache files button, somtimes it starts to upload, gets partway along, then the percentage resets and then jumps to some lower value, then appears to suddenly complete. But there's no thumbnail on the attachment, wehther I do it as one file or several. and they don't show up in the post. Sometimes it says parsing error, and no attachment is generated. Sometimes it says parsing error and the blank attachement is genrated. Soemtims it jjust gives a gneeral "oops there was a problem" message.
If i drop them right onto the editor window, i can see a shaded preview image as normal, and the upload percentage slowly increases, but then stops, no attachement is generated, and usually give sthe "oops there was a problme". :/
Same happen sin a pm.
too tired to figure out any othe rworkarounds, so...maybe i'll remember to put them up later. eventualyl.
image uploads still not working, for high res / large images, which is what is neeeded. they uipload at low res but that's not h elpful. :/
EDIT: Wierd, the pics won't attach as jpg or png or even a zip file. I get different errors randomly. If I use the attache files button, somtimes it starts to upload, gets partway along, then the percentage resets and then jumps to some lower value, then appears to suddenly complete. But there's no thumbnail on the attachment, wehther I do it as one file or several. and they don't show up in the post. Sometimes it says parsing error, and no attachment is generated. Sometimes it says parsing error and the blank attachement is genrated. Soemtims it jjust gives a gneeral "oops there was a problem" message.
If i drop them right onto the editor window, i can see a shaded preview image as normal, and the upload percentage slowly increases, but then stops, no attachement is generated, and usually give sthe "oops there was a problme". :/
Same happen sin a pm.
too tired to figure out any othe rworkarounds, so...maybe i'll remember to put them up later. eventualyl.
image uploads still not working, for high res / large images, which is what is neeeded. they uipload at low res but that's not h elpful. :/
Last edited:
The front wheel i started using after my old disc hub was proven to have "collapsing cups" (not the right word, but) started feeling "wonky", and i found most of the spokes had little or no tension, could spin the nipples by finger on them. no cracks visible in the nipple holes. Weird. I assume it's been losing tension slowly over time and was never properly tensioned. I don't think i ever got to the step of doing that becuase it was supposed to be temporary, but stuff as usual got in the way and i never checked.
So i spent an hour or so last weekend retensining the wheel. I didn't retrue it fully, just basic, and now i'll keep an eye on the tension (by sound) to see if it detensions again. if it does it's the rim, and I'll ahve to do the wheel replacement / rebuild thing.
in the meantime if there are futrher problems I do have the old Jumpbike bafang front hubs that have disc mounts, so even if i'm not using it as a motor i can still use it as a front wheel.
So i spent an hour or so last weekend retensining the wheel. I didn't retrue it fully, just basic, and now i'll keep an eye on the tension (by sound) to see if it detensions again. if it does it's the rim, and I'll ahve to do the wheel replacement / rebuild thing.
in the meantime if there are futrher problems I do have the old Jumpbike bafang front hubs that have disc mounts, so even if i'm not using it as a motor i can still use it as a front wheel.
No further spoke problems, however, the problem fo the skewer loosening has returned.
Based on the design of this hub, it should not be the same progblem as the previous, where the inboard cups of hte bearings relocated inward under the skewer tension and the sideloading the front wheel experiences in turns. This one has bearing modules, with a cylinder between the inner races to prevent taht kind of relocation. So I am not sure what is causing it. It shoudln't be skewer stretch or skewer barrel "cup" compression; these are metal.
it has happened only once so far in all the time since changing the wheel, around ten months. So it could be some other cause than the previous one (someone messing with the wheel while I am at work, for instance, as unlikely as that is. (The trike stays in our breakroom, whcih while that doens't prevent access to the public, deters it. ))
I am looking into replacing the entire skewer and hollow axle with a bolt and nut.
Separately, when i changed all the tires out at the same time (first time for that, they all happened to be worn enough around the same time this time), I had problems with the air pump I've been using for over a decade. The motor is not very good, and was not wound with thick enough wire to start with, so it has visbily overheated over time. it sitll works, but it had "that smell" when i was airing up the second of three tires during this process. It's a crappy harbor freight pump, cut down from it's original casing whcih included a crappy SLA battery, to just hte minimum plastics needed to keep the pump and motor itself enclosed, and h old the airgauge and switch, and more ventilation than the orignal had. Heck the motor is so weak they even instaleld a plastic fan on it. :lol:
So I dug out an ancient 1980s Sears automotive compressor meant to be kept in your trunk with your spare tire, etc., that when she was still around my mom had bought (new...) for her car. I've kept it as a spare, but the hoses inside and out rotted away (no surprise after four decades). So first I had to cut the casing down, taking over an inch out of the middle, so it would fit in the trike's toolspace.


I replaced the hoses with reinforced fuel line; those are heavier but also are unlikely to fail.

Unfortuatnely I have not yet found an acceptable and affordable air chuck for the valve stem end, so I am using the crappy right angle lever type off the HF unit. I don't like the style; it is hard to use, and it is hard to fit between the stem and the hub's spoke flanges on the rear 20" wheels.
I have previously tried several types of 90-degree adapters for those, but they all leak, and having ot install them just to air things up is too anoying, and it also causes more air loss as i take them off afterward, usncrewing them as they hiss my air away.... so i stopped trying those things. :/
This is the chuck type I would prefer to use,

That particular brand has a good gripping mechanism, but it requiers putting the chuck straight onto the valve stem. can't do taht on my wheels. This version

is too tall to work, too.
So I want to use a ball style angled one like this, but with those multi-jaw grips, but the company doesn't seem to make one.
I don't want to use the little guillotine on just one side-this type does not hold onto the stem straight so I have ot keep holding it in place anywya to keep the seal, making the entire lcoking mechanism almost useless.

I'll settle for this style if i ahve to, but haven't found one that already has a 1/4" barb inlet, or a cheap one with a threaded input and a cheap 1/4" barb inlet to matc that thread. So far the bits I want are all sold separately, in packs of two ro more (only need one), and getting just one each is twice as expensive, or more, or four times as much for each part. So it's looking like 25 to 50 bucks total just for teh chuck. No thanks.
I also replaced the skinny power wires to it (12v lighter plug style) with the better ones off the HF unit (which I think I had pulled off something else when i reubuilt that one back when..).
I kept the sears gauge on it, which turns out to be accurate. I did not realize the HF guage was not accurate at all (perhaps it failed over time; i'm sure i checked it when I first started using it way back). It always read high, but i did not know that. So I have been running underpressure by as much as 10psi, or more.
I have an ancient radioshack airgauge, that surprisingly also still works, battery still good (not designed to be replaced). I used it to verify which of the gauges was "right", and later used another tester (see below) for comparison to verify.

When i now air up with the rebuilt sears pump, the entire trike rolls FAR EASIER and rides much better and more efficiently. It literlaly feels like I removed glue from all the wheel bearings (which were not touched in this process).
I'm sure part of this is due to the stiffer nature of new tires vs the old thoroughly flexed and softened ones. But the rest is likely the pressure.
So i am going to run experiemnts, just because, and see where the border lies between easy ride and best comfort (bumps, as the tires *are* my suspension).
To that end, and because sometimes I get a slow leak either in a valve core or from a thorn or piece of road debris, even with the thick moped tires and tubes on the rear. (the front wheel doesn't normally have any problems, other than the occasional valve core leakage, and typically lasts perfectly fine from tire install to worn out tread, I decided to try out one of those cheapo TPMS units (on a tenbuck amazon sale),

It does work.

There are six sensors in this set, and the display has two sets of three readouts, one for left and one for right, so I am using hte set of sensors for hte left side right now, wiht the other side taped off so it isn't distracting.
Unforutnatley the six sensor versoin of the device does not have the setup menu at all, whie the four sensor verison apparently does (the manual and other info doesn't say this, but reviews and my own experience show this). So none of the limits can be changed, or the alarm points. all that can be changed is (simultaneously) if it reads in C/F and KPA/PSI. Thankfully hte alarm is in one of my tinnitus bands so i can't hear it so it doens't annoy me.
It is not as accurate as it could be, for the cap sensors. I'd guess the pressures are off on each one by at least 1psi from each other. The temperature on the main unit is close enough to any other thermometer, but the ones int eh cap sensors are perhaps 10F too low on average.
The biggest issue is the leakage. all the caps leak, losing a few PSI over a couple of weeks or less. Today I've temporarily moved the gaskets from each of the three "spare' sensors to the ones I'm using, to doulbe them up and make it easier to get a seal without having to crank them down hard.
this also helps the amoutn of air loss during reinstall after airing up; they have a lot fo travel down onto the stem while htey are letting air out the whole time, before the seal caps off the stem. the extra seal thickness works a fair bit better this way.

The unit is interesting, in that it is internally powered by a little 2.5Ah liithium battery, that is rechraged from a solar cell on the back. it's intended to sit on your dashboard of a car or truck.
The plan, if i keep it on the trike, is to move the solar cell to the top of the trike, while the unit itself stays in the forward part of the canopy where i can look up to see it any time if i want to. It activates on vibration, so i don't need access to any buttons. it does have a usb port for recharge if necessary, but so far it's been going for over a month without an inital charge or a recharge, at two bars on the battery meter.
I also intend to swap out the little flat battery for an 18650 i have from some dead BT speaker; it already has the same plug and it's own BMS board just like the flat battery.
the 18650 is proabbly more capable of handling the temperatures outside in the summer than the flat battery (yes, supposedly the thing is designed to work sitting inside a sealed up car on the dashboard in direct sunlight so it should handle high temps, but i honestly don't believe that they'd use a battery designed for those conditions...and i can use the flat battery in something else that doesnt' need to be outdoors but wont' fit an 18650 inside of. )


Based on the design of this hub, it should not be the same progblem as the previous, where the inboard cups of hte bearings relocated inward under the skewer tension and the sideloading the front wheel experiences in turns. This one has bearing modules, with a cylinder between the inner races to prevent taht kind of relocation. So I am not sure what is causing it. It shoudln't be skewer stretch or skewer barrel "cup" compression; these are metal.
it has happened only once so far in all the time since changing the wheel, around ten months. So it could be some other cause than the previous one (someone messing with the wheel while I am at work, for instance, as unlikely as that is. (The trike stays in our breakroom, whcih while that doens't prevent access to the public, deters it. ))
I am looking into replacing the entire skewer and hollow axle with a bolt and nut.
Separately, when i changed all the tires out at the same time (first time for that, they all happened to be worn enough around the same time this time), I had problems with the air pump I've been using for over a decade. The motor is not very good, and was not wound with thick enough wire to start with, so it has visbily overheated over time. it sitll works, but it had "that smell" when i was airing up the second of three tires during this process. It's a crappy harbor freight pump, cut down from it's original casing whcih included a crappy SLA battery, to just hte minimum plastics needed to keep the pump and motor itself enclosed, and h old the airgauge and switch, and more ventilation than the orignal had. Heck the motor is so weak they even instaleld a plastic fan on it. :lol:
So I dug out an ancient 1980s Sears automotive compressor meant to be kept in your trunk with your spare tire, etc., that when she was still around my mom had bought (new...) for her car. I've kept it as a spare, but the hoses inside and out rotted away (no surprise after four decades). So first I had to cut the casing down, taking over an inch out of the middle, so it would fit in the trike's toolspace.
I replaced the hoses with reinforced fuel line; those are heavier but also are unlikely to fail.
Unfortuatnely I have not yet found an acceptable and affordable air chuck for the valve stem end, so I am using the crappy right angle lever type off the HF unit. I don't like the style; it is hard to use, and it is hard to fit between the stem and the hub's spoke flanges on the rear 20" wheels.
I have previously tried several types of 90-degree adapters for those, but they all leak, and having ot install them just to air things up is too anoying, and it also causes more air loss as i take them off afterward, usncrewing them as they hiss my air away.... so i stopped trying those things. :/
This is the chuck type I would prefer to use,
That particular brand has a good gripping mechanism, but it requiers putting the chuck straight onto the valve stem. can't do taht on my wheels. This version
is too tall to work, too.
So I want to use a ball style angled one like this, but with those multi-jaw grips, but the company doesn't seem to make one.
I don't want to use the little guillotine on just one side-this type does not hold onto the stem straight so I have ot keep holding it in place anywya to keep the seal, making the entire lcoking mechanism almost useless.
I'll settle for this style if i ahve to, but haven't found one that already has a 1/4" barb inlet, or a cheap one with a threaded input and a cheap 1/4" barb inlet to matc that thread. So far the bits I want are all sold separately, in packs of two ro more (only need one), and getting just one each is twice as expensive, or more, or four times as much for each part. So it's looking like 25 to 50 bucks total just for teh chuck. No thanks.
I also replaced the skinny power wires to it (12v lighter plug style) with the better ones off the HF unit (which I think I had pulled off something else when i reubuilt that one back when..).
I kept the sears gauge on it, which turns out to be accurate. I did not realize the HF guage was not accurate at all (perhaps it failed over time; i'm sure i checked it when I first started using it way back). It always read high, but i did not know that. So I have been running underpressure by as much as 10psi, or more.
I have an ancient radioshack airgauge, that surprisingly also still works, battery still good (not designed to be replaced). I used it to verify which of the gauges was "right", and later used another tester (see below) for comparison to verify.
When i now air up with the rebuilt sears pump, the entire trike rolls FAR EASIER and rides much better and more efficiently. It literlaly feels like I removed glue from all the wheel bearings (which were not touched in this process).
I'm sure part of this is due to the stiffer nature of new tires vs the old thoroughly flexed and softened ones. But the rest is likely the pressure.
So i am going to run experiemnts, just because, and see where the border lies between easy ride and best comfort (bumps, as the tires *are* my suspension).
To that end, and because sometimes I get a slow leak either in a valve core or from a thorn or piece of road debris, even with the thick moped tires and tubes on the rear. (the front wheel doesn't normally have any problems, other than the occasional valve core leakage, and typically lasts perfectly fine from tire install to worn out tread, I decided to try out one of those cheapo TPMS units (on a tenbuck amazon sale),
It does work.
There are six sensors in this set, and the display has two sets of three readouts, one for left and one for right, so I am using hte set of sensors for hte left side right now, wiht the other side taped off so it isn't distracting.
Unforutnatley the six sensor versoin of the device does not have the setup menu at all, whie the four sensor verison apparently does (the manual and other info doesn't say this, but reviews and my own experience show this). So none of the limits can be changed, or the alarm points. all that can be changed is (simultaneously) if it reads in C/F and KPA/PSI. Thankfully hte alarm is in one of my tinnitus bands so i can't hear it so it doens't annoy me.
It is not as accurate as it could be, for the cap sensors. I'd guess the pressures are off on each one by at least 1psi from each other. The temperature on the main unit is close enough to any other thermometer, but the ones int eh cap sensors are perhaps 10F too low on average.
The biggest issue is the leakage. all the caps leak, losing a few PSI over a couple of weeks or less. Today I've temporarily moved the gaskets from each of the three "spare' sensors to the ones I'm using, to doulbe them up and make it easier to get a seal without having to crank them down hard.
this also helps the amoutn of air loss during reinstall after airing up; they have a lot fo travel down onto the stem while htey are letting air out the whole time, before the seal caps off the stem. the extra seal thickness works a fair bit better this way.
The unit is interesting, in that it is internally powered by a little 2.5Ah liithium battery, that is rechraged from a solar cell on the back. it's intended to sit on your dashboard of a car or truck.
The plan, if i keep it on the trike, is to move the solar cell to the top of the trike, while the unit itself stays in the forward part of the canopy where i can look up to see it any time if i want to. It activates on vibration, so i don't need access to any buttons. it does have a usb port for recharge if necessary, but so far it's been going for over a month without an inital charge or a recharge, at two bars on the battery meter.
I also intend to swap out the little flat battery for an 18650 i have from some dead BT speaker; it already has the same plug and it's own BMS board just like the flat battery.
the 18650 is proabbly more capable of handling the temperatures outside in the summer than the flat battery (yes, supposedly the thing is designed to work sitting inside a sealed up car on the dashboard in direct sunlight so it should handle high temps, but i honestly don't believe that they'd use a battery designed for those conditions...and i can use the flat battery in something else that doesnt' need to be outdoors but wont' fit an 18650 inside of. )
Last edited:
I agree, those are terrible. My friendly local bike co-op has a drawer full of chucks that were saved from otherwise faulty (manual) good quality floor pumps. $10 or so gets me 2 or 3 that I can experiment with; at least 1 or 2 are winners. Most have similar barbed nipples that seal fine with a small hose clamp if necessary, some have a screw down collar.Unfortuatnely I have not yet found an acceptable and affordable air chuck for the valve stem end, so I am using the crappy right angle lever type off the HF unit. I don't like the style; it is hard to use, and it is hard to fit between the stem and the hub's spoke flanges on the rear 20" wheels.
I have previously tried several types of 90-degree adapters for those, but they all leak, and having ot install them just to air things up is too anoying, and it also causes more air loss as i take them off afterward, usncrewing them as they hiss my air away.... so i stopped trying those things. :/
If your area doesn't have a bike co-op maybe try your FLBS?
Yeah, other than having to grind down a wrench to make it thin enough to fit the cone nuts (mine actually broke while trying to do this tonight, along with all the other things that went wrong), changing hte axle out was easy.
Well, turns out it wasn't actually the qr itself this time. (and might not have been before, to startt with a anyway).
On my ride home from work today, I happened to be pondering the idea of this problem, and listing in my head the wheels I have in the shed taht might have the right solid axle, etc. And thinking about the monster dropouts Chalo had sent me to build this fork from but that I never got around to becsue I "wanted to do it right" and build a little jig to hold the dropouts and fork legs at all the perfect angles.
Then I also thought aobut the old fork that broke in the only crash I've ever had of this trike, several years back, when the intense wind (don't remember the speed, but probbably 30-40mph+, it's in the post probably from several years ago) blew me faster even as I tried to slow for the corner, and I couldn't brake or steer properly because it was pushing the trike in such a way as to take traction off the front wheel *just enough*...so I ended up drifting into the left turn lane for the other direction and broke my fork on someone's bumper (which wasn't even scratched because only my tire touched their car, and it was very slow vby the time it hapepned).
Then... (unbelievably) at the exact same place where *that* had hapepned:
I was making my usual careful turn (because the pavment there has "waves" and "ripples" in it that are up to several inches high from the buses and other traffic turning there and braking), and there wasa bang snap and grinding but there was a car right behind me so I couldn't just stop and couldn't steer properly either...didn't know waht was wrong but it was def the front end, and the only place I could go that the trike woudl let me was into the empty left turn lane *in the same place I had the crash before*. :/ (though at that time before it wasn't an empty lane, this time therew was no traffic in that lane or the other oposing-direction lane).
With no traffic coming, i looked (from the seat, still sitting) at the front end and the wheel was obviously askew, top of the tire rubbing on the left stanchion. Well, that can't be good, so I very very slwoly continued up the slope of the bridge over the canal south of metrocenter (the only exit out of metrocenter in that direction), until I could get over the bridge, and past it, to a palce where there is a "driveway" entrance on the sidewalk (becuse this thing doesnt' go over curbs even when it *doesn't* have a dangling front wheel)
I got up onto the sidwalk, locked the rear parking brakes, got off, and examined the problem:


Well. :/
There really isn't a lot of field repair you can do with that, even with the stuff I carry.
So, I just removed the little bit of dropout still clamped in the QR, stuck it in my pocket, loosened the brake pads as far as they would go in the caliper, retighthned the QR to keep it in the left side at least, and veyr very very slowly rode home. I was lucky, and nothing else broke, and i happened to get all the clear stretches of road so I could go very slwoly across dunlap, boht sides, and then the rest of trhe way home.
I dug out those uber-droputs from Chalo
and...theyr'e going to take some hours at least to install even in the fastest crappy way becuase i have to redo the caliper setup, wiring to the brake switch, etc etc., because the caliper goes on top in front with these.
their dropouts are farther forwad by quite a bit, so it also changes the geometry slightly, so I don't know how that will affect the handling.
Anyway....so i have to use this tomorrow for my work commute, so my only real option without digging for parts off other junk in the shed to replace the whole lowers (with more crap parts) was to just weld the piece back on.
That went about like things usually do, with fifty things being way harder than they should be, and me already being exhausted from work and overheated from the long slow ride home (because at that speed there's no cooling airflow, not enough, and it's just 105F+ air at six thousand percent humidity. :lol:
But, eventually, I got it rewelded, and also ran a bead through the same area of the other side becuase if this side broke the ohter is probably arleady cracked. Then ground them back down, and replaced the QR axle with solid one out of a crappy wheel that will be donating it's rim later anyway (if I ever build the new trike).
Oh, and it turns out that this hub does NOT have cartridge bearings; it looks like it does but they are acutally still cup and cone, there is just a little metal cover over them that looks like a cartridge side.
BTW, the thing had been failing for some time, as there is obvious oxidation on the broken surface between the safetywasher tab hole and the dropout itself. avbove the tab hole it was shiny and torn, so that all hapepend pretty quick.


I was way too tired to remem ber to take many pics, butr here's the welded fixed reassembled thing. ugly, but will probably work until i get the chance to rebuild the fork. i have pto coming up for a week but not till next month; it's going to take a tleast a day or two to do this and then if i screw anything up another day or two to fix the screwups. :/


I can't imagine a bike shop or bike place has the chuck I want, and if they did, it would probably cost two or three or ten times as much as amazon or ebay. :lol:
I'm currently living with the crappy lever-type chuck shown in the pics before, but am going to order the really cheapest bits for the clip on type with aball end, i found some (taht are probably garbage) for about ten bucks total for a pair of the chucks with QR airhose fittings taht unscrew, and a pair of some other thing that I can't use but has the barb fitting I need that also unscrews, both of which say they're the same size npt threads. We'll see.
I would pay the money for that good six-segment locking chuck, but they simply don't make one in the style I need. :/
Well, turns out it wasn't actually the qr itself this time. (and might not have been before, to startt with a anyway).
On my ride home from work today, I happened to be pondering the idea of this problem, and listing in my head the wheels I have in the shed taht might have the right solid axle, etc. And thinking about the monster dropouts Chalo had sent me to build this fork from but that I never got around to becsue I "wanted to do it right" and build a little jig to hold the dropouts and fork legs at all the perfect angles.
Then I also thought aobut the old fork that broke in the only crash I've ever had of this trike, several years back, when the intense wind (don't remember the speed, but probbably 30-40mph+, it's in the post probably from several years ago) blew me faster even as I tried to slow for the corner, and I couldn't brake or steer properly because it was pushing the trike in such a way as to take traction off the front wheel *just enough*...so I ended up drifting into the left turn lane for the other direction and broke my fork on someone's bumper (which wasn't even scratched because only my tire touched their car, and it was very slow vby the time it hapepned).
Then... (unbelievably) at the exact same place where *that* had hapepned:
I was making my usual careful turn (because the pavment there has "waves" and "ripples" in it that are up to several inches high from the buses and other traffic turning there and braking), and there wasa bang snap and grinding but there was a car right behind me so I couldn't just stop and couldn't steer properly either...didn't know waht was wrong but it was def the front end, and the only place I could go that the trike woudl let me was into the empty left turn lane *in the same place I had the crash before*. :/ (though at that time before it wasn't an empty lane, this time therew was no traffic in that lane or the other oposing-direction lane).
With no traffic coming, i looked (from the seat, still sitting) at the front end and the wheel was obviously askew, top of the tire rubbing on the left stanchion. Well, that can't be good, so I very very slwoly continued up the slope of the bridge over the canal south of metrocenter (the only exit out of metrocenter in that direction), until I could get over the bridge, and past it, to a palce where there is a "driveway" entrance on the sidewalk (becuse this thing doesnt' go over curbs even when it *doesn't* have a dangling front wheel)
I got up onto the sidwalk, locked the rear parking brakes, got off, and examined the problem:
Well. :/
There really isn't a lot of field repair you can do with that, even with the stuff I carry.
So, I just removed the little bit of dropout still clamped in the QR, stuck it in my pocket, loosened the brake pads as far as they would go in the caliper, retighthned the QR to keep it in the left side at least, and veyr very very slowly rode home. I was lucky, and nothing else broke, and i happened to get all the clear stretches of road so I could go very slwoly across dunlap, boht sides, and then the rest of trhe way home.
I dug out those uber-droputs from Chalo
and...theyr'e going to take some hours at least to install even in the fastest crappy way becuase i have to redo the caliper setup, wiring to the brake switch, etc etc., because the caliper goes on top in front with these.
their dropouts are farther forwad by quite a bit, so it also changes the geometry slightly, so I don't know how that will affect the handling.
Anyway....so i have to use this tomorrow for my work commute, so my only real option without digging for parts off other junk in the shed to replace the whole lowers (with more crap parts) was to just weld the piece back on.
That went about like things usually do, with fifty things being way harder than they should be, and me already being exhausted from work and overheated from the long slow ride home (because at that speed there's no cooling airflow, not enough, and it's just 105F+ air at six thousand percent humidity. :lol:
But, eventually, I got it rewelded, and also ran a bead through the same area of the other side becuase if this side broke the ohter is probably arleady cracked. Then ground them back down, and replaced the QR axle with solid one out of a crappy wheel that will be donating it's rim later anyway (if I ever build the new trike).
Oh, and it turns out that this hub does NOT have cartridge bearings; it looks like it does but they are acutally still cup and cone, there is just a little metal cover over them that looks like a cartridge side.
BTW, the thing had been failing for some time, as there is obvious oxidation on the broken surface between the safetywasher tab hole and the dropout itself. avbove the tab hole it was shiny and torn, so that all hapepend pretty quick.
I was way too tired to remem ber to take many pics, butr here's the welded fixed reassembled thing. ugly, but will probably work until i get the chance to rebuild the fork. i have pto coming up for a week but not till next month; it's going to take a tleast a day or two to do this and then if i screw anything up another day or two to fix the screwups. :/
I agree, those are terrible. My friendly local bike co-op has a drawer full of chucks that were saved from otherwise faulty (manual) good quality floor pumps. $10 or so gets me 2 or 3 that I can experiment with; at least 1 or 2 are winners. Most have similar barbed nipples that seal fine with a small hose clamp if necessary, some have a screw down collar.
If your area doesn't have a bike co-op maybe try your FLBS?
I can't imagine a bike shop or bike place has the chuck I want, and if they did, it would probably cost two or three or ten times as much as amazon or ebay. :lol:
I'm currently living with the crappy lever-type chuck shown in the pics before, but am going to order the really cheapest bits for the clip on type with aball end, i found some (taht are probably garbage) for about ten bucks total for a pair of the chucks with QR airhose fittings taht unscrew, and a pair of some other thing that I can't use but has the barb fitting I need that also unscrews, both of which say they're the same size npt threads. We'll see.
I would pay the money for that good six-segment locking chuck, but they simply don't make one in the style I need. :/
Last edited:
Similar threads

- Replies
- 44
- Views
- 9,409
- Replies
- 15
- Views
- 3,915
- Replies
- 20
- Views
- 4,281
- Replies
- 12
- Views
- 4,676
- Replies
- 0
- Views
- 1,525