• Hello ES! We could use some help to get us past the finish line on building the new knowledgebase for the forum.
    Can you donate? Please see our fundraising page. Thank you!

DIY College EBike

P2: Made some torque arms for the bike. I started by designing in Autodesk Fusion 360, then 3d printing them at a local makerspace out of PLA plastic to test fit them.
View attachment 379529
This is a more final design, but you can see where I've marked fitment issues with the derailleur and frame. This was my first time using CAD for a project where I actually had some creative freedom, so it was a real learning curve (it still is).

I also bought tires, Maxxis Hookworm 27.5 x2.5 slicks. Madison gets lots of ice and salt on the roads in the winter, so over Thanksgiving or winter break I'll order some Schwalbe studded tires and swap them over.

With lots of help from the makerspace's resident engineer, I finalized my design in CAD.
Some more info on the design:
Left & right have different designs (accomodating derailleur on right, extra bracket on left).
Both are 30.75mm wide, 15.75mm wide section of metal locates the axle up/down & front/back, connecting to a 70mm long 15mm wide stem that is anchored to the frame via hose clamps. At the time of this writing, I am considering upgrading to U bolts and/or utilizing the bracket on the left side of the frame to better anchor the torque arms.


I made the torque arms out of some aluminum stock lying around. No clue what alloy, if someone else knows I'd love to find out just to have that knowledge.
View attachment 379532

This was my first time ever using a CNC mill, so the engineer there had to design my tool paths and work the mill for me. I know I have my whole life ahead of me to learn how to use all these tools but I really can't wait to get better.
View attachment 379533

Here's the finished product; it was necessary to hand mill back side of the stem off because it would have interfered with the frame, and flipping the part over to CNC mill it would probably have been a waste of time. Obviously, some hand filing was needed to finish it all up.


This is what the bike looked like with torque arms installed. Note the lack of a rear brake (only running regen back there) and at this point the lack of a front caliper. I spent some time figuring out the right ebrake lever for my bike's controller and mineral oil brakes, only to discover that I would have to make my own. For the first week or so of this bike running, I ran it at the lowest setting (under 15mph) and could only stop via regen or shoes to the asphalt. Suffice it to say, wouldn't recommend.


With the bike effectively running and driving, I could now turn to all the little things (like physical brakes) that make a bike actually daily driveable.
cutting-stock-to-size-jpeg.379532


cnc-milling-jpeg.379533


Notice string bracelet and spinning mill machine. Bad things happen with jewelry, bracelets, string, hair, and machines that spin.
 
Thanks for the info! I'll be the first to admit I'm very much at the beginning of the learning curve here, so I appreciate all the skepticism and knowledge from people who know more than me.
There’s nothing wrong with a generic cell pack, as long as you stay within its capabilities and avoid charging while unsupervised. The pack can last a long time if you treat it well, and avoid fully charging or discharging it.
The motor can take a lot more than the pack (6kW-7kW in bursts), and will try to take it from the battery if you’re on the throttle, if unchecked.
You have your toe in the water with your current setup, so have fun, while planning on future upgrades. Get the torque arms or you’ll be really sorry, if you survive the crash.
EDIT - I just read you got the 3T winding. Be easy on the throttle or you’ll kill that battery, and controller.
 
Last edited:
You bought a 52V20AH Risun pack. . The spec states "5000mAH 3C Powerful DMEGC INR21700 Cell". The 3C indicates it has a 15A discharge current, which gives you a battery capable of 60A, but that's limited by the 45A BMS. A comparable Grin 52V20AH battery uses Samsung 18650 GA cells. The cell specs say the battery is capable of 60A, but it has a 40A BMS which limits safe operation. I think both of these are similar as far as performance and will run your DD motor,

I've used GA cells in my batteries and think they're great. However, Google says that DMEGC is well respected battery supplier in the solar area. The RisunMotor still seems cheap, but maybe it will be OK for longevity and safety.

Hope it works out. Meanwhile, follow the battery safety proocol. Never charge unsupervised. Don't recharge when battery internal temperature is below 40-45F.
The cell spec sheet shows 3C as peak discharge, while the rated current is 9.8A, low for a 21700 cell and more like a medium discharge 18650 cell. Might be good to install a temp sensor if the plan is to draw more than 35A continuos. Grins pack is capable of more than 60A if you went with peak; I doubt they’d ever get warm at 40A.

The DMEGC does have a decent fast charge rating though.
 
You don't need rear breaks just regen. Get the front brakes working and keep them in good shape. I use regen the most and only use the brakes to complete the stop and hold the bike still.
 
^This. Regen is great. Definitely need a torque arm. I have the V7 Regen TA from Grin. It is expensive, but it’s better than rebuilding your bike after the dropouts fail from the unrelenting twisting force of a Regen capable motor.

I still use my disc brakes, to finish my stop. Not sure if I have to tweak any regen settings, but when I use regen to come to a complete stop, the bike starts to go backwards. I understand that is normal, but I feel like it might be much.

Still, regen is great. I usually capture 5-7% of capacity back from my 4 mile commute. Lots of hills. Got 12% once.
 
cutting-stock-to-size-jpeg.379532


cnc-milling-jpeg.379533


Notice string bracelet and spinning mill machine. Bad things happen with jewelry, bracelets, string, hair, and machines that spin.
Good call! This CNC mill has a case to catch all the chips and coolant, so that wasn't a concern. On the hand mill, however, I made sure to remove all jewelry, bracelets, etc. before doing anything on that.
 
Get the torque arms or you’ll be really sorry, if you survive the crash.
I have a few things for my current set to help it cope with the loads, but I think that a fresh set of mild or stainless steel clamping torque arms with some grade 12.9 bolts will be the ultimate way to go.
EDIT - I just read you got the 3T winding. Be easy on the throttle or you’ll kill that battery, and controller.
I've killed all 3 phase wire connections separately (shitty crimps on all of them, but probably some user error as well). This bike gets most of its miles under 30mph and sees short bursts of speed sometimes, but I've started getting further around town with it so I'll need to keep an eye on those.
 
Might be good to install a temp sensor if the plan is to draw more than 35A continuos.
Sounds like a fun project! I'll look into taking apart the case and installing a temp sensor inside to monitor the batteries.
Grins pack is capable of more than 60A if you went with peak; I doubt they’d ever get warm at 40A.
I'm gonna have to look more into their battery, definitely sounds like a good upgrade down the line.
 
P3: Brake and Tire Trouble
*Note: This section doesn't have many pictures, because my hands were too covered in brake fluid to take photos of a lot of it.*

The most important thing to me was stopping, so I bought a Tektro Orion 4 piston front brake caliper. I haven't done the exact math with the piston diameters, but I'll say I roughly doubled the area pushing on the pad. I got new mineral oil brake handles with built in ebrake connectors because my original purchase of magnetic ebrake sensors didn't work out. They didn't have the correct connector, so I returned them and ordered DOT handles that had the correct connector. I used the DOT handle for a while as my back brake (my regen brake) lever, but I returned the front one and ordered the exact same set of mineral oil ebrake handles and soldered on the correct connectors from the stick-on ebrake sensors.

With all these handle changes, I spilled lots of mineral oil on the cardboard below my workspace, and plenty on my hands and other bike parts. It was necessary to bleed the brakes lots, especially because I had never done it before. My first attempt involved my neighbor's Shimano brake bleed kit, a bottle with a straw in it, and lots of mineral oil everywhere but in the lines. After that fiasco, I ordered a Bleedzone Tektro-specific brake bleed kit, and it's seen maybe a half dozen uses over the few months since I got it. Only thing it doesn't come with (which I use an appropriately size piece of scrap wood or aluminum for) is a bleed block.

I ruined 1 set of brake pads by not fully tightening the banjo fitting which caused brake fluid to get all over the caliper and pads.
I ordered a caliper bracket for a 180->203mm brake rotor increase, but I didn't realize that the rotor was already sized up in the front to the stock 180. So when I removed the old bracket and put the new one on, I had some fitment issues. After having bled the brakes for what felt like the millionth time that day, I was unwilling to wait for a bracket that might work better to ship over, so I went to the local makerspace, got some nuts, washers, and bolts, and added another ~20mm to the bracket.

Finished result:
Brakes installed.JPEG
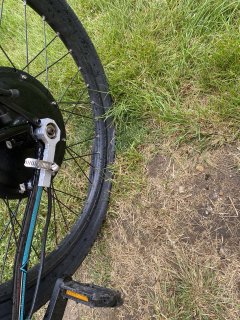
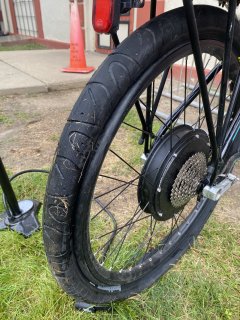
A few days after I got my brakes working, I discovered a leak in my tire.
Flat tire.JPEG
This was the first day of class, and it was hard to see this bike as the reliable commuter I had pitched to myself and others.
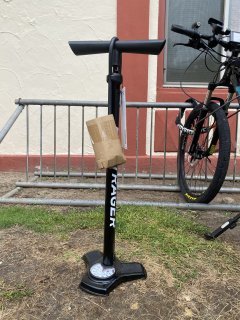
Upon trying to reinflate it with my dad's old dept. store bike pump, the old pump's seal gave up the ghost. It was an old Target or Dick's no name pump, not exactly serviceable; more to the point, I needed a new and better pump ASAP, so I went on foot to the local bike shop to get a pump, a Bontrager Charger floor pump.
New bike pump.JPEG

I discovered the tire wasn't able to hold air for more than 15 minutes, so I went to class and resolved to fix it later. After class, I splashed soapy water on the tire (and made a mental note to buy an empty spray bottle to use for things like this later) and found no visible leak. At that time I (incorrectly) assumed it was a leak from the valve. I went to my local bike shop and bought a Schwalbe seamless tire tube, and installed it on my bike.
Of course, I didn't do it perfectly the first time:
Tube poking out.JPEG

I installed it correctly and then went along my merry way.
 

Attachments

  • Tube poking out.JPEG
    Tube poking out.JPEG
    1 MB · Views: 2
If you ever get tired of the mess of oil, bleeding them, etc., I can highly recommend Avid BB7 MTN cable-operated disc brakes, as long as you get the real ones and not whatever counterfeits are out there, with a 200mm rotor.

This is sufficient to easily lockup the front wheel of the heavy heavy-cargo-trike SB Cruiser, if I pull the lever hard enough. (Avid SingleDigit lever, which even my arthritic hands can easily operate, and is adjustable-pull).

Rotor gets hot enough to be untouchable with stops from 20mph for the few hundred pounds of trike and me; dunno how much energy that is. I suspect it'd flashsteam if I sprayed water on it (somehow I never manage to remember to look at it in the infrequent rain).


(if I need it I also have proportional regen in the rear motors, controlled via a cable-operated-throttle puiled by the other brake lever).
 
P4: Battery & some New Gear
Up until this point, my battery was held onto the frame by 1 M5-08 bolt. The battery's design combined with the bracket's available mounting options meant that my only choice was one bolt.
one bolt battery holder.JPEG
The bottom fitting is visible with the red paint.

This is how wild the battery could (sometimes would) swing if I took a turn too aggressively:
Wheeee!!.JPEG

After conferring with the engineer at the local makerspace (you're gonna be hearing a lot of this), I decided to drill a hole out for the bolt to go through right below the tines that connect with the battery.

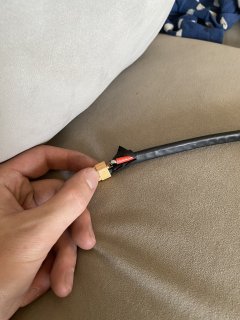
After all that battery fun, I was promptly rewarded by my battery's connector popping.
IMG_2555.JPEG

I did an ok job melting down the big blob of solder and getting the wire to reconnect with the connector, but that lasted a whole 5 minutes and blew on my way home. I went back to the makerspace and actually did it the right way, inspecting the wires and soldering joints more closely after I was done. Now it's held up for a couple of months.

For fun, I quickly designed and 3d printed some torque arm end caps out of PLA pastic to keep out the salt and water in the coming months. I couldn't find O rings to make it a perfect fit, so I'm using O ring string right now to make them a snug fit. If you have other suggestions abour rust prevention on a mild steel axle, I'd love to hear them.
IMG_2581.JPEG

After plenty of bike testing around town, I started to realize that given how well this thing keeps up with traffic and how much I like my head, it might be time to upgrade to a helmet with mandible protection. I went to the local motorbike shop (the only place in town I could get to that had full face helmets for me to try on) and bought a well-fitting DOT & ECE certified helmet, a Sedeci Viaggio. I'll be the first to say I know nothing about motorcycle helmet safety, so if you have an article that says my make & model of helmet will kill me in my sleep, please send it my way.

Here's the helmet when I first got it:
IMG_2609.JPEG

And here's how it looks now:
IMG_2683.JPEG
 
This is sufficient to easily lockup the front wheel of the heavy heavy-cargo-trike SB Cruiser, if I pull the lever hard enough. (Avid SingleDigit lever, which even my arthritic hands can easily operate, and is adjustable-pull).
That's worth considering. I doubt my original 2 piston caliper could lock my front wheel at full tilt, but my 4 piston caliper can lock up my front wheel. How much does weight v. speed factor into brake kit design?
Rotor gets hot enough to be untouchable with stops from 20mph for the few hundred pounds of trike and me; dunno how much energy that is. I suspect it'd flashsteam if I sprayed water on it (somehow I never manage to remember to look at it in the infrequent rain).
That's another interesting point, I need to read more in the tech section about braking theory, I have a lot of questions.
(if I need it I also have proportional regen in the rear motors, controlled via a cable-operated-throttle puiled by the other brake lever).
That sounds like something I should check if my controller has inputs for.
 
The Grin V7 is also made of stainless steel though. Should I put zinc-plated mild steel washers in between the torque arms and the frame then, or something else? Or is a stainless steel axle not a viable choice for me?

The arm itself does not attach to the frame. Rather there is an intermediary 'foot' that attaches to the end of the arm and presses against the frame. The two are attached by a bolt and nut to permit removing the wheel with the arm from the bicycle without also releasing the frame attachment.

While I have one of these, it's packed away. This foot may not be stainless steel, but rather aluminium. In this case, the attaching bolt could be zinc plated to avoid the problem.

If the foot itself is stainless steel, then the paint on the frame could be sufficient.

I'm not quite clear on the experimental setup to make this happen. What are you envisioning?

I'm suggesting paper and pencil drawing just the length of the distance from the center of the axle to the corner at the edge of the flat to establish the lever arm, and then taking the larger of the two of the motor torque, or the torque provided by a panic stop, and calculating what load the axle flat corner puts on the surface that is resisting it (the internal face of the torque arm).

The brakes can probably stop the machine in a shorter distance/time than the motor can accelerate to the same speed, so the stopping load will probably be larger.

While explaining it, I realise the problem may not be as simple as I'm proposing, with the actual contact point depending on the flatness and fineness of the surfaces. Failure would be either due to shearing of the aluminum at the place where the flat of the axle reaches the threads of the axle, or due to plastic deformation of the aluminium at the same place instead, whichever requires less force.

I'll withdraw the suggestion, although someone else who is closer to their engineering education may chime in.
 
If you have other suggestions abour rust prevention on a mild steel axle, I'd love to hear them.
Oil, grease, vaseline, or what ever you got. Or just try not to worry about it. Maintenance is clean it up with a wire brush once in a while.

In one of my past lives. I was building boats. After tightening. We would pee on the nuts and bolts. Salt in the pee would cause rust. This was the earliest thread lock fluid.
 
Oil, grease, vaseline, or what ever you got. Or just try not to worry about it. Maintenance is clean it up with a wire brush once in a while.

In one of my past lives. I was building boats. After tightening. We would pee on the nuts and bolts. Salt in the pee would cause rust. This was the earliest thread lock fluid.
I hope you only piss on the boats you built for yourself. :LOL:
 
Why is the hose clamp closer to the middle instead of the end of the arm where it's most effective?

Will you be remaking the torque arm in steel?

Nice to have access to Makerspace! I assume it's free to students?

img_2581-jpeg.379565
 
If there is room, machine slots in the battery bracket for two hose clamps to secure it to the downtube.

wheeee-jpeg.379563
 
No one here likes flats. Good tires and tubes. I run Schwalbe Marathon Plus. There are others, a few threads on tires tubes. I tried the fix a flat in tires they plugged up my valve stems. Good tires are not cheap. Most here carry extra tubes not so many patches and small tool bag. Carry mini pump or CO2 canaster.
 
A shout out from Lake Wisconsin!

I put 4 bolts in my downtube battery holder. Riv-nut kits are cheap. Use stainless, not aluminum riv-nuts.

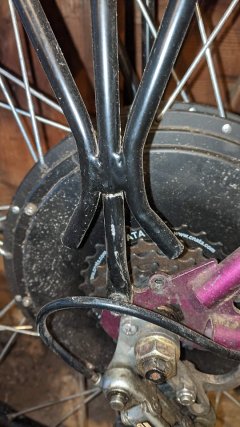
A word of caution on the rack support. Mine broke after the first year or so. It carries just the battery (14s5p). I sleeved each of the main support tubes inside with a solid aluminum shaft potted in epoxy. Been good so fr (3 years).

break1.jpg
 
Sounds like a fun project! I'll look into taking apart the case and installing a temp sensor inside to monitor the batteries.

I'm gonna have to look more into their battery, definitely sounds like a good upgrade down the line.
Honestly, if you’re riding in traffic, I’d consider swapping out the motor for one better suited for that, in the long run. The 3T winding is better suited for a purpose built project (an aero application as mentioned, or small wheel, etc.), since you don’t have the torque to accelerate out of traffic situations with the wheel size and voltage you’re running. A 4T or 5T at 60v or 72v would be a huge improvement. You could use the 3T for something like a fun pit bike project later. I’d ride the bike as is and have fun until the battery dies and map out your upgrade plan

PS. Good idea on the helmet. Im sure if your parents are paying for school, they’d support that investment.🤓

A word of caution on the rack support. Mine broke after the first year or so. It carries just the battery (14s5p). I sleeved each of the main support tubes inside with a solid aluminum shaft potted in epoxy. Been good so fr (3 years).

View attachment 379582
There aren’t many racks that hold up with e-bikes, especially on rough roads or trails. After destroying a couple, I ended up redoing and rearranging the supports to increase strength where the failures occurred. So far, so good.

Post in thread 'My econo-e-bike'
My econo-e-bike
 
Oil, grease, vaseline, or what ever you got. Or just try not to worry about it. Maintenance is clean it up with a wire brush once in a while.
Sounds like good ideas!
In one of my past lives. I was building boats. After tightening. We would pee on the nuts and bolts. Salt in the pee would cause rust. This was the earliest thread lock fluid.
Maybe as an anti-theft feature
 
There aren’t many racks that hold up with e-bikes,
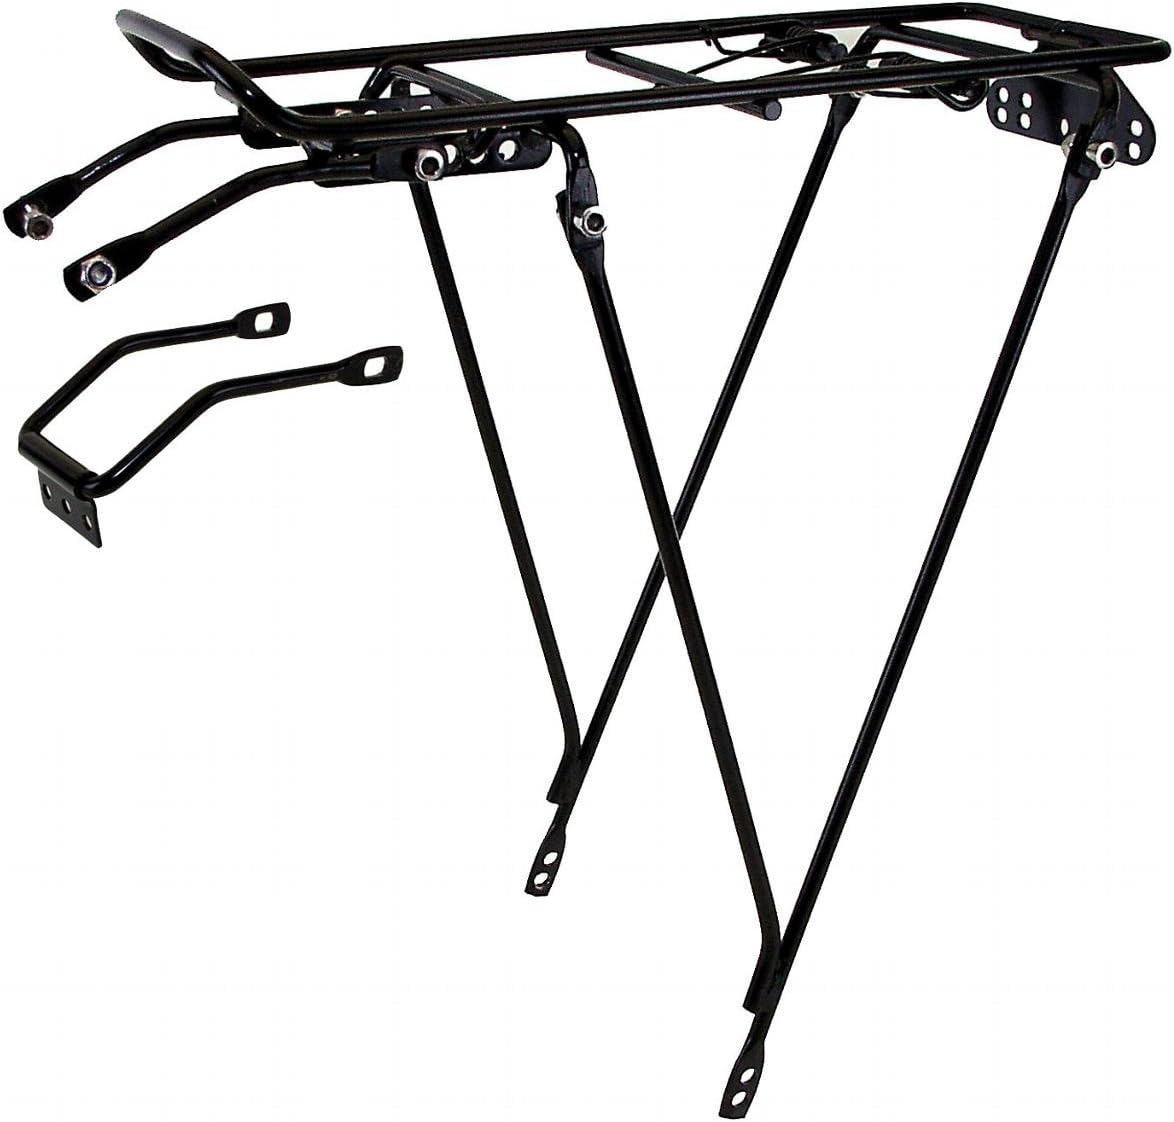
Agreed! That's why I'm amazed at this spindly rack on my daily cruiser has held up for 10,000 miles and going strong. It has not only a 14s6p pack on it but all my tire repair/tool stuff and saddle bags that I load clothes and groceries. It's steel where everything else seems to be aluminum.

611p3ysMuwL._AC_SL1230_.jpg


ebikeagain.jpg
 
Agreed! That's why I'm amazed at this spindly rack on my daily cruiser has held up for 10,000 miles and going strong. It has not only a 14s6p pack on it but all my tire repair/tool stuff and saddle bags that I load clothes and groceries. It's steel where everything else seems to be aluminum.

611p3ysMuwL._AC_SL1230_.jpg


View attachment 379586
Thanks for the tip. Steel seems like the best option, since it won’t just snap after fatigued, like aluminum.
 
Looks like a fun project and I hope it eventually reaches the stage where you can just charge it, lube the chain (or wax), pump the tires and ride it. Otherwise you might beggar your studies having to get into it constantly. This stuff can get addicting and some of the folks here literally LIVE for it! Another thing, in Madison Wi you are gonna need some different tires with tread if you plan to keep riding in winter. Maybe even some studded tires. And some warm clothes.
 
Why is the hose clamp closer to the middle instead of the end of the arm where it's most effective?
Poor judgement, now the U bolts are as far out as possible (will post pics in the later parts of build thread).
Will you be remaking the torque arm in steel?
Either remaking it out of mild steel or ordering a Grin V7 stainless steel arm.
Nice to have access to Makerspace! I assume it's free to students?
I wish. Since I transferred out of the dept. of engineering, I can't use the on-campus makerspaces. The one I go to is a 501C-3 that's discounted for college students.
 
Back
Top