Gazelle Chamonix conversion

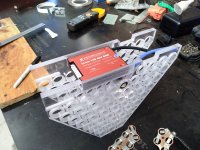
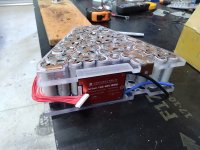
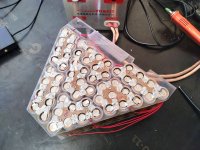
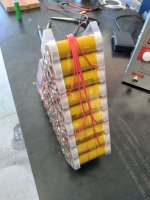
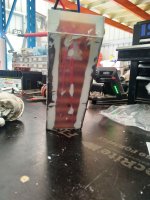
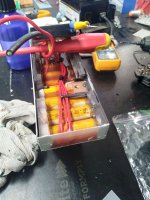
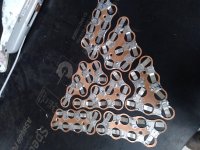
Battery is starting to come together. I thought I'd use this as a good test bed for the copper-nickel-link method using these Molicell 21700 cells. So far so good. The machined polycarbonate was way too expensive for what it is, but it works well.
Soldering the nickel is OK, but I think I need to cool the whole plate down before attempting to solder the next one. Otherwise it all gets too hot and the previously stuck bits melt and float away.
20220403_152553.jpg
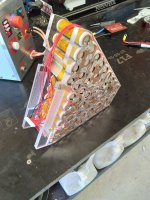
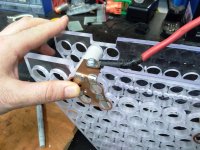
The end terminal solution is pretty elegant I think. I solder a brass nut to the underside of the copper tab and bolt the BMS to it. That way if the BMS ever needs to be bypassed for troubleshooting you can. I was going to say 'if the BMS needs replacing' but at that point, your battery is already toast. The recessed polycarbonate means all the terminations are internal to the top cover, so it's protected and secured from vibrations.
20220403_152646.jpg
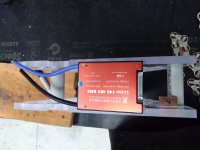
The BMS is a fraction too big to fit inside the space left at the top, but that's OK as I can machine out the inside of the polycarbonate capture plates to accommodate the BMS with room for the cables to go underneath. I don't have a mill, but I do have a drill press. Time to buy myself a cheap X-Y table and some end mill cutting tools. A Jacob's chuck will be fine for polycarb.
20220403_152701.jpg
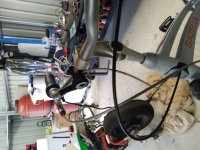
I conclude I need to buy a longer shifter cable for this lever :lol: I didn't find an 8-speed shifter, so it's really only comfortable for about 3 of them. That's fine, as the motor does all the work, and the lowest gear is what you need for riding up the hill with a flat battery. All others are for show.
20220403_152737.jpg
 
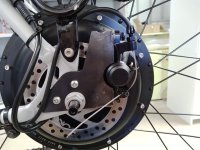
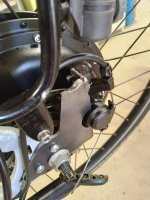
Rear brake calliper is fitted. And it's fair to say that these kinds of brakes are not all that great. But, it's better than nothing and once the regen is working, it should be satisfactory. In fact when I bought my last regular pushbike, I opted for rim pads over the discs as they just didn't stop as good. The front roller brake is arguably better at stopping the bike than the rear, but even that one's nothing flash.

20220424_142322.jpg
20220424_142523.jpg

Just laser cut steel and some angle sections to hold the calliper in place. I can't do skids, but at least it doesn't rotate in position.

Also had a friend machine out the space for the BMS on the battery. Hopefully my last 10 cells arrive this week and I can get started on this. Only real concern will be routing the BMS wiring around the outside of the pack and up to the main header pins.

20220424_142633.jpg
 
20220425_153539.jpg
Battery under assembly.
Edited for clarity - it's still missing 8 cells, which are apparently in the country but not on my doorstep yet. I just quickly put this together to see how the BMS wiring might pan out.
 
Finally got a day to finish welding up the pack.
Spotwelding2.jpg

The BMS wiring wasn't too difficult to manage, but it's fairly tidy at least.
balance wires.jpg
Spotwelding1.jpg

The BMS sits upside down now, as this made for a nicer lay of the cables. Next step is to glue the sides on and then use the thermally conductive epoxy to seal the welded ends. I hope to pot it with some polyurethane compound, but we'll see how easily (or not) the resin flows to the bottom.
 
Glued the edges on. Next step is to bond the sides in place with thermal epoxy.
20220508_120218.jpg
 
No longer step-thru Gazelle. Did you help your sweetheart over the threshold the 1st time ?

Is the "50-odd" P42A DIY working as good or even better than you could have hoped for - :thumb:
 
More of a step-over than a step through now. At least it's not a 'saddle up' :) It still appears to sit fairly low in the frame.
Haven't really put the Daly BMS through it's paces yet. I need to find a lower current charger as some of the cells are a bit out of whack (I had to order a dozen more cells from a different batch to finish the pack).
 
Fully sealed and potted now.
PU potted pack infiltration.jpg
Decent infiltration all the way to the bottom.
PU potted pack.jpg
Room for more wiring adjustments etc.
 
You really want to throw the thing away when the very first component fails? Not even have a decent shot at recycling it, let alone repairing it?
 
Chalo said:
You really want to throw the thing away when the very first component fails? Not even have a decent shot at recycling it, let alone repairing it?

In my experience, building reparability into it actually introduces weaknesses, which almost always turn into future repair jobs. I did a full suite of bench tests before potting it, so I'm pretty confident it will last the distance.
 
jonescg said:
Chalo said:
You really want to throw the thing away when the very first component fails? Not even have a decent shot at recycling it, let alone repairing it?

In my experience, building reparability into it actually introduces weaknesses, which almost always turn into future repair jobs. I did a full suite of bench tests before potting it, so I'm pretty confident it will last the distance.

You also swapped a much more reliable transmission for a less reliable one, and much more reliable brakes for less reliable ones. So forgive me if I don't see the consistency here.

I've transplanted enough BMSes and failed cells to see the value in being able to bring a pack back instead of sending it to landfill.
 
Bike stuff aside (which was adapted due to a lack of other options) the BMS is replaceable and yes, they are a good contender for failure. If push comes to shove the BMS can be swapped out easily enough.

But I have no intention of replacing any failed cells or contacts as there shouldn't be any, at least for a few years.
 
jonescg said:
Rear brake calliper is fitted. And it's fair to say that these kinds of brakes are not all that great. But, it's better than nothing and once the regen is working, it should be satisfactory.
It looks like you have enough clearance to increase the rotor by a couple of sizes.
 
It looks like you have enough clearance to increase the rotor by a couple of sizes.

I think I will. It's a bit too soft for my liking, which is wierd considering its sold like this.

For the record, a 1000 W motor is necessary for this bike as it's got a 7 km, ~250 m elevation gain at the end of a 22 km ride. Likewise going downhill some regen braking is desirable, so direct drive it is.
Generally its not good to put that sort of power in the front so rear it is. And the frame doesn't lend itself to many other options for brakes; even rim callipers can only be fitted to the front.
 
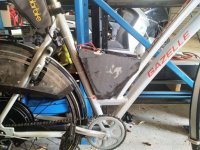
battery on bike.jpg
It's nice and low - just need to decide whether to bias it forwards, backwards or straight up and down.
I might run the lead out the top and lay it back towards the seat post.

:?
That's a decent lineup of bikes in the background :lol:
 
For the Daly BMS, what the difference between a Li-ion 14S 48V and the Li-ion 13S 48V BMS?

I see there's both flavors, and both are for Li-ion.
 
One manages 14 cells in series, the other 13. Some ebike makers are releasing 13 cell battery packs and it might allow a different packaging arrangement to suit a specific enclosure. 14s is good because it's pretty close to 16s LFP and 48 V lead acid, so the chargers are interchangeable to some extent.
 
Most of this you probably already know. 14s is usually called a 52 volt nominal pack, and 13s is 48 volt nominal. I prefer 14s because when used with a 48 volt controller, the low voltage cutoff in the controller is set to 40-42 volts in case you're using lead acid batteries. 42 volts / 14s = 3 volts per cell remaining, which is more energy you can extract from a lithium ion battery than a 13s at 3.23 volts per cell remaining.
 
thundercamel said:
Most of this you probably already know. 14s is usually called a 52 volt nominal pack, and 13s is 48 volt nominal. I prefer 14s because when used with a 48 volt controller, the low voltage cutoff in the controller is set to 40-42 volts in case you're using lead acid batteries. 42 volts / 14s = 3 volts per cell remaining, which is more energy you can extract from a lithium ion battery than a 13s at 3.23 volts per cell remaining.

I noticed a few reviews where folks bought the 14S version of the Daly BMS, because it's labeled 48V, but they only had 13S packs, so it wouldn't work with their setup. Seems like they have a 14S 48V and a 14S 52V version, which seems confusing (I wonder if they're the same with different labeling).
 
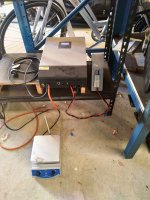
Another discharge test - only a 11 amp load on the battery.
capacity test.jpg

I'll do a full charge and balance tomorrow and cycle it to see what sort of energy I can expect.

Then it's time to make some bike mounts. 3D printers at work will get some action.
 
E-HP said:
I noticed a few reviews where folks bought the 14S version of the Daly BMS, because it's labeled 48V, but they only had 13S packs, so it wouldn't work with their setup. Seems like they have a 14S 48V and a 14S 52V version, which seems confusing (I wonder if they're the same with different labeling).

I charged this pack fully and it seemed to stop charging at 56.6 V, which is only 4.04 V per cell. I did a 500 W discharge test and it got down to 43.5 V (3.11 V per cell) but still didn't cut out. In fact the off-grid inverter was complaining about the low voltage! So that translates into a roughly 13 Ah available capacity, despite a nameplate capacity of 16.4 Ah. So it will either last a long time or leave us stranded :lol:
 
It sits lower than i envisioned ... thought it would take up more space. A PERFECT Fit - :D

file.php


She should have no problem stepping over ... so no need to carry her over the threshold ...
although it might be a worthwhile gesture that could earn you some extra gratitude - :wink:

Like all such custom build projects it always takes longer than originally planned. Always better to do it right the first time than getting in a rush and just when you least expect ... OOPS :(

It's going to turn out just as good as you planned, if not better. Post a youtube of her riding.
 
[youtube]N-LW65hG-EA[/youtube]

It stops OK, but I will be trying to make that better. Perhaps grippier pads on the rear, and maybe a larger disc?
Front brakes are OK for now.

Next step is to 3D print some mounts for the battery.
 
Glad to see it up and running! The one cheap cable disc brake I tried came with awful pads that would not produce enough friction, no matter how much pressure they were under. I like Shimano B01S pads, if your caliper can fit them.
 
jonescg said:
It stops OK, but I will be trying to make that better. Perhaps grippier pads on the rear, and maybe a larger disc?

Ah, you're learning that disc brakes are not the same as good brakes. Well, now you know.

Sintered metal pads are an upgrade (until they too get contaminated). Or you can fit a dual pivot caliper brake with good pads, if your rim has brake tracks.
 
Back
Top