GCinDC's Giant DH Comp

GCinDC said:
i think lipo is the lightest, cheapest and most powerful, but i'm starting to think the high discharge lifepo4 might be a better move, and i'm very curious about the 18650 cells, esp for triangular packs, but know little about them. but if i could get a triangular 18650 (cylindrical) cell pack, that's safe (unlike lipo) and not too much heavier, i'd go for that. in fact, if anyone has any recommendations in this regard, please post links.


GC, see my post on my upgrade to 18650:
http://endless-sphere.com/forums/viewtopic.php?f=6&t=23996&p=914315#p914315

If I would build same pack from lipos, like nano-tech
http://hobbyking.com/hobbyking/store/__14609__Turnigy_nano_tech_5000mah_10S_25_50C_Lipo_Pack.html

The weigh would be more, 18kg compared to 12kg
 
Brake said:
Use a SDHC card. RSDwriter.exe run on your computer and choose the mini-l.bin file for the locked version. Download everything from electrotransport.ru. Not sure if you can use the card again for anything else after its been formatted with the firmware. You only have to remove the top two screws to open the display enough to insert the card. Power it up and update. One thing I had to do, that they recommend on electrotransport, is to perform a full reset afterwards. Mine acted funny before I did that.
thanks, brake. really appreciate. i followed your steps and added some info (reposting here for myself)

- insert SD card in computer (format the SD card as FAT?)
- go to: http://adaptto.ru/firmware/
- Open the firmware version folder you'd like and download the version to your local drive.
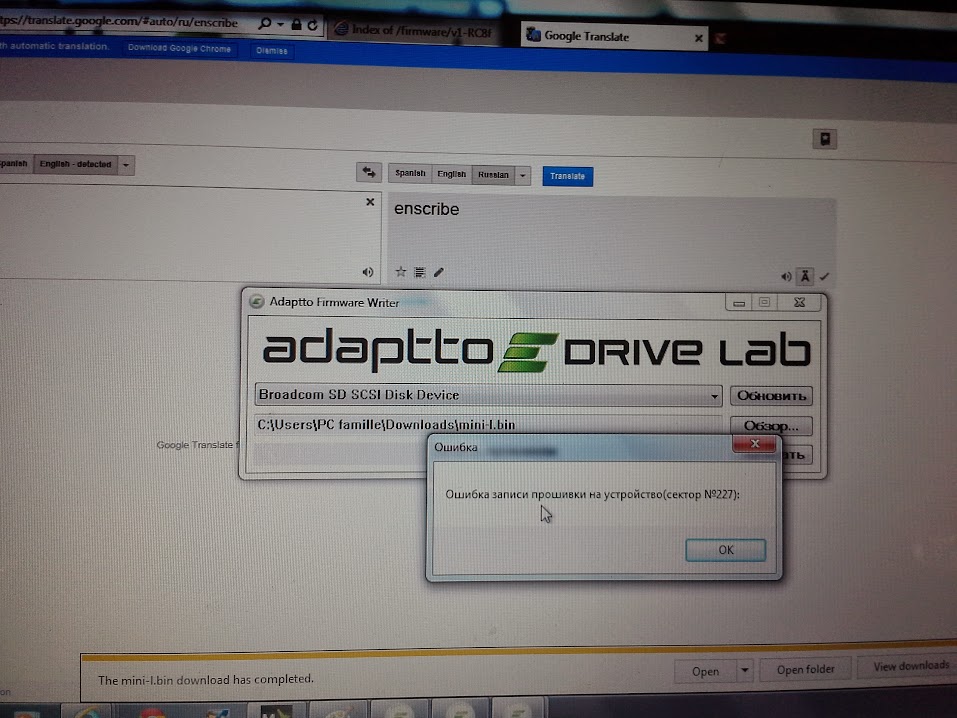
- click and run: RSDWriter.exe
- make sure the SD card is recognized in the pull down (reinsert SD card if it's not displaying and click Oбновление to refresh.)
20140706_120423.jpg

- click second button on right to browse to downloaded firmware file. (do not use mini-u.bin as it will be unlocked version and void the warranty. use this ONLY if you want to set higher than max current limits. you will no longer be able to use mini-l.bin as it's not possible to write the locked over the unlocked version.)
- click bottom right button and wait. this writes the firmware to the SD card. don't understand the messages. can someone translate these? i notice the computer will no longer ever recognize the SD card, so don't use a high capacity one!
- remove SD w/ new firmware from computer
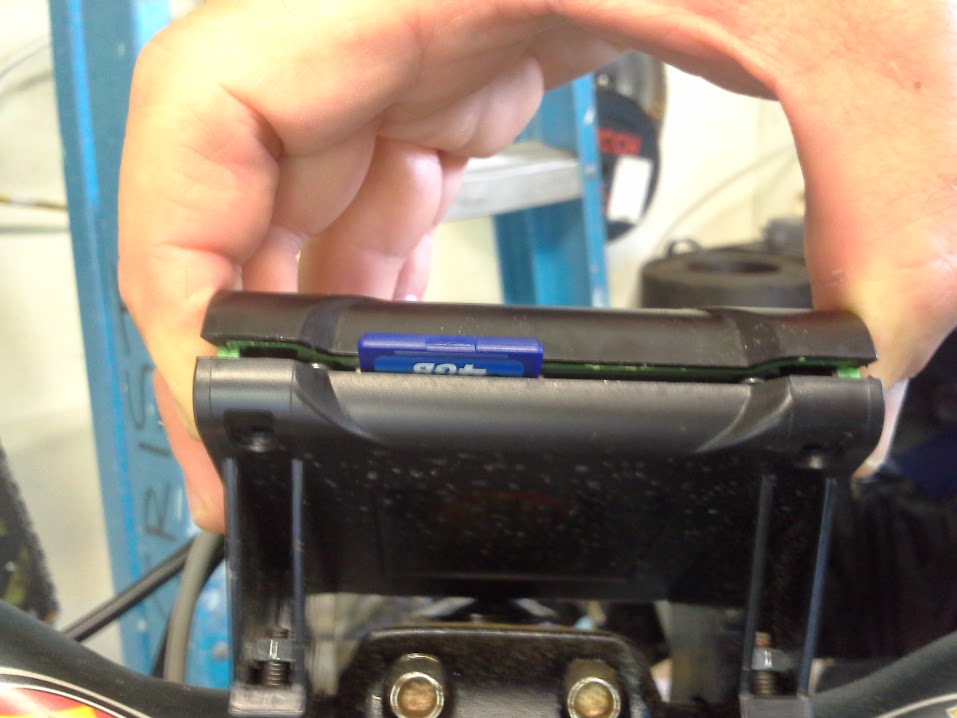
- unscrew top mini-E/Max-E display screws and carefully open top to reveal SD card port
- insert SD card.
20140706_140120.jpg

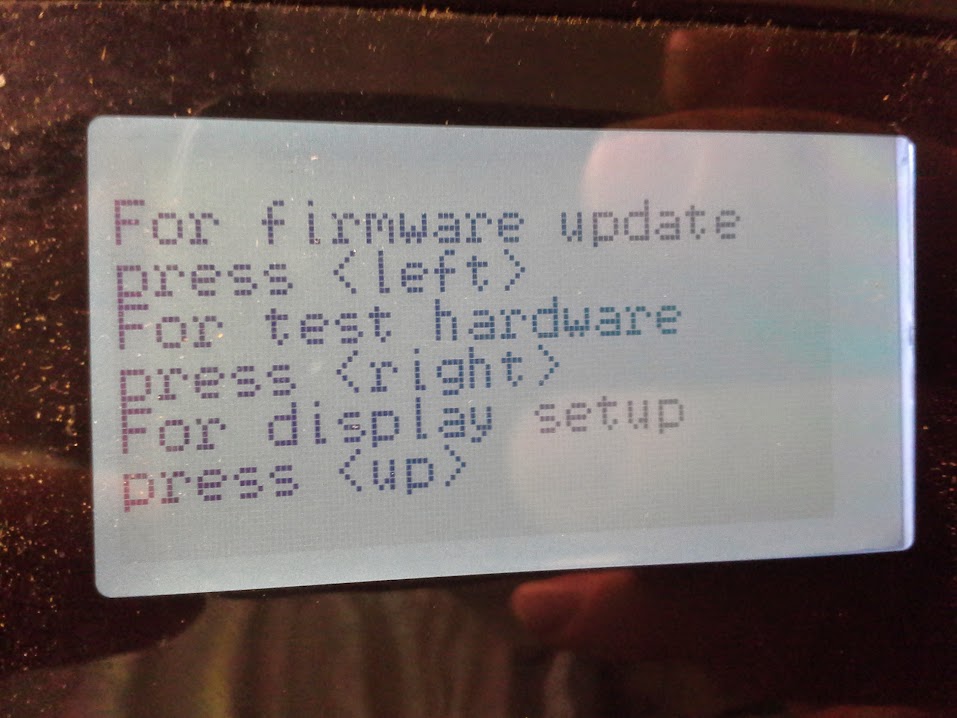
- power it up and follow instructions to update:
20140706_140157.jpg

20140706_140643.jpg

- Remove the SD card.
- Power off and on system.
- Go to Advanced Menu and do full system reset, and then reset all your settings manually, including autodetect.

i found that the display screws strip wicked easily. in fact i'm pretty sure two were already stripped. when i opened the display a crack, a bottom screw dropped out! :eek: now i'm concerned about waterproofing it.

rewired axel's battery balance harness from 4x5s to 5x4s:
20140705_075323.jpg


BMS works:
20140706_151514.jpg


made a vid on how to use a reed switch for the eBrake:
[youtube]PlNwYSsmzMM[/youtube]

the jb weld got messy - the reed slipped before it dried so i had to redo it - so this is a bit embarrassing, but it's the UNDERSIDE of the lever...
20140705_093229.jpg


also had a fun time riding around the mall with the fam watching parts of the july 4th parade:
Screen+Shot+2014-07-04+at+5.51.19+PM.png


and a selfie w/ charlie in the glow of the fireworks:
20140704_211126.jpg
 
Great video Greg, Nice bike too!
Translation
Main window, buttons from top right:
----------------------------------------
Refresh
Browse
Write
----------------------------------------
Small window with OK button is:

Error

Error during write of firmware in to unit(sektor Nr.227)
----------------------------------------
 
thanks, allex!

i wired up a circuit breaker and momentary switch for axel:
20140708_071422.jpg

unless i wired it wrong, the MOM switch must have fried leaving the circuit closed, as it's now always on. going to replace w/ a bigger MOM later. bike will be on a container bound for France tomorrow! :shock:

i cut out the frame a bit to mount the switches. will still be nec to open the velcro flap, but he should no longer have to fuss with the bullets. to disconnect batts from controller, flip cirucuit breaker switch. to turn on, 1) push momentary (precharge circuit) switch for 3 seconds and then 2) flip circuit breaker switch ON:
20140708_072555.jpg


ok, adaptto experts, i need help. the temp bars are driving me nuts. is there a way to callibrate the controller temp sensor? when it's > 80F (now all the time), i see 1/4 temp bar. when the controller rises to 100F, is see half bar. when up to 140F, i see two bars and acceleration is seriously hampered. the motor's only at 180F. the controller doesn't feel hot at all. here i have this mega heat sink now and it's acting like it's overheating all the time... :roll: i was hoping the firmware upgrade would help this... i read somewhere madini or allex had callibrated the internal temp sensor... HELP! :mrgreen:
 
Allex said:
Small window with OK button is:

Error

Error during write of firmware in to unit(sektor Nr.227)
----------------------------------------
good to know. i actually made two SD cards, and got this message on the card w/ V.8f but i updated the controller using the V.9 firmware. so i won't try to use the v.8 one!
 
The bar limits are calibrated to the max motor temperature... I think it's under advanced, don't have my bike near me now, but there's a setting for Motor Temperature-- you can set it to whatever you like, take note of your units. I'm conservatively at 230F. Never hit it.
 
swapped the mom switch with a N.O. MOM. and here, colored tape ought to help minimize accidents later on.... :wink:
20140708_180745.jpg


now how to place BMS? first we need to stand it off from lipos, so i'll use a slice of kydex:
20140709_060541.jpg


then cut some tabs to flip (after hitting w/ torch. oops. :mrgreen: - gimme a break, it's 6AM and the bike will be on a contrainer soon...). that ought to secure the board.
20140709_061618.jpg


the bottom edge slides down, between pack and frame. then i cut a a slice of clear plexiglas (you can't even see it here!) to slide over on top so the bms (and a bit of the packs) can be clearly seen when lifting the velcro flap, but mainly it will protect the bms from the side:
20140709_071842.jpg

20140709_071808.jpg


now, the ebrake fiasco:
axel came by to pick it up last night but i made him test it out, but when inspecting the ebrake, it didn't appear to work!

before, when hitting the brake the 'boost' on the menu would be replaced by 'brake', but it wasn't working! panic.

i checked the settings and they appeared correct.

finally i told him to go home and that i'd have to reexamine the wiring later on. i put his bike alongside mine, started to swap the throttle/ebrake connector to test mine on his, but i first checked to see mine worked on my bike, and it DIDN'T. whaaaaa??? i rode the bike yesterday and the ebrake worked, so am i going insane?? exhaustion got the better of me and i went to bed.

first thing this morning, i tested axel's bike again, and the ebrake worked fine! i'd not done anything. conclusion: 'brake' displays on menu WHEN MOVING (and ebrake can actually work....). it will take a while to get used to all the new menu changes... but that was a red herring.

axel, come on over and get your ebike. bon voyage!
 
fun commute this am. shoulda recorded it... :mrgreen:

dropped the regen current from 30A to 20A so 1) it doesn't slow so hard and 2) it doesn't heat the controller as much. i really want to use the unlocked firmware and up the current from 56A max to ~80A, which is what i've got my older miniE at...

in other news, i haven't had a chance to fix the prius yet (dealer wanted $6k for inverter replacement - mulling other options), and since the remote won't unlock, we've been using the metal key so much that the little plastic handle broke off.
Toyota-Prius-Hidden-Key.jpg


i epoxied it, but that only lasted a week.

why not finally test out my new auto-darkening welding helmet? here i folded a steel bar (3/4" x 1/8") in half, slipped the key in, clamped it up again wicked tight all around, welded the seams and grinded it down. then drilled a hole for the ring:
20140720_200845.jpg

rough job, but i love it. it's such a pleasure working with steel! nice weight too.

side by side w/ the minivan key:
20140720_200810.jpg


all good practice for that bike or go cart frame in my future somewhere...

oh and since i'm off the topic, finally did a bit more on the treehouse
GOPR5375.JPG

GOPR5381.JPG


oh, and here's a nice way to get to the golf course... :p
20140712_083948.jpg
 
you should be able to take the inverter apart and replace the bad modules. there is a thread here somewhere with pictures of how the inverter is built and how to get it open and work on it. a parts car from a junkyard is an alternative also.

where your tree goes through the roof of the tree house you can use a cricket made from a metal roof vent pipe cricket. if you can find a really large one for wood stove pipe which is closer to the tree diameter it will help but even a 4-6" vent collar would work. match the pitch of the roof to the collar you buy, so it fits best.

the shield around the base is one flat piece of sheet metal and you can cut it like pie slices around the perimeter to the collar so it can be cut down one side in the collar, and then the base expanded to fit around the tree and then your roofing can go right down to the collar and you can then use polyurethane sealant between the roofing and sheet metal to seal the roofing.

on the downhill side of the tree where the collar is missing since it is pulled out around the tree you can insert a flat piece of metal cut to match the tree diameter, and slip it under the cricket and seal with polyurethane and shield the nails under the collar base. so the downhill side goes on first as your roofing goes up the roof. since that felt got wet it is hard to get it to lay flat again so you might have to do what roofers do and cut it everywhere it has puffed up. or you can just roof it without the felt since it is a tree house anyway.
 
dnmun said:
you should be able to take the inverter apart and replace the bad modules.
just to recap on the prius: the dealer wanted $6k to replace the inverter. i found a prius tech via CL would thought he could fix the existing inverter so i dropped it off at his house on our way up to wisconsin a couple weeks ago. he called and told me he couldn't fix it, but found a used one for $400 nearby and picked it up and installed it. didn't work, so he returned it, found ANOTHER inverter for $450 and went and removed it himself from the car that had been rear-ended. installed it and it fixed the inverter issues. charged me only $200 for all that! unbelievable. and for another $200 he had a friend of his fix the remote key and radio, that the dealer wanted $350 + $600 for.

back from WI, i rode my bike 23mi out to his house to pick it up. used the adaptto smart range to make sure i made it:
20140805_163018.jpg

very nice to know i can get that kind of range if i need it! :D

tossed the bike and the old inverter and some spare prius cells he gave me for fun into the hatch to bring home:
20140805_162608.jpg


i'd love to play more with the bike, to set up variable regen for example, but i've got another project on my hands: building the front porch (and then having solar installed). the before on the left and a quick sketch of the solar layout on the right:
Screen%2BShot%2B2014-05-28%2Bat%2B7.12.27%2BPM.png


got the permit, so step 1: demo the existing porch. neighbor across street was amused and took some pics:
2014-08-07-MOTION.gif


really wish i took a vid of the front beam and columns going down with a couple hits of the sledge, but just took a pic after:
GOPR0998.JPG


hired some concrete dudes to demo the landing and haul it away. brutal job. built some temp stairs and next have to repair the existing sill plate and rim joist behind the landing where water had gotten in... :roll:
2014-08-10


i was about to pay heaps of money to have the city move the gas line to the side of the house, but there are issues w/ new locations so i've decided to save the dough and leave it there, accessible via trap door.

y'all enjoy reading about this? it's way off ebike topic, so i could spare you, but this is a bit of a blog anyway. :mrgreen:
 
The guys just finished my 4 kV solar installation. Should be able to get it inspected and turned on tomorrow.

After all the rebates and tax credits it cost me about $5k out of pocket. That's less than a 5 year payback. I consider it an excellent investment. Beats the shit out of the stock market and both the panels and inverters have a 25 year warranty.

Now I'll be happy when the price of grid power goes up. :mrgreen:
 
worked 12hrs each day friday and saturday, and 10 hrs sunday on the porch and got the whole roof covered (ice & water shield) 15 min before the storm hit and the rain.
GOPR1205.JPG

lifted/installed the beam by myself (in pieces of course). carried all the 4x8 sheets of plywood onto the roof myself. (the ladder is tied tight to beam, btw) i love figuring out how to do things myself - it's like a puzzle.
 
GCinDC said:
full-throttle said:
I still find it hard to believe that DH-comps have some kind of a offset in their swing arms.
i took a closer look with the wheel off. damn...
20120509_205122.jpg

20120509_205052.jpg

but check out the ding.
20120509_205423.jpg

i marvel the original owner didn't limp.

the gold level is square to the frame
20120509_210038.jpg


and yeah, reversing the rotors would only make it worse:
20120509_210254.jpg


so i unlaced the wheel, removing the 135mm spokes:
20120509_213540.jpg


and i relaced it with the old 130mm spokes, with all the spokes going in from the drive side, therefore drawing it closer to the disk side, trued it up pretty nice i'd say and whipped that mofo tire on.
20120509_233016.jpg


tomorrow i've gotta find a radio shack that's got mini xlrs..

Is it possible to center the wheel with 135mm rear arm and HS3540?
Or do you have to life with 135mm rear arm offset?

Thank you!
 
Back
Top