How about a 3D printer section?

j bjork said:
Thanks, I'm not sure exactly what you mean though.
To get the bed to move freely?

First I just assembled the printer after the instructions in the manual, but then I watched a youtube video where the guy (just vlad or something like that I think) did it a lot more thoroughly.

Checking that the base was level, it wasent. That was easily fixed by just loosening the screws on the sides.
Checking that the bed mowed freely, it didnt. I actually thought there was something wrong, because it was clearly hacking in certain places. But just loosening the tension on the rollers cleared it up nicely.

He said you should be able to turn the rollers relatively easy by hand, on all the axles. I was afraid to get play somewhere so I tried to get everything play free but move freely, even if it didn't mean I could turn the rollers.

I let it run overnight and print this little monkey cup:

LBKOB2t.jpg


I tightened the bed a little more, it is hard to move a paper between the bed and nozzle now.
But it is not exactly the same all over, the gap gets a little bigger in the middle. And I think there are some places between the middle and and the edges that are a little tighter.
But still it loosened a little at the edges. Maybe I should just get some glue or hairspray or something?

Ibr3YgX.jpg


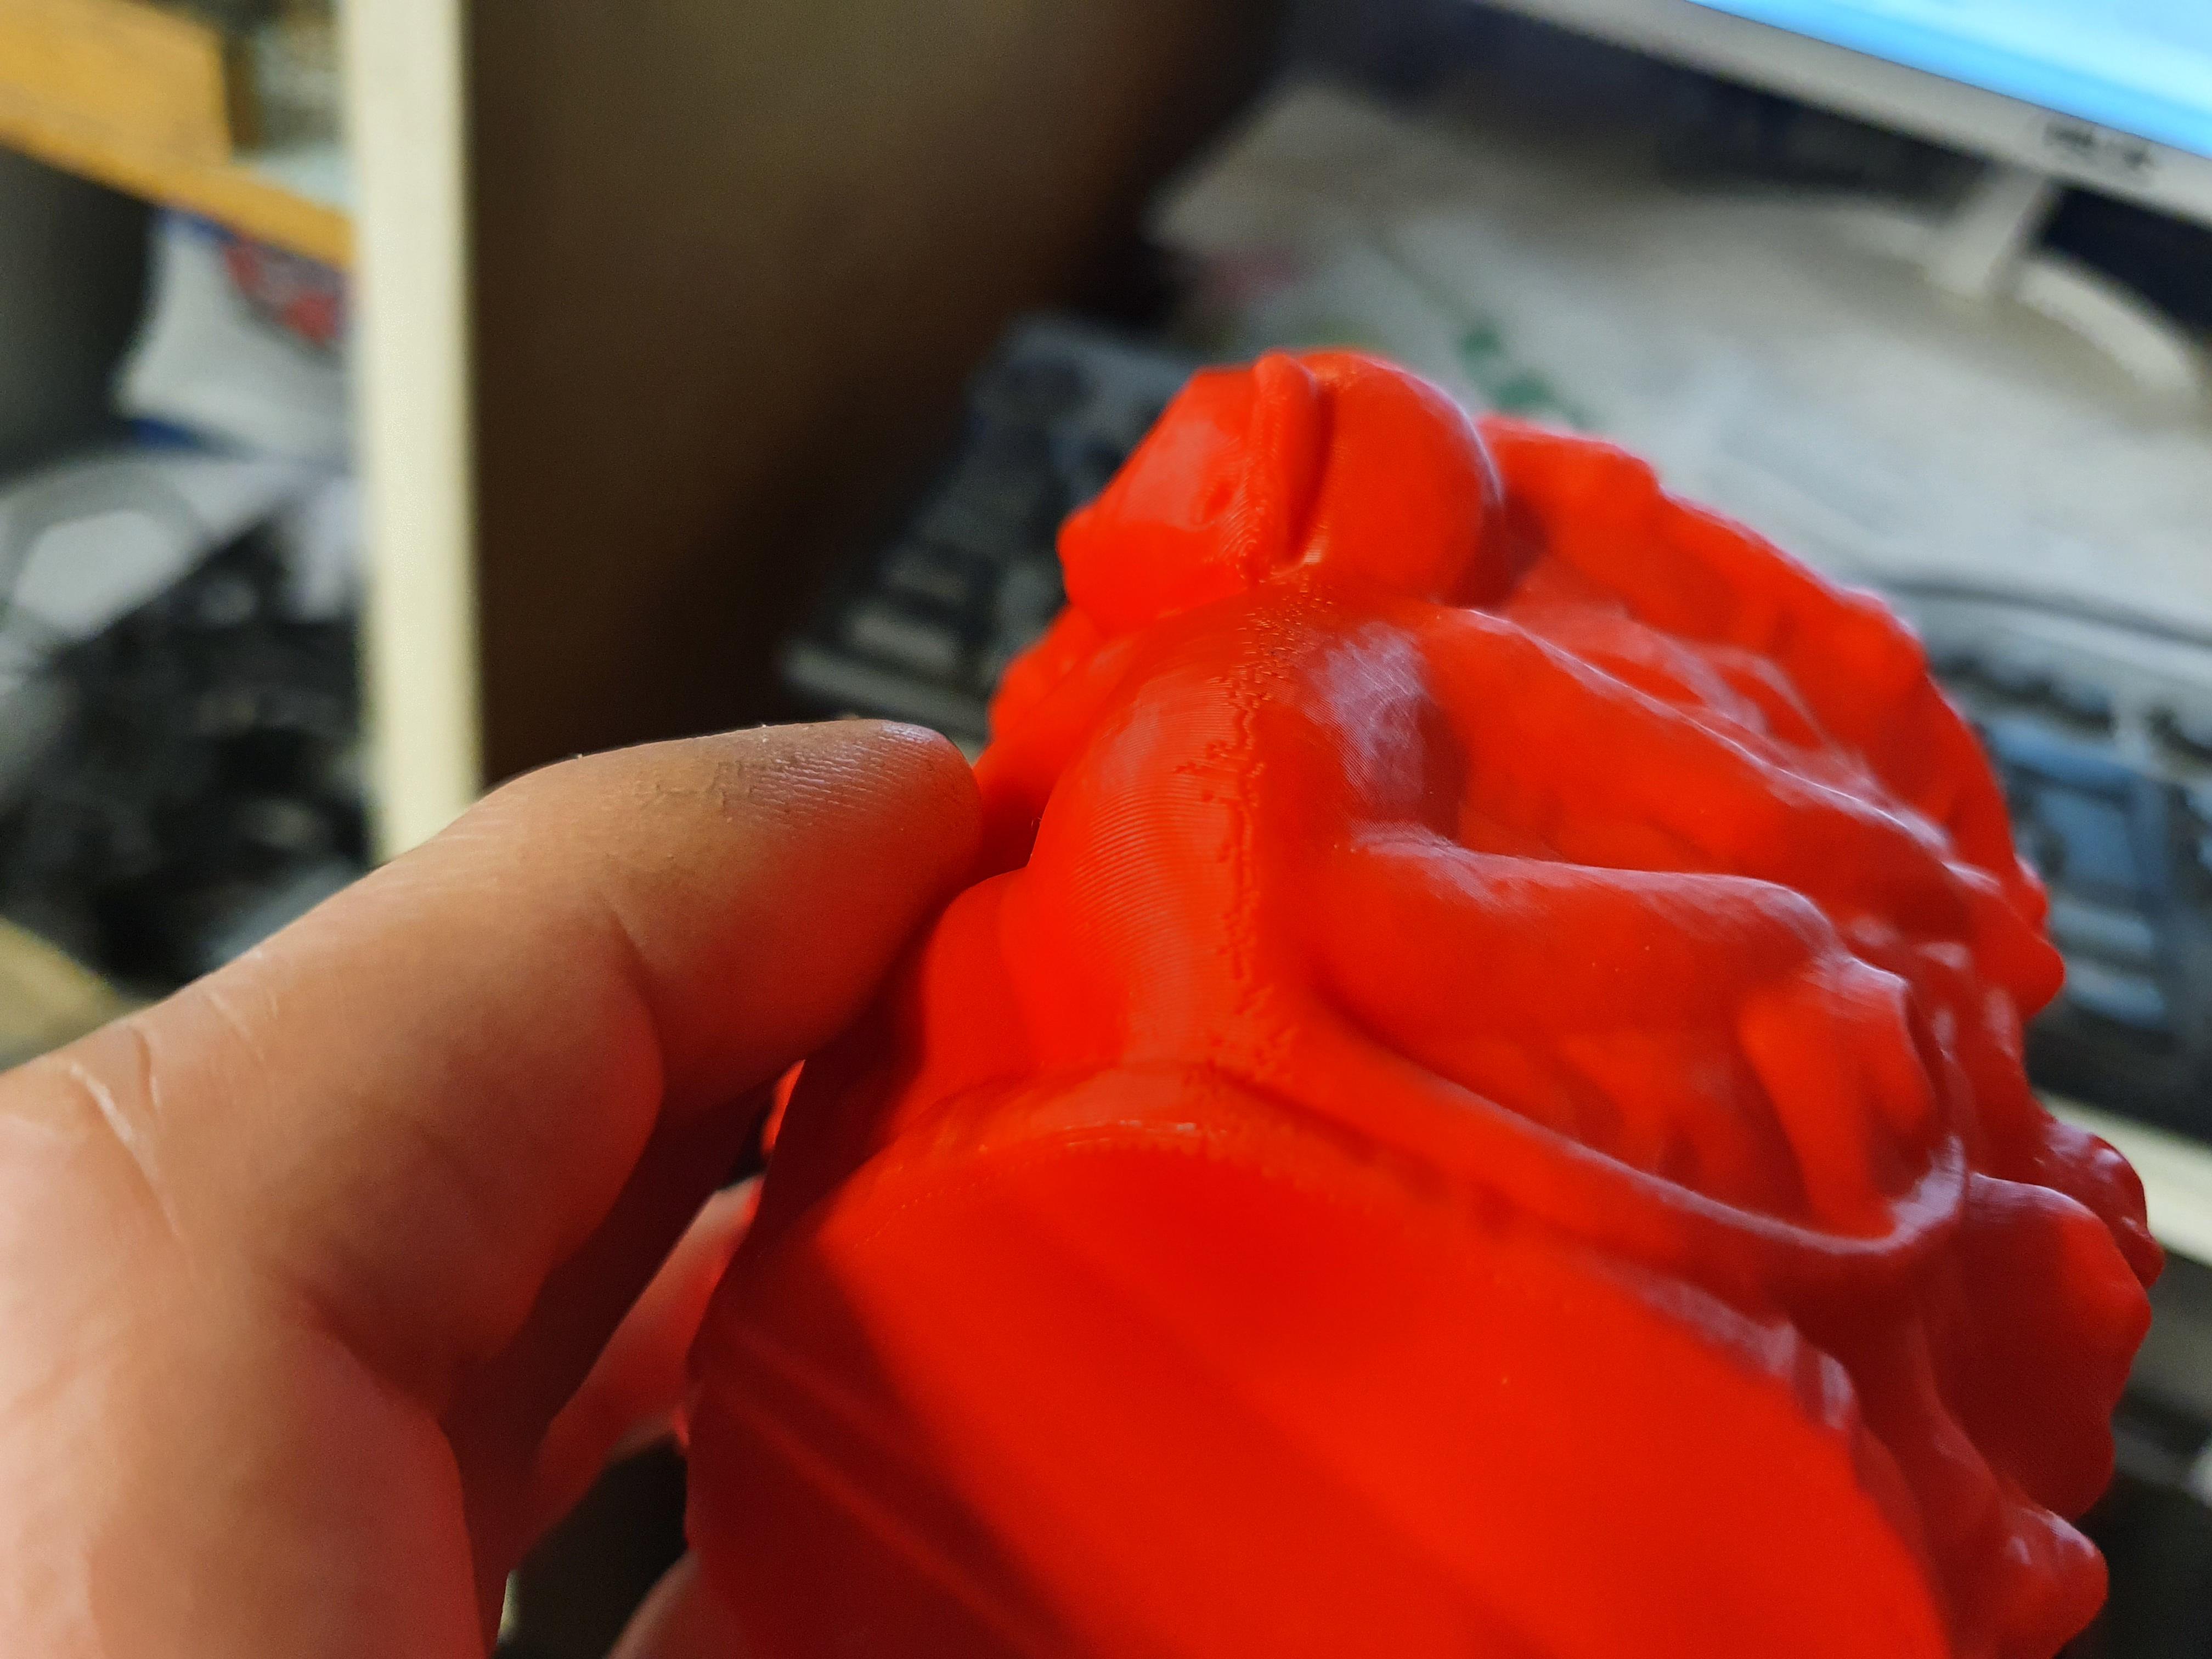
I got like a tiny scar over the back of a monkey, it is at the same place that it loosened the most from the bed.

FdPamgV.jpg


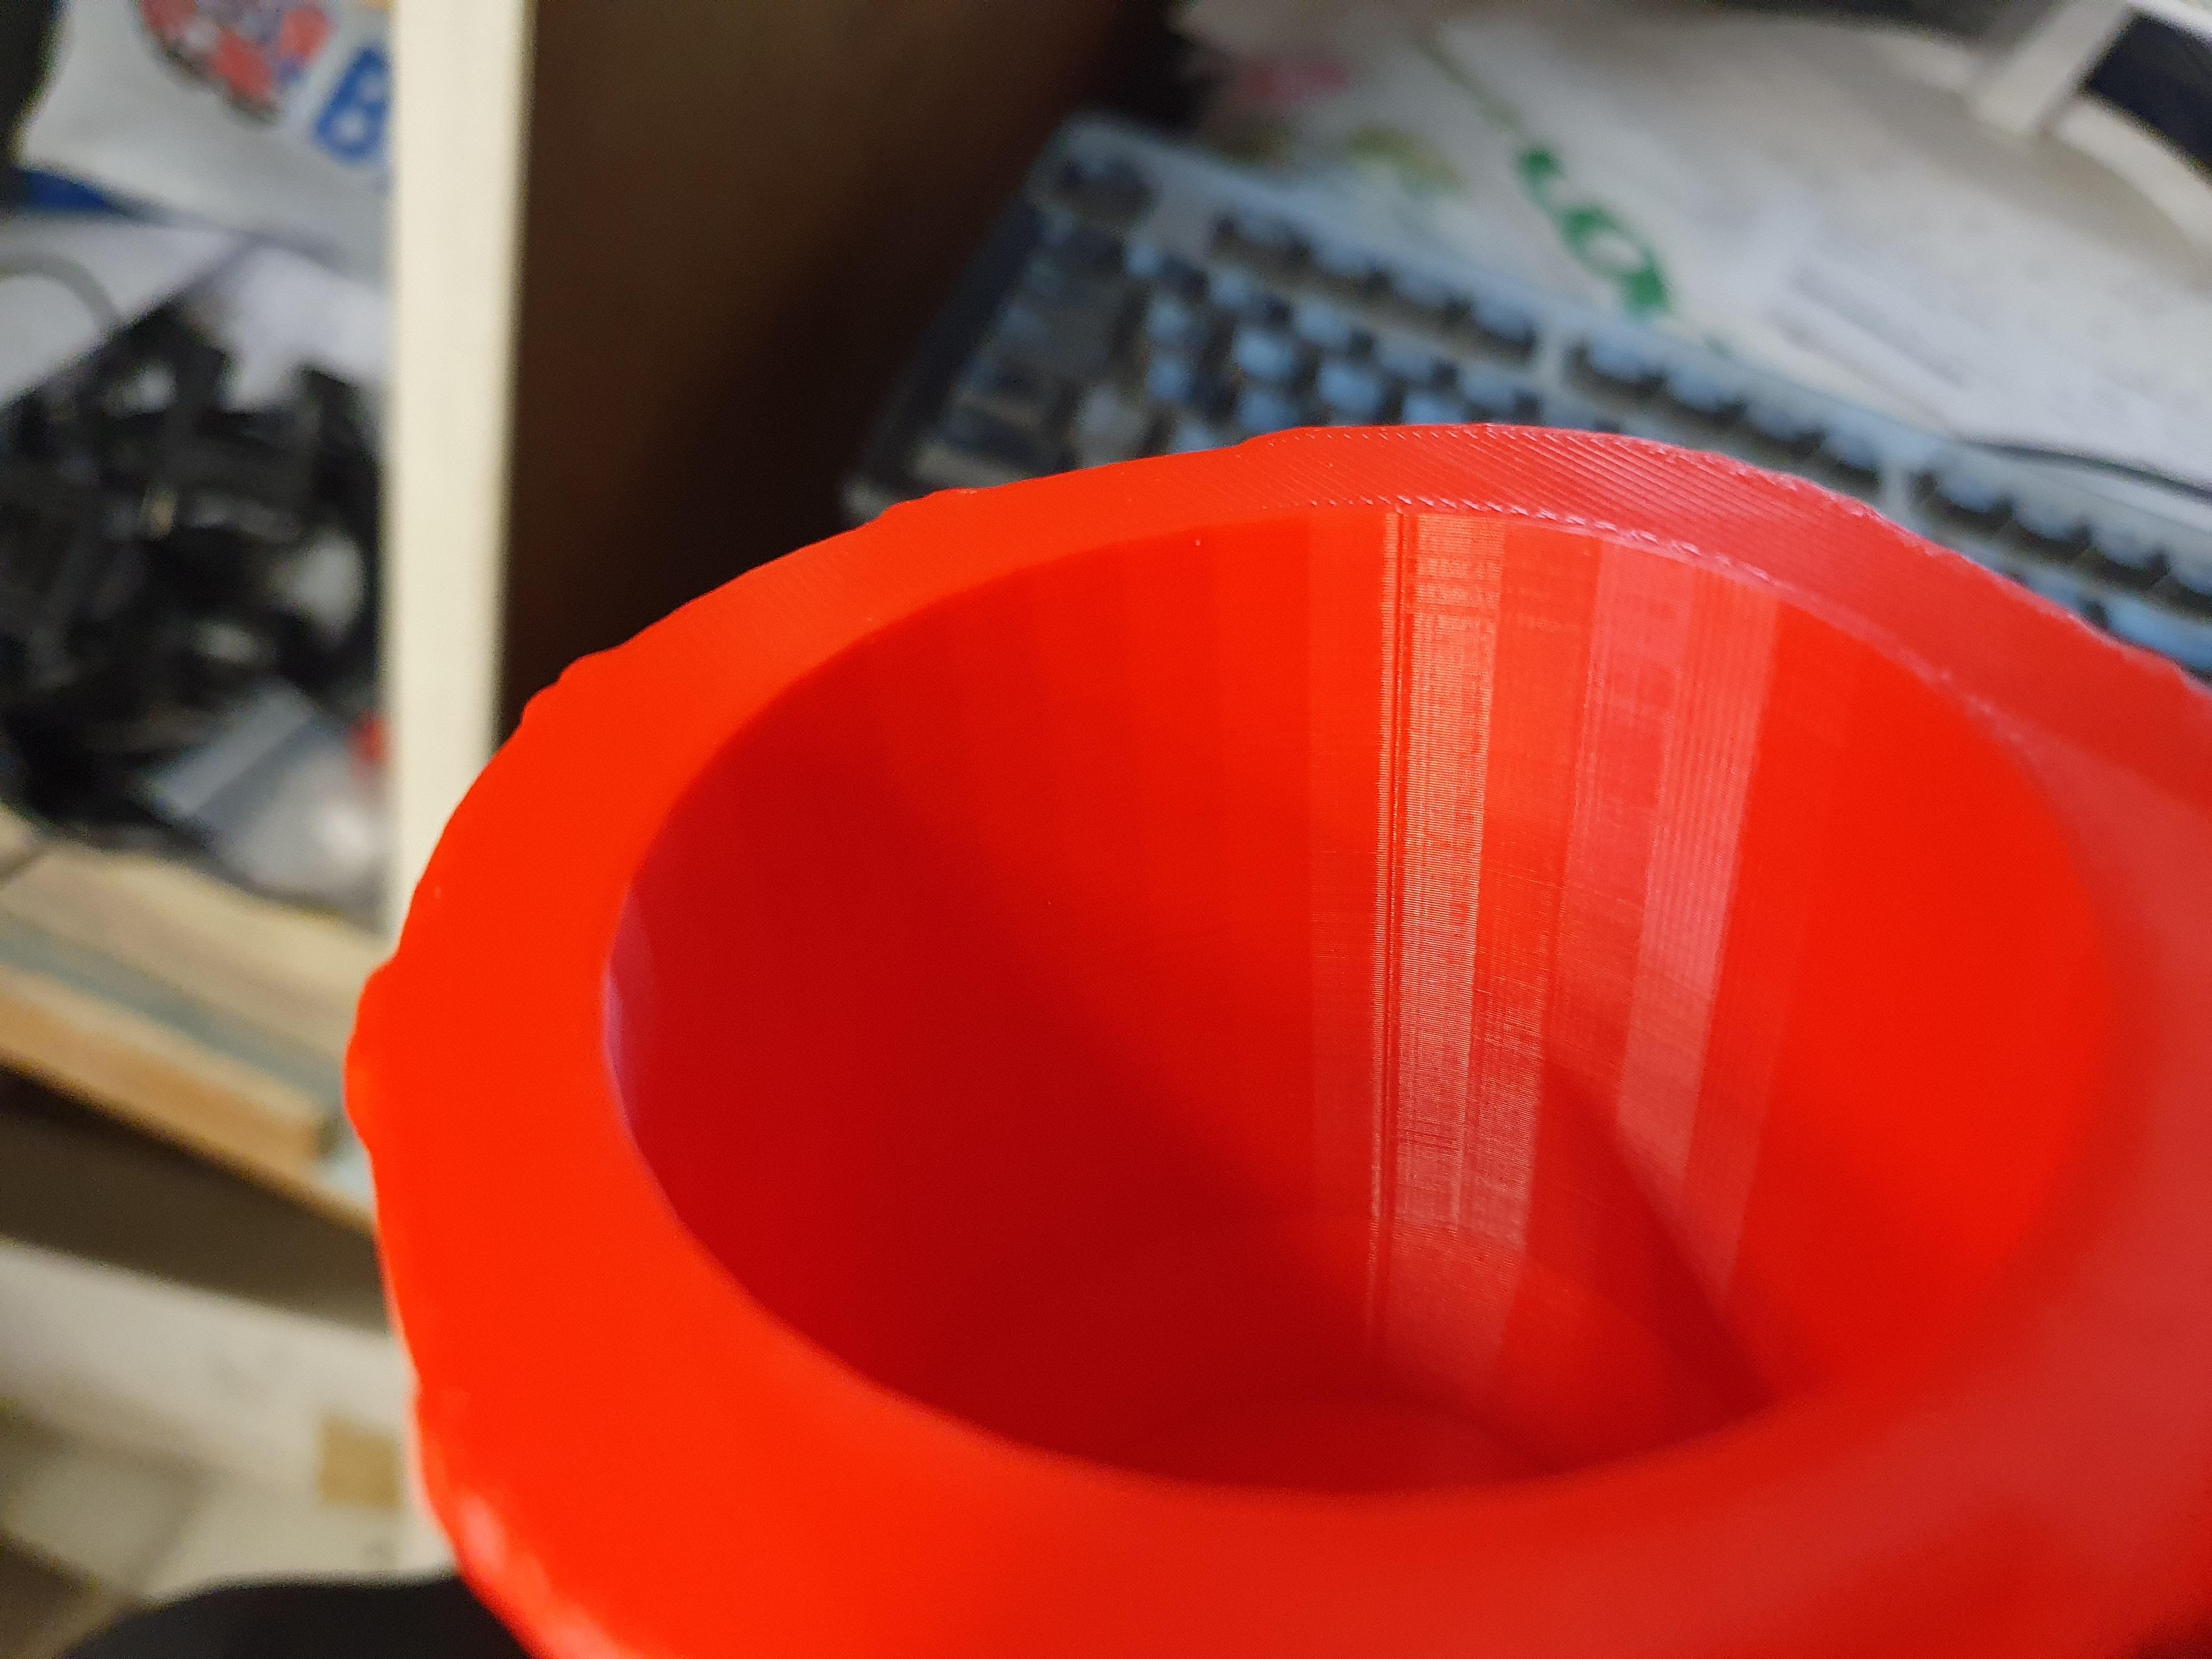
At the same place I got this little line on the inside.

I also got this strange thing:

P2RswgO.jpg


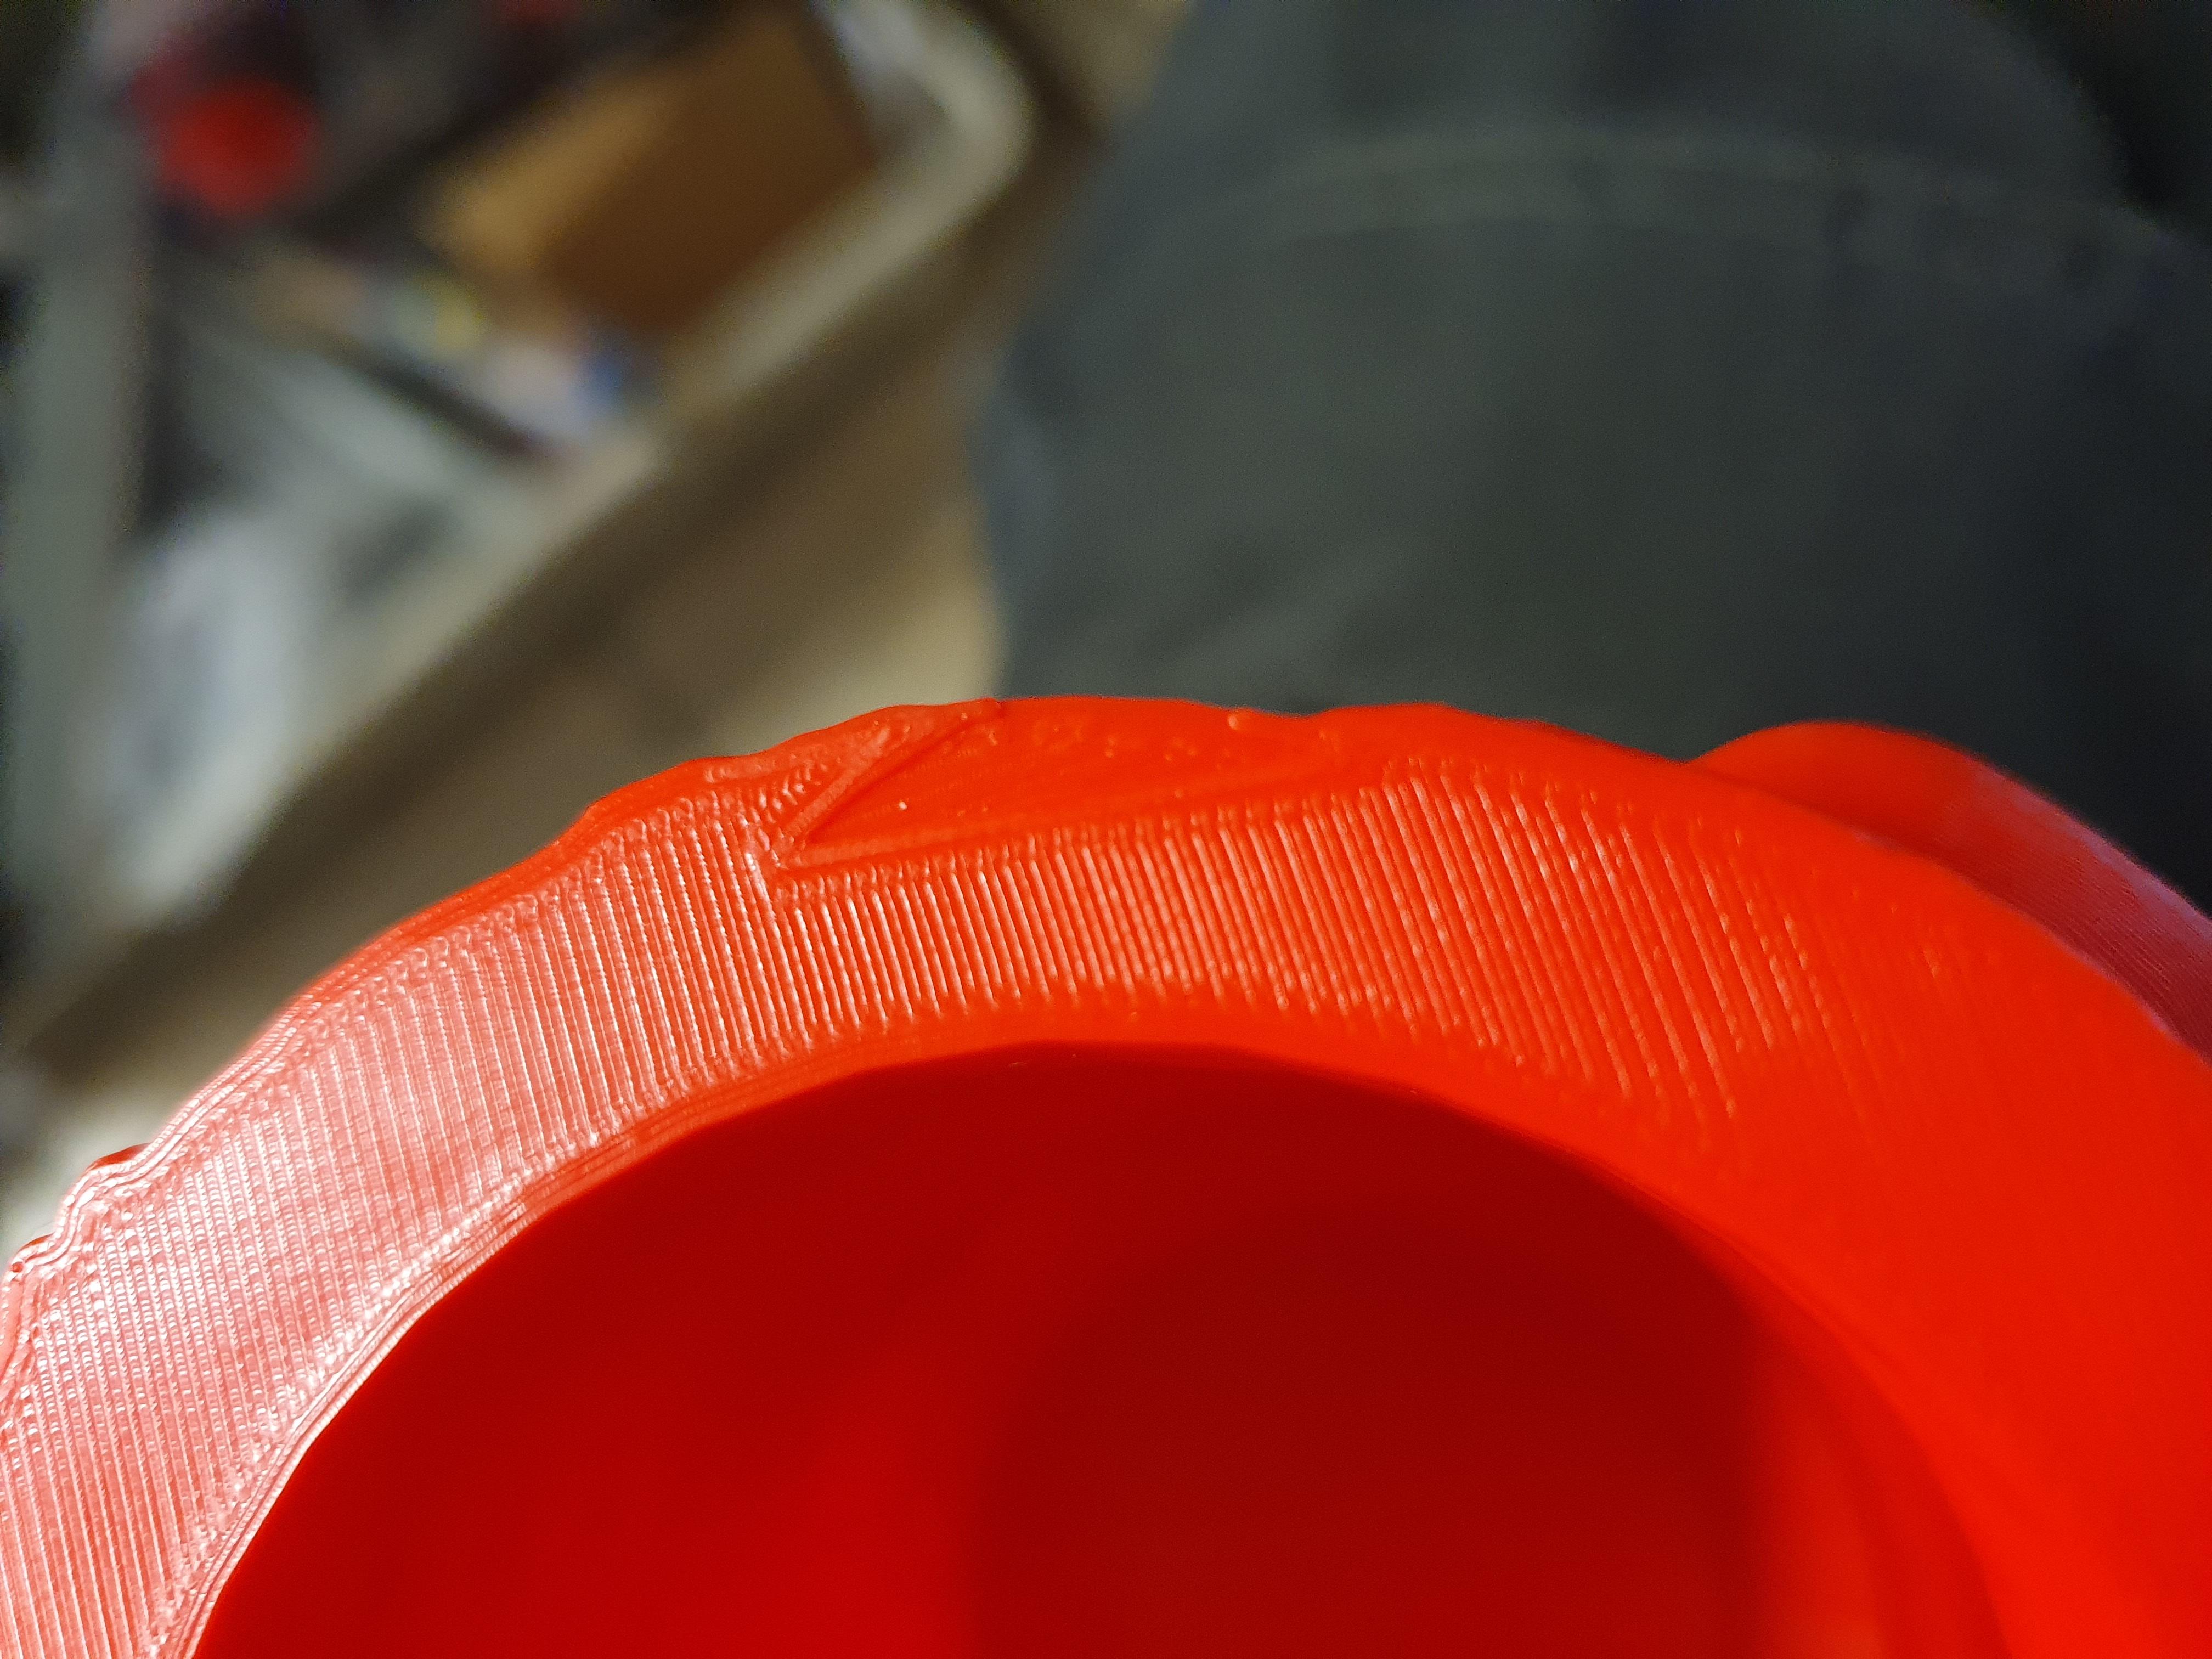
Maybe that is something in the drawing itself?

When leveling the bed DO NOT raise the bed so much that it is hard to move the paper. I use thin thermal printed receipt paper folded in half and raise the bed only enough to feel the paper is barely touching the nozzle and the paper slides easily. Otherwise your nozzle will be too close.

Do the same when setting z offset.

I upgraded my ender 3 max with a BL touch and did not get a great deal of better performance, and it added 3 minutes to my print times since it levels prior to every print. I was blessed with a very good bed to start with though. As it ages that may not be the case though.

Oh and I'd suggest using a brim 10 lines wide when printing square corners, because they always want to pull away from the bed. I ruined a few parts before I found out how to use a brim...
 
I have been an engraver for over 20 years. I have a good selection of manual gravers since I make my own tools, but I have always wanted a air powered hand piece. The cost has always been prohibitive given the activity is only an avocation I have had to limit due to issues with arthritis.

However, I recently found plans for building my own air powered handpieces on the cheap. I have a metal lathe, a milling machine and a wood lathe, and could easily make dozens of these for myself, but I thought what about everyone else who wants to try engraving? So I thought lets design a simple air powered engraver that is almost completely 3D printed. Here is the result. It is fully adjustable and the only purchased parts are a 3/8" ball bearing and a spring. It is powered by a modified 12v air compressor of the type people keep in their cars to pump up their tires.

You can 3d print a piston instead of using a ball bearing, but it wont be nearly as smooth and therefore wont operate as smoothly. The air engraver will benefit from having the bore trued with a 3/8" reamer too.

AM-JKLXyuxL9DzVl9FE3uoH6lv9bBeXafBtsnvNxtIDuBM2yOowYaq-h_NnhnrMh7GP_mXJ74LYwUznLZGpHabRKYvJLNuokLmtxedgjc-5fKeBqk3osp58-Z3P34Pu-wwh0oPCBNB-PucyO714VmEGXEOjS=w568-h757-no


AM-JKLXvRztqofcZ2YOG_Tt6hIyFwn2QFo1jFekyHx4YSAawBaUdsUGMfnTFyWinPd5v9eBWoY60ZJKhxyeNk8Y-9pIdXlfk83oBo4Uht0FbQYGxz-TAdhH0fvTbbNnO46lDkIyTBMwnEWLhjgVHtDd2omgW=w1010-h757-no


I think we can say that 3D printers are for everyone due to their versatility. Never in a 1000 years would I have expected to make a air powered engraver on a 3D printer before I bought one

Edit: note this is not the complete tool but it gives the idea.
 
TorontoBuilder said:
I have been an engraver for over 20 years. I have a good selection of manual gravers since I make my own tools, but I have always wanted a air powered hand piece. The cost has always been prohibitive given the activity is only an avocation I have had to limit due to issues with arthritis.

However, I recently found plans for building my own air powered handpieces on the cheap. I have a metal lathe, a milling machine and a wood lathe, and could easily make dozens of these for myself, but I thought what about everyone else who wants to try engraving? So I thought lets design a simple air powered engraver that is almost completely 3D printed. Here is the result. It is fully adjustable and the only purchased parts are a 3/8" ball bearing and a spring. It is powered by a modified 12v air compressor of the type people keep in their cars to pump up their tires.

You can 3d print a piston instead of using a ball bearing, but it wont be nearly as smooth and therefore wont operate as smoothly. The air engraver will benefit from having the bore trued with a 3/8" reamer too.

AM-JKLXyuxL9DzVl9FE3uoH6lv9bBeXafBtsnvNxtIDuBM2yOowYaq-h_NnhnrMh7GP_mXJ74LYwUznLZGpHabRKYvJLNuokLmtxedgjc-5fKeBqk3osp58-Z3P34Pu-wwh0oPCBNB-PucyO714VmEGXEOjS=w568-h757-no


AM-JKLXvRztqofcZ2YOG_Tt6hIyFwn2QFo1jFekyHx4YSAawBaUdsUGMfnTFyWinPd5v9eBWoY60ZJKhxyeNk8Y-9pIdXlfk83oBo4Uht0FbQYGxz-TAdhH0fvTbbNnO46lDkIyTBMwnEWLhjgVHtDd2omgW=w1010-h757-no


I think we can say that 3D printers are for everyone due to their versatility. Never in a 1000 years would I have expected to make a air powered engraver on a 3D printer before I bought one

Edit: note this is not the complete tool but it gives the idea.

I decided to try printed springs for this.

It did not come out well with the supports I had to add... so I took a page from winding springs and copper tube boilers on my lathe and wound filament on a mandrel and cooked it in toaster oven. I have tried PLA and TPU so far trying to find a light compression spring. I am thermosetting petg springs right now as well. But I think TPA or another copolymer with nylon content may be best, but I dont have any to trial yet...

AM-JKLVnqmctKyEEO2eDg_cR9DOHEFm6Tuyae2rMQWkLLcO6avBzcjsBwIkbgrF1s-YEzeHDY0A-udEde5OLjgDjpSxkfhMLs9NMT3RDfOs0EuzNBAmCPLIp7mm5-0HAupu04ajJ-T-la7uQiaklYinULu6n=w1010-h757-no


I wound these around a threaded bolt, and pinched the ends of the filament between two jam nuts on each end to maintain the tension on the filament until it set.
 
Vortecks got himself a portable 3-d scanner
https://www.youtube.com/watch?v=0iYHm3GCw3A

heres the link to the scanner

https://shop.revopoint3d.com/products/pop-3d-scanner?variant=41847467606203
 
I ordered an upgrade kit together with the printer, but got it later.
If I was going to make adjustments I thought I might as well change some things first.

W5KvFeE.jpg


You can see pretty much what I got in this picture. But this seems strange, the black one comes from the printer.
As you can see, the brown ones have a bigger hole and are not tight around the nozzle.
Is that supposed to be an advantage?
I didnt change that.

The all metal extruder kit looks like it was a good idea at least:

s6xa0mJ.jpg


I noticed when I was taking it apart that the roller didnt seem stable :roll:

Stiffer springs for the bed:

f5WQuKy.jpg


They are to long, (or to tight rolled) I cant compress them enough, the bed ends up maybe 10mm to high.
I could raise up the end switch i suppose, but then I will loose movement in the Z axle.
What do you think?
 
i did the same, used the stiffer springs and raise the switch
also replaced the brass feed wheel with a stainless steel one, its a different tooth count but didnt need to adjust anything

https://www.amazon.ca/BIQU-Extruder-36Teeth-Stainless-Filament/dp/B01J5ON2Y2/ref=sr_1_11?keywords=stainless+steel+extruder&qid=1639953774&sr=8-11
 
If I recall when E3D originally introduced the silicone socks for the V6 they did cover most of the nozzle and that works great until you have a fault where melted plastics starts getting stuck under the boot that covers the nozzle and things go poorly after that. The later versions only covered part of the nozzle to prevent this. I think some of my printers still have the original boots where I cut that part off to avoid the problem. The black one doesn't look like it covers too much but the brown one is closer in line to what was eventually settled on, and then copied by everyone of course. Also a quick tip, some versions silicone socks don't like to stay on by just clipping over the top of the block but a thin strip of silicone tape does a great job at keeping them nice and secure.
 
j bjork said:
Thanks, I want to get 260mm z travel for a print. I think it should work if I dont change springs, there seems to be 10mm left when it is at 250mm. So I will skip the springs for now.

Trying to understand freecad so far :?

the hardware guy does good tutorials on freecad

https://www.youtube.com/watch?v=uh5aN_Di8J0
 
TorontoBuilder said:
nicobie said:
Alan B said:
Revo Hotend preorders started today.

They look interesting and I can see that they would fulfill a need for quick nozzle changes.

I wonder if they will make one that will fit the ender style hotends?

Or how about a revo and direct drive extruder for enders?

You mean just a Revo Hemera? I'm sure somewhere there is a printable mount to stick a Hemera on an ender, or probably any other other extruder for that matter.
 
scianiac said:
TorontoBuilder said:
nicobie said:
Alan B said:
Revo Hotend preorders started today.

They look interesting and I can see that they would fulfill a need for quick nozzle changes.

I wonder if they will make one that will fit the ender style hotends?

Or how about a revo and direct drive extruder for enders?

You mean just a Revo Hemera? I'm sure somewhere there is a printable mount to stick a Hemera on an ender, or probably any other other extruder for that matter.

Precisely. Sadly it costs as much as my entire printer.

Maybe when I go to build voron2
 
TorontoBuilder said:
Precisely. Sadly it costs as much as my entire printer.

Maybe when I go to build voron2

Exactly how I feel. It's easy to fall into the update hole.

I'm not sure I want to go through the trouble or expense of more upgrades or even a Voron. Heck, even stock my Ender printed PLA pretty darn good. I probably should have left it as it was but now that I have a quality hotend, A2 nozzle and bl touch with jyers firmware and some time messing with the cura settings I can reliably print with PLA+, PETG and the carbon fiber filaments.

If I had known then what I know now I would have started off with building a Voron2. But at this point, unless I need to print something bigger or somewhat faster, I think I'm maybe done with the major upgrades.

I'm enjoying messing around with the machine and highly recommend owning one.
 
Some upgrades make small differences, the Revo will make changing nozzle diameters trivial, so the nozzle size can be adjusted to suit each print job. This is a major improvement. No tools, done at room temperature, no chance of leaks or damaging the hotend.

A case of quality filament costs more than a cheap 3d printer. Maintenance on a cheap printer is not really cheap. Things wear and should be replaced or upgraded. Your time is probably worth more than the printer or the upgrade parts. One question is - how often does the printer waste time and materials? Upgrades often address time and material waste, or improve printer life, precision, bed calibration or user convenience. Can you trust the printer to be safe when unattended? Is it precise enough to work well with a 0.25mm nozzle and make accurate parts? Can it print flexibles well? How fast does it print well? What materials would you like/need to print, and can it handle them? Is it big enough while not being too large?

If you just want to print the occasional thingiverse toy most any printer will do, providing it is large enough. If you want to print functional parts from tougher or flexible plastic and routinely need to run 8+ hour precision print jobs overnight you may need a higher quality printer and/or some upgrades. Maybe multi-material would improve your workflow. Or even two or more printheads. Figure out what printer you need, and get there by either getting the right machine, or by doing upgrades, or both.
 
Alan B said:
Some upgrades make small differences, the Revo will make changing nozzle diameters trivial, so the nozzle size can be adjusted to suit each print job. This is a major improvement. No tools, done at room temperature, no chance of leaks or damaging the hotend.

A case of quality filament costs more than a cheap 3d printer. Maintenance on a cheap printer is not really cheap. Things wear and should be replaced or upgraded. Your time is probably worth more than the printer or the upgrade parts. One question is - how often does the printer waste time and materials? Upgrades often address time and material waste, or improve printer life, precision, bed calibration or user convenience. Can you trust the printer to be safe when unattended? Is it precise enough to work well with a 0.25mm nozzle and make accurate parts? Can it print flexibles well? How fast does it print well? What materials would you like/need to print, and can it handle them? Is it big enough while not being too large?

If you just want to print the occasional thingiverse toy most any printer will do, providing it is large enough. If you want to print functional parts from tougher or flexible plastic and routinely need to run 8+ hour precision print jobs overnight you may need a higher quality printer and/or some upgrades. Maybe multi-material would improve your workflow. Or even two or more printheads. Figure out what printer you need, and get there by either getting the right machine, or by doing upgrades, or both.

This is why I selected the Ender 3 max. It was cheap even with the single upgrade of the BL touch. it has an all metal hot end and can print most of what I want, and can tide me over until I can build a Voron 2 that will be kitted out to print quality parts in technical plastics.

Now I just resist temptation to upgrade anything on the max.
 
The Voron 2.4 is an excellent 3D Printer, and there are some good kits coming out now making it more accessible to build. The r2 update will be out soon with minor improvements and a major manual rewrite.

I've been following the Vorons for awhile now and have chosen the Trident in 250mm for my first Voron build. For my purposes the 0.1 is too small, the 2.4 is overly complex and the Switchwire's moving bed is less than optimal. I am in the parts collecting phase at this point, unfortunately the good quality kits for the Trident aren't available for awhile yet.

For those building a Voron 2.4 the LDO kits will be available in a few months and are of excellent quality. LDO makes a lot of the Prusa components so that gives one some calibration of the quality.

Other high end 3D printers one might consider are the Railcore, RatRig and the coming in 2022 Prusa XL.
 
Interesting, I had seen quite a bit about the Voron and RatRig but had not seen the Railcore. It seems like it uses a lot more off the shelf and laser cut parts than the other two which for me makes it much more interesting as running the other 2 with high heat chambers becomes problematic. Even kits and parts available with every part in metal, although that would be a pricey build.
 
I loved being able to print massive prints on my Creality Ender 5+ in a reasonable time, but I just got a good deal on a 2nd-hand Prusa MK3S and damn... the user interface, design and quality of the Prusa are just fantastic. It's so nice to use a printer built by people who actually use their own products. I can just start a print and walk away, I could never do that with my E5+ (for one thing the firmware had a hilarious bug where it would put the wipe diagonally across the bed after auto-leveling, so you had to be very quick with the spatula before it started printing)
E5+
unnamed (1).jpg
Battery compartment lid
unnamed.jpg

The 'new' Prusa
unnamed (2).jpg
 
Back
Top