the bad weather is helping me to get some stuff done on the board again. got 3 new things:
1.) picked apart my 2nd gt2b -> badwolf, this time hopefully with poti thats working. didnt get done yet because:
2.) received my arduino uno, installed arduino, verified the wiiceiver 2.0 code and uploaded it to the wiiceiver - spend the rest of the night fiddling around - its awesome! the wiiceiver 2.0 code feels a lot better. startup of the motor is a LOT better after calibration, I also love the customisability on the fly. couldnt test it outside yet though, cause the weather is really horrible. overall superhappy - its so simple to deal with the arduino code that Im really happy that I gave it a try. for the people like me, who had no idea about arduino and all that stuff: relax. its so simple that even my mum could make it work.
* buy an arduino uno rev3 (cost me only 15eur new on ebay)
* buy 5 male to male pin cables/jumper cables/bridge cables/whatever the name could be in english, 10-20cm length is enough
* remove the atmega chip carefully with a slottet screw driver
* connect the wiiceiver with the 5 male jumper cables to the arduino following the wiiceiver description - you find 5v, ground, tx, rx and all that written on the arduino uno board - just find the right pin and connect it with the wiiceiver, following the great description of torqueboards and austindavid
* download the wiiceiver code from github and open Wiiceiver.ino with the arduino software that you downloaded from arduino.cc
* power up arduino uno (which is connected with the wiiceiver by now)
* press "upload" in your arduino software - it will verify/compile and upload, takes 2-3 seconds and you are done
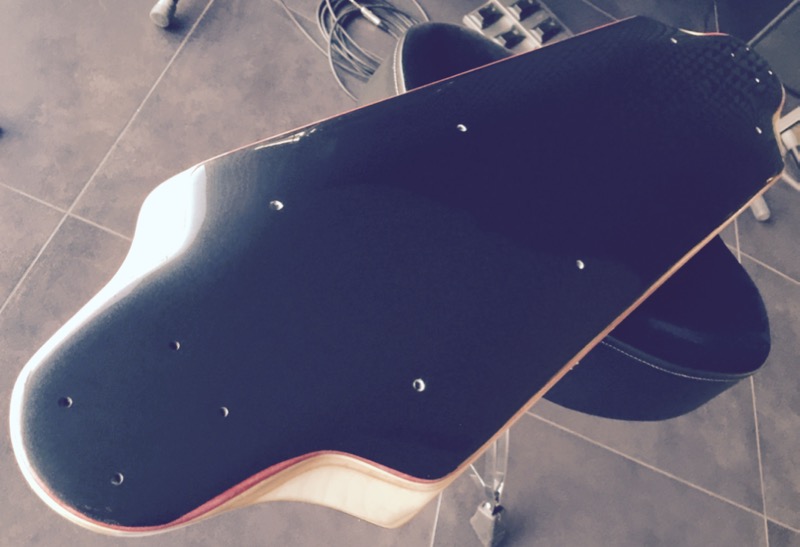
3.) finally I sanded down the board to 7ply maple (from 8) to get slightly more damping by flex. at the same time I was tired of the oiled wood look, cause after very short time it was completely messed up from all the stuff I ran over - looked for a dark color this time and while thinking about how to get graphics on it, I found something REALLY cool: photo transfer potch!!

basically you can print out graphics with a laserprinter (even in color), use this fluid on your surface and on the printed paper, "glue" it on your board or wherever you want the graphics, then use a hairdryer on it for 10min, finally soak it with water and rub off the paper -> done.
directly after soaking and rubbing off the A4 paper:
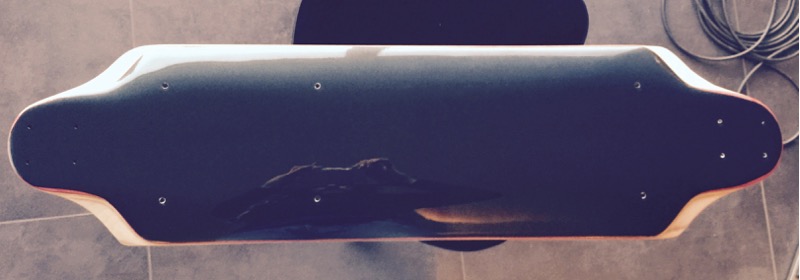
and now with glossy yacht clear coat:
the graphic is cut off directly where my battery enclosure starts, so the cut off wont be visible. im pretty happy about it - a very simple and very cheap way to get cool graphics on your board for those of us who arent banksy