Loaded Tesseract Carbon Single VESC 6355 10S4P

piyiotisk said:
With the Nyko Kama wireless wii NunChuck I have to buy the Wiiceiver or I only have to connect the transmitter wires to the VESC ?

Either will work, but i believe they usually recommend direct connect to VESC. Save $ and less components to troubleshoot/fail. Supposed to work really well w/ latest updates and improvements.

GL!
 
with the nunchuck->wiiceiver->vesc ppm (compared to nunchuck->vesc direct connection) you would waste the absolutely amazing cruise control on current speed. and of course its a more complicated setup overall, since it adds one more device into the mix!

to learn about how to connect the nunchuck directly to the vesc, follow the link I have given in the first post: click me!
 
whitepony said:
with the nunchuck->wiiceiver->vesc ppm (compared to nunchuck->vesc direct connection) you would waste the absolutely amazing cruise control on current speed. and of course its a more complicated setup overall, since it adds one more device into the mix!

to learn about how to connect the nunchuck directly to the vesc, follow the link I have given in the first post: click me!

I didn't know how to set it up but now i understand! Great! Thanks!

1) Do you prefer this setup over the GT2B?

Also, at first i wanted to build a dual drive but then i realize that i want it to be as practical and lightweight as possible.

2) As you already said the Abec 11 is more comfortable, why didn't you chose the 83mm? Is that heavier?

3) I found this website http://eu.nkon.nl/a123-systems-anr26650m1b-a-grade-3-3v-a-grade.html and it will spot weld me the cells. I think is much better than LiPo batteries (also much more expensive). What is your opinion? You are like a guru now!!! :D
 
piyiotisk said:
1) Do you prefer this setup over the GT2B?

2) As you already said the Abec 11 is more comfortable, why didn't you chose the 83mm? Is that heavier?

3) I found this website http://eu.nkon.nl/a123-systems-anr26650m1b-a-grade-3-3v-a-grade.html and it will spot weld me the cells. I think is much better than LiPo batteries (also much more expensive). What is your opinion? You are like a guru now!!! :D

for 1): GT2B vs. nunchuck are very different and it depends on how you want to use your board. if you need a very direct, very sensitive and very robust controller, the gt2b is much better. I would recomment that if you accelerate and brake a lot or if you drive really fast and need the best reliability.
for cruising, carving where you stay at one speed for a longer period of time, when you dont accelerate and brake like a madman the whole time, i favor the nunchuck because of its amazing cruise control button! its simply how I use my board: dial in a speed, hit cruise control, just adjust speed around that slightly, coast a little for traffic, resume cruising. its what I do. some people moan about nunchuck connection reliability, but I never had a dropout yet with my wiiceiver and Im hoping that it will be even better with the vesc and the solid JST plug!

2.) I like kegels too, got them on my long distance board. think the comfort comes mostly from the diameter. probably the difference of 80mm kegel vs. 83mm flywheel is really small. also, I really like the looks of the kegels 8)

3.) I dont have much knowledge about cells and chemistries. from what I read the a123 sound like really good cells with a lot of throughput. try it and report back! :)
 
Hi whitepony,...So If i were to build an Enclosure 45x15, like you mentioned , would that be perfect for excact same setup ? could it be any less wide?

Thanks.
 
in theory it could be 13cm wide (2x 6.5cm cells), in praxis with thick 80A capable cables and shrink tube its 14.5cm. the space cell is also 14.5cm wide. still thinking about cutting 5mm off my carbon plate to make it 45x14.5 ... probably will do that to make the case as small as possible - every bit counts and the battery will be perfectly fixated!

given you build your own 10S4p cell, you can still arrange cells differently. in my setup the battery is in theory 2x 6.5cm wide and 20x1.8cm = 36cm long. if you tilt all 4P packs by 90° you achieve an 8x1.8cm = 14.4cm wide and 5x6.5 = 32.5cm long battery! or you arrange it in a completely different way!
 
whitepony said:
in theory it could be 13cm wide (2x 6.5cm cells), in praxis with thick 80A capable cables and shrink tube its 14.5cm. the space cell is also 14.5cm wide. still thinking about cutting 5mm off my carbon plate to make it 45x14.5 ... probably will do that to make the case as small as possible - every bit counts and the battery will be perfectly fixated!

given you build your own 10S4p cell, you can still arrange cells differently. in my setup the battery is in theory 2x 6.5cm wide and 20x1.8cm = 36cm long. if you tilt all 4P packs by 90° you achieve an 8x1.8cm = 14.4cm wide and 5x6.5 = 32.5cm long battery! or you arrange it in a completely different way!

I prefer your Battery arrangement. Just looked at Spacecell 10S3P ,..it's actually 140mm Wide x 380mm.

Would you use same batteries if you did another pack?
 
yea, you are right with the space cell and my battery - they are both 14cm. I didnt think actually measure them, but I knew they fit my 14.5mm box perfectly. now, Im using aluminium L-profiles with 2mm thickness - so if you substract 2x2mm from both sides, youll end up at 14.1mm width for a battery inside the case if your baseplate was 14.5mm - and thats why a 14.5mm baseplate is actually a really snug fit for space cell and my DIY battery! :)

not sure about the cells - I wrote my feedback in my topspeed thread ... I always got 30km range from it, which either means my setup sucks more watt than anticipated or that the discharge capacity is smaller under the typical load than expected. either way, they seem to be fairly robust, since their capacity after the horrible 2.5V/cell discharge was not really affected.
 
whitepony said:
yea, you are right with the space cell and my battery - they are both 14cm. I didnt think actually measure them, but I knew they fit my 14.5mm box perfectly. now, Im using aluminium L-profiles with 2mm thickness - so if you substract 2x2mm from both sides, youll end up at 14.1mm width for a battery inside the case if your baseplate was 14.5mm - and thats why a 14.5mm baseplate is actually a really snug fit for space cell and my DIY battery! :)

not sure about the cells - I wrote my feedback in my topspeed thread ... I always got 30km range from it, which either means my setup sucks more watt than anticipated or that the discharge capacity is smaller under the typical load than expected. either way, they seem to be fairly robust, since their capacity after the horrible 2.5V/cell discharge was not really affected.


Ok great , 14 cm ,..as long as the VESC fits in the position you have it.

Might try the Sanyo NCR 18650 GA , not as high max current discharge though, but still Riba recommends them
 
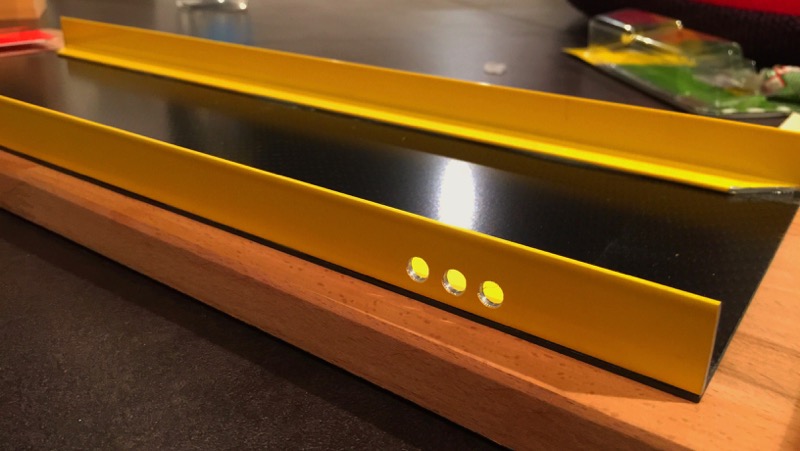
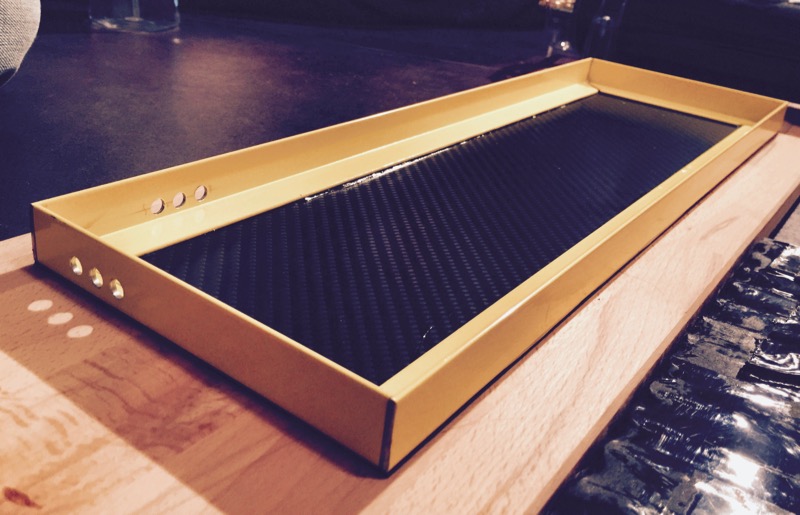
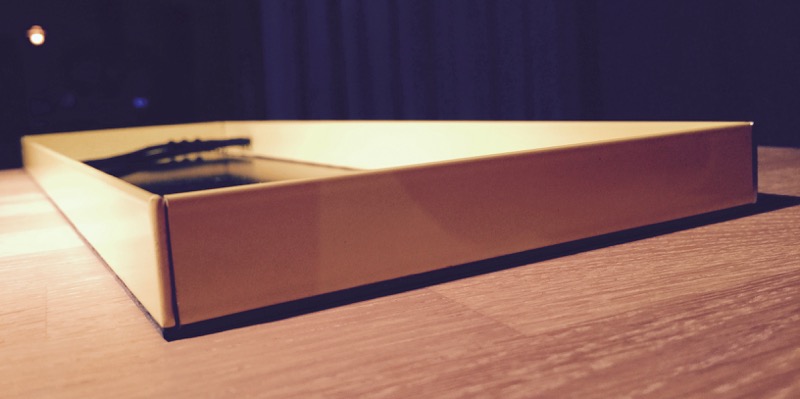
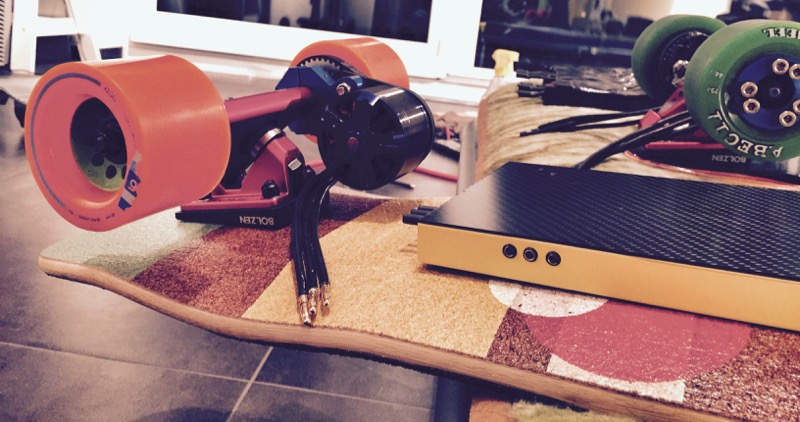
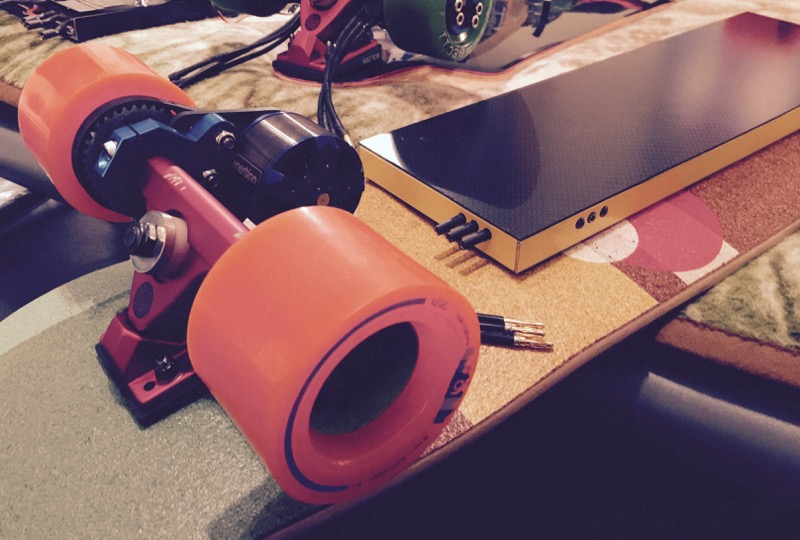
started my case - it will be colorful this time - screw the cops - sunny yellow + carbon looks great, especially with orange/bright green kegels and red calibers! :D

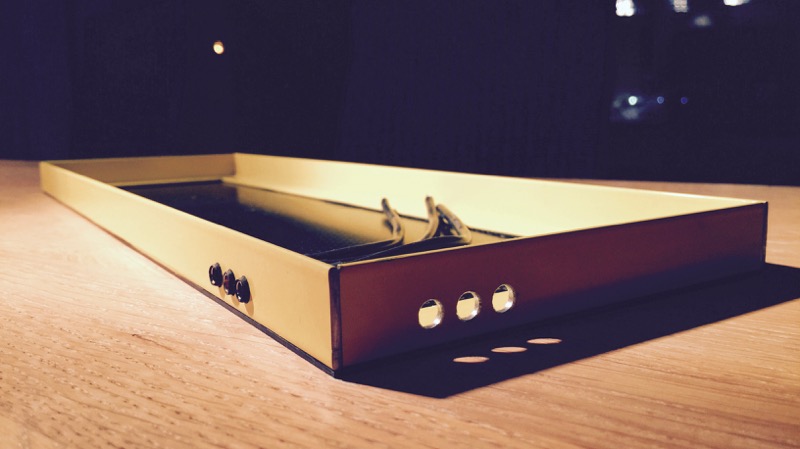
in the end I cut it down to 45x14.5cm - felt wrong to leave it 5mm too wide - now its a snug fit with the battery! went for simple epoxy resin adhesive to attach l-profiles to baseplate (sanding the surfaces a little to roughen it up). on my topspeed I used sticky tape and many many screws - unnecessary weight and it doesnt look very sleek anymore. this time it will be much better. this time Ill also have l-profiles all around the case, but wanted to add front and backside once the sides are properly fixated.

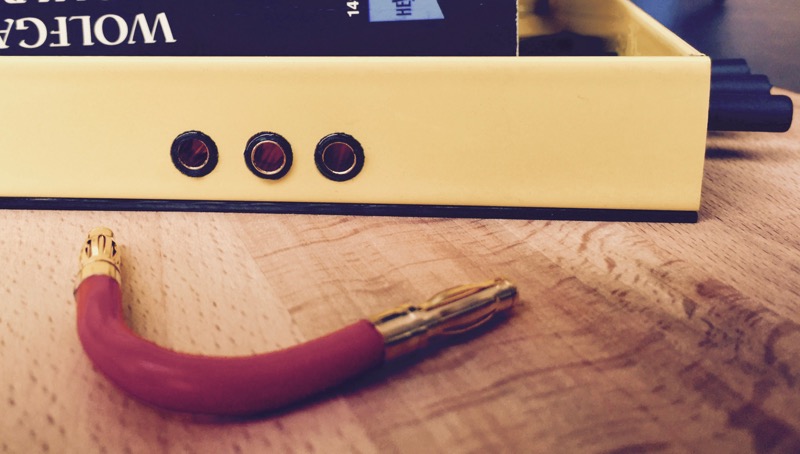
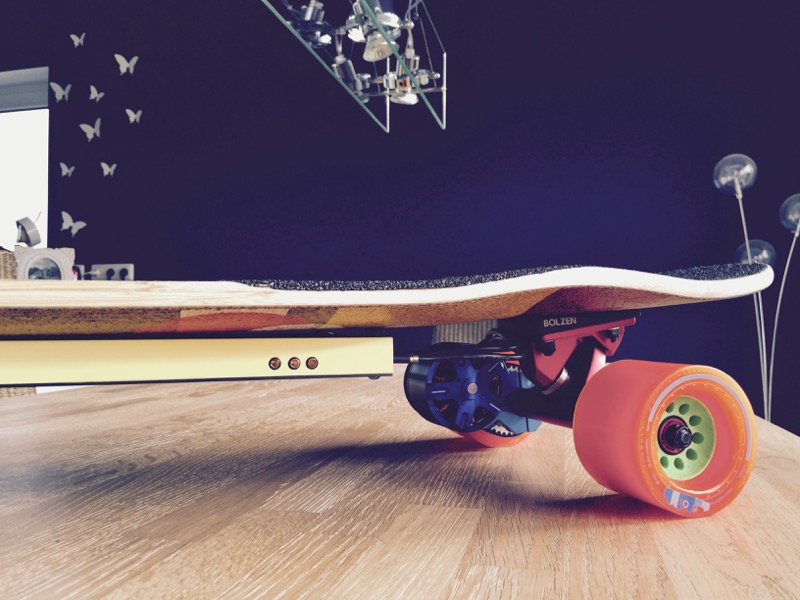
incase you wondered about the 3 holes at the side: I'll insert 3 gold connectors enclosed in thick shrink tube for sturdy insulation. left connector will be hooked to battery "-", the middle one to battery "+", the right one to VESC "+", so I can switch on the board with my antispark loopkey by bridging middle & right, and I can charge the board by hooking up the charger to left and middle connector. :idea:

I better pay attention every time I switch the board on - would suck to short the battery with the loop key :p

newcase.jpg


think Ill be done with everything by the end of this weekend. rubber tubes to attach case to board also arrived! :)
 
What about using some sort of 3D printed plastic block to keep the key from connecting the two left pins? Then you could still use two bullet connectors on cables to charge it.
 
Nice !!

About the 3 holes?...Isn't the Evolve charger you are using, just a simple plug in ??
 
piyiotisk said:
Can you post some photos how you will attach the case?

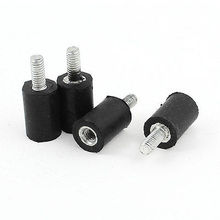
yea, I will after this weekend - it will basically hanging from the underside of the board via 4 rubber joints like these
4Pcs-M4-Air-Compressor-Rubber-Vibration-Mount-Isolator-10mm-x-15mm.jpg_220x220.jpg


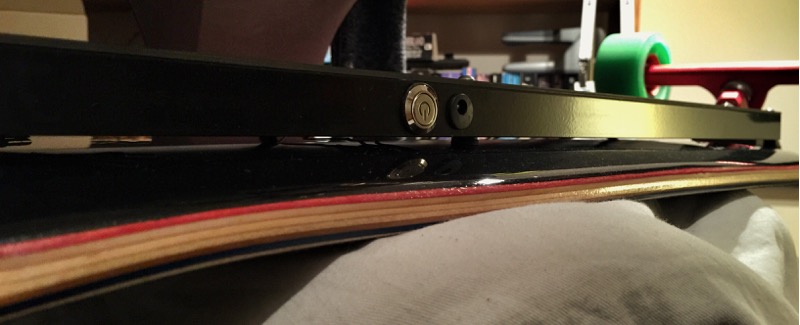
check my topspeed build if you cannot wait - its where I made this kind of case the first time and iterated on it a little. the case of the topspeed is quite a bit larger and is connected to the board via 6 of these rubber tubes which are connected to the board via 4x M4 inserts. it dampens vibrations of the board well and reduces stress on the electronic components (also, no rattling at all!). there is a small gap for air flow and board flex, which is also why all my electronics are shrink tubed to be pretty much waterproof.
enclosure_vs_rocker2.jpg


its not really a work of art and craftsmanship - its just one of the most achievable cases for anyone with a drill borer and a metal saw. :lol: and its very light, robust, cheap, allows flex and doesnt look too bad afterall. :D

Montiey said:
What about using some sort of 3D printed plastic block to keep the key from connecting the two left pins? Then you could still use two bullet connectors on cables to charge it.

i dont like the look of 3d printed stuff too much - the carbon + aluminum profile has a pretty decent look, 3d printed always looks a little like rapid prototyping. Ill just be careful, shouldnt be too hard to plug in my loop key into the right holes! :p

or maybe Ill be smart and use the 2 outer holes for the loop key and middle left for battery charging - that way the loop key has a unique widths and it cannot short the battery! :idea:

randyc1 said:
About the 3 holes?...Isn't the Evolve charger you are using, just a simple plug in ??

yea, but I already soldered a converter for gold connectors. I dont like the cheap evolve jack too much, the connecting soldering spots are extremely close to each other and once from vibration, they touched and immediatly pulverized the jack from the battery current. gold connectors >>> evolve jack! :)
 
case is all closed up now with 3 holes for charging/turning it on and 3 holes for vesc->motor connection. that adhesive resin is really superstrong. tried to bend it and get those profiles off the carbon plate: no chance! :eek:
newcase_profiles.jpg


clean look of the front. its actually not very easy to be precise with only a stupid hand metal saw. I made all the pieces a little bit larger and then tried to fit them by sanding. it worked quite well, but it was a lot of sanding. :|
newcase_front.jpg


backside, side connectors for charging /on-off already stuck in for a test fit ...
newcase_back.jpg


... and now glued in with the same slow resin adhesive I used for the profiles<->carbon connection. currently its curing, put some books on the wires to fixate them. note how I used extra thick shrink tube to make sure that the gold connectors are not coming into contact with the aluminum profiles. the tiny gap between shrink tube and aluminum is now also filled with resin. Ill probably protect my battery with an additional 40-60A fuse to really make sure that nothing ever shorts its.
you can also see that the backside has 3 gold connectors stuck out far outside the case (also glued with resin adhesive) - I couldnt have these nearly 2cm long connectors inside because I needed that room for the vesc. in front of the case you see my red on/off switch *coughcough* :D
newcase_onoffcharge.jpg


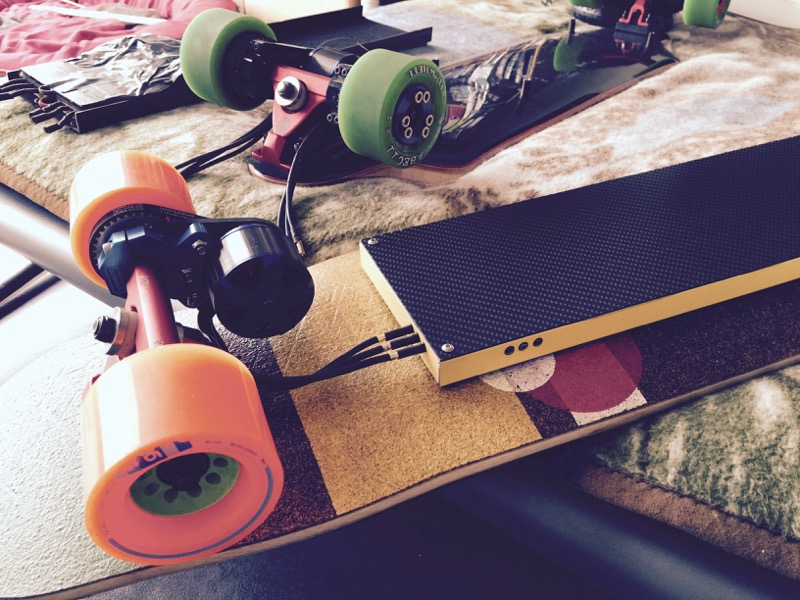
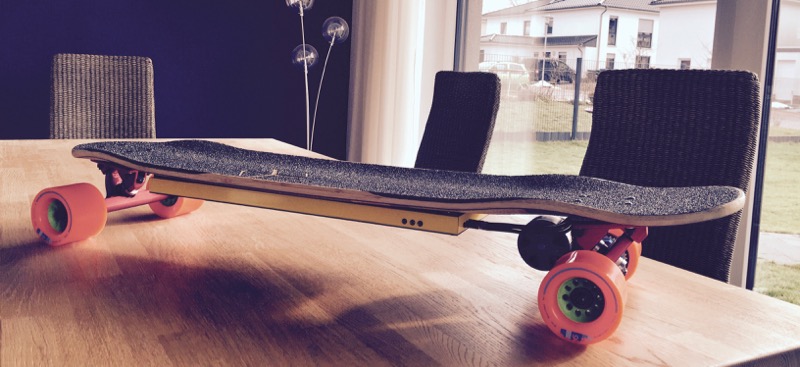
finally case on board to get an idea for the weird yellow color choice :D
tesseractcomplete1.jpg


tesseractcomplete2.jpg


Ill let the resin cure until tomorrow, then drill the inserts into the tesseract to connect the case with the board, glue in some felt sheets to prevent any rattling of cables and vesc and finally hook up the electronics. then the long wait for spring :cry:
 
ye, I built a female antispark gold connector like chaka did *click*, but wasnt happy about its robustness (im only using 4mm connectors AND I didnt have SMD type resistors), so in the end I just went with sparks for now! :|
 
Is that GFK or CF ?

I love that case!, ..can i ask where you got the Base Plate ?
 
randyc1 said:
Is that GFK or CF ?

I love that case!, ..can i ask where you got the Base Plate ?

its CF, bought it on ebay - got a guy in germany selling various sizes in various thicknesses for really decent prizes. this one is 450x150x1.5mm for 25€. carbon is really a LOT lighter than GFK (first base plate of my topspeed was GFK). I also looked for carbon L-profiles for ultimate lightweight, but they are EXTREMELY expensive. 20x20x1.5mm carbon L-profile of 1m length costs nearly 100€, so I went for trusty old aluminum there for 5€ instead. :)
 
Well, that is hardly a compromise Whitepony as I must say it looks very cool.
Splash of colour with the carbon, oh yeah.
 
Whitepony ,.... I saw video of an Evolve Baboo Flexing so much!,...do you have any idea how they gets there bamboo Board & Battery to Flex so much?

There battery must have a flex point in the middle? maybe some Copper wire mesh like you used on your battery ?

...Where did you find the Anodized or painted Angles?
 
I dont know about the bamboo/bustin series - my guess is that the case is tall enough to allow movement of the batterie within its case without following the boards curvature ... cause the case looks quite tall for only a 7Ah battery!

there is an ebay merchant who sells angles powder coated in any RAL color of your choice! :)
 
finished my case & attachment to board :)

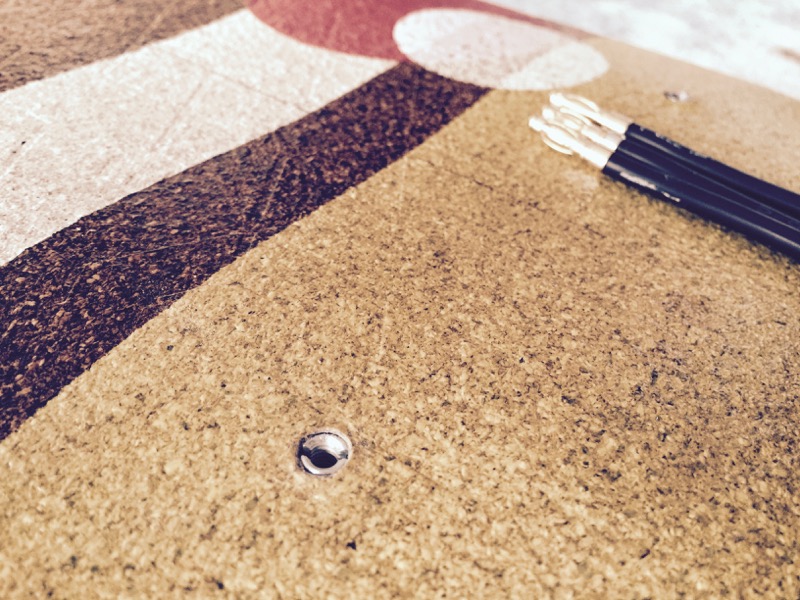
this time I was very careful with the inserts I drilled into the board - really wanted it to be a snug fit with the case. on my topspeed, attaching the case always comes along with some squeezing and bending of the rubber tubes :lol: - this time I took the drilled case, used double-sided adhesive tape to attach the flipped case on my board (to have baseplate-holes as close to the board as possible), and then drilled a small hole right through the case holes. a major help this time was the double adhesive tape really, so the case was properly fixated on the board.

this time I was also very patient with finding the perfect position on the 3D-molded board. especially the tesseract is an absolute bitch, because the graphics look as if they are aligning perfectly with the middle of the board (& perpendicular to it), but in fact they are off by 2-3°! took the front to rear truck screws as the "real" coordinate system on the board - and Im glad I bought the 60cm aluminum ruler afterall!! ah well, lots of boring stuff for most I guess ... Im always again suprised how easy it is to screw up if you arent patient and careful and lack the right tools. :D

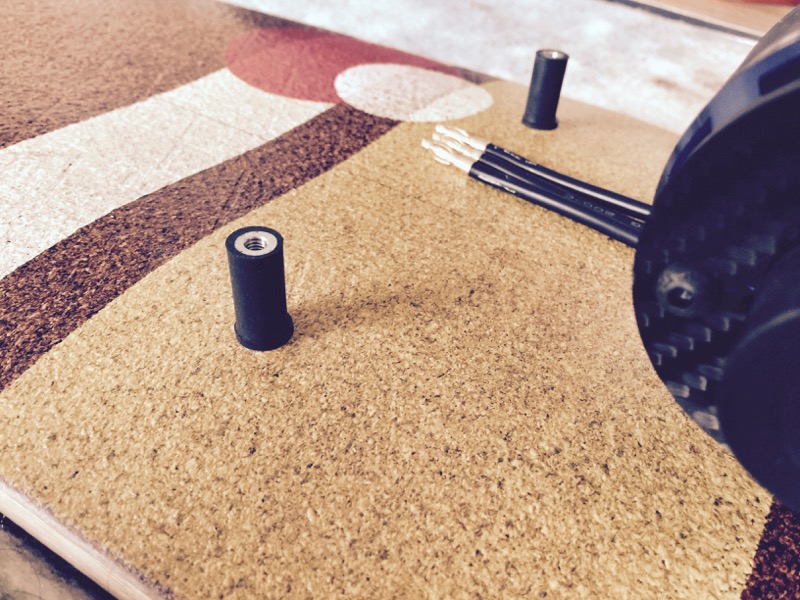
anyway, 6mm drill for the M4 inserts - sank them about 5mm into the board:
tesseract_inserts.jpg


attached the M4 rubber rubes (1cm diameter, 2cm height):
tesseract_rubber.jpg


and the big moment - attaching the case. a perfect fit, also with the motor cables! /happy
tesseract_firstfit.jpg


turning it all around and giving it a quick rattle check:
tesseract_done.jpg


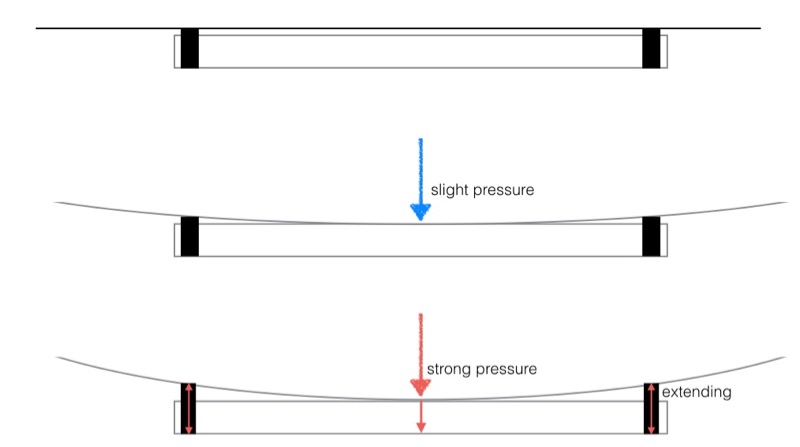
finally checking on the gap between board & case around the board middle (tesseract has quite a lot of rocker as you can see). might be sufficient, Ill have to see in daily business if the case is touching the board or not. if its not enough, Ill add one more rubber washer.
tesseract_rocker.jpg


todo: attach felt sheets inside to eliminate possible rattling, organize cables and electronics inside, wait for spring. :)
 
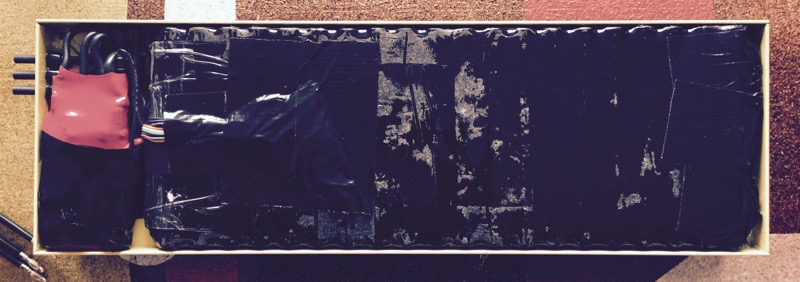
felt sheet and electronics dealt with, quite a tight package, so attaching case to board with electronics inside is still coming along with some squeezing ... damnit! :p

tesseract_electronics.jpg


now the only thing left to do is waiting for spring .. :cry:
 
Very esthetic build whitepony , Very nice ! Could'nt be any tighter than that!!


So what happens when board flexes ?,....the middle of board touches and those rubber spacers at the ends Compress to compensate ?? ....suprised there was enough room for them .
 
Back
Top