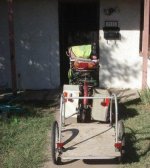
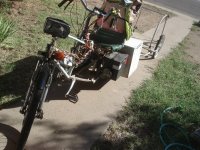
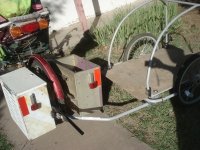
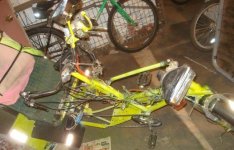
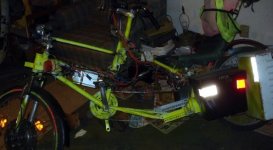
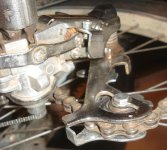
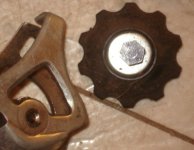
2WD Semi-Recumbent Recycled-Parts Cargo eBike: "CrazyBike2"

Pics from yesterday (havent' got any further yet):

DSC05308.JPG

DSC05309.JPG

DSC05310.JPG

DSC05311.JPG

DSC05312.JPG

DSC05313.JPG

View attachment 1


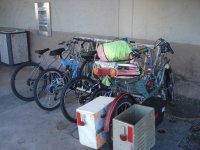
And I had to go to the store for some stuff, so I took a pic of teh bike on the rack with some others already there when I arrived. Often it has twice that many, occasionally with a bike chained to another bike! (I hope they came together, or somebody's gonna be unhappy when they come out and want to leave. :lol: )

DSC05304.JPG
 
More ride videos over in that thread, including a couple rear-facing ones now.


I need to pick up a mostly-working electric lawnmower later this week, from a Freecycle.org posting, and I don't want to use DayGlo Avenger to do it. Right now that's the only bike with a trailer hitch for my Flatbed / Kennel Trailer, and I don't want to weld one up for CrazyBike2, or modify the trailer's existing hitch to make something that will work for CB2.

The other option is to use my Bell 2-kid trailer with a plywood deck, but it clamps to the chainstay/dropout area, which is inaccessible on CB2 (and DGA) because of the pods. The only bikes I have that it would fit on are not powered. That would mean either a pedal-only trip hauling a trailer and cargo for maybe 10 miles, which I don't think I could do.

I considered bolting a chainstay or even part of a triangle to the back of CB2, with an axle bolted thru the dropouts to keep wiggle to a minimum. But that's a lot of stuff to stick back there, and a single chainstay would probably just bend laterally during turns, maybe even break.

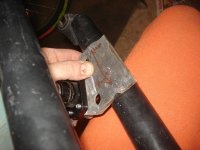
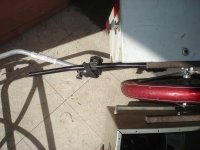
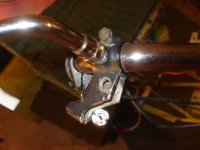
So I pondered and got inspired by a handlebar: The tubing is small enough diameter that the Bell trailer clamp will easily work on it, but thick/strong enough to not bend under loads like I'll have on it.
DSC05329.JPG


I just have to drill two holes in it, one near the middle and one at one end, to run bolts thru it laterally to secure it to the cargo rail and pod. That should be stiff enough to work.


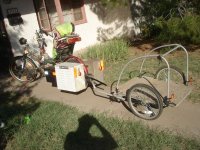
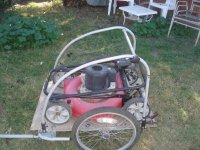
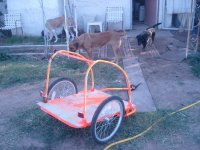
The trailer itself was easy to convert to flatbed, by removing all the sunrotted and apparently chewed-on nylon kid-seat/housing area, and just using the existing bolts for the trailer to go thru the recycled 1/4" plywood scrap and hold it down. A hacksaw, utiilty knife, and pliers were used to remove rectangular section cutouts to clear the vertical posts and the wheel axle/spokes. I didn't need to cut the plywood itself, as the scrap was already nearly perfect sized. It overhangs a bit but still fits.
DSC05332.JPG

DSC05333.JPG

DSC05334.JPG


It should have clearance in turns this way, too.
View attachment 2

DSC05337.JPG


One problem is that the trailer tires don't yet have slime or protector strips, and I can't seem to find my giant jug of chunky Slime. :(


My own non-working lawnmower seems to be almost the same as the one I'm going to pick up, so I folded up the handle and rolled it onto the trailer, and it fits perfectly. Just strap it down and off I go. For extra security I could probably take the wheels off, but that shouldn't be necessary.
View attachment 6

DSC05331.JPG

Now I need to actually go drill the holes in the handlebar and mount it on CB2, then test ride it empty and with my mower on there, but that will have to wait till after a nap and lunch.
 
Drilled and mounted ok. Turns out the bars were aluminum so easy to drill and cut (hacksaw). Still hard enoguh taht I can't bend them, so I don't think I'm going to see any problems with it.

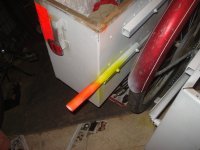
The black pipe sticking out the back looked too much like a tailpipe, though, so I decided to try to find my dayglo paint to make it bright pink or something, to make it easier to see so that I won't gash a leg on it (and others can see it easily when I'm parked somewhere like a store, but the trailer isn't attached). Eventually I found my white primer and the dayglo paint, and decided to do up some of CrazyBike2 itself since I meant to do that when I got hte paint, and never got around to it.

DSC05340.JPG

It's a craptastic job, but it'll do; I just wanted to make the bike more visible in daylight (and it can also be seen better at night now, just in case someone can't see my lights. :lol:). It also makes it uglier, if tha'ts even possible, so maybe evne less of a theft target than before. :)
DSC05338.JPG


There' some video here http://www.endless-sphere.com/forums/viewtopic.php?p=491626#p491626

to show the trailer being hauled on a test ride, for my work commute today. Rear facing camera mounted just left of my turn signal/taillight unit on the back of the seat.

Seems to be pretty stable even with rough roads, turns, driveways, etc. and this is while unloaded. Have to test with a load later.
 
Had a bit of unintended "spare time" today, as I got sick with what feels like flu last night at work, and was still too sick to work today. Sort of felt better now and then, including well enough to start off heading to work, but by teh time I got there I was totally regretting it. :( Fortunately, having already been sick before leaving, the morning managers knew and found someone to take over my shift so I had no troulbe just going back home (after a bit of a rest).


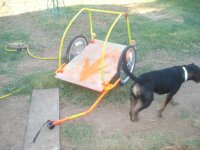
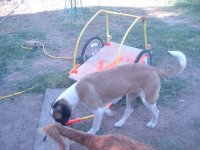
Anyway, after I got home and rested a bit more, I took the trailer out and primered it (badly) and dosed it with dayglo paint (even more badly) to make it MUCH more visible than it was as just a gray frame with plywood on it:
DSC05342.JPG

DSC05343.JPG

DSC05344.JPG

I also think I am going to use a Yamaha LED taillight/brakelight planned for the new bike on this trailer for now. But I am not up to wiring anything right now, so that will be later.

One issue with this light is it's common ground, with separate positives for brake and tail. The brake switch on the bike is wired to make/break the ground wire, so either I have to rewire that to make/break the positive or i have to add a relay. I am probably going to rewire the switch as that is a lot simpler and less prone to failure.

Then I would like to add turn signals to it, too, but as high up and bright as the ones on CB2 are, there's no real need for that unless I put a kennel on here to take the dogs places. The other kennel is tall and wide enough that it would at least partially block direct view of the turn signals. In order to add them to this trailer, though, I would have to either take them off DGA, or build some new ones. I'd much rather do the latter, and leave DGA intact, but it would be lots easier to do the former.


Oh, and a note about trailer performance: At least when unloaded, I cannot feel that it is attached at all, nor hear it, even over rough road patches. That's nice, but it makes me have to keep looking in the mirror to be sure it's still there. :lol:

I'll have to come up with a system to make it easier to tell, and a cable attachment that ensures I cannot lose the trailer even if the hitch breaks.

I also want to drill a hole thru the hitchpost and hitch so I can bolt them together, perhaps with a carriage bolt and butterfly nut for relatively quick release by hand, but making it difficult for it to come loose by itself.

Having had a hitch break on two different trailers in the last few years, almost losing the trailer and cargo (Hachi, in one case!), I do not ever want to have that happen again.
 
Ran really low on dogfood, so I got some tonight at the end of my shift, a couple of small bags maybe 12lbs total (free with coupons!) in the left pod with all my other usual stuff and a 40lb bag (on clearance for 40% off) in the right pod by itself.

Normally this kind of load isn't a problem, but tonight it had been sprinkling off and on for a few hours, just enough to leave all sorts of oil slicks washing over the road (not enough rain to actually wash them off the road, just bring them to the surface and float on the wetness). Almost no puddles, maybe a few millimeters deep for any that did happen. Almost no sprinkling at all during the ride home; brakes only started to get wet near the end of the ride, just enough to squeal but not enough to significantly affect their performance.

However, the load in the pods is right on the rear axle, so enough weight was behind the axle to take enough weight off the front wheel that I pretty much had to pedal to help get started every time, as the wheel would just spin out and never grab. Must be this tire, because the Cheng Shin I had on there before didnt' have this kind of problem.

A significant issue is that I dont' have the battery weight in the center of the bike; rather it is in the black boxes under the seat to left and right of the frame, just forward of my cargo pods. Used to be that the battery weight held the front end down enough more than it does now that I didn't typically have spinout even if I tried to do that, but now it's more or less a constant issue even on dry pavement if it isn't sticky asphalt. Lots of dust and dirt around, as well as crumbly pavement, so starting from a stop can be a problem sometimes, with lots of weight in teh pods.

But not like it was tonight, with the wetness and oil slicks all over.


Worse, because the weight isn't on the front wheel, it's really easy to break traction during braking in wet/slick conditions, when the pods are full like tonight. Just braking gently for a red light, I almost slid out sideways because I hit an oil slick about where the second car back at the light would normally sit waiting, and lost traction with the front tire.

I hit the throttle and it spun and then gripped, and I turned into the skid and got control back, but had to have both feet on the ground to keep from tipping over, and I was dragging a pod corner on pavement even so, for a couple feet. Managed to actually stop just at the first crosswalk line, almost like I meant it that way. :roll:


Same thing happened making a left turn onto 31st, hitting a slick spot just before entering the intersection during the actual turn, and that was much less fun to recover from. Fortunately with the rain, almost no one was on the roads, so there was no other traffic except someone making a U-turn behind me.

After that I just kinda crawled down the road at about 15MPH or less, depending on visibility of pavement surfaces, and managed to not have any problems the rest of the way home.


I think having more weight on the front wheel would have helped out a lot; back when I had the SLA in the center of the bike, pressing down on the front, and the smaller 24" front wheel, I didnt' really ever have this kind of problem that I can recall, even with the really slick cheap tire like I run on the rear wheel still. Keeping in mind that was rear wheel drive and now I'm running front wheel, I think the weight makes more of a difference than the source of motor power to the road.

Not totally sure, though.
 
How much does that hub motor weigh? Glad you got home intact.

Bike fenders; I'm envious. :)
 
Apparently not enough to make up for the move of the battery weight. :) The SLA was something over 45lbs, IIRC, and the big powerchair motor and gearbox directly under the front BB was about 20, maybe a bit less.

Removing all that, then adding the NiMH in place of the SLA was about 15-17lbs? I forget now; would have to weigh it again. The hubmotor is probably about the same, including the extra wheel weight from the slightly larger size maybe add 20lbs total. Even though that weight is much farther forward, it's a lot less weight on the front end than before, including the fact that the frame is angled higher up at the front due to the extra 2" of wheel.

Skip forward to having a different battery now in the side boxes completely behind where all the battery weight had been before, and it takes even more weight off the front wheel.

Add cargo to that, right on the rear axle (half in front half behind) and it begins to cause problems with front traction and steering.

All of these are reasons for the redesign and new bike, which is slowly coming together as I get all the pieces I need. (especially now that I have a swingarm and dirtbike wheel, but I need to find a narrower 18" slick to replace the wide knobby on it, and probably a new tube cuz I think the old one is ruptured at the valve base).
 
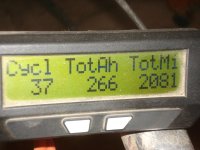
A milestone passed without me even noticing: 2000 miles with the CA on here:
DSC05453.JPG

IIRC I had something more than 1600 miles on the bike before putting that on, but I can't remember right now, and cant' find my last post about that before the CA. I have a notepad with that info on it somewhere here in the house, but it could be anywhere. :(
 
Day before yesterday, a really nasty sounding clanking started, but I couldn't find any cause of it at all. Tonight, I started taking things apart at the back end to see if I could find the problem before the bike fell apart under me on the road. :lol:

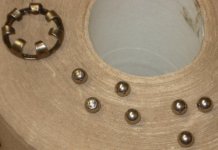
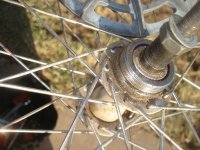
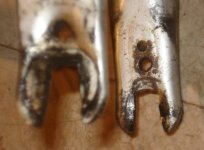
Turned out to be very simple, but I don't know why it happened. See the two bearings on the left?
DSC05476.JPG
They're flattened on one spot each, badly ground up there.

View attachment 3

Flakes of steel are embedded in the grease throughout the right side bearing cup, but there doesn't appear to be any damage to the race. Some of the cage itself appears worn away, as the tines are not all the same size anymore. Five of the bearings are not visibly destroyed, but I can see scratches, so all of these go in my "only for emergencies" bin of broken parts. I replaced them with nine cageless bearings from a different type of rear hub (from one of my previously destroyed-rim wheels), as I didn't have another 7-bearing caged type handy. Works fine so far.


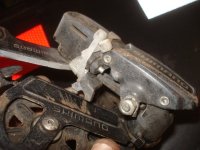
While I was at it, I changed out the broken derailer
DSC05478.JPG


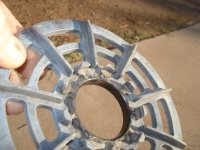
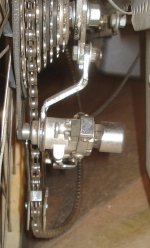
and decided that this is a good time to try out the Landrider autoshifter derailer, since I know that this is one of the few hubs I have (built into a wheel already) that the little plastic pulley will fit perfectly on.
View attachment 1

Took a bit of fudging around with a derailer hanger adapter but I got it working where the pulley belt is tight enough to operate, and aligned well enough it shouldn't come off. (this device is designed to hang from a hanger on the frame of the Landrider, and the frame of CB2 does not have a hanger).
DSC05480.JPG


I haven't taken it out for a ride yet as it's not-quite-pouring rain out there, and I got wet enough on the ride home to be chilled and not wanting to go out again tonight, especially since things might not work as expected and I don't wanna be stuck roadside in the rain. :roll:


However, while I had the bike on it's side anyway, I used it to friction-drive a powerchair motor for testing some things:
http://www.endless-sphere.com/forums/viewtopic.php?p=503510#p503510
file.php
 
Took CB2 with the Landrider autoshifter out for a spin, and it works ok. If I were pedalling only, no motor power, I'd probably be kind of annoyed at it's shift points, though. I am not sure but I think it may have an adjustment for where those points are; I have not played wiht any of them yet.

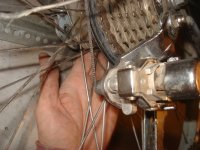
I did have a problem with the largest sprocket on there, at first it shifted back down to that sprocket ok, but after a bit of real pedal power with the motor off, it couldn't. Apparently the freewheel wasn't fully seated at first, and was tightened by pedalling, which then compressed the plastic pulley so that it bowed outward away from the wheel at it's outer edge, causing interference with the largest sprocket.

This test video is from before I fixed that.
[youtube]fOUml8LhT_g[/youtube]


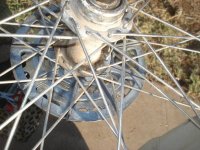
A bit of investigation with the wheel off and freewheel removed showed me that the back of the plastic pulley, which is molded so that it will fit around spokes and spoke heads, as well as the hub spoke flange, doesn't fit as well to my hub as I thought. Aside from me having it rotated one spokehead off from where it should be, the spokes interfered with the stiffening vanes, at both ends.
DSC05485.JPG

Also, the hub's spoke flange was *slightly* larger (maybe .25mm) diameter than the little bumps around it on the pulley. A bit of scraping with a razor blade fixed both problems (a file would have taken too much material off too fast). No after pic, as I can't see the difference on camera, just by eye.
DSC05486.JPG

DSC05487.JPG


Now it fits far enough down to not be a problem, and it seats ok, but I guess my hub is still a little different, and the threaded part is closer to the flange than on the Landrider hub, so there is not quite enough clearance between pulley outer face and largest sprocket, and the chain rubs just a little on the pulley. I don't want to wear the pulley, so I locked out the largest sprocket by adjusting that allen-head screw immediately inboard of the spinning weights, at the back of the shifter/derailer.


There is still a bit of misalignment between the wheel pulley and the shifter's pulley, but it does nto appear to be causing a problem and it does not derail at any speed up to fast enough that the rear end wiggles around from the wheel wobble. I don't have a speedo on the rear wheel, but I'm guessing that is over 40MPH on the unloaded rear wheel off the ground. I won't be doing even half that, so no problems, I think. :)
 
So far the only real problems I have had with the old Landrider autoshifter are caused by me forgetting to keep pedalling while slowing down, because if I don't, then as it automatically downshifts the chain doesn't get moved from the smaller sprockets to the larger ones, but the derailer is being moved anyway. Eventually it is at such an angle between them that it cannot shift over and will jam as soon as pedalling commences.

Sometimes the jam can be undone by reverse pedalling, but more often I have to actuallly pull over and manually unjam it, becuase it comes off one of the jockey wheels in the derailer, too (usually the top/rear one). That's really annoying.

The only other problem I have had (twice so far) is that with all the bumps or potholes in the road causing chain-whip while pedalling, the chain jumps rings on the front 3-ring set, always downward to smaller rings. I leave it on the largest so I can keep up with the motor and do something useful, as I don't have a front shifter...I am going to have to put one on there just so it will stay in place, even if I just lock it to the outer ring and don't use a shifter. :(


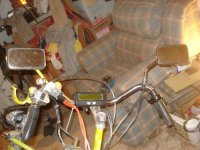
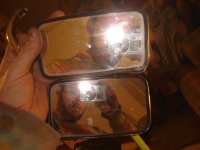
In other news, I meant to post last night that I also added a right side mirror, and changed the leftside one to match it. They are both the convex type that give a wider-angle view, but make things look smaller and farther away than they are, so it is taking some getting used to to judge properly how far back other vehicles really are.
DSC05495.JPG


My old mirror (top in pic) was flat.
DSC05496.JPG


For a mount on the right side I used a piece of a brake lever mount off the blue Suzuki dirtbike from Mdd0127.
http://endless-sphere.com/forums/viewtopic.php?p=493399#p493399
file.php


The lever mount had no lever or anything else; it may actually have been a clutch lever rather than brake lever, since it was a leftside piece, but as it's only the mount for it I can't tell. It did have the threaded hole for the mirror, though, so it is useful for that. :)
DSC05497.JPG


On the left side I used the existing cobbled-together mount and arm off of DayGlo Avenger that I'd put on here when I broke off the old CrazyBike2 mirror. At some point I will come up with something better, once I need to move this one back to DGA. Or maybe just build a second one for CB2 at that point--it's just made of seat-clamp hardware and some washers.


One thing I'll definitely say about motorcycle mirrors, is that they don't shake around like all the bicycle mirrors I have ever tried or seen. Unfortuantely they're a lot heavier, but it makes little difference on something as heavy as CB2 already is. :lol:
 
I am definitely not liking the Landrider's autoshifter, in combination with not having a derailer cage on the front triple ring. Whenever it downshifts at the rear, it is pulling the chain completely off the front triple, all the way left so it falls on the BB. :( It doesn't even have ot downshift all the way, the third ring on the rear is far enough to cause it. By the time it gets to that third one, it's already yanked the chain off the large front ring on the right, and down onto the middle or granny ring, and right after that it just flops onto the BB.

I thought it was cuased by bumps and potholes, but it happens even on smooth roads.

I've taken to simply not pedalling during deceleration, so that the chain stays wrapped on the higher gears all the time, and only pedalling after it's already gotten past 15MPH or so (I think that's about where the autoshifter has reached the highest gear).

Anyway, I'm going to probably find a front derailer that fits and set it up, but it's distinctly possible that I will end up removing the landrider autoshifter from this bike entirely; I just don't like the shift points especially since it doesn't seem to downshift at the same points it upshifts. :(


Also, a story of a near-accident tonight:
(crossposted from another thread about accident(s)):

Alan B said:
I suspect that if I had not locked up the brakes and made some noise the cop would not have seen what happened, so squealing the tires served several purposes. It notified the cop, warned the driver, and made me feel better.

Tonite, such a noise made by me squealing the front (only) brakes on CrazyBike2 *may* have woken up a couple of pedestrians.

It was VERY dark on the section of road they chose to cross, and tehy were wearing such dark clothing that with the glare of the headlights from the truck oncoming on the other side of the curved road, a ways down from me, I did not even see the pedestrians at all. I have gone back thru my memories of riding up to that point and can't see them at all right up to the point they walked into my lane in front of my headlight beam, less than two bike lengths from me.

I *do* remember that the truck seemed to be going slower than much of the traffic that usually goes thru there that time of night, but it was not unusually slow given that a fair few vehicles slow down when approaching me to figure out what I am. :) I was still going about 19MPH as I approached the near-incident, not knowing there was anything at all about to cross in front of me.


The two pedestrians (I think a guy and a girl, but it was hard to tell in the momentary headlighting on them just before I braked and swerved around them) were quite a ways from any safe place to cross, and picked the darkest place on the road, with no streetlights there and no business lighting either, or parking lots.


Obviously neither one of them had even bothered looking in my direction at any point, becuase they were both deer-eyed at me when they heard the squeal of my brakes as I slowed/swerved, shocked to see me, from all appearances.


If they had been approaching from my side of the road, already in my lane, I woudl probably have seen them some distance away, but because of the curve of the road my headlight (a halogen car headlight) was at that time pointed away from the other side of the road (where they were coming from).

If it had been a straight road, I would also have seen them, even if it was only in silhouette from the truck's headlights.

If there had been any street lighting there, or nearby parking lot or business lighting, I would probably have seen them or at least noticed motion and looked harder for whatever it was that caught my eye.


Fortunately no one was hurt, and nothing happened other than we all got an adrenaline rush. But if I had been a car, I'd've been going twice that speed, and they would have had little to no chance as I probably wouldn't have been able to stop or swerve completely around them. I doubt they will think of that, or even realize that they could have easily avoided any risk by crossing in a different (and lit) place, not very far up or down the road.

Oh, well.
 
AW, you are probably aware of how the AutoShift bikes with the weights in the wheels downshift, but I'll post it here anyway, even knowing with your front chainring problem you wouldn't want to implement it at this time.

The AutoShift bikes have a conventional freewheel (I think 5 or 6 speed), but they add a washer on the axle that puts pressure on the freewheel eliminating its ability to (easily) freewheel. Then they have a freewheel on the crank, so that when you are coasting (both speeding up down a hill or coming to a stop) the rear cogs (and chain) keep spinning. This then enables the chain to move onto the correct cog wheel, including low gear as you approach a complete stop, unless you slide the back wheel. :D
 
That would be a nice way to do it; I wish the Landrider's autoshifter worked that way. If I had any freewheeling cranks (or could finish making the ones I started to, way back when), I could set this up even on CrazyBike2. Since I still need the granny and/or middle gear for the "just in case" situation of motor system failure so I can stil pedal it home, I can't replace it with a single-size ring, though (unless I carry the smaller ones with me and make it so I can change them out in such a (rare) situation).


But the Landrider didnt' have a FW crank, just the autoshifting derailer. I guess they just went cheap on the design.

THe Landrider's derailer is almost normal, except that the spinning weights on it (driven by the pulley on the hub) do the shifting, and there's no cable override (or place to put one). The thread-on 7-speed freewheeling cassette is perfectly normal (though very cheap and loud, even after greasing).


Still, it is a solution I hadn't thought of to the downshifting problem, and one I can actually solve if I build a FW crank. (if I ever have time)
 
I was an unhappy camper (well, rider) today: My front tube blew out while I was going a hair under 20MPH with traffic to my left at twice that, halfway to work at midday.
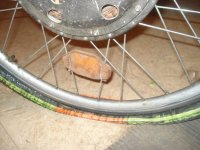
DSC05541.JPG

If I had never experienced this before I would probably have totally lost control and ended up sideways across traffic, and possibly dead. But it happened on a regular bike going down a very steep hill at 30-40MPH once, many years ago, and I DID lose control then, and that was very unhappy (lost a fair bit of skin).

This time, I was able to partially control the bike, but I coudln't steer properly and I couldn't brake or accelerate because the Slime-filled tube puked it's slick contents out into the tire, which promptly began spinning on the rim--somethign I never have had happen, because Slime has always been able to fill the punctures, and not spew out. (when it couldnt' fill the punctures it was becuase they were at the valve core, and any spewing happened OUTSIDE the wheel).

So I ended up uncontrollably side-drifting between sets of cars next to me, and fortunately they were able to stop or go around. One of the stopped drivers just sped up around me and the other one as soon as he could, but the other driver stayed stopped to see if I was ok, with his flashers going, and only went on after I was up on the sidewalk out of the way.

A quick attempt to pump it up showed it was futile as expected, and I had no spare tube. Nowhere I could get to before work would have a spare, either.

I didnt' really have enough time to go home and then fix the problem and get back to work, or to transfer the battery pack to DayGlo Avenger and ride that to work, so I just continued on to work. I stayed on the sidewalks, since I was limited to about 7-10MPH; above that the wheel would spin in the tire and/or slide around sideways when under motor power, making it uncontrollable. I tried pedalling for some stretches but the slight rocking of the bike from my body sway during pedaling caused too much sliding, eventually crashing me against some bushes near a bank once. :roll:

Almost half an hour later I got to work, and left messages with a couple of friends with trucks that I thought might be available by the time I'd be getting off work after 7pm, and one of htem called back a few hours later, arranging a ride/transport home.

I could've ridden it back home, too, but another two+ miles of riding on the flat tire wasn't going to do it or the rim any favors, so not doing that was high on my list of things to accomplish. :)


After getting home, I got the wheel off the bike, and the tire/tube off, finding this hole right in the middle of what would be the tread area on the tire as the source of failure. There is no debris in the tire at all, other than Slime, and no holes in either the tread or the Slime protective liner. No sign that the liner might've caused the damage, either; looks like the tube simply failed and blew out.
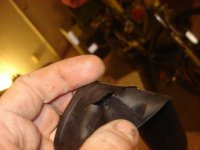
DSC05543.JPG
Pressure was 54PSI a couple days before when I'd checked both front and rear, so it wasnt' too high or low. I've never had a tube blow out this way without some cause, though. I just wish I knew what the cause was.


I had forgotten to write to Slime about the blown-valve-stem tube a few months ago, so I will write to them about both of these tubes, and see if they warranty them. If not, no biggie, but it'd be nice.
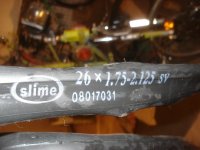
DSC05547.JPG

DSC05546.JPG


In the meantime I have another medium-thickness tube I'll put in. I may also change the tire itself, as I don't like this one in wet conditions--it's REALLY slippery. It also doesn't grip while cornering very well compared to the worn-out Cheng Shin I had on there before.


If there is time tomorrow on Christmas Day, I am probably going to change out the front fork, too, for the one I want to add the disc brake caliper mount to. I'd like to add the mount first, but only if the welder will cooperate (which it didn't last time I wanted to do that).


Speaking of welders, while a friend and I were out picking up the MC tires
http://endless-sphere.com/forums/viewtopic.php?p=507831#p507831
file.php


we saw a nice-looking older-model 110VAC Lincoln wire-feed welder at a yard sale for $250. If I thought I could've talked him down to less than half that, I would have seriously wished for the money. But even if it was worth it, $250 was way more than I could afford even if I borrowed it and paid back over several months (more likely for that much would take a couple of years, at the rate things have been going). It looked kinda like this one, but with white panel and black markings:
View attachment 4
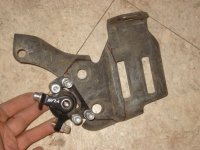
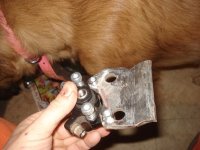
 
Today I spent several hours dealing with stuff that needed to be fixed here at home, and then tackling CB2's problem above. I thought first that I might go ahead and change the fork out for that double-crown one, as planned, but it turns out it's steerer tube is too large at the bottom to go into a 1-1/8" headtube bearing race. :shock: I'm guessing that makes it 1-1/4", though there are also 1-1/2" ones as well. Haven't measured it yet; I had assumed it was 1-1/8" because it *is* that size at the top end, and I didn't notice the outward fluting as it nears the bottom. :(
View attachment 1


I don't think I have any headtubes and bearing races that size (at least, not on any steel frames; haven't checked the alloy ones as I can't weld those anyway), so I will have to figure something else out to be able to use it. Most likely, I'll have to press out the steerer tube and press in a smaller one with a spacer ring around it. I don't have a press or easy access to one, so I will either have to build one out of a hydraulic car jack and scrap metal, or I will just use a sledgehammer and a wood block. :lol: ;)

In the meantime, I went thru all the suspension forks I have, and none of them can be used to replace the junky one I already had on there, except one that is just as crappy as it is (in fact, is identical except for the paint color and the "brand" stickers). So I went thru the non-suspension forks, and only the Trek fork that Li-ghtcycle sent me with that Nishiki Play frame could be used.

But since it's not a suspension fork it's 2-3 inches shorter than the existing one, which will change the geometry a lot. Not sure if it will be better or worse, but since I really need some sort of front suspension (even crappy), and I don't have the time to take it out for test rides and then come back and change it out again if it didnt' work out, and still be able to get other things done that I need to tonight, I decided to just put the existing junky one back in.


It is good that I had to take it all apart, though, because taking the wheel off let me see that the dropouts are widening EVEN WITH THE TORQUE ARMS ON BOTH SIDES and even with tight nuts, probably from the regen braking. It's much worse on the side with the longer arm (the wrench), whcih was unexpected. I guess clamping dropouts are in my future, soonish. ;)
DSC05548.JPG


Taking the fork off made me take the brake pads and arms off, which is the only reason I noticed this:
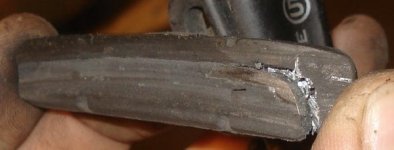
DSC05550.JPG
which explains the horrendous squeal I heard last day or two that I thought seemed lots louder than before. Apparently it's been carving into the rim a bit, as you can see from the metal flakes caught in the loose rubber backing of the pad. :(

I took some used pads off a Diamondback alloy frame Mdd0127 gave me, mostly because I dont' know where my box of assorted used pads is, and the frame was handy. They're Promax, and shorter/fatter than the Shimano ones I apparently totally wore out above.

Had to take a break from trying to get the wheel back in the dropouts, though; I keep getting it most of the way in there then loosing my grip on things (hands hurt too much today) and having to retry. After losing count of the number of times I did that, I decided it was time to go nibble on the leftovers some friends brought over from the Christmas dinner I haven't felt well enough to go to, and type up my "experience" from today so far.


Another thing to be done tonight after I get the wheel back on and working is to either flip or change the BB shaft to a shorter one, so that the chainrings are closer to the frame and thus more aligned with the rear cassette, so that the Landrider autoshifter doesn't keep dragging the chain off the big ring whenenver I slow down, and also so that the front derailer can actually be used (right now the derailer is nearly one whole chainring spacing too little to be able to reach the largest ring at all, even if I had a shifter on it). I'm sorely tempted to just pull off the autoshifter while I'm at it, but I'd like to give it a fair shakedown with better chainring alignment.


All these "little things" are reasons I really wanna finish the other bike, but I still have design work and welding to do (after I fix the welder!) before I can even get it coastable, much less powerable by pedals or motor.
 
Finally got the wheel back in, and trued it while I was at it (only a few spokes needed adjusting, but the spotty brake rub with newly-installed close-rim-adjusted pads was annoying).

Tried to deal with the cranks, but there's only about 3mm difference from one side of the shaft to the other, and none of the others I had handy were any shorter on either end. So it's slightly better, but probably not enough to stop it from coming off. And the derailer won't reach out far enough to act as a guide (whcih is why I put it on there in the first place). The other few I found in a quick search won't extend that far out, either, INCLUDING the one off the bike that crankset came from! :?

Oh, well, maybe I'll figure out what I'm doing wrong some other time, when I dont' have a pounding migraine from all the little stresses plus the boom-boom-boom of the bass of music several people in the neighborhood have been playing all day long (by leaving their cars opened up and stereo blasting, while they all go inside and shut the house up :roll:). Thankfully none on my street, but a few streets away instead--yet still so loud that the bass can be felt inside the house, even though I can't hear the music itself. :( Anyway, not a rant thread, just complaining--they stopped an hour or so ago, so at least I get to sleep. :)


Didn't have time for a test ride, as I am way too tired to go trying to do it now, and it's below 40F already, flickering 38/39 and cooling fast. I don't want to go riding and find I need to adjust something in order to get back home, and have to take helmet/gloves/etc off just to work on it. So that will wait for tomorrow before work when the sun is up and shining on me.
 
Rode to work fine, and home, and then today's commute back and forth, too. So far no problems with the repairs.

I tried to test it out with the 10s RC LiPo at 41.5V, but apparently that is below the LVC of the controller, as it will not engage the motor. :?

That's kinda wierd, cuz I was SURE I had tested CB2 with the present controller on the 36V 9Ah NiMH at one point, which is way below that. So I'm a bit confused on that part. I suspect that I am misremembering, and I had done that testing using that NiMH pack with the Fusin 36V controller and Fusin motor...or perhaps the 36V Ecrazyman controller currently in use on the powerchair motor project.


Anyway, I guess in order to test the RC on CB2, without changing the bike itself, I'll have to fix at least one of those two 6s packs.
 
Uneventful day today, except that on the way home, the lower jockey wheel on the derailer went missing. I felt the bike downshift even though I was at speed, then rattling, then the chain jammed and I couldn't pedal anymore. Motor kept going fine, and no wheel problems, so I kept going until I was in the parking lot I have to pass thru anyway, and stopped in a space.

Took a minute for me to notice that the derailer was not normal, and that it was in fact sticking down below the chain's forward loop, which should be impossible, then I noticed there was no lower jockey wheel. :roll:

The bolt and bushing is missing, too, of course; thankfully I have other similar derailers by Falcon that I can probably pull one from to fix it. My own fault, I'm sure, I probalby didn't tighten that bolt enough. Something similar happened once before on CB2, when I had chain drive for the motor, on my first ride down to a FreakBikeNation gathering on a First Friday event downtown in Phoenix (back in I think May 2009).

EDIT: yep, it was:
http://electricle.blogspot.com/2009/05/phirst-phriday-phoenix-phreaks-ride.html


Anyway, have to do that later; I'm apparently too tired to hold tools cuz I kept dropping them loking for the allen keys and pliers in the toolbag. Maybe after a long nap, or tomorrow before work.
 
Last night I started to finally get the derailer fixed, but it turns out it's the TOP wheel, not the bottom, so it's going to require the cargo pod to come off to deal with it; I can't hold the tools *and* the derailer parts at the same time otherwise. :(
DSC05555.JPG

DSC05556.JPG

So all I got done was to remove the "new" wheel off another derailer, so far.
DSC05558.JPG


Gotta go do the rest of the work in a bit, so I can then go pickup some dogfood with that trailer I tested out in a previous post, which hasn't been tested with much of a load yet. Should be interesting to see how it handles.

BTW, the new bike with full cargo capacity would've been very useful yesterday, as I had the chance to pick up a BUNCH of food but couldn't take hardly any of it, and someone else got some of it, partly because I couldn't fit it all on the bike itself (and didn't have the trailer with me, of course, not expecting to run across it). Oh, well, at least I can get the rest of it today, hopefully.
 
Forgot to come back and post that the work went ok, though it took me an hour to be able to hold the parts right long enough to thread the bolt thru the wheel and into the back part of the derailer cage. :roll:

Trip to get the food was fine; trailer behaves very well unloaded even at 35PSI on the tires at just under 20MPH, not really any bouncing, etc. I had my right rearview mirror angled so I could see the trailer at almost all times, so that if something went awry I might see it before I felt it. :lol:

But once loaded down with a over a hundred pounds of stuff, it got squirrelly at over about 16-17MPH, and would start a side-to-side shimmy that I was afraid was going to break loose traction on the rear wheel of CB2 (it probably would have done so already on any lighter bike).

I suspect that either the wheels' axle-holes in the frame of the trailer are not perfectly aligned with each other, or that the clamp-post I mounted on CB2's lower left cargo rail is just a bit too far leftward from center, so that the hitch is a bit left of center, and thus the whole trailer is pointed slightly diagonally when pulled fast enough with enough load.

When slowing down or when actually at a higher speed, like 18-20MPH, the trailer behaves ok. But trying to reach those speeds it is a little scary, unless I accelerate so slowly that it takes at least 1/3 mile to reach those speeds. There's only a couple places where the run between traffic controls or full stops (or cross traffic that usually doesn't stop like they should) is even that long, so I couldn't really test the theory as well as I'd like.


Fast forward to today....new years's eve afternoon, and traffic was a nightmare even at midday, just going to work. (was kind of an adventure just being *at* work, too, with events such as someone setting fire to our dumpster TWICE in less than an hour, and the fire dept coming out each time pretty quick, but almost being unable to reach us the second time due to traffic that simply didn't bother pulling over!)

On the way home, I felt something really wierd: Whenever I braked just prior to a turn (and began to angle the wheel as I let off), it pulled into the direction I was turning, kinda like a car that has a grabby brake on one side. But this is a bike and that shouldn't be possible. I stopped and checked and found nothing really wrong, but it got worse as I got closer to home, so I rode the last half mile or more at maybe 12-15MPH.

When I got home I found the fork actually felt loose in the headtube, and a check with a wrench found the entire set of steerer nuts/washers/etc. could be turned EIGHT REVOLUTIONS before it was fully seated and tight enough to make the bearings grab a bit, and then back off just a hair. I must not have fully tightened it when I took the fork off thinking I was going to swap it out. :( :oops:
 
No further problems wiht the steering/etc, but today it seemed I had almost no braking as I neared work, and I found once I got there that I had almost 4mm on each side between the pads adn the rim. :( So squeezing the lever would put the pads on teh rim, and even squeeze a little, but not enough to really do anything. Thank goodness for regen braking!

I still haven't figured out how it could happen, because the nut was super-tight at the brake arm, holding the cable in position. I almost hurt my wrist trying to move the allen key in it, and had to stick a box wrench's ring end over the allen to get enough leverage. So it wasnt' likely cable-slip. No broken strands in the cable, either, at least not the part that's visible outside the housing. Easily fixed, but dangerous and annoying. No problems since then, and I have hard-pumped the brakes without doing regen first (whihc I would nromally do), with no issues, at every stop on the way home.


Worryingly, another failure is creeping up: Battery box is starting to come loose, by splitting the plastic just past the edge of the spreader-plate I used in hopes of keeping this from happening. :(


You can see the foam padding inside the battery box, and some of the pack wiring, thru the crack. It's only going to get worse, as vibrations and potholes jounce the pack/box so that it wiggles the box around, and tears thru the ABS more and more. So far the crack appears to be only on the front end, not on the rear, but once enough weight is not supported at the top the rear will go too.

So I need to make some angle brackets or a strap that wraps around the whole top of the box, and is bolted to the bike frame just like the spreader-plate is inside the box. I think I have some suitable material, but I'll have to find it first.

I might end up just bolting some angle brackets at the inside corners for now, as I think i know where those are hiding.
 
I'm thinking that maybe your cable wasn't seated in the slot all the way at the lever end. Or maybe it was something else at the lever end.
 
I suppose that's possible, but I am pretty sure I checked those things when I first setup the replacement brake pads on there. Since my mind wanders a fair bit all the time, I could easily have forgotten it, though. :(
 
Back
Top