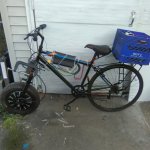
AliExpress battery pack unboxing (for my eZuma project)

Spent the afternoon re-wiring the junction box to accommodate the new panel. Along the way I added some (long overdue) waterproof glands. Unfortunately, the re-wiring dictates that I need one more M32 nylon gland, of which I have nothing available. As such, I have to "hard wire" the primary circuits for now until that gland comes in. Thank God for Amazon -- it should be here by Tuesday.

In the meantime, I have a ride scheduled tomorrow with a couple from church who ride Harleys -- I told them I'd show them around the 'hood and they were down with that. Wiring mess aside, I should be good to go.
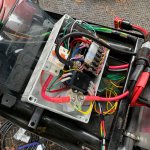
IMG_8678.jpg
 
Are those rcd's rated for dc or ac?
 
Took her out for a nice ride around "The Hills" today with friends Ken & Carolyn. A picture-perfect day. Bike ran great too. She seems to use about 1.1Ah per mile doing the speed limit as currently configured.

IMG_8680.jpg

Oh, that's me on the right of course.
 
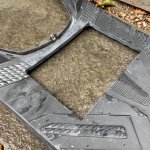
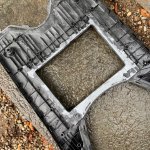
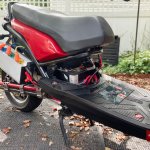
I found some really cool stuff for those of you who want to modify the plastic components on your bikes. It is called Apoxie (see: https://www.amazon.com/gp/product/B005J03Q5W/) and it is available in either white or black. I found this product is great for reinforcing broken plastic and/or shaping a new form within or around your existing panels. In my case, I wanted to cut a whole in my floorboard that would give me full access to my electric junction box. Trouble is, the floorboard is thin and needed to be reinforced. So I mixed up a batch of black Apoxie epoxy putty and formed a "lip" around the edge of the opening and let it cure overnight (be sure to use nitrile gloves while mixing/applying). An even cooler aspect of this stuff is that it can be smoothed with water while it is curing -- basically just like clay. Anyway, I'm happy with the result. YMMV.

IMG_8705.jpg

IMG_8703.jpg

M
 
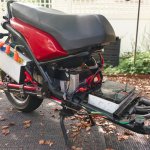
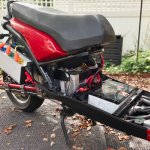
So I finally finished all the main wiring into and out of the junction box as well as tidying up the plastic panels to accommodate it and I think it looks pretty good. Lots of other tweaks here and there, too numerous to recount here, not the least of which was repairing some of the broken plastic that the former owner inflicted on this puppy. It's getting close to the time for me to install the remaining panels and leave things "as is" until wintertime when I can implement some other mods at my leisure.

IMG_8712.1280.jpg

IMG_8714.jpg

IMG_8715.jpg

M

P.S. the APT AE96600 controller has turned out to be an excellent match for the QSmotor 8000W V4 hub motor. And while large, it fits nicely on my scooter.
 
And here she is mostly all buttoned up. Rides like a dream. 60+ mph on flats (much more than I need, btw). 50 mph up hills, 50-60 mile range depending on how I ride her. In the future, with a 150% bigger battery, I should be able to get 75-90 mile range. But that is at least two years off. In the meantime, I now have a solid and fun every-day, errand-runner. For me, the key is reliability over performance any day.

_D8B5462.1280.jpg
 
11 months later...

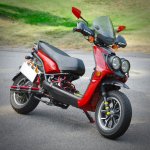
As a recap, I picked up this pathetic Boom 72V AGM 2000W Chinese Zuma clone back in September 2018 from Craigslist on the cheap. While it was only one year old at the time, the owner had abused the bike royally, but I didn't care as I had other plans.
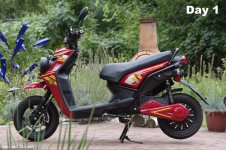
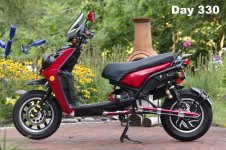
Eleven months later with a bunch of sweat equity, I created the bike I always wanted, and she rides like a dream.

Before:

_IMG5416_DxO.before.jpg

After:

_IMG5416_DxO.after.jpg

M
 
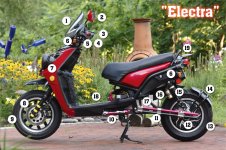
So here is the list of upgrades that I applied to "Elektra" over the course of the past 11 months:

_IMG5416_DxO.Electra.jpg

  1. PUIG windscreen
  2. Webike mirrors
  3. Reverted to cable-operated throttle + remote Hall throttle body
  4. ProGrip gel grips
  5. Acerbis hand guards
  6. Amber turn signals
  7. Dual PIAA automotive sport horns with relay
  8. 13" aluminum rim
  9. 110/90-13 Pirelli Diablo front tire
  10. CNC kick stand
  11. CNC swing arm
  12. QSmotor 13" V4 8000W hub motor
  13. 150/70-13 Pirelli Diablo front tire
  14. Custom fender
  15. Progressive rear shocks
  16. APT AE96600 24fet controller
  17. Custom 72V 57Ah battery pack with Anderson connectors
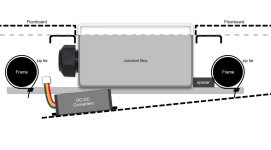
  18. Waterproof junction box with power distribution, 12V & 72V fuses, 72V circuit breakers, DC-DC converters, high-current DC contactor, Zeva smart precharger, and PowerVelocity Bluetooth module
  19. Rear stop light wing
 
so, you replaced everything then. :mrgreen:
 
flippy said:
so, you replaced everything then. :mrgreen:

Yup. Ultimately cheaper that way given that the donor bike was a bargain. And in the end I not only learned a lot, but I got exactly what I wanted.

M

P.S. I sold the original 2000W motor + controller for half of what I paid for the whole donor bike. And I have a bunch of other parts I can get a few more bucks for.
 
fechter said:
...I'm sure you'll find something else to upgrade.

Well, I'd like to repaint it -- something like Ferrari red.
And in two years I'll likely add a bigger battery and stronger BMS.
I'd also like to sculpt the seat and recover it in brown leatherette.
But high on the list will be solar panels to keep it and my electric power & yard tools powered up, eventually expanding that to run the house.

So yeah, a few more projects. Things to keep me busy during the winter months.

M
 
Now that everything is running well, it is time to start planning on improving the charging situation.

Currently I use a cheap 5A charger that takes about 8hrs to fully charge my pack. It works, but is slow. So far so good.

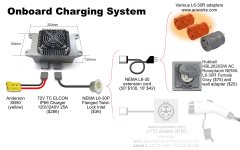
Notwithstanding, I want to have more flexibility on the road. As such, I'm starting to design a modular solution. A key being that for the foreseeable future, 90% of my charging will still be from home. But I do want to have the flexibility of charging on the road in the future. And that means having adapters for RV, Welding, and even Dryer outlets as there is no "standard" 240V plug here in the USA. Later I can worry about J1772 compatibility as there are no commercial charging stations nearby currently anyway.

Fortunately, I already have a 240V outdoor receptacle about 10m away from where I work on and store the bike. I figure I can get a 50ft 240V L6-30 "extension cord" to charge the bike until such time when I can afford to move the 240V source closer.

As such, my modular plan entails the following:

eZuma charging.v3.1600.jpg

One thing is for certain: 240V components are not cheap! :shock:
Comments, alternate sources for 240V components, and/or improvements welcomed.

Michael
 
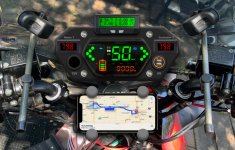
I'm not happy with the useless console that came with the bike -- not the least of which the LED turn signals are shot and not working. I'm contemplating creating something more useful. The key is having insight into the battery status as well as temperature status. For that I'm considering adding a CA V2 and some temp sensors. I've ordered the updated speedometer console from AliExpress (the bit in the center of the sketch below). When it arrives, I'll need to figure out how to mount everything so that it looks "original". But I'm likely to leverage black HDPE as a mounting panel as it is very machinable and waterproof to boot.

Curious as to your thoughts.

dashboard IMG_8517.v6.1280.jpg
 
MJSfoto1956 said:
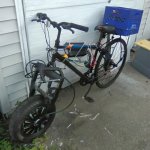
Funny thing just happened: The guy I sold the original 2000W motor + controller to just contacted me and showed me his creation:

Nice to see things being recycled, huh?

The guy who has built this deserves it what will happen with the bike when he is riding it.
 
MJSfoto1956 said:
This is good information but not exactly what I am experiencing -- basically if I move the throttle even minutely, the motor engages. And it doesn't matter where on the (cheap, Chinese, Hall) throttle curve I have the throttle. For example, I cannot do any slow-speed maneuvers. And on a bumpy roads I get the extreme on/off behavior as shown in screen video of the app. Other than this twitchiness, the overall bike performs beautifully and exceeds my expectations.

I can tell you for sure that this is not a controller issue (unless you got a defective one, but I really doubt it). Sabvoton controllers are really good at managing slow speed since they do current vectoring control, not speed control.
So either your issue comes from the throttle itself, or, more likely, a wrong setup of some parameters in the controller interface.

Also, I disagree on the fact that those controller are unreliable, I've got two of them that I use everyday for around 5 years now and they work flawlessly :)

I know you got a new controller, and APT is a really good brand (though their controllers are insanely huge and heavy), but you might want to give an other chance to the sabvoton by checking again how you set it up, especially the part regarding throttle voltages and mid current.

Anyway, kudos on your bike, that's a really neat build!
Oh, and while you're at it, don't hesitate to change that puny front brake with something beefier. It's very cheap (frando/rpm/adelin/whatever clone), easy to do, and it's a day and night kind of improvement for both safety and ride comfort. :wink:
 
Dui said:
Anyway, kudos on your bike, that's a really neat build!
Oh, and while you're at it, don't hesitate to change that puny front brake with something beefier...

Front brake upgrade is on my winter project list. The issue is whether I keep the existing mediocre forks and get a 260mm rotor + custom rim-to-rotor adapter, + caliper + matching bracket, or go for a complete set of new forks with matching brakes (which are much more expensive of course).

M

P.S. I can definitely feather with the AE96600 -- riding at 1kpm is no problem now. She drives like a dream.
 
Back
Top