New "TSDZ2 Torque Sensor Central Motor"

Retrorockit said:
Retrorockit said:
I linked to the photos in a previous post because the photo files were too large to post here.
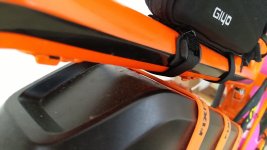
It shows a simple mod to the water bottle holes to provide a swing out battery removal using the standard bracket. I call it the switchblade mount.
https://electricbike.com/forum/filedata/fetch?id=97888&d=1575484709
By drilling and tapping 1 hole to 6x1mm thread I could use a standard automotive exhaust manifold stud with a bare section between the threads to provide a pivot, and allow one end tight in the frame, with the other adjustable for tension. Large stainless washers epoxied to the frame provide a support area for stability. I do use a strap at the front to keep it in place.

This battery was very tight fit in the smalll frame. The full size photo is on this page.
https://electricbike.com/forum/forum/main-forum/diy-discussion/82828-trek-navigator-400-igh-tsdz2-project/page3
 
casainho said:
andyme said:
Since last night I am a proud owner of 3 working OSF displays: 850C, 860C and newest arrival is SW102

The little one is really a cutie...Now my question:

Anyone who owns both 850/860 and 102: which one has become your favorite and why?
You mean you have 3 ebikes? :)

I own both but I use 860C on my ebike. I like SW102 because it is cheaper, robust and very discrete. Still, I prefer 860C because it shows the motor temperature graph and with that I can better manage max TSDZ2 support because I ride fast (like peaks of 50 km/h) as possible on the city on dangerous streets because they are narrow and with lot of cars at fast speeds. What I don't like on 860C is the fragility in the case of a fall when I do MTB (because is big)
So i just rode with the 102.. :roll: cold and gray day,, and still very tough to read..LCD quality 850 level max, probably worse plus the small numbers...difficult...this is a pity...I love the discretion of it, but some info while riding is also not bad... :confused:
 
vlvuk said:
Be careful, torque is very high and could beng/break this arm. I used aluminium profile 1mm thick and once I found it was broken and motor turned around BB.

Thanks for the tip, although I used 3mm steel plate so I think it'll be okay. I'm more concerned that something might break in the motor housing, but I guess we'll see. I will report here if a problem occurs.

Retrorockit said:
I linked to the photos in a previous post because the photo files were too large to post here.
It shows a simple mod to the water bottle holes to provide a swing out battery removal using the standard bracket.
...

Ah okay now I understood your solution, seems like a great idea! But I don't think it would work in my frame without modifying the battery case, as the topmost part has ridges on the sides which would come against the top tube. Luckily I don't need to remove the battery that often, so I can manage with it being a bit annoying.
 
andyme said:
So i just rode with the 102.. :roll: cold and gray day,, and still very tough to read..LCD quality 850 level max, probably worse plus the small numbers...difficult...this is a pity...I love the discretion of it, but some info while riding is also not bad... :confused:

Yeah that certainly is a problem with SW102. I also noticed that with polarized sunglasses I cannot see literally anything on the screen.
 
thineight said:
Hello everyone.
I just bought a Mondraker Foxy full suspension

I just stumbled over this design...maybe an inspiration for you?

https://newatlas.com/bicycles/greyp-g6-1-review-ebike/
 
ilu said:
I recently finished a build with Mondraker Factor+ which has very similar frame. I managed to fit a 14s4p battery from em3ev.com inside the triangle, although it is quite tricky to remove and put it back because of how the bracket works. Would be easier if the bracket was side-loading type. But anyway there are bottle cage screws available for mounting and I have straps for better stability.

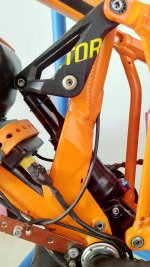
Also note that because of the rear suspension linkage, there is no space to attach the torque arm behind the bottom bracket. My solution was to use the hole in the fixing plate on non-drive-side and it seems to be working well to keep the motor from rotating.

Thanks you all for the replies.
I was investigating the chance of using a custom pack in the triangle but I also need to remove the battery for the car transport. The only option is the soft bag but I don't want to spoil the look of the bike. Also the chance to fit a sliding mechanism from a native case is a bit tricky.

Please tell me which model of case you bouhgt from em3ev.com because 14s4p is even more of what I need. For my use a 13s4p is ok.
I do not understand how you remove the battery then, looks like you can't move it forward to disengage the cradle.

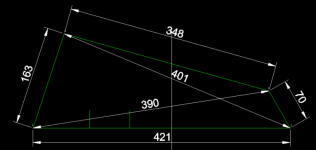
Here below my available space in the triangle, just for quick comparison with yours..

2020-06-08_235611.png

Thanks
 
andyme said:
thineight said:
Hello everyone.
I just bought a Mondraker Foxy full suspension

I just stumbled over this design...maybe an inspiration for you?

https://newatlas.com/bicycles/greyp-g6-1-review-ebike/
Unfortunately not.. this is a native design.
 
thineight said:
Please tell me which model of case you bouhgt from em3ev.com because 14s4p is even more of what I need. For my use a 13s4p is ok.
I do not understand how you remove the battery then, looks like you can't move it forward to disengage the cradle.

This is the battery I have, they do sell 13s4p battery as well but the case is the same.

There is a little it of space in the uppermost corner and I also filed 1-2mm off from the case, the fitting is actually so tight that the couple of mm makes all the difference wether I can remove the battery or not, first I had to remove the rear shock bolt to fit the battery in place. I also turned the rear shock upside down from the original build, that also gave a little bit more space. And removing the battery is quite a complex motion of pushing it forward, then tilting and finally twisting to the side.

factor3.jpg

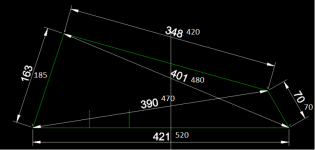
It seems that your frame is way smaller, what size is it? Mine is L. I put my rough measurements next to yours in the image. It seems that similar case will definetely not fit your frame :/

frame.png
 
ilu said:
thineight said:
Please tell me which model of case you bouhgt from em3ev.com because 14s4p is even more of what I need. For my use a 13s4p is ok.
I do not understand how you remove the battery then, looks like you can't move it forward to disengage the cradle.

This is the battery I have, they do sell 13s4p battery as well but the case is the same.

There is a little it of space in the uppermost corner and I also filed 1-2mm off from the case, the fitting is actually so tight that the couple of mm makes all the difference wether I can remove the battery or not, first I had to remove the rear shock bolt to fit the battery in place. I also turned the rear shock upside down from the original build, that also gave a little bit more space. And removing the battery is quite a complex motion of pushing it forward, then tilting and finally twisting to the side.

factor3.jpg

It seems that your frame is way smaller, what size is it? Mine is L. I put my rough measurements next to yours in the image. It seems that similar case will definetely not fit your frame :/

frame.png

Thanks for the info.
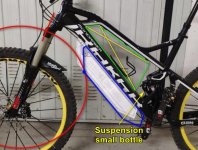
My frame is L too. Just for clarity, my available area is calculated on the free trapezoid between the frame and the suspension, not the space between the metal frame, see the pict below for reference.
2020-06-09_135516.jpg

I can see you do not have the small suspension bottle protruding out towards the front of the bike, or maybe you placed it on the other side while reversing the suspension?

As per my CAD trials (even if i do not have the drg of the case), the 13S4P hailong case is not fitting by millimiters.. so every small detail can be a game changer here.

But definitely yours is the closest solution to my case.. alternative is a custom pack (need to understand how to make it removable) or a hailong underneath the downtube.. plus black straps and proper protection layer.

Just for you consideration about the anti rotation bracket: a friend with a Mondraker Crafty made a braket to the holes for the chain guide fixing that are located below on the drive side. So the motor fix hole and the frame fix hole are both at the same (right) side. Your solution looks is a bit... apollo 13 style :wink:
 
Retrorockit said:
I linked to the photos in a previous post because the photo files were too large to post here.
It shows a simple mod to the water bottle holes to provide a swing out battery removal using the standard bracket.
...

Ah okay now I understood your solution, seems like a great idea! But I don't think it would work in my frame without modifying the battery case, as the topmost part has ridges on the sides which would come against the top tube. Luckily I don't need to remove the battery that often, so I can manage with it being a bit annoying.
[/quote]

You are correct about the ridges. I think we have the same battery. Mine touches the ridges when I swing it in and out, but the battery doesn't touch anywhere when installed. But it's a very different frame than yours, so maybe not right for your situation.
 
thineight said:
I can see you do not have the small suspension bottle protruding out towards the front of the bike, or maybe you placed it on the other side while reversing the suspension?

As per my CAD trials (even if i do not have the drg of the case), the 13S4P hailong case is not fitting by millimiters.. so every small detail can be a game changer here.

But definitely yours is the closest solution to my case.. alternative is a custom pack (need to understand how to make it removable) or a hailong underneath the downtube.. plus black straps and proper protection layer.

Just for you consideration about the anti rotation bracket: a friend with a Mondraker Crafty made a braket to the holes for the chain guide fixing that are located below on the drive side. So the motor fix hole and the frame fix hole are both at the same (right) side. Your solution looks is a bit... apollo 13 style :wink:

Okay yeah I was measuring the dimensions inside the frame, so the dimensions of the trapezoid as in your pic are pretty much the same.

factor4.jpg

My rear shock is more basic Fox DPS Performance, which has no extetnal damping chamber and thus it's possible to reverse, your shock might not have enough space for that. As you can see from the pic above, the shape of the battery case with the slim shock head brings about 1cm more space lenghtwise.

factor5.jpg

In my frame there's no chain guide mounts, and behind the BB there isn't really any stable point to which mount the motor. Of course I could make my bracket a bit prettier, but I think it's okay for a DIY project to look DIY :)

factor6.jpg
 
thineight said:
Thanks for the info.
My frame is L too. Just for clarity, my available area is calculated on the free trapezoid between the frame and the suspension, not the space between the metal frame, see the pict below for reference.

According your sketch you will newer have touching wheel to battery case if you place it under bottom bar.
If you don't use bike for agressive downhill it is simpliest and cheapest solution.
BTW, I recomment fix battery case to frame by worm drive clamps.
7YVkhJfvWziNbauH43CLCpRdrd4KbtvEJwP9b7ZAA5QFDTKfuGuDxghPO0mn5LqEbOcCudBFMjmwFBoFR-h4iAW6Iwu26sKx3IVgOO7oAQqvj4OQ5eV9m_M2WtiJCHgUJxwQU2K1QZUjIhz6qUSoEPI-eafpYn_X3T97LOJR-DU0SlGQfjbs7C06NToWpqhYqV4UcRC3ZxjS4RfdHdpJjRkzFzeXHzPRScWHKWGO3n2NUAHN7gbkcrWB9ck_sgzBfdmjaZ42AVcxwHMfH9nbOQuL-5YPMY6yttxP35wsfkxtyQFHv9HFT0UrHenoqDMNhy06AqbPu0Oha1FtyDzsxjJSUB4GM98UjfpzlB2Qhl9gRO455cEYxZPd_RMeAlAczcwoNw8Tx7G8voH2NdLjJojnArfxGoFAm0EY7WM3I-m1KRPeuDlCHs1MvcQiX-oxDjaNXCHeqZ8qWSIFQYTZ3Jngo_RN0wqVsGXEzndSw4WFaaNOxLEpRx2bH7p8t9o3MmIqshxRLhiDn1Qe8JTMKvzdwAfrqVVggIJDfMSEbui4WmyEfzuRut1gsO-pvx0Vh09kCLSAZHZWFY-AGrw7L9OWatNJ1tFZg6XzZIwMMZ-in2LNJJCh4W641IzDqiDl3uHD0RfFJYA0rlanQZjt9K5BRaJ2j9StF_hi3cjgn0hz4OzO7suxk4YBo9KVhKk=w703-h937-no


LrRtsaXMOw0-j6HAVf_q2vDTV6mF6VU2huH6VZa2DzMnfzUt8jas9UmhTzbx6i8S4rVFRm6YS1DL-iChSxtkVrx9dSIpAd3NKn1UOymWnBTG54AdCFBcuY4XZd6sRhqmyTiUaoAeRgDVHZ8Q0qHcsSTIiWAKvv5iCRXRvW86nEDZ7HOAA0gx3NHN4vq6ZEu7p1hxMCxYG6Q_jtI8xi9jYpz19O9q8Y_CwavVHntriyzXP5y0r8IOKkTgNf3gk5YBxXhkLohZy3doTrTxqVGKdq0OPzFi9ZicLw6H-G0z4sTCKJTgrb-M0aOfNxFq0gYvIy5UUU7444OqL2VS5TyX21L1VXdFbXdDer1S4fiyfIBsur4Tt5xzPtYjutFbgpgMk91-btzHWMLRS_lIMGeMcXa9kJyCO-4wr63rGhV2m4U4TZtYBamfOtTsGa-XseMjR_lSxFXMDhC_FjAdq9zOfxy1vd3Pw6N_LehQuIz7nfmOSSCSwBOiBAf018ixAwo0bWCL8QsjC133P4JNO3xcZLjE7563TQ7dIDV_jC_7DGm1ihjeuUJZRYIS1T89PTUw3JhRWxLS7UF7z-9fONFimLRwQDRB8Joe6ahcan8E4pSphfCH1h2VsIjPweaJ6aNAim3nZv-dwbH4Ww1oHWF5xY-k95v75KyOWqnNogjs-4JIG_WU5oftHKqlp694TEA=w703-h937-no
 
Regarding putting the battery under the frame. Most forks have a plastic travel stop inside the spring on one side. A piece of plastic (Nylon?) rod stuck down in there could lose a few mm of travel if needed to keep from locking up the wheel and causing an OTB situation.
This would not change the ride height or geometry like removing travel by using shorter springs, which would not help with this.
 
Hi. I posted this question in the thread for the stock display OSF, but figured it is maybe better place in this thread, as it is a general question, and not firmware related.

Regarding the hardware calibration method that is described in the Wiki, what exactly do you calibrate when you perform this method? The scale of the sensor? I have 2 bikes with the tsdz2, and on my main bike the difference between right and left pedal is big. Its not a problem when I'm up to a certain speed, it is the force that is needed on the pedal to get assistance from standstill that is a little annoying. I have tuned hat when I push the right side pedal really hard, it starts the assistance. That makes the left side so that I can barely rest my foot on the pedal without the assistance starts. It is a little annoying in the technical trails when trying to get up on the bike, it is not always possible to start with the left foot.

If it wasnt for my other bike which is damn close to perfect, I would have just thought you get what you pay for (this motor is really cheap for what it is capable of after all). If it is an easy way to fix it, I figured it was worth a shot. I tried to read the wiki, but I'm not sure if hardware calibration of the sensor would help this issued with the pedals being so different?
 
I think there is a setting for the assist to have a delay of several degress rotation. A lot of times this gets turned to 0. That is what it's there for. To keep the motor off when resting your foot on the pedal. I haven't used the OSF yet myself, but I think that's the setting you need to change.
 
Retrorockit said:
I think there is a setting for the assist to have a delay of several degress rotation. A lot of times this gets turned to 0. That is what it's there for. To keep the motor off when resting your foot on the pedal. I haven't used the OSF yet myself, but I think that's the setting you need to change.

Well, yes Im aware of the setting. Its the huge variance of left and right pedal that is my "problem". My other bike is close to perfect, so I was just wondering if this is what you adjust when you open up the motor and adjust the torque sensor manually.
 
Finished today my new build, it´s a Mondraker Foxy R 2010, size L

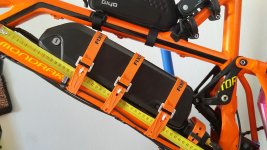
Battery is super tight to fit inside the frame, have to remove the base and cut a litle bit in the front of the battery and sealed it with black silicone.

Made a L shaped bracket fixed to one of the water bottle holes, and fixed the battery with stainless steel hose clamps wrapped with black duck tape.


It sits super tight, doesn´t move 1 mm, i´m pretty happy with the result, unfortunately it isn´t easily removable.
 
The bulge at the front of the top tube looks like it was made for the battery. It looks nice and organic. I think you were lucky to get it in there at all. I suppose you just charge it on the bike?
 
ilu said:
My rear shock is more basic Fox DPS Performance, which has no extetnal damping chamber and thus it's possible to reverse, your shock might not have enough space for that. As you can see from the pic above, the shape of the battery case with the slim shock head brings about 1cm more space lenghtwise.

It's a pity that your bike does not have the two fixing screws underneath, that is a nice holding point for the motor.

I think I will go for a battery underneath the down tube.. it is quite difficult to fit a custom battery inside the frame with the possibility to remove it.

I see the new hailong case can house in 9cm height 56 cells instead of 52 as the previous model. This means I could fit a 52v battery (14S4P) instead of 48v (13S4P).
I also read that, unfortunately, the 52v is really close to the controller components (e.g. 63v condenser) limit and is is reasonably probable to fry the controller. What do you think about it?
Is it better to stick to a 48v battery?
Thanks
 
bjorsa said:
I ordered assymetrical Delta-0 crank arms from Miranda. For my tourer (with fat chainstays), the right arm adds zero q, the left 16mm.
Are you happy with your Miranda crank arms? Bolts shipped with Miranda cranks are also compatible? Thank you,
 
Retrorockit said:
The bulge at the front of the top tube looks like it was made for the battery. It looks nice and organic. I think you were lucky to get it in there at all. I suppose you just charge it on the bike?
Yes, I charge the battery on the bike, too much work to unscrew the clamps everytime it needs juice.


sp1n4d0 said:
Retrorockit said:
The bulge at the front of the top tube looks like it was made for the battery. It looks nice and organic. I think you were lucky to get it in there at all. I suppose you just charge it on the bike?
Yes, I charge the battery on the bike, too much work to unscrew the clamps everytime it needs juice.
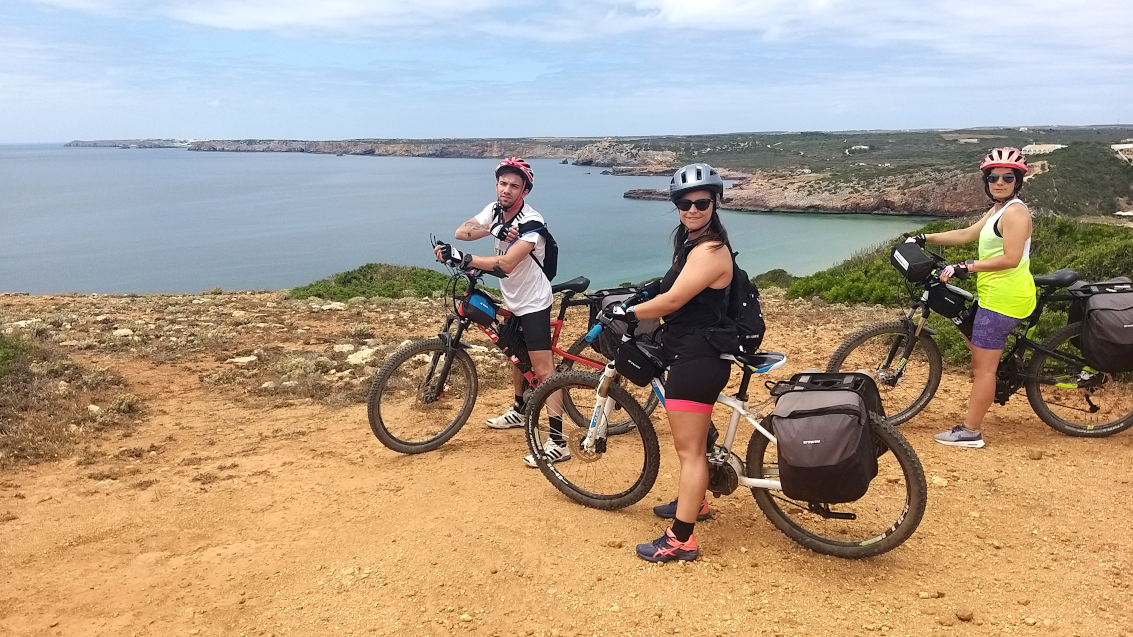
Why not developing a 3D print base for battery pack that can be easily attached to bike frames and make a battery quick and easily removable? I am not a mechanic but I think could be possible and would bring a lot of value. I have 4 TSDZ2 ebikes and recently I did a trip of 5 days with family and friends, 3 TSDZ2 ebikes and 1 commercial with Bosch battery - this one was good because was easy removable to charge on the places we slept: would be great to have a similar solution to TSDZ2!! Any mechanical user able to design / develop a 3D print base?

image.png


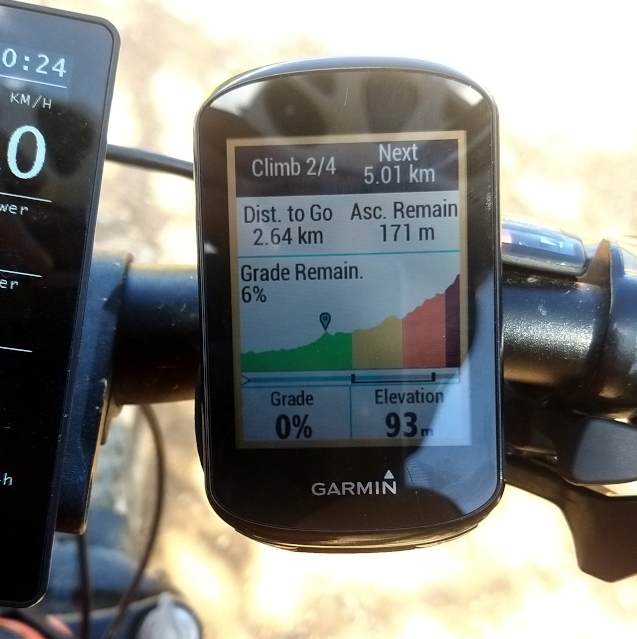
My current project is to remove the 860C display from the handle bar and use a Garmin instead, which have advanced features like in advance identification of climbs:

image.png
 
Hi - looking at getting a TSDZ2 for my 29er to ease my winter commute.

I've tried a 36v 250w Shimano motor and that provided me with more than enough assistance during the commute.

I should be fine with getting the 48v 250w (road legal) version with something like 48V 11.4Ah Samsung 29E battery? My commute is around 20km each day.

I've been trying to read regarding the cadance - during my commute my cadance is usually around 95-100 rpm. Is this a problem?
 
chickenflex said:
I've been trying to read regarding the cadance - during my commute my cadance is usually around 95-100 rpm. Is this a problem?
Not a problem with our developed OpenSource firmware where the max cadence limit is 120 RPM. The original firmware will not work for you, only our firmware: https://github.com/OpenSource-EBike-firmware/TSDZ2_wiki/wiki
 
andrewgateway said:
What grease did you use for the new blue gear?


Sent from my iPad using Tapatalk Pro

Sorry for the delay! I just used general automotive grease - I can't remember exactly which one, probably valvoline.
 
Back
Top