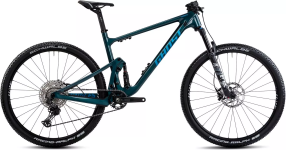
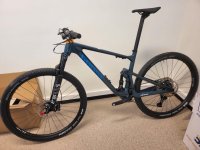
Ok, I had time to assemble my bike. It took five hours, not including cleaning up afterwards. I started at 18.00h.l, directly after work.
Removing the rear wheel
I started with the motor. I put my bike upside down. I removed the rear wheel from the frame. I removed the outer and inner tires from the wheel. I removed the brake disc from the wheel.
Preparing the motorized rear wheel
I put the inner and outer tube onto the rim and inflated to 2.5 bar. I added the two disc brake spacers and added the original brake onto the motor, taking care of the motor wires. Then I assembled the torque arm onto the motor, ensuring gentle fit with those delicate screws. On the other side of the motor, I added the rear gearset. I added the two extension pieces that allows the motor to be fit within a 148mm rear through axle frame.
Fitting the motorized wheel in the frame
I loosened the disc brake screws, so the brake calipers could move freely. With the bike still upside down, I gently put the wheel inside the frame, taking care that the brake disc was not pulled to one direction. I ensured that the torque arm was positioned close to the horizontal frame tube. I then inserted the through axle pin and fixated the rear wheel appropriately. Then I fixated the torque arm to the frame. It is important to note that there is very little room left between my 160 mm brake disc and the fixation plate of the torque arm. I then turned the bike and put it back on its wheels again.
Fitting the battery pack to the frame.
Ok, I made an important mistake here. I had measured the space within the triangle, and the very large 52V battery pack should fit exactly. Well, when I put the pack inside the triangle, it did fit, but I would never be able to remove the battery pack from the bike to charge it. I had not counted for the fact that you need at least two cm up front and another 2 cm on top in order to remove the battery from its saddle. Fortunately, the battery pack fits on top of the upper tube, but it doesn't look as beautiful as I had planned for. In the near future, I will order a smaller 52V battery pack, because that will fit within the triangle, and probably rearrange the wires so I can bring the large pack in a saddle bag too, for super extended range when I feel like it and have the time.

This experimentation while finding out the best place for the batterypack in an empirical way (i.e. trial and error) cost me an hour. In the end, I fixated the TripleBob to the top tube using the metal zip ties. It is very important to cover these metal zip ties with the accompanying shrink tube, to protect the paint of your frame. The three metal zip ties are extremely strong and make a really trustworthy fixation of your heavy battery pack to the frame. As this is a carbon frame, I really would not want ro rely on only the two screws that thread directly onto the frame to keep your heavy pack in place.
Fitting the Phaserunner controller to the frame
The Phaserunner fit very nicely between my saddle tube and the rear wheel The two provided zip ties are sufficient, but the close proximity of the base of the battery pack and the Phaserunner means you have to take care how to position your wiring.
Fitting the CA
I really like my CA as central piece in my cockpit. While reassembling the head, I also fitted the front light. As I wanted to connect not only the front and rear lights, but also my phone charger to the CA, I had also ordered the three way splitter. Saves time soldering...
Fitting the gas handle
I had ordered the right half turn gas handle. It is important to position it in such a way that during rain, water can drip out of it via the hole, as you probably do not want full power all the time.... Taking care that switching gears and braking is not affected by the place of the gas handle is of course obligatory.
Connecting the circuit
I first connected the motor to the CA. Then I connected the gashandle to the CA, and the battery-pack to the CA. I put the bike on a stand so the rear wheel could turn freely. Ensure that the pedals can move freely as well, which might mean that you may need to temporarily fixate some of the dangling wires, too. Then I turned on the battery power.
Testing the motor
This was really easy. Ensure the rear wheel could turn freely. Then turn on battery power. Check what the CA tells you. It told me that the battery was charged for about 50%. I gently turned the gas handle, and the wheel started spinning in the right direction. The brake disc was touching the brake shoes, so I had to adjust the brake slightly. And that was it.
Tidying the bike
Attaching the rear light, and guiding all the wires was time consuming but easy. I did not yet use the cable guides that I also had ordered, because I want to ride the bike first for some time and see if it needs any changes (like the smaller battery).
Testing the bike
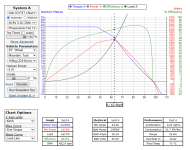
It was 23.00h when I took the bike for a ride. Acceleration was mediocre, in the current settings I can get maximally 1600W. This is something I still need to figure out, how to get maximum power out of it. Topspeed was 53 km/h, not too bad considering i just put it together.
Conclusion & next steps
Loved building it! Loved riding it!
The next month will consist of testing and tweaking. Grin put together a motor/controller/battery package that, with some experience, can be put together in one evening. Hats off for them!
Let me know any questions or comments.....

).


