Hi everybody, and thank you to mbrusa and all the contributors of this wonderful OSFirmware.
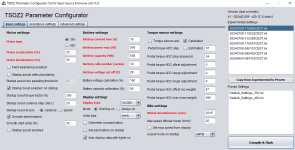
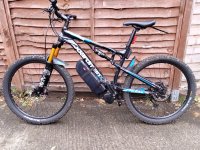
I am new to this forum and just installed 2 bikes with 36V TSDZ2B motors, 8 pins VLCD5 and 36V 25Ah batteries. I managed to flash (after some cable and STLink dongle-related tribulations...) the 1.20.1C.2-update-3 version of mbrusa firmware.
So far, so good and we appreciate a lot riding with this configuration, in Hybrid Mode for now.
My concern is now a thermal one : I understood that cooling the motor is almost necessary, and I plan to buy this
cooling kit for that purpose, a
little test showing the benefits of it.
I know that I should also add a temperature sensor, but i want to keep the throttle for now, and i know I cannot have both...
So my idea is to keep the throttle (as suggested inside
this video) and to add a "thermal security switch" to the motor, (like
this one, the KSD9700) connected to the brake sensor line.
When the switch becomes ON, at 85°C, it will ground the Brake sensor line (which is active low) and that should stop the motor.
So my question is : does anyone here have some experience with this technique ? Is there any better thermal switch that I should consider for that ?
And finally, putting the brake sensor line directly to ground through this switch, seems to me a little risky, because some TTL outputs may already be connected to it, making their current flow directly to ground ! Should I better use an 1K resistor to do that ?
By advance thank for your remarks and comments !