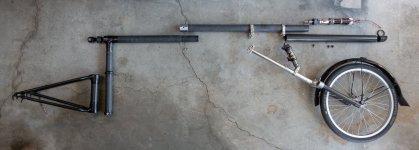
The Tilt-o-matic 2.1 trailer body is nearly ready for its first road test. I've removed the u-joint and replaced it with modified Bob trailer mounting hardware. This seemed like good timing to post a few notes on working with carbon fiber.
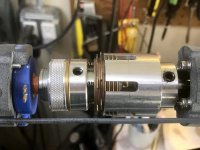
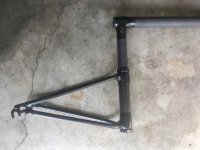
The axle dropouts and smaller tubing on the left are original steel components made by
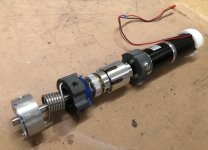
Bob. I cut off the original 1" (25mm) steel tube vertical pivot and replaced it with carbon fiber tubing with 1.625-1.85" diameter (41-47mm). The two black rings are Delrin (acetal plastic) acting as thrust bushings.
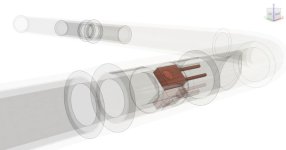
The trailer body is made of 3 different sizes of carbon fiber tubing. They are sized to fit into each other. The gap size between the tubes is designed to fit either UHMW tape to create a low friction sliding/rotating joint or it can be bonded with epoxy to increase wall thickness as needed, such as where the tube has additional stress from mechanical connections.
View attachment 16
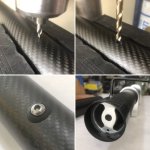
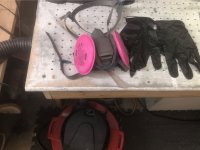
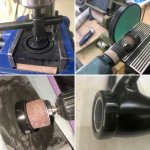
If you're thinking about working with carbon fiber, take Personal Protective Equipment (PPE) seriously. Your body doesn't know what do with this stuff when it's embedded in your skin or your lungs. I always wear gloves and a respirator when cutting or sanding. The holes in the tabletop shown here are connected to a shop vac to create a makeshift downdraft table. I also wear closed shoes, pants, long sleeves and head covering which are only used in the workshop to avoid contaminating my living space with carbon fiber dust and particles.
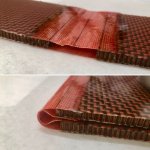
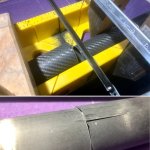
Cutting this stuff is very hard on tools. If you want clean cuts, consider a dedicated hacksaw blade such as this
Park Tool Carbon Cutting Saw Blade. Tear-out can happen even with the right blade. The lower photo is a special insert ferrule without the woven fabric outer layer so it's more susceptible to this problem.
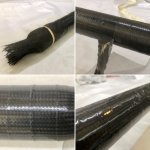
I reinforced the trailer's main horizontal tube with two layers of axially wound carbon fiber braid. One layer probably would have been sufficient but after seeing the importance of torsional stiffness on this kind of trailer geometry I decided to double up. I wound vinyl electrical tape (sticky side out) around the tube to squeeze out excess epoxy and trapped air. It distorted the weave of the fabric a little which is not ideal for optimal strength. Next time, I would probably use vacuum bagging.
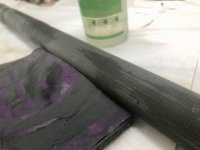
I added an extra coat of epoxy and wet-sanded. The black color on the sand paper shows that I sanded too far down and abraded away some of the carbon which is a bad idea as it creates weak spots but I figured I've got a little leeway here with my extra layer.
Where the wheel and suspension attach to the main boom with aluminum brackets, I added an additional layer of fiberglass and used vacuum bagging materials and heat shrink tape to compress the fibers and bleed away the extra epoxy with much better results. The fiberglass layer is necessary to avoid galvanic corrosion of aluminum. Unlike fiberglass, carbon fiber is an electrical conductor and direct contact with aluminum in the presence of water will result in electrochemical corrosion, quickly consuming the aluminum.
View attachment 3
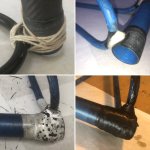
To attach the steel Bob fork to the carbon fiber, I used a carbon fiber wrap joint. I did a dry run with string to visualize the wrapping process, see where the gaps would be and to confirm that the fibers would be oriented correctly relative to the forces on the joint. The white fillet material is epoxy thickened with Cab-o-sil (fumed silica) and microspheres to make a thick paste and to ease sanding. The white tape is vinyl electrical tape perforated with a pin. The last photo is freshly cured epoxy before sanding.
Here's the jig I made to wet out the 24k carbon fiber tow with epoxy. This is the "yarn" used to weave carbon fiber cloth.
View attachment 11
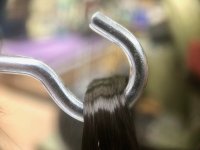
Here's a closeup of the tow. There are 24,000 individual fibers in this bundle.
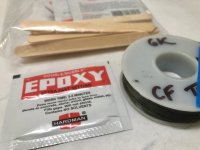
My field repair kit includes a small spool of 6k carbon fiber tow and small packets of epoxy for making minor repairs.
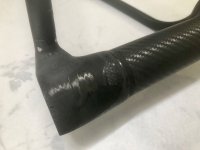
Here's the joint after sanding and fairing. It came out much nicer than I expected.
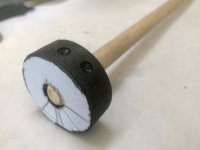
I cut Delrin rings out of 5/8" (16mm) plate using a heavy duty circle cutter on my drill press then sanded and polished.
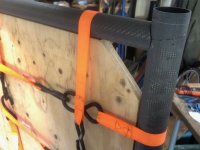
For the 90° joint at the top where two carbon fibers tubes come together, I improvised a jig to hold them in the proper orientation.
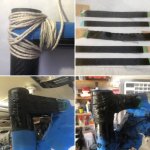
The string wrap showed that the fiber orientation was not matching up well with the forces which will be acting on it so I prepared some strips of unidirectional carbon fiber fabric and used them for the bulk of the reinforcement with CF tow wrapped over the top for good measure.
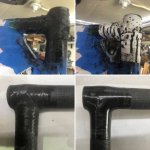
I kind of like the look of this joint so I think I might leave it clear with just a UV top coat.
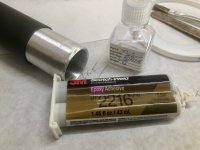
Here's what I'm using to bond carbon fiber to aluminum. This 3M epoxy is crazy expensive compared to most of the other adhesives I use but it's designed to bond well to aluminum and remains flexible down to cryogenic temperatures. The flexibility is critical because aluminum has a high thermal expansion coefficient and carbon fiber has a near zero coefficient (it's actually negative). A bond line controller made of tiny glass beads must be mixed into the epoxy to achieve the optimal gap size between the two surfaces. This gives us concentric alignment between the parts, optimal mechanical bond strength and minimizes galvanic corrosion. Rock West Composites has a
good video on this.
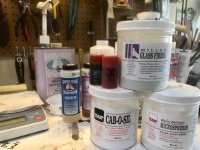
Finally, a few useful additives I keep on hand. These can be mixed into epoxy to change its properties to fit the job at hand: pigment to change color, glass fibers to make stronger filets, cab-o-sil to thicken for fairing, microspheres to reduce weight and ease sanding.
