
If your running on a 10s pack I would avoid and breaking it down to charge and use a 3010b icharger, this can be set to bulk or balance charge as required and also allow you to set the termination voltage a little lower if you wish to as well as measure cell internal resistance and give you a readout of all the cell voltages etc. A very good solution for a 10s pack.
You are using an out of date browser. It may not display this or other websites correctly.
You should upgrade or use an alternative browser.
You should upgrade or use an alternative browser.
my electric vehicle project so far advise would be nice
- Thread starter phillmoorewot
- Start date
phillmoorewot
10 mW
Tench said:If your running on a 10s pack I would avoid and breaking it down to charge and use a 3010b icharger, this can be set to bulk or balance charge as required and also allow you to set the termination voltage a little lower if you wish to as well as measure cell internal resistance and give you a readout of all the cell voltages etc. A very good solution for a 10s pack.
Ah brilliant that charger will be perfect I'll replace the other charger with this for when I buy the lot etc thank you....those extra features including the lower termination voltage will help me keep the battery's healthy for longer

Tho would this power supply work well with that charger http://www.hobbyking.co.uk/hobbyking/store/uh_viewItem.asp?idproduct=56458
Or would it limit it to the 500w setting? Instead of the 1000w an would that matter? :lol:
phillmoorewot
10 mW
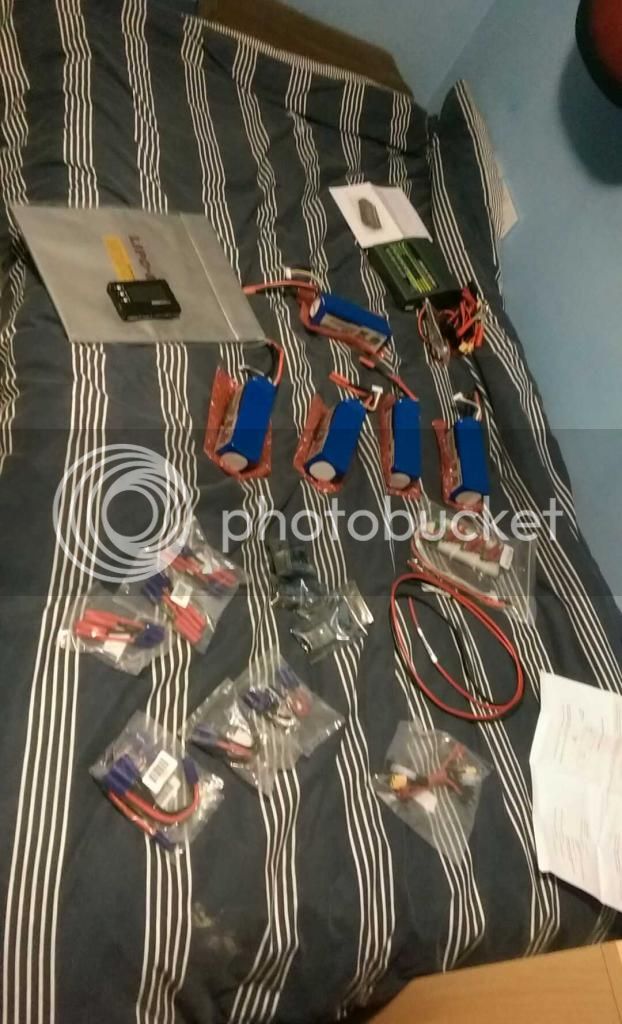
right I've made another list of what i think ill need for making a 10s pack, monitoring it an charging it etc .....an i tried to use the public wishlist link but it keeps saying that it's empty so i took a screenshot instead
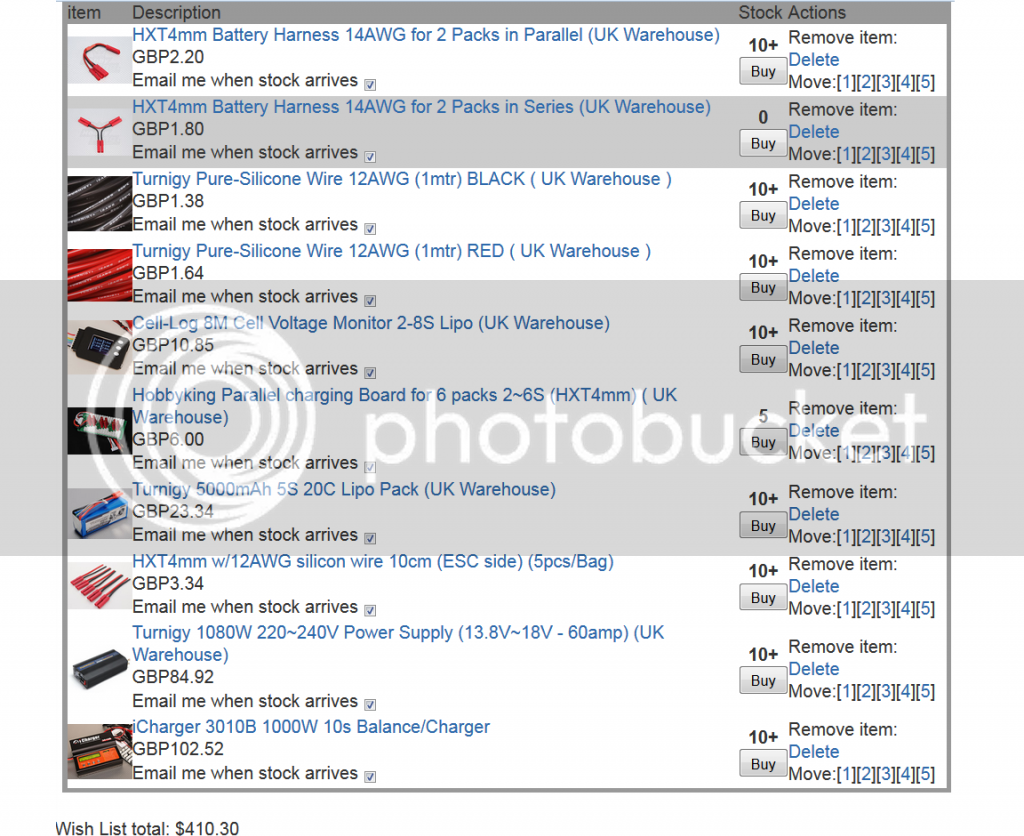
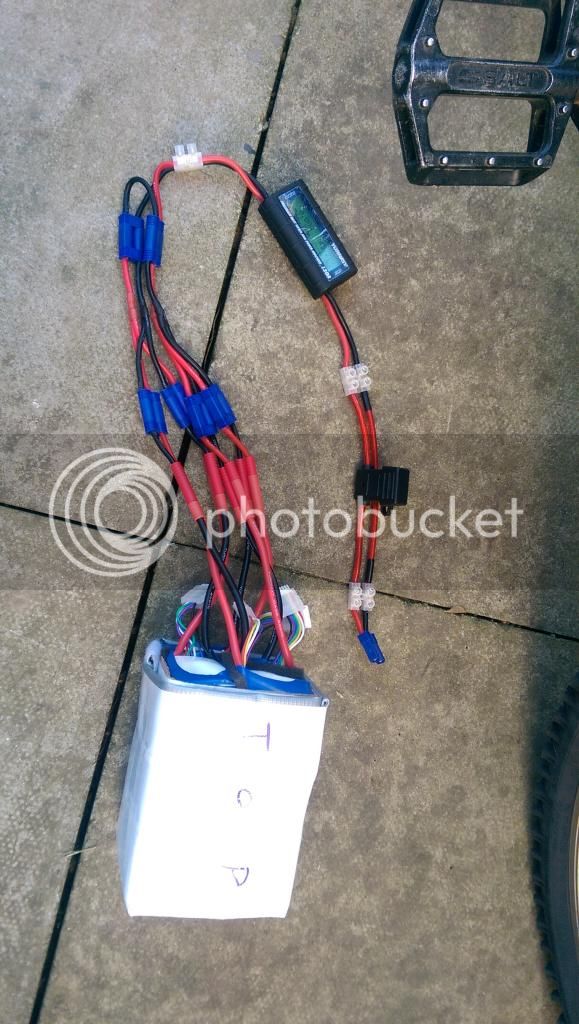
ill be getting 4 battery packs, 2 parallel connectors an 2 series's connectors to make the 10s1p - 10ah pack an also 2 cell log monitors ( the extra wire an esc connectors is to replace the wire between my battery bag an the controller bag on the bike )
and im thinking of getting this bestech bms for keeping the pack in one piece when built http://bestechpower.com/37v10spcmbmspcbforli-ionli-polymerbatterypack/PCB-D167.html
have i missed anything ?
ill have made my torque arms before I've bought all this so the bike should be able to take the extra power an also bought some disc brakes so i can actually stop :lol:
Ykick
1 GW
With regard to the bestech BMS be aware that you can use a higher cell count board merely leave the + upper sense wires disconnected. In fact, if you compare dimensions and photos of the 10S-20S boards they're identical. The only difference, if any, may be the sense wire connectors installed on the board?
If there's little or no difference in price + shipping between 10S-20S why not go for 20S D167 so you're good in the event you evolve to a bigger/faster pack?
Please be aware, no discussion of the Bestech BMS would be quite right without a shout of THANKS to forum member dnum for discovering and sharing these fine little circuits.
phillmoorewot
10 mW
Ykick said:With regard to the bestech BMS be aware that you can use a higher cell count board merely leave the + upper sense wires disconnected. In fact, if you compare dimensions and photos of the 10S-20S boards they're identical. The only difference, if any, may be the sense wire connectors installed on the board?
If there's little or no difference in price + shipping between 10S-20S why not go for 20S D167 so you're good in the event you evolve to a bigger/faster pack?
Please be aware, no discussion of the Bestech BMS would be quite right without a shout of THANKS to forum member dnum for discovering and sharing these fine little circuits.
ah now that's what i was hoping for but wasn't sure from reading the specs on the site so a 20s it'll be then thank you for letting me know as an upgrade later on will most probably happen :lol:
most certainly a big Thank You very much to dnum for finding such a wonderful piece of circuitry an for sharing with the community 8) :wink:
phillmoorewot
10 mW
hello again got a few more updates to my project so far:
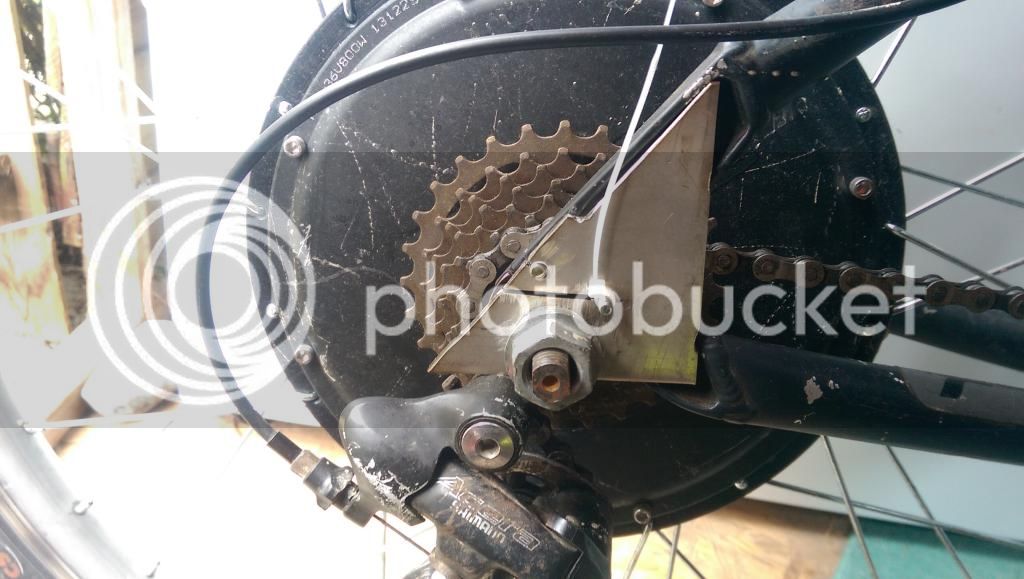
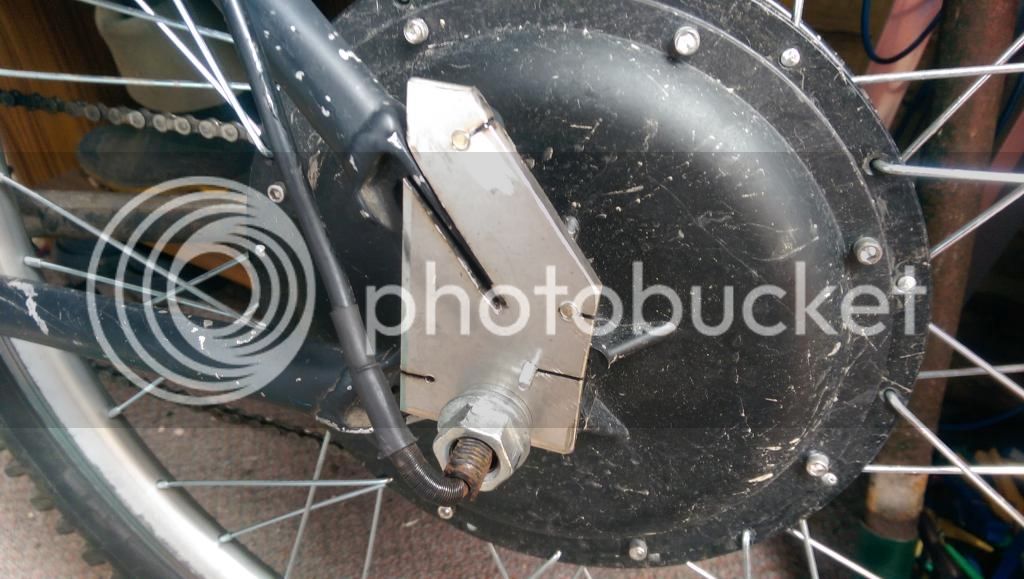
well the inevitable happened the motor has warped the rear dropouts i knew it was coming an was checking them before an after each ride so luckily haven't had a run away wheel :lol: an i was most of the way through making my torque arms when i noticed the dropouts starting to warp with my digital vernier caliper by a few millimeters so i stopped using my bike an finished making my torque arms
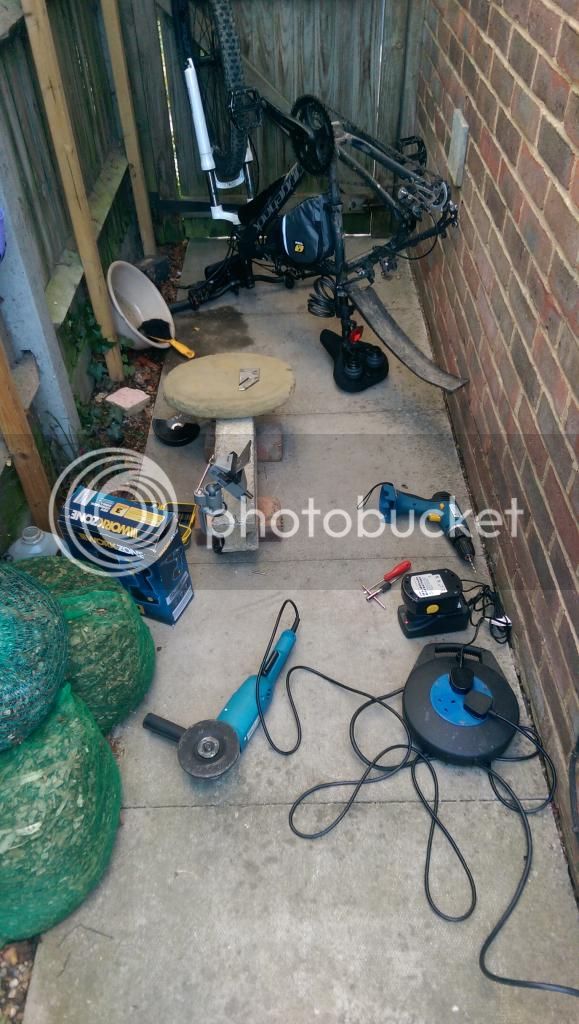
my lovely work area :lol:
half way through making with the plastic templates

an the finished torque arms fitted
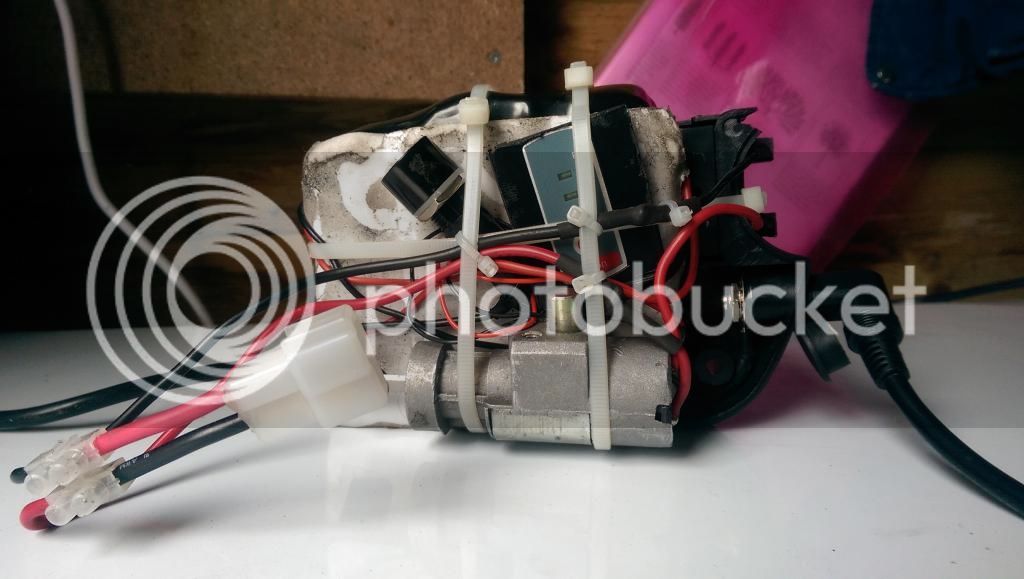
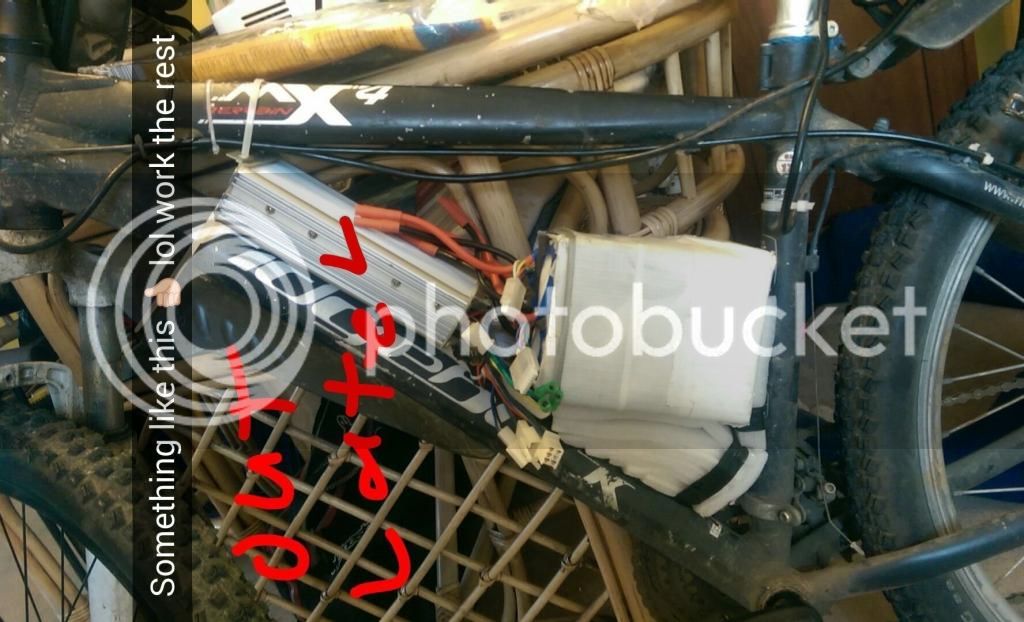
an ive opened my controller to check if its able to deal with a 12s rather than 10s battery for when i make my own pack
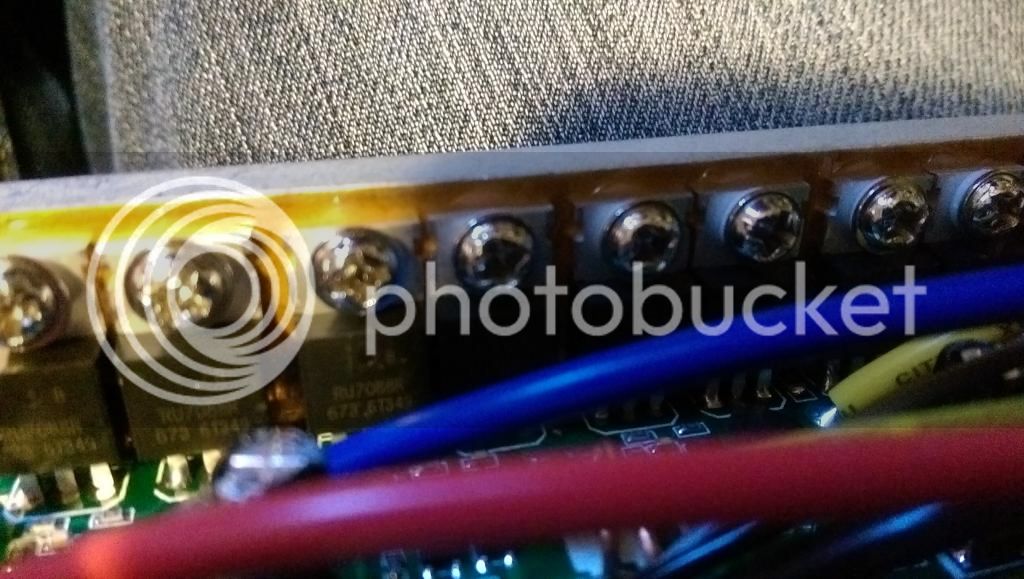
i believe its a 12fet
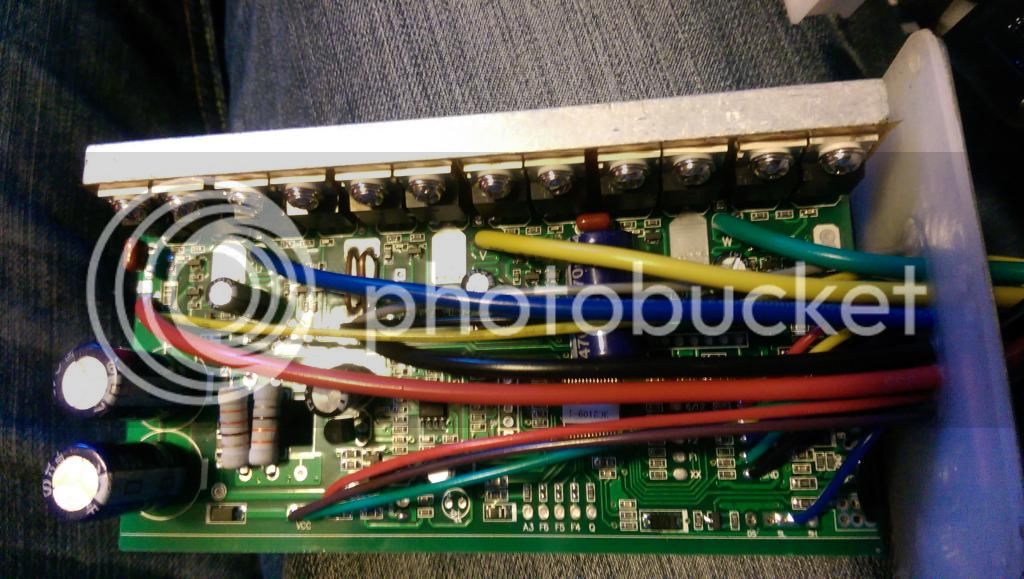
with ru7088r fets (couldn't get the camera to focus properly)
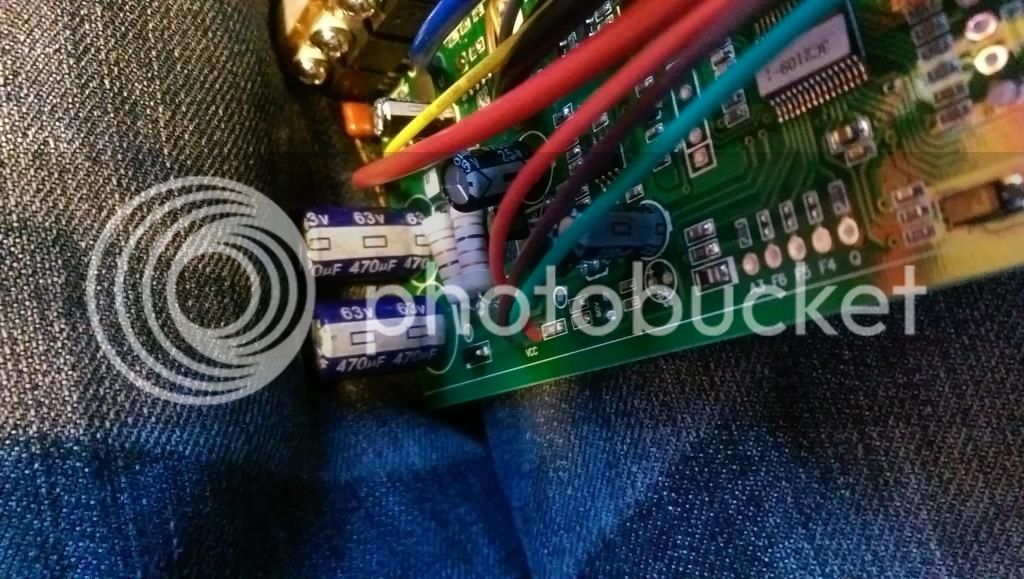
an 63v caps so could take up to 15s i believe
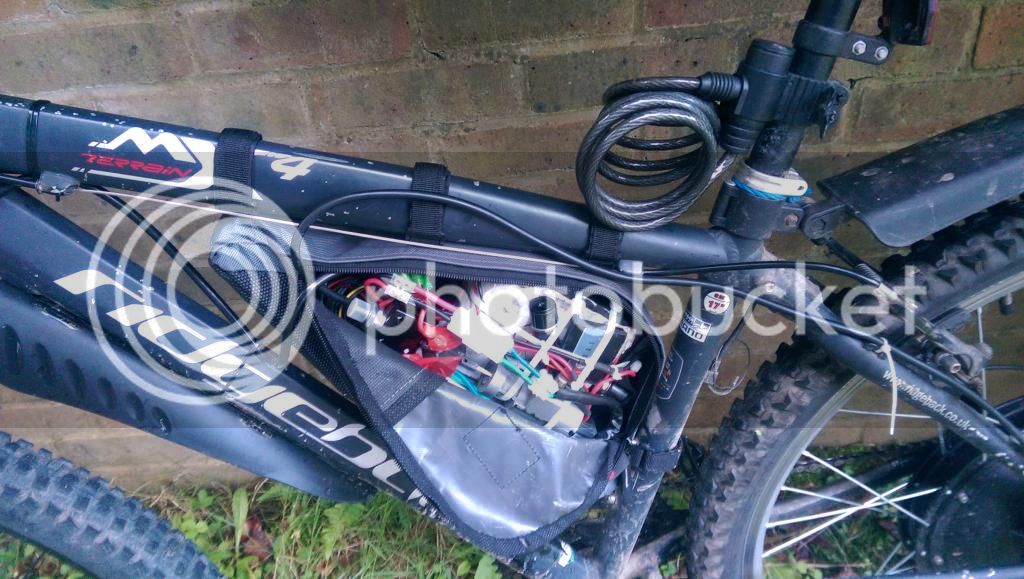
ive also bought an fitted a small waterproof triangle bag for my controller an 'tiny' battery
the 'tiny' battery which i need to replace asap as it dieing
an my trip switch which is limiting my amp draw to 10amp atm to help prolong my battery life

unfortunately the connections cant deal with the amps an is slowly melting the plastic

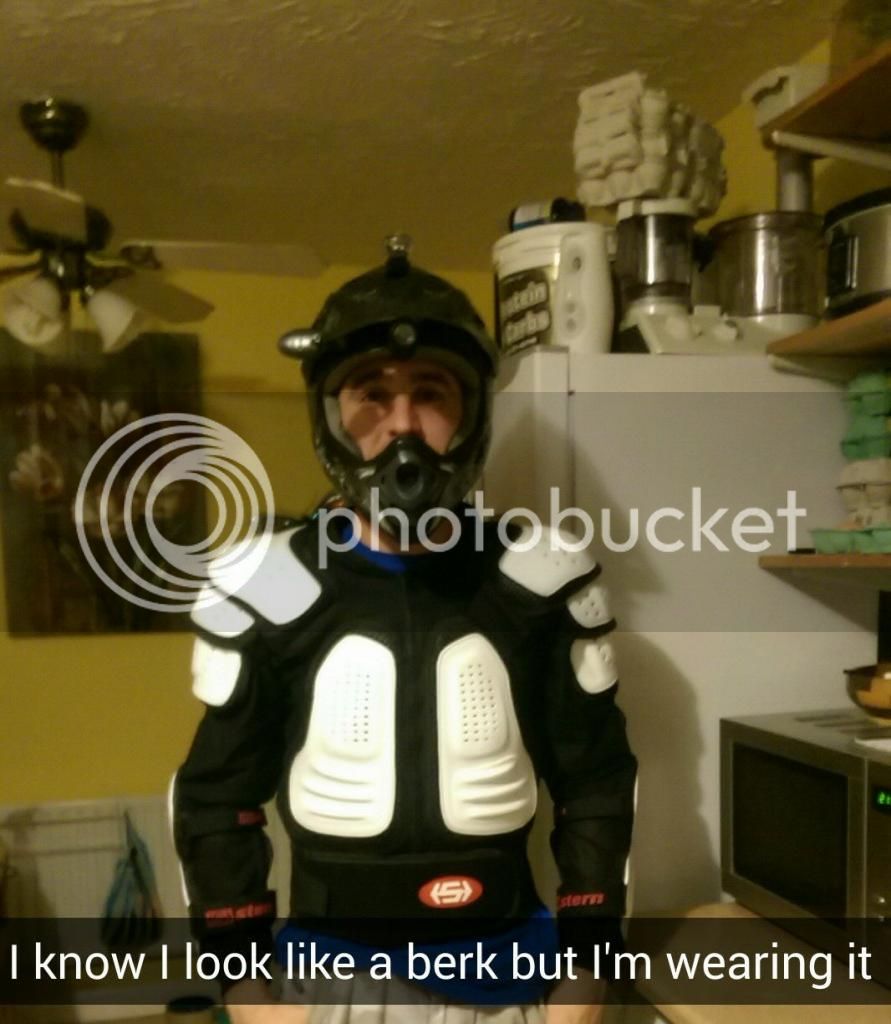
and my new armour as ive had too many close calls with vans an cars trying to knock me off my bike an cutting me up on the way to work etc
well the inevitable happened the motor has warped the rear dropouts
my lovely work area :lol:
half way through making with the plastic templates
an the finished torque arms fitted
an ive opened my controller to check if its able to deal with a 12s rather than 10s battery for when i make my own pack
i believe its a 12fet
with ru7088r fets (couldn't get the camera to focus properly)
an 63v caps so could take up to 15s i believe
ive also bought an fitted a small waterproof triangle bag for my controller an 'tiny' battery
the 'tiny' battery which i need to replace asap as it dieing
an my trip switch which is limiting my amp draw to 10amp atm to help prolong my battery life
unfortunately the connections cant deal with the amps an is slowly melting the plastic
and my new armour as ive had too many close calls with vans an cars trying to knock me off my bike an cutting me up on the way to work etc
phillmoorewot
10 mW
hello again its been awhile since i updated my projects so here's another update =
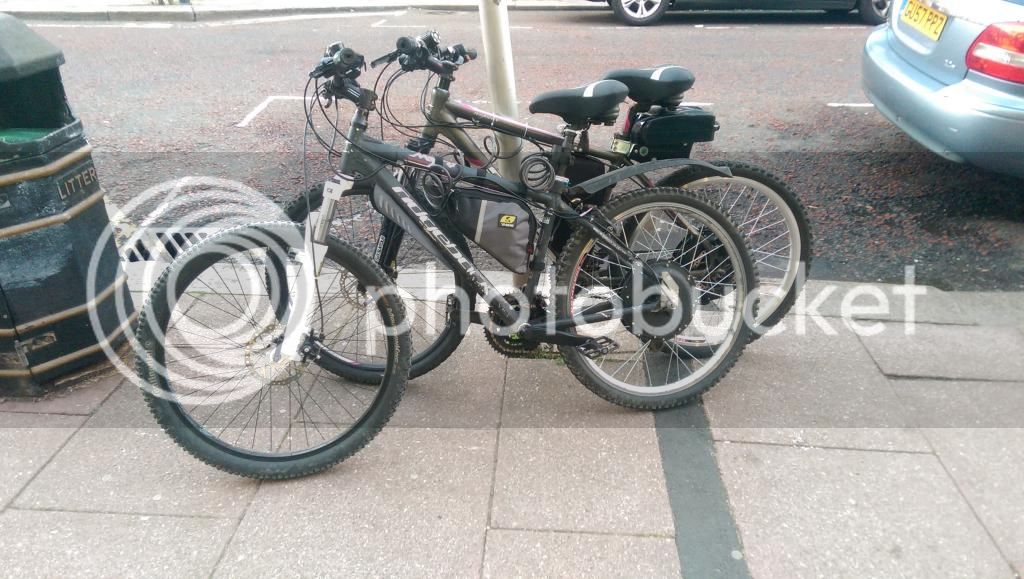
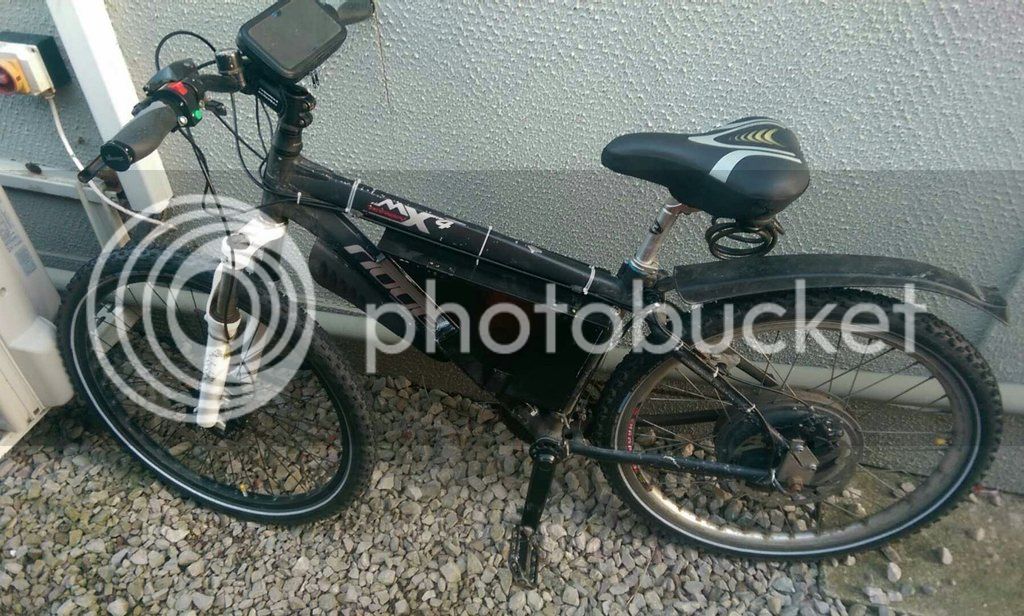
a nice pic of mine an my missus bike waiting for us while we got a takeaway lol (with my old battery an controller in the frame bag)
i had to move the controller as the bag couldnt handle the size an weight of both the batt an controller
then i spent some money on lipos an chargers etc ( and found out my controller had a high voltage cutoff so i had to get a 48v controller ... so i swapped my 36v controller with a friend for his 48v one )
the initial charge setup (straight from a car battery i have spare)
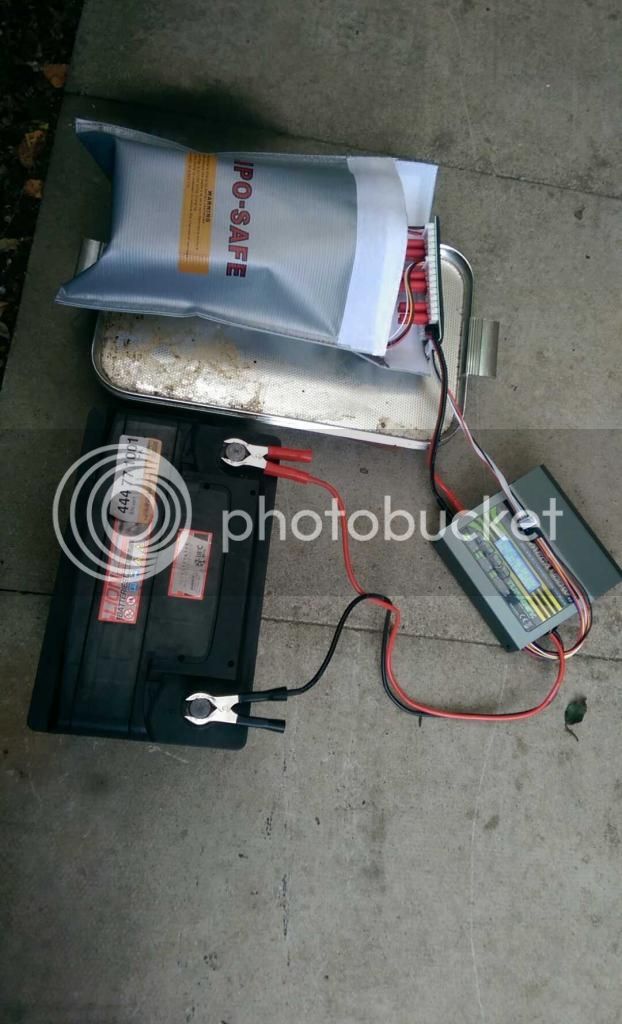
an i added a charger to keep the car battery topped up ( basically using the battery as a buffer)
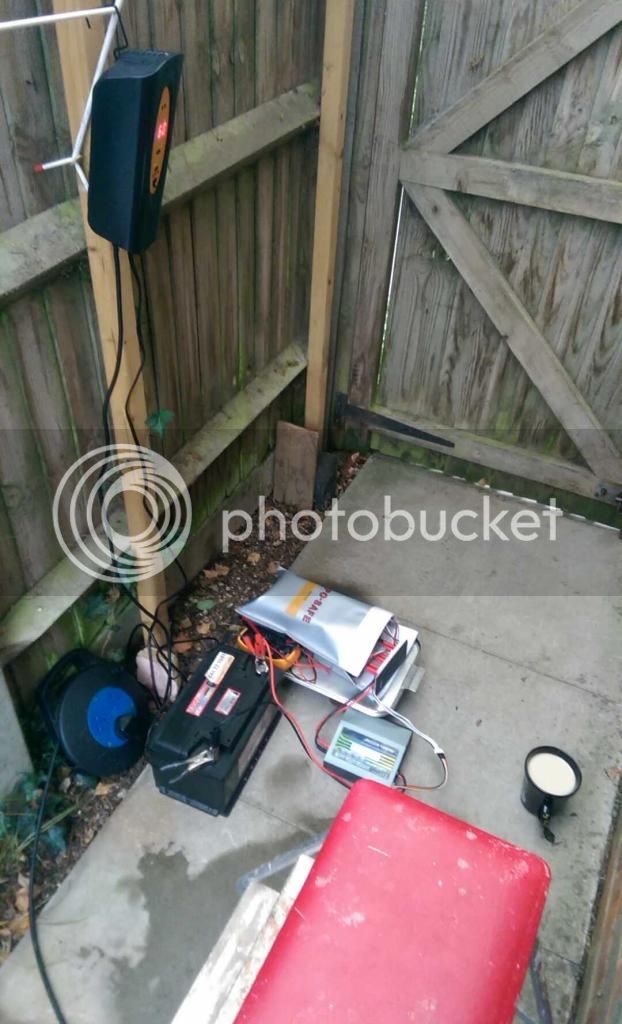
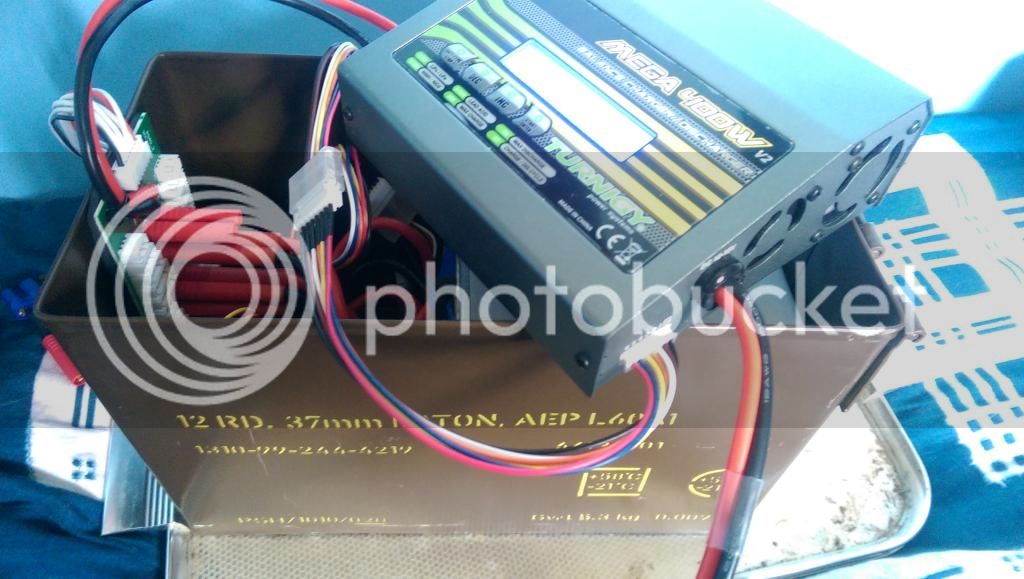
i bought an old ammo box from ebay an used that for more safety ( i dont charge with the charger on top obv lol )
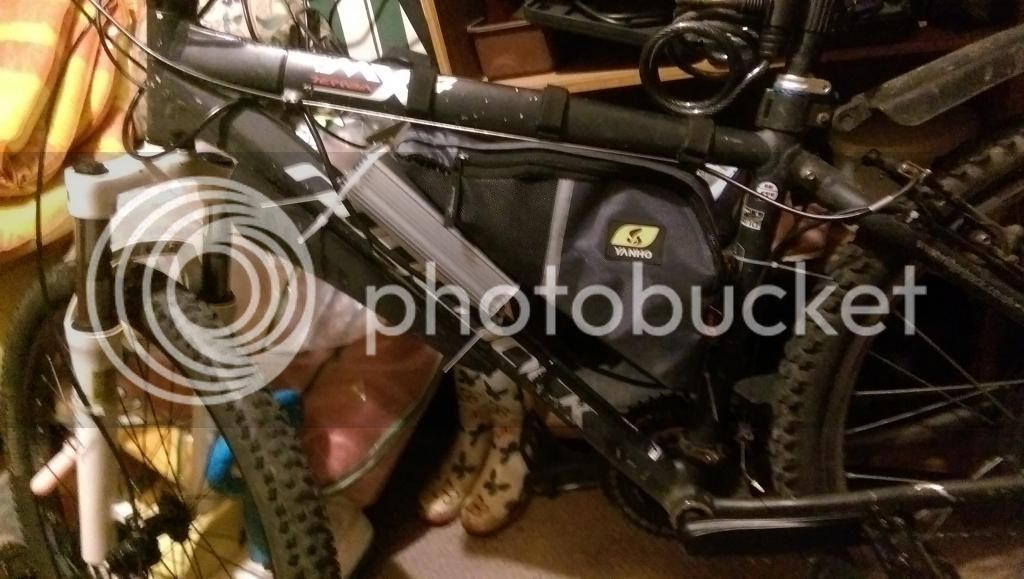
i got an ibera bag to fit the lipo battery an moved the controller ( the controller has been moved many times trying to find somewhere good lol)

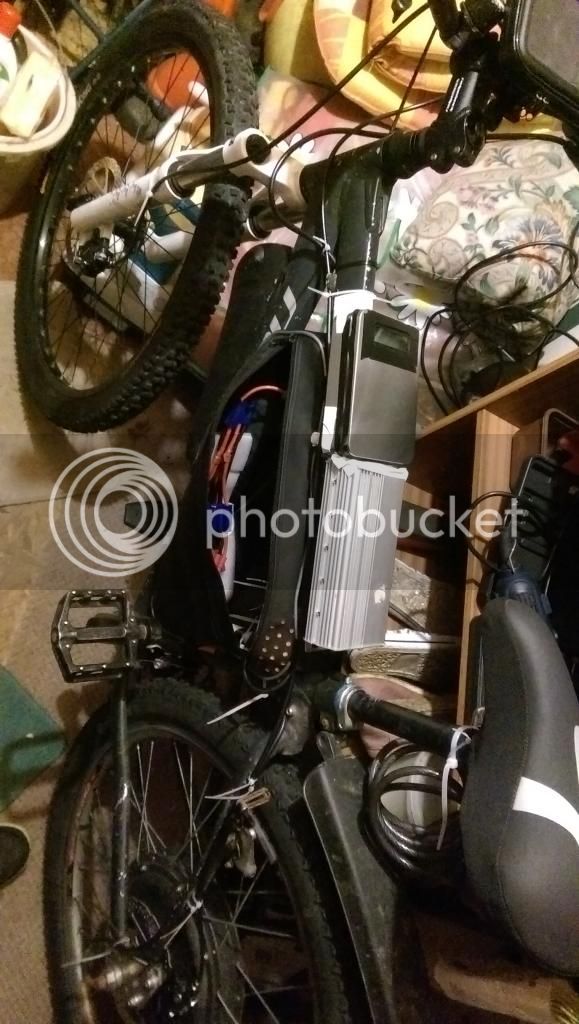
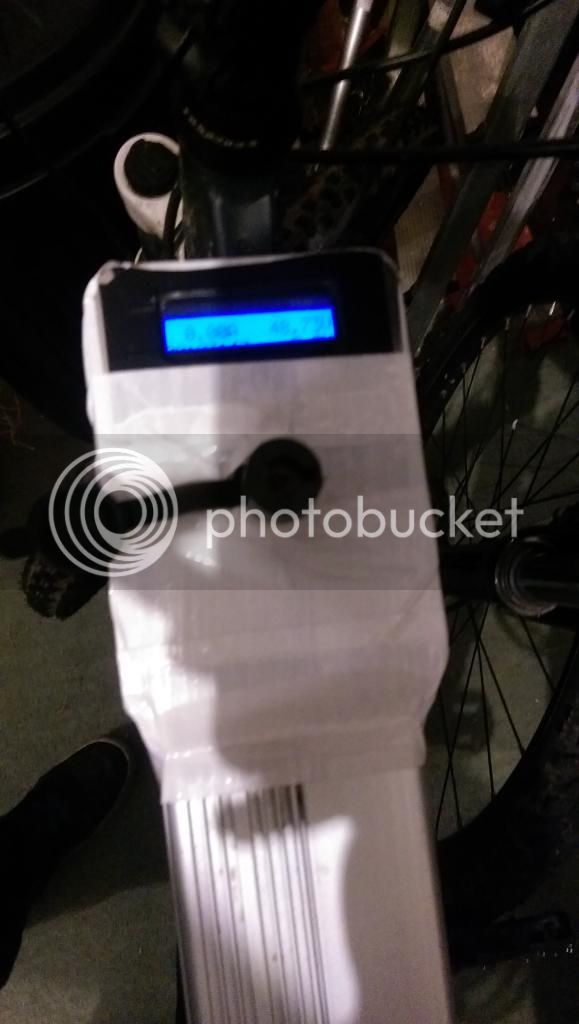
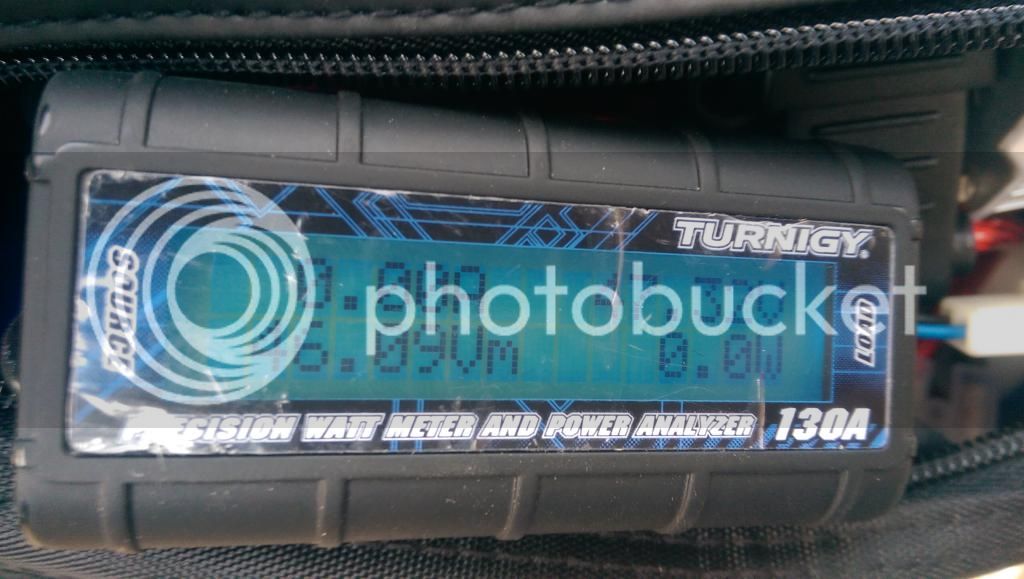
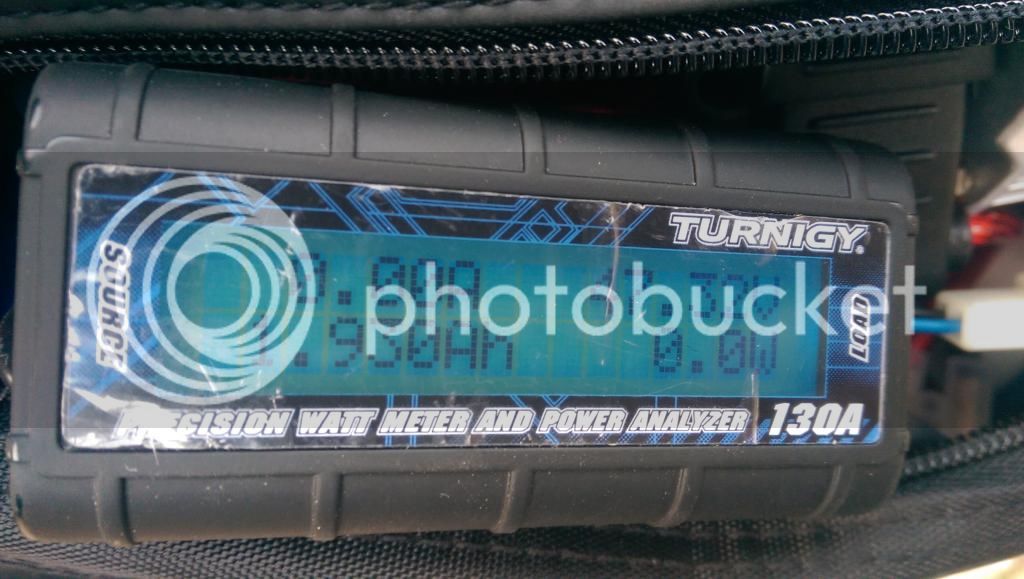
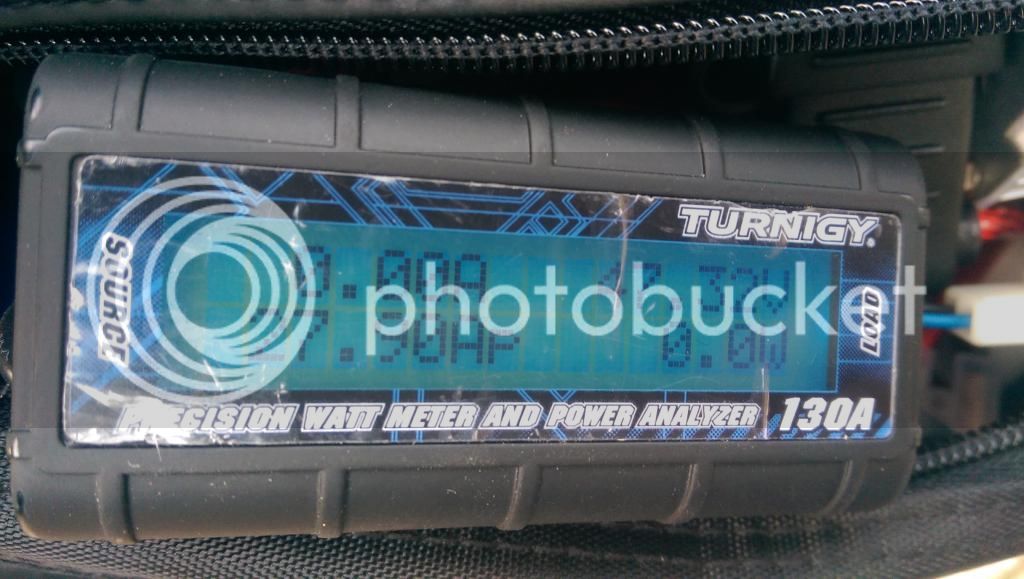
the inside of the bag showing battery , cables an wattmeter
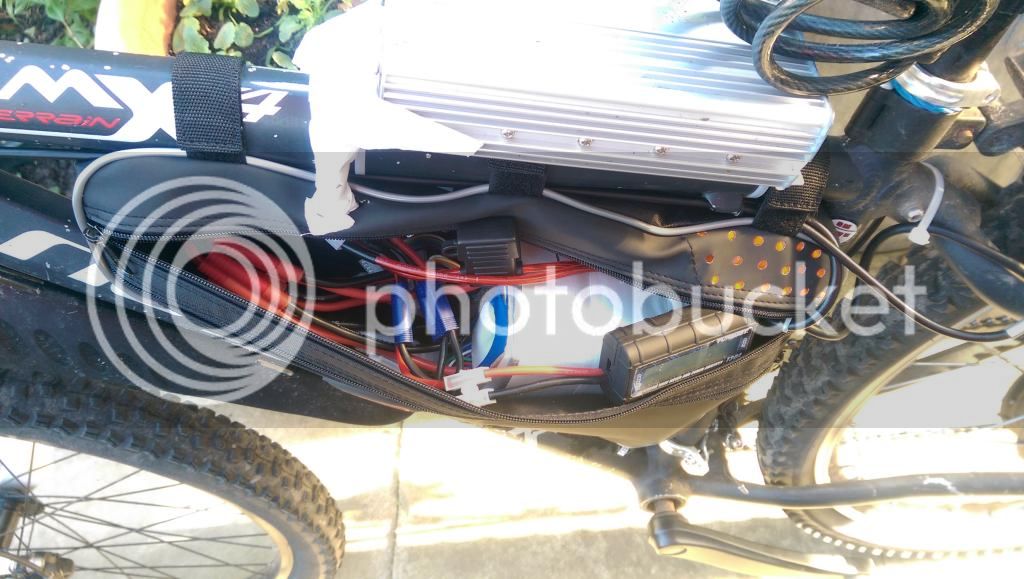
the battery an connections with watt meter
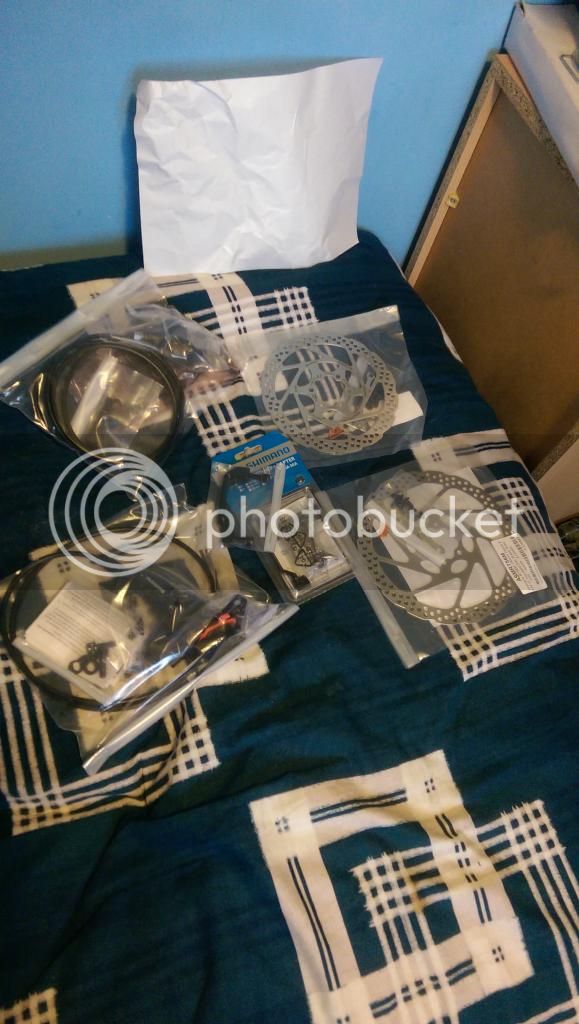
the much needed brake upgrades ( shimano 180mm front an 160mm rear hydro brakes )
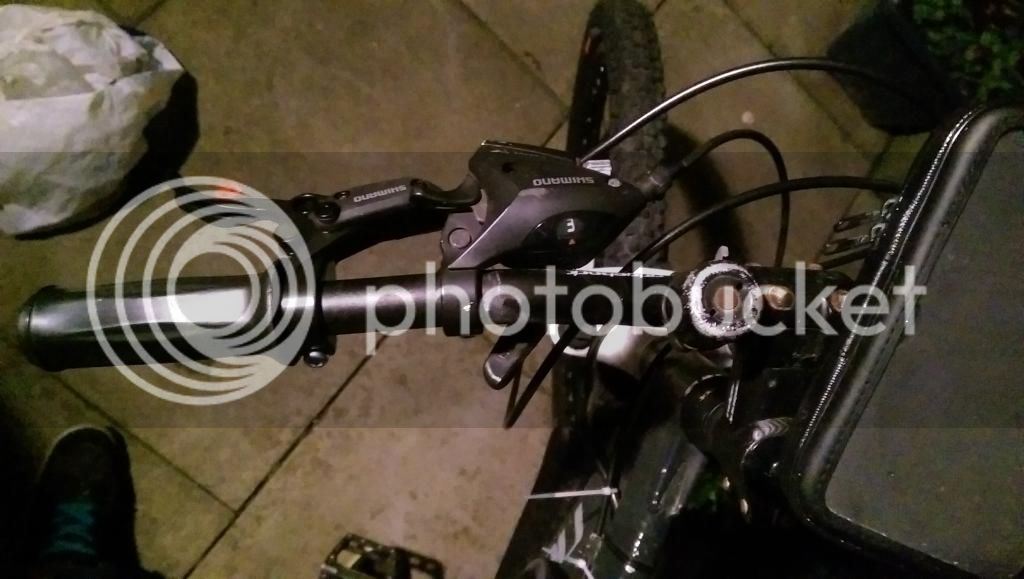
since my gear shifters where part of my original brake i chopped the lever off an moved it over for when i need to change gear... ive always ridden in top gear on the rear so only need the front changer
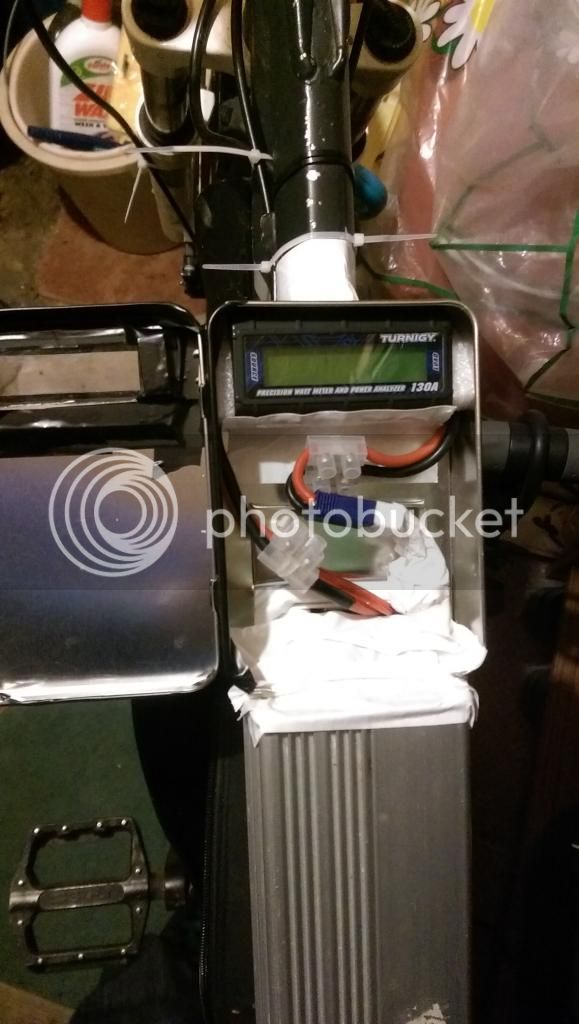
i put the watt meter into a tin an mounted it with the controller closer to the headset as i was occasionally hitting it with my knees while pedaling

an the inside of the tin
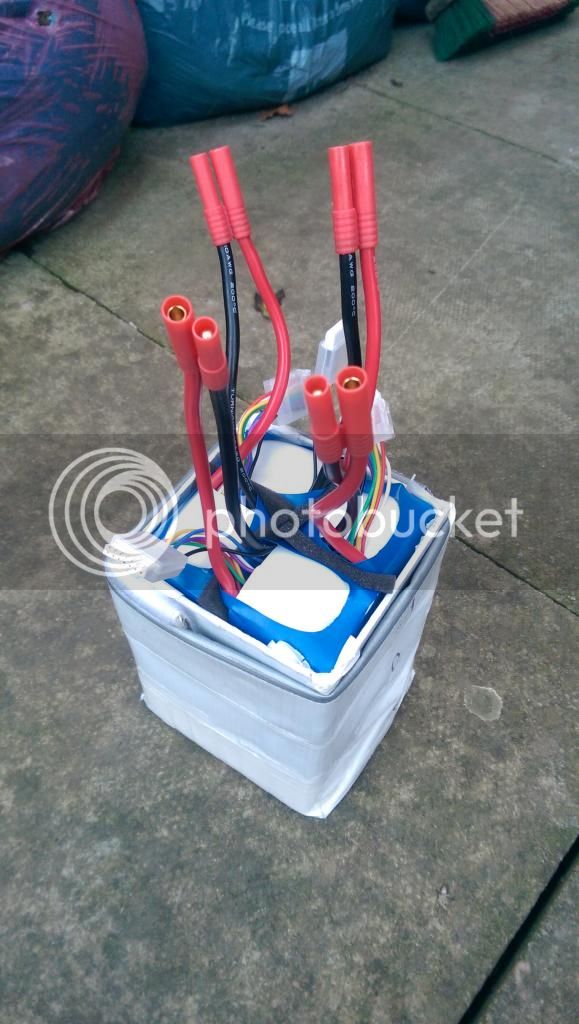
the battery pack wrapped in fireproof fabric an reinforced with plastic sheets an lots of gaffa tape lol
i also added a 120 amp switch with key to save some connectors from spark ( i need to get round to adding a pre spark ) an moved the tin an controller further up the frame towards the headset so i didn't hit my knees again lol
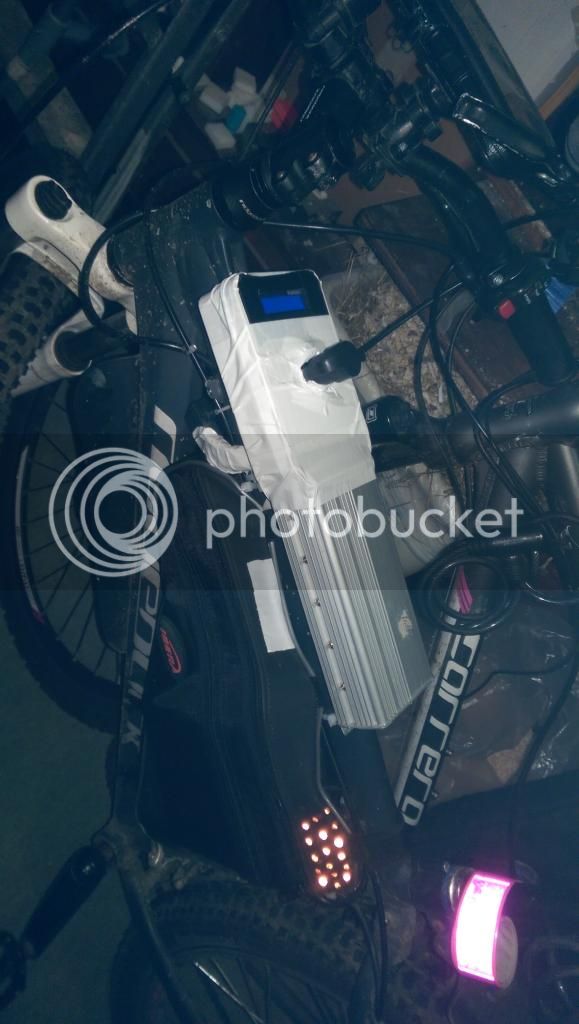
an the wattmeter an switch
the fun i had after months of riding in the rain an the water finnally made its way through my covers ( the bike just lost power on the last road home luckily it was on flat an i didnt have many cars around)
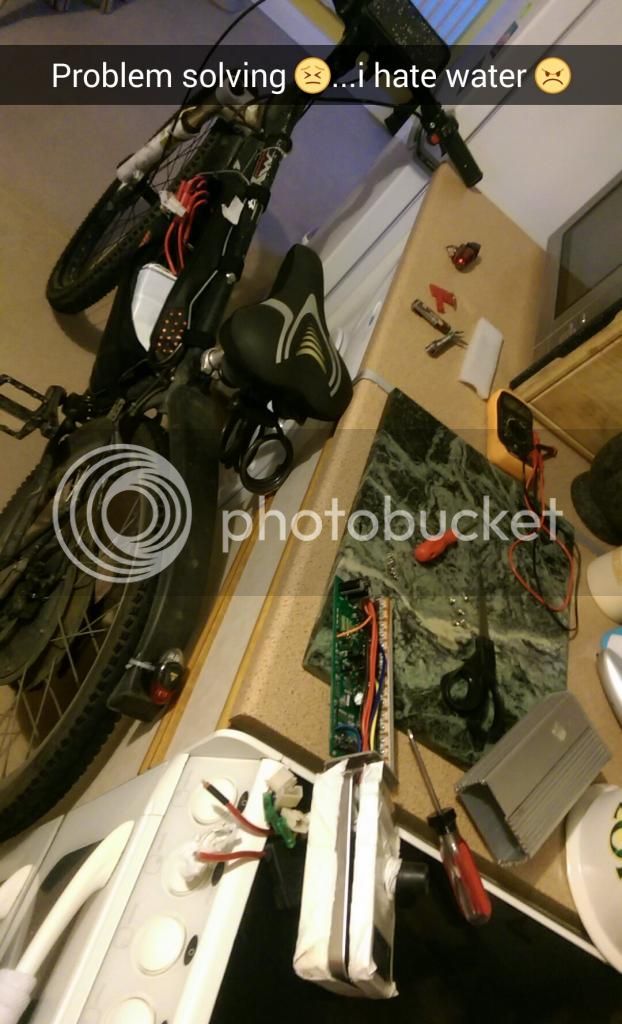
the underside of my controller with some water marks ... luckily after drying an cleaning everything its still working fine but took me hours to strip , clean an rebuild

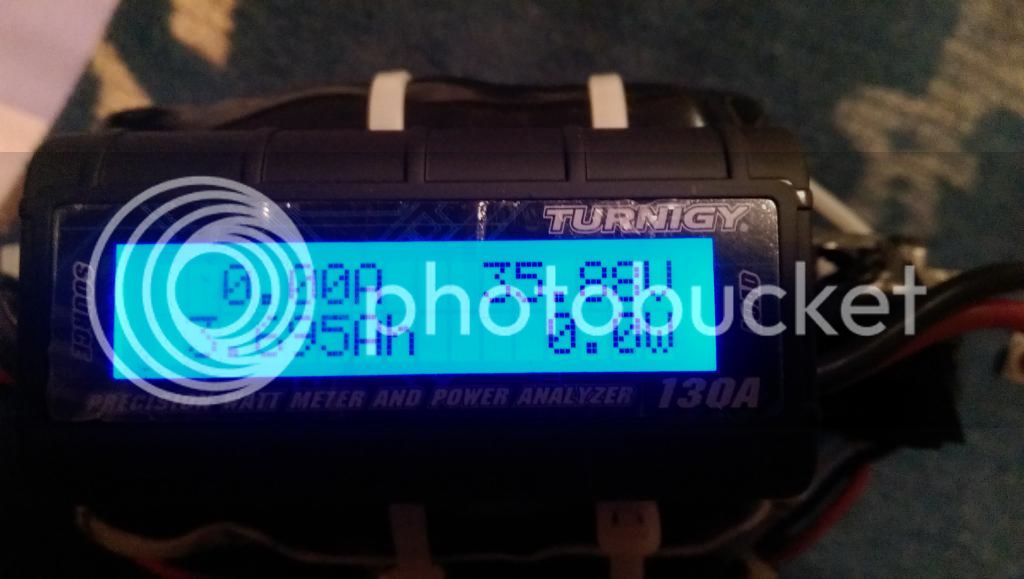
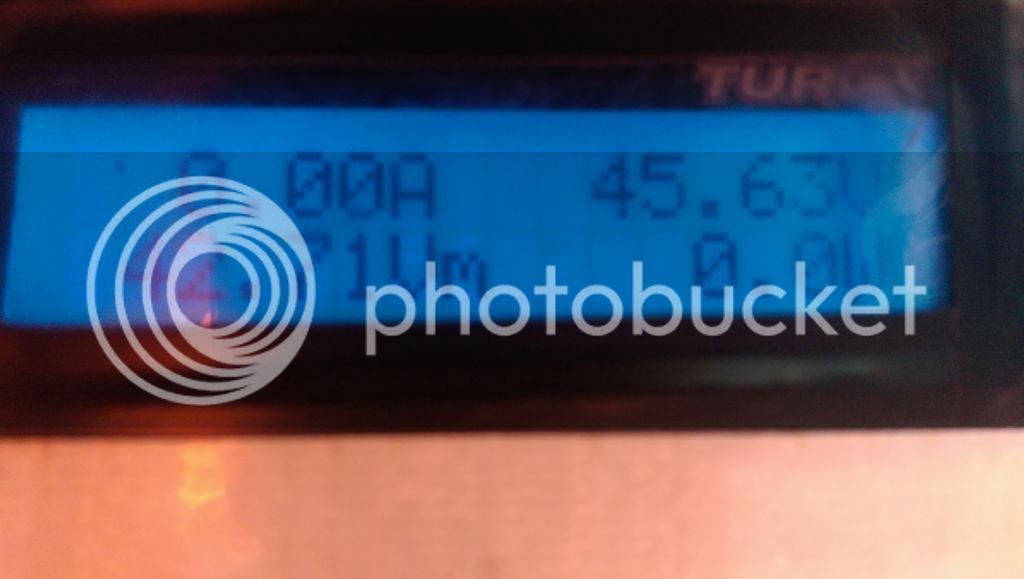
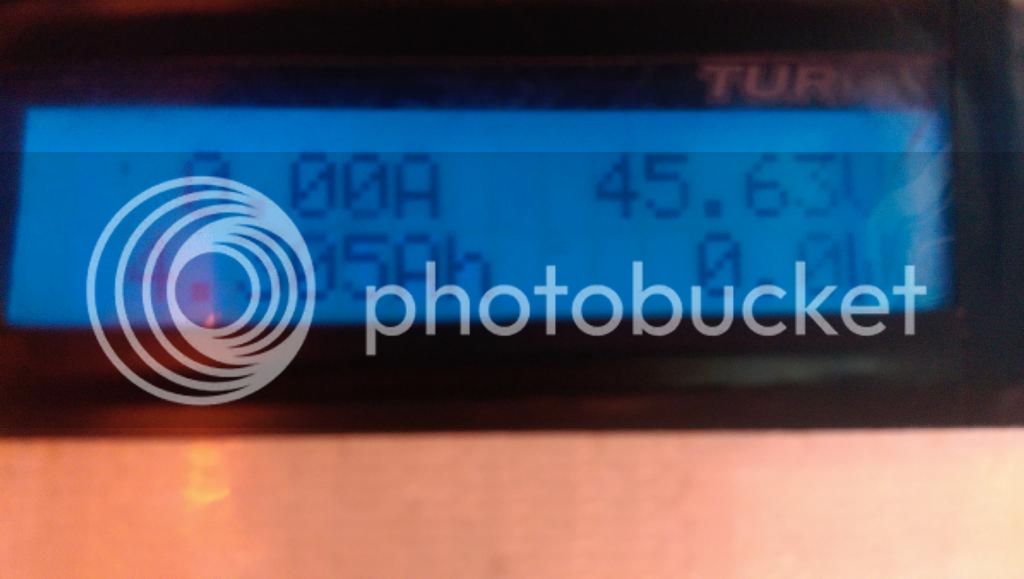
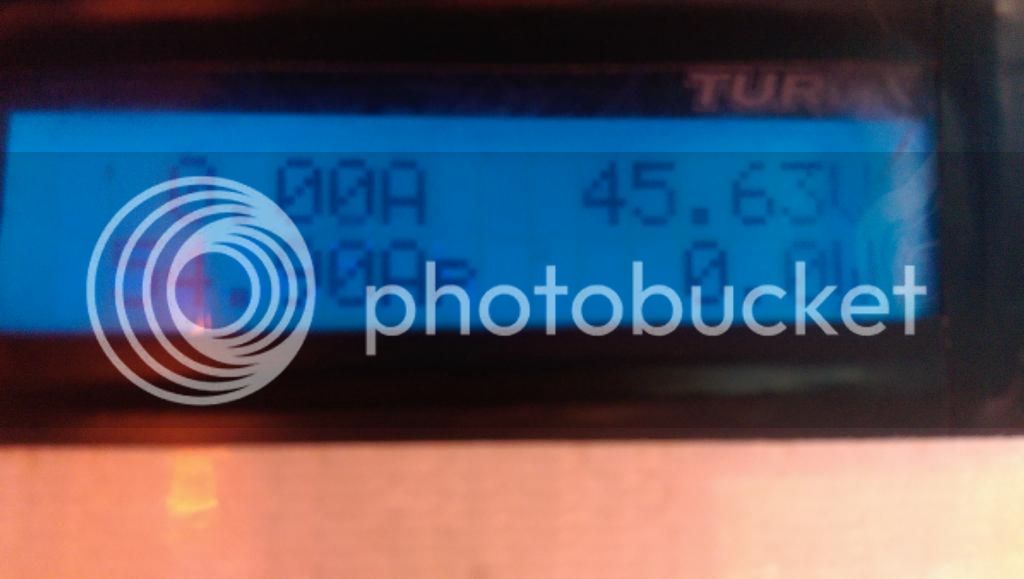
an a few pics from my wattmeter showing the power increase's from the old battery to lipo an then when i repaired from water damage i may have added some extra solder lol =
the old 36v 6.6ah battery ( it was ment to be a 10ah but i found out its actually a 6.6ah due to chinese false advertisement an only had less than 4ah left after 3 years of abuse)
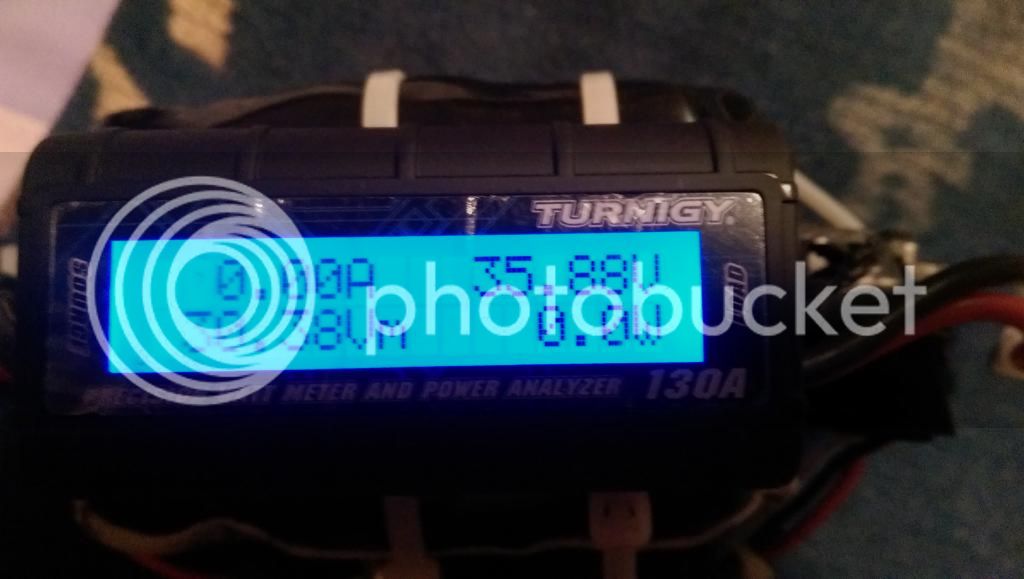
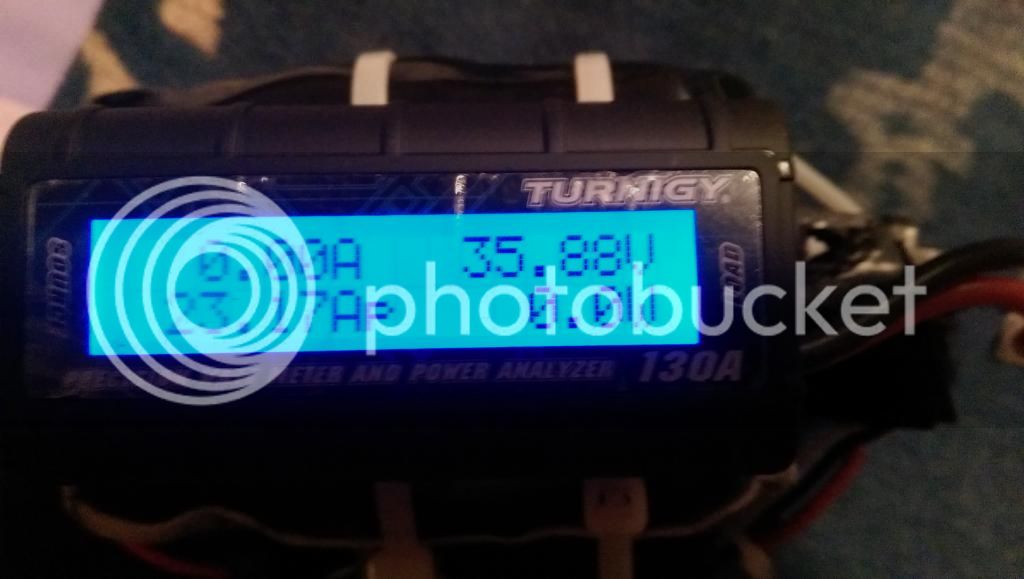
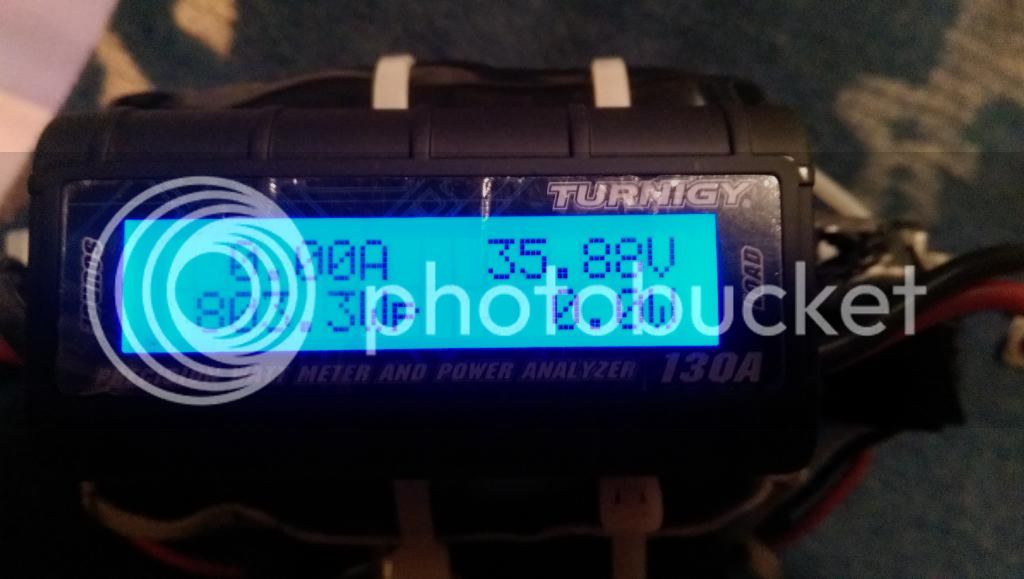
then the 12s 10ah lipo battery ( it had only done a trip to work normally use 4ish ah to an from work its about 5 miles with a few hills the 36v one used 3.5ish normally so not bad for the power increase)

then after id repaired the controller from some light water damage an added some solder here an there ( after a to an from work 4.3ah instead of the 4ish from before and again not bad for power increase)

ive been keeping an eye on temperature an cables an i may need to re-adjust as we get into summer but currently it doesnt get hot only warm and not very warm compared to my scooter 1400w scooter plaything lol
an ill be looking at getting some more lipo's to parallel so i dont have as much voltage sag an building my own frame box...im off this week to copy my torque arms so my missus has some extra strength as she's ridden my bike an liked the extra oomph compared to her 500w controller ( even tho her kit had the same motor size as mine lol but the controller only gives 12amp an is currently limited by a 7amp trip switch until i made some torque arms lol she was happy with the 300w untill she tried mine a few times lmao
a nice pic of mine an my missus bike waiting for us while we got a takeaway lol (with my old battery an controller in the frame bag)
i had to move the controller as the bag couldnt handle the size an weight of both the batt an controller
then i spent some money on lipos an chargers etc ( and found out my controller had a high voltage cutoff so i had to get a 48v controller ... so i swapped my 36v controller with a friend for his 48v one )
the initial charge setup (straight from a car battery i have spare)
an i added a charger to keep the car battery topped up ( basically using the battery as a buffer)
i bought an old ammo box from ebay an used that for more safety ( i dont charge with the charger on top obv lol )
i got an ibera bag to fit the lipo battery an moved the controller ( the controller has been moved many times trying to find somewhere good lol)
the inside of the bag showing battery , cables an wattmeter
the battery an connections with watt meter
the much needed brake upgrades ( shimano 180mm front an 160mm rear hydro brakes )
since my gear shifters where part of my original brake i chopped the lever off an moved it over for when i need to change gear... ive always ridden in top gear on the rear so only need the front changer
i put the watt meter into a tin an mounted it with the controller closer to the headset as i was occasionally hitting it with my knees while pedaling
an the inside of the tin
the battery pack wrapped in fireproof fabric an reinforced with plastic sheets an lots of gaffa tape lol
i also added a 120 amp switch with key to save some connectors from spark ( i need to get round to adding a pre spark ) an moved the tin an controller further up the frame towards the headset so i didn't hit my knees again lol
an the wattmeter an switch
the fun i had after months of riding in the rain an the water finnally made its way through my covers ( the bike just lost power on the last road home luckily it was on flat an i didnt have many cars around)
the underside of my controller with some water marks ... luckily after drying an cleaning everything its still working fine but took me hours to strip , clean an rebuild
an a few pics from my wattmeter showing the power increase's from the old battery to lipo an then when i repaired from water damage i may have added some extra solder lol =
the old 36v 6.6ah battery ( it was ment to be a 10ah but i found out its actually a 6.6ah due to chinese false advertisement an only had less than 4ah left after 3 years of abuse)
then the 12s 10ah lipo battery ( it had only done a trip to work normally use 4ish ah to an from work its about 5 miles with a few hills the 36v one used 3.5ish normally so not bad for the power increase)
then after id repaired the controller from some light water damage an added some solder here an there ( after a to an from work 4.3ah instead of the 4ish from before and again not bad for power increase)
ive been keeping an eye on temperature an cables an i may need to re-adjust as we get into summer but currently it doesnt get hot only warm and not very warm compared to my scooter 1400w scooter plaything lol
an ill be looking at getting some more lipo's to parallel so i dont have as much voltage sag an building my own frame box...im off this week to copy my torque arms so my missus has some extra strength as she's ridden my bike an liked the extra oomph compared to her 500w controller ( even tho her kit had the same motor size as mine lol but the controller only gives 12amp an is currently limited by a 7amp trip switch until i made some torque arms lol she was happy with the 300w untill she tried mine a few times lmao
pff7
100 W
If I may ask where did you get a 120 V DC switch with key? Amp rating would need be at least probably 10 amps or so....I tried 250 AC rated toggle switch and it doesn't work as power switch just stays closed(on) with my 64 volt battery set-up. Thanks in advance.
phillmoorewot
10 mW
pff7 said:If I may ask where did you get a 120 V DC switch with key? Amp rating would need be at least probably 10 amps or so....I tried 250 AC rated toggle switch and it doesn't work as power switch just stays closed(on) with my 64 volt battery set-up. Thanks in advance.
http://www.amazon.co.uk/gp/product/B002RAN4E0?psc=1&redirect=true&ref_=oh_aui_detailpage_o04_s00
my bad its not 120 I bought one of these ^ from amazon its apparently 12/24v 300A Battery Cut Off Switch but has worked fine with my 49.1v 10ah battery @ 55A so far
phillmoorewot
10 mW
a quick update of my idea for a frame box an sorry about the sidways text my snapchat has been playing up recently
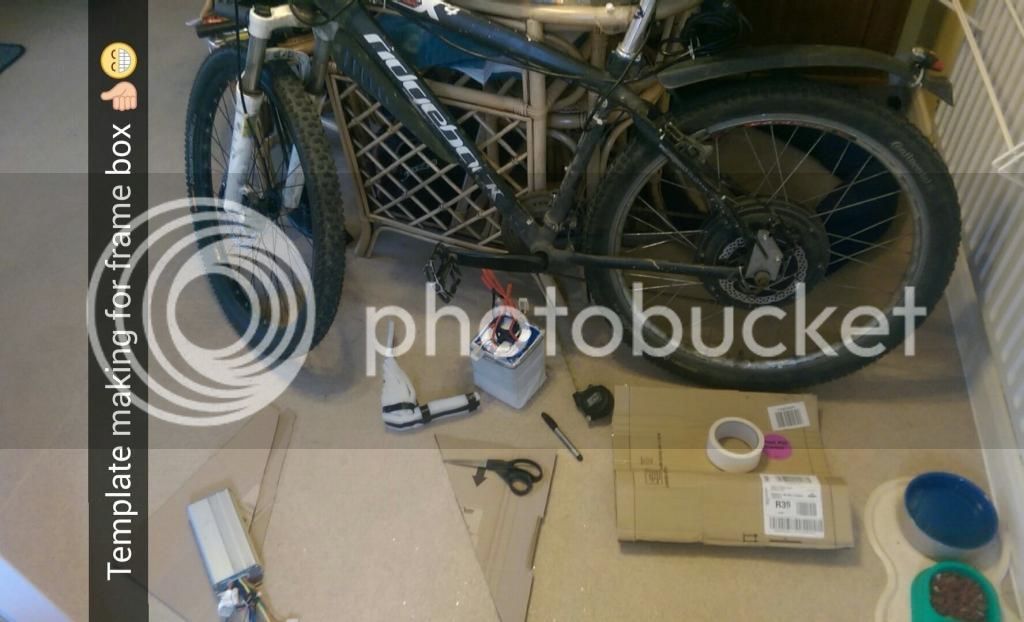

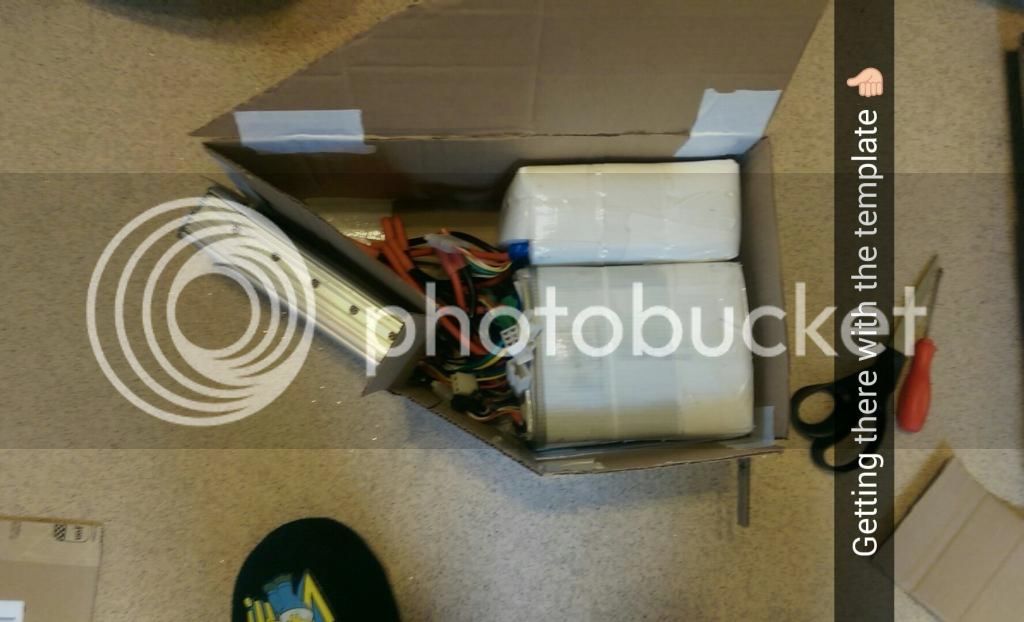
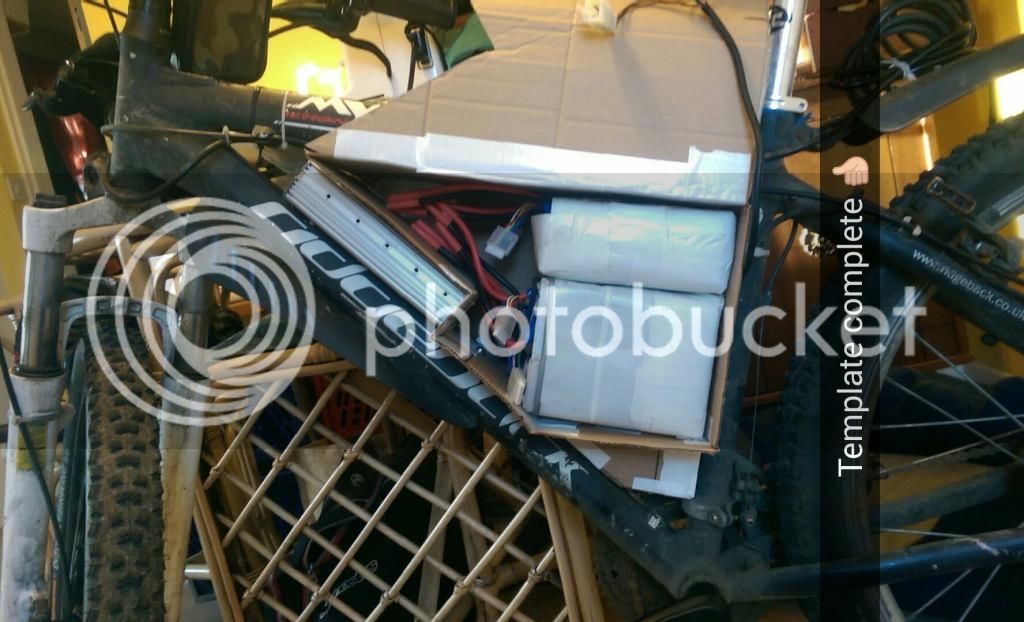
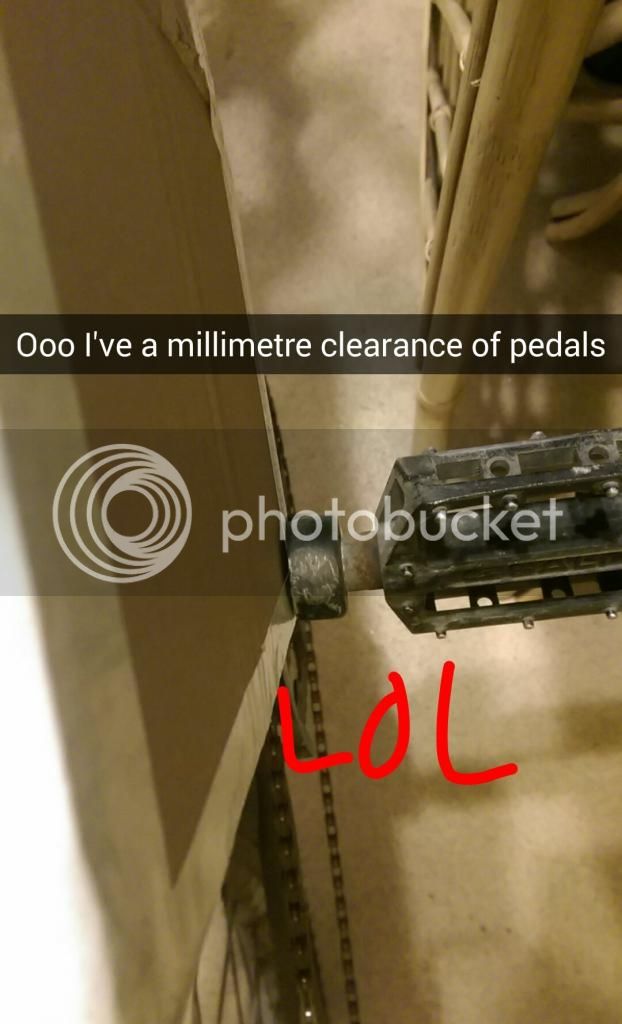
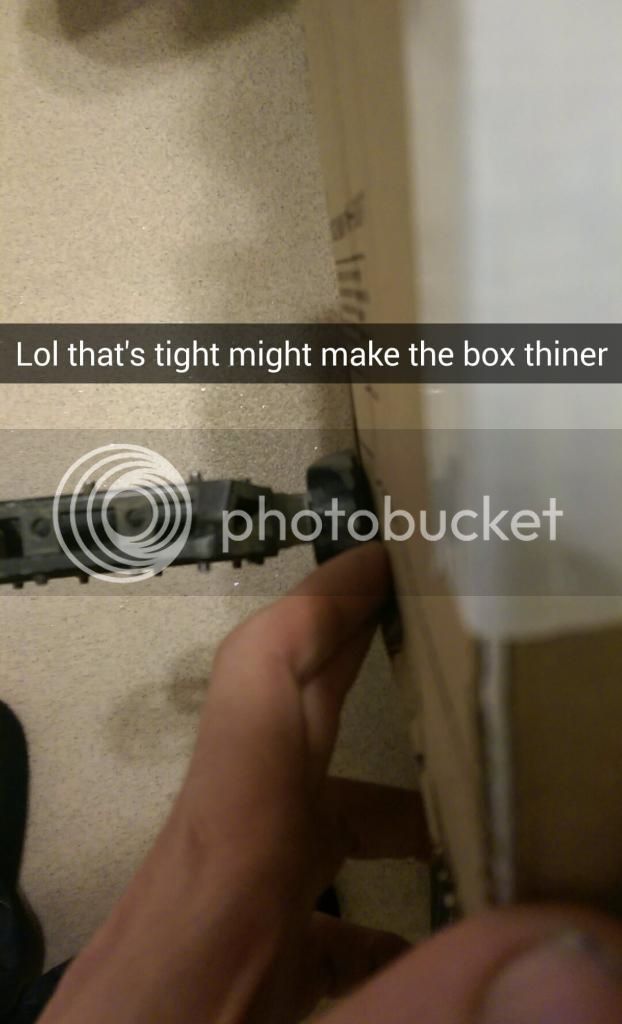
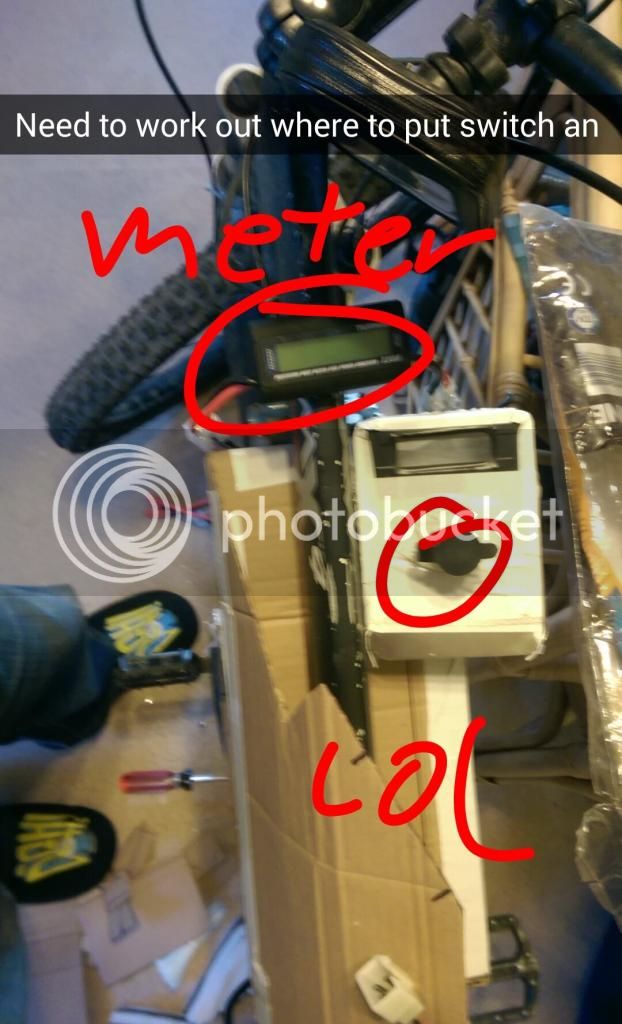
ill probably put the switch where it is in the last photo on the right side of the frame box an ill work something out for the watt meter later lol
now i just need to get some sheet metal an either have it welded or use lots of rivets an corner pieces with silicon waterproofing all round
ill probably put the switch where it is in the last photo on the right side of the frame box an ill work something out for the watt meter later lol
now i just need to get some sheet metal an either have it welded or use lots of rivets an corner pieces with silicon waterproofing all round
pff7
100 W
"now i just need to get some sheet metal an either have it welded or use lots of rivets an corner pieces with silicon waterproofing all round"
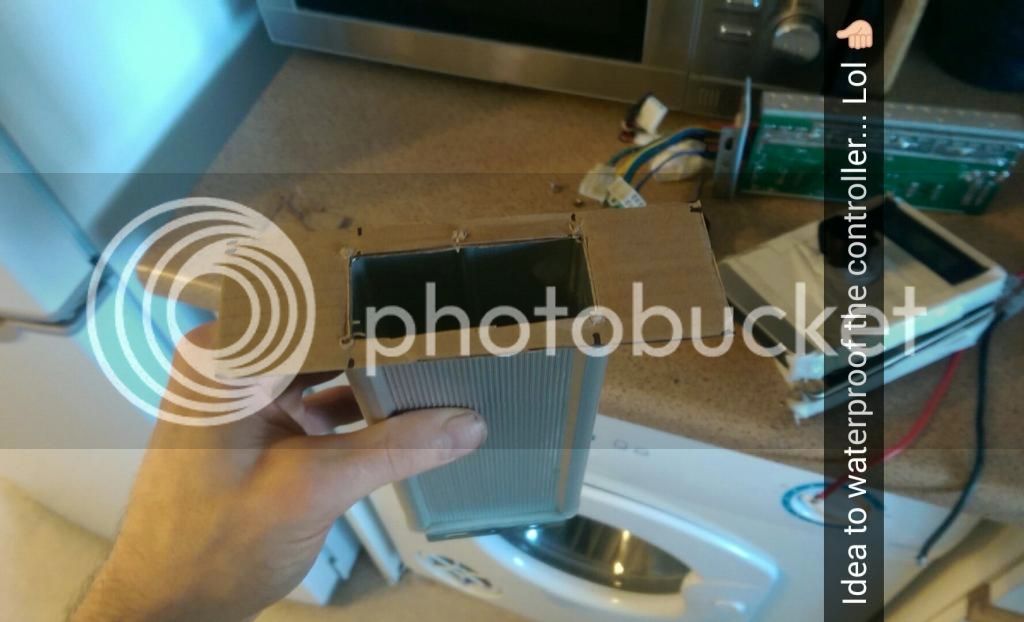
Before you buy sheet metal let me show you what I tried........I need to photo my bike controller waterproof solution(not saying it's so good but will make it non-necessary for welding) tonight.
Before you buy sheet metal let me show you what I tried........I need to photo my bike controller waterproof solution(not saying it's so good but will make it non-necessary for welding) tonight.
pff7
100 W
 Sorry I had to figure how to upload from my camera to a new pc. Will try again.
phillmoorewot
10 mW
pff7 said:Sorry I had to figure how to upload from my camera to a new pc. Will try again.
that a very nice idea
do you get any problem with the controller heating up?...I've tried to keep airflow to the case while waterproofing the connectors side and as my battery sits inside the frame and i have a 17inch frame the triangle is quite small and everything is rather snug atm but i may make something from plastic similar to yours from the connector side to my current frame bag :wink:pff7
100 W
'
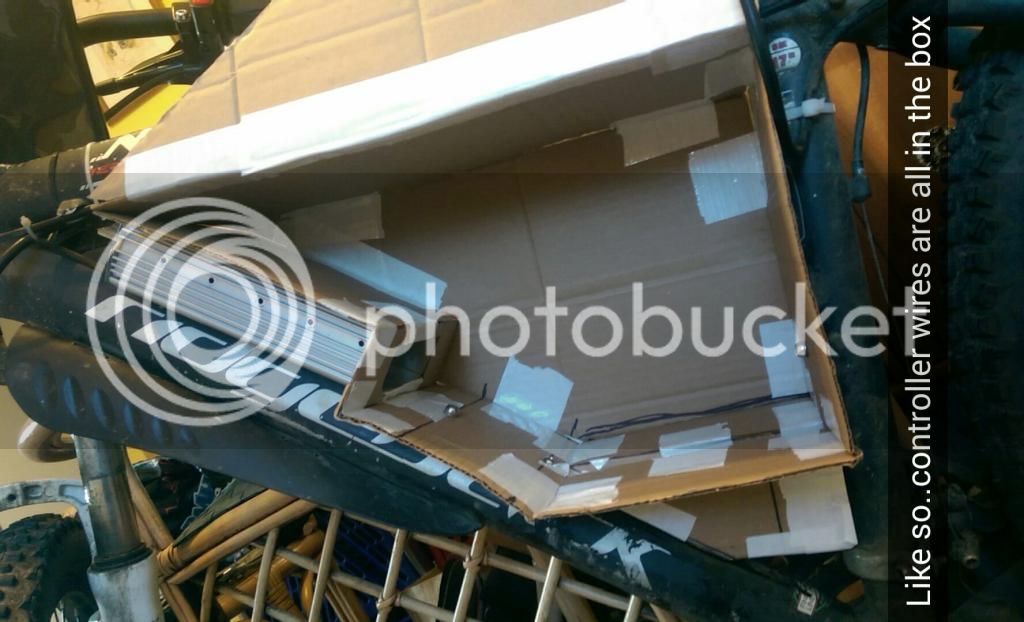
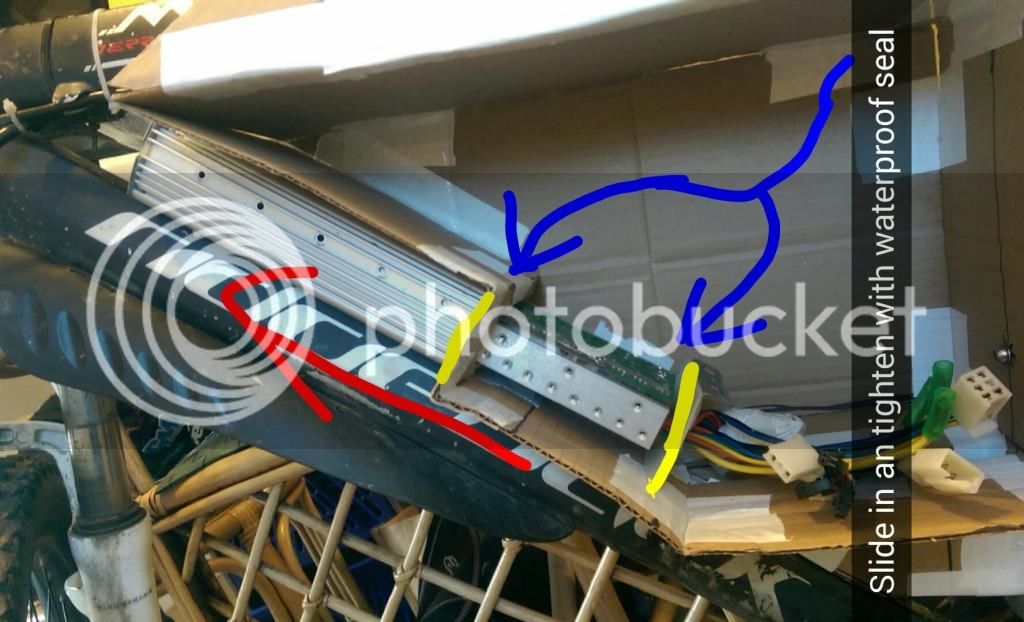
I'm less worried about the controller heating up than getting the controller wet as I had one controller fry due to my bike being locked up under open sky and i thought the controllers were supposed to be waterproof???!!!
But yes controller heat-up would be a concern, but so far have noticed no problem there. Youi could put ventilation slots on the bottom I would think, but at least I would not on the sides as I usually keep riding in the rain(I have to keep going usually).
Other people I know instead of using plastic used circuit board mica I believe for the box construction.
pff7
100 W
'phillmoorewot said:pff7 said:If I may ask where did you get a 120 V DC switch with key? Amp rating would need be at least probably 10 amps or so....I tried 250 AC rated toggle switch and it doesn't work as power switch just stays closed(on) with my 64 volt battery set-up. Thanks in advance.
http://www.amazon.co.uk/gp/product/B002RAN4E0?psc=1&redirect=true&ref_=oh_aui_detailpage_o04_s00
my bad its not 120 I bought one of these ^ from amazon its apparently 12/24v 300A Battery Cut Off Switch but has worked fine with my 49.1v 10ah battery @ 55A so far
What concerns me is the DC voltage rating.Have you used that switch a number of times? Not just once I mean. My voltages go up to 72-74 volts DC. Not sure though on my amperages though as I need to get a proper riding cycle monitor.
DC voltages seem to arc worse than AC voltages....
phillmoorewot
10 mW
pff7 said:'phillmoorewot said:pff7 said:If I may ask where did you get a 120 V DC switch with key? Amp rating would need be at least probably 10 amps or so....I tried 250 AC rated toggle switch and it doesn't work as power switch just stays closed(on) with my 64 volt battery set-up. Thanks in advance.
http://www.amazon.co.uk/gp/product/B002RAN4E0?psc=1&redirect=true&ref_=oh_aui_detailpage_o04_s00
my bad its not 120 I bought one of these ^ from amazon its apparently 12/24v 300A Battery Cut Off Switch but has worked fine with my 49.1v 10ah battery @ 55A so far
What concerns me is the DC voltage rating.Have you used that switch a number of times? Not just once I mean. My voltages go up to 72-74 volts DC. Not sure though on my amperages though as I need to get a proper riding cycle monitor.
DC voltages seem to arc worse than AC voltages....
yeah i thought the same as i bought it but as its designed for dc voltage an also to cut power to a car/boat battery it should be able to deal with some abuse...I've had it on my bike for about three months an ride daily to an from work or to my missus on the weekends ...I haven't had a problem with the switch yet an i generally check everything's off after switching it just in case ( I'm making a pre spark to sit next to the switch so i don't pit or damage the contacts inside the switch which would cause some arcing over time id assume)
I'd say get a watt meter so you can see how many amps your pulling from the battery until you get your cycle monitor etc
phillmoorewot
10 mW
been awhile an I've updated the bike with a few bits :
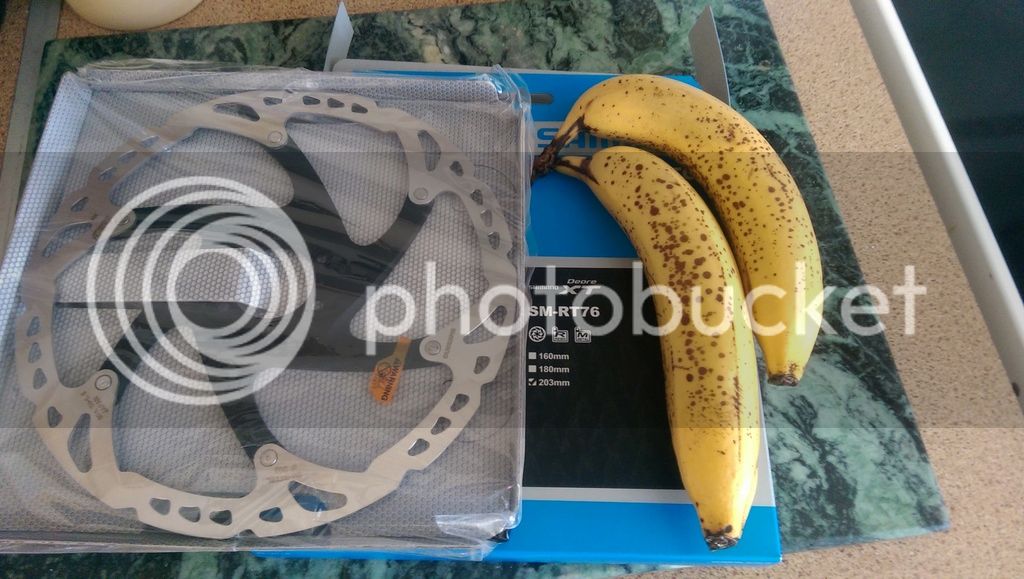
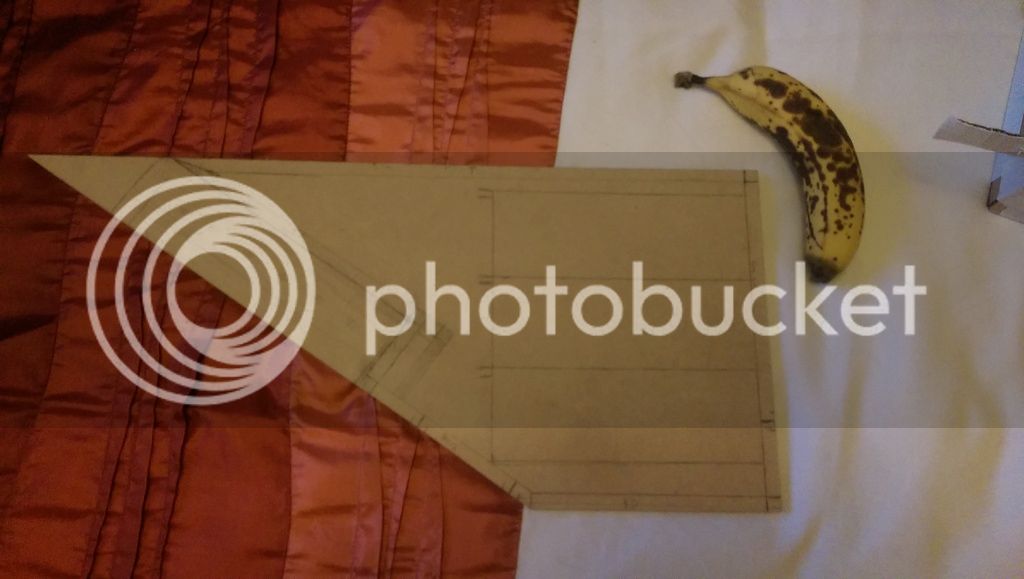
my new 203mm rotors so the caliper misses the hub and also the extra braking force needed to stop quicker ( banana included for scale lol)
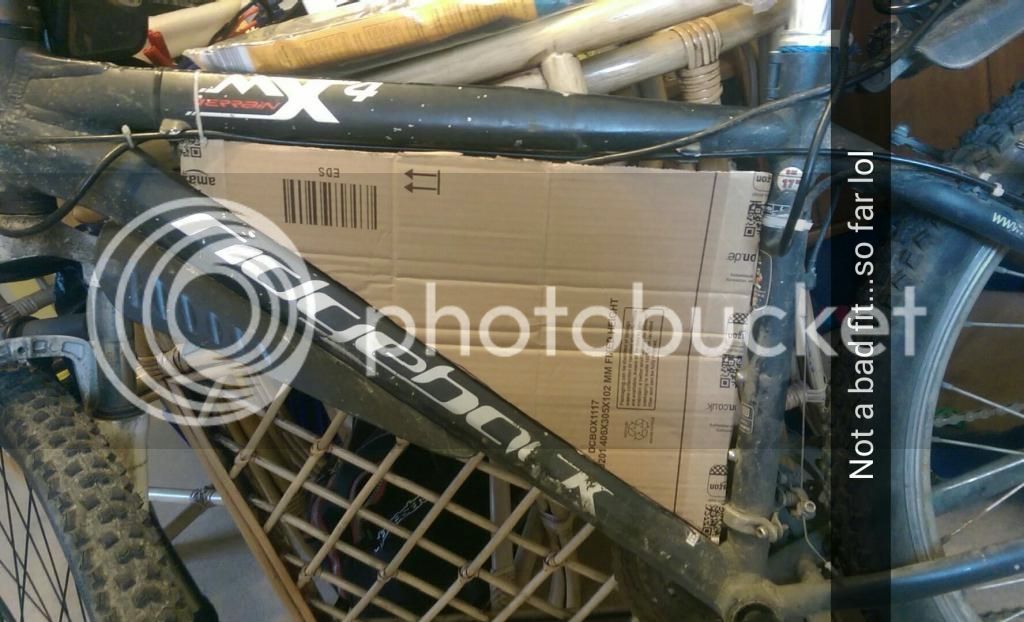
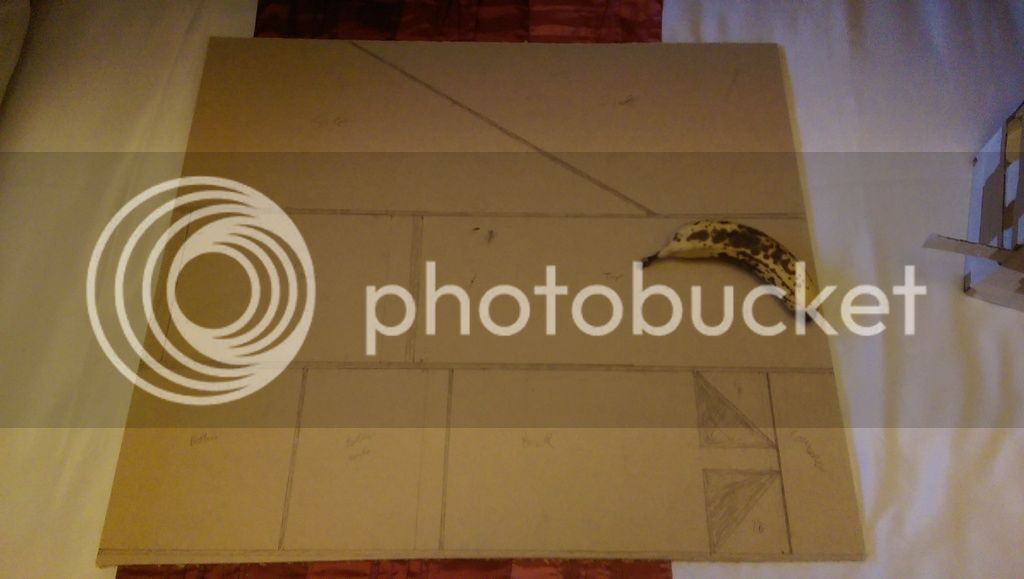
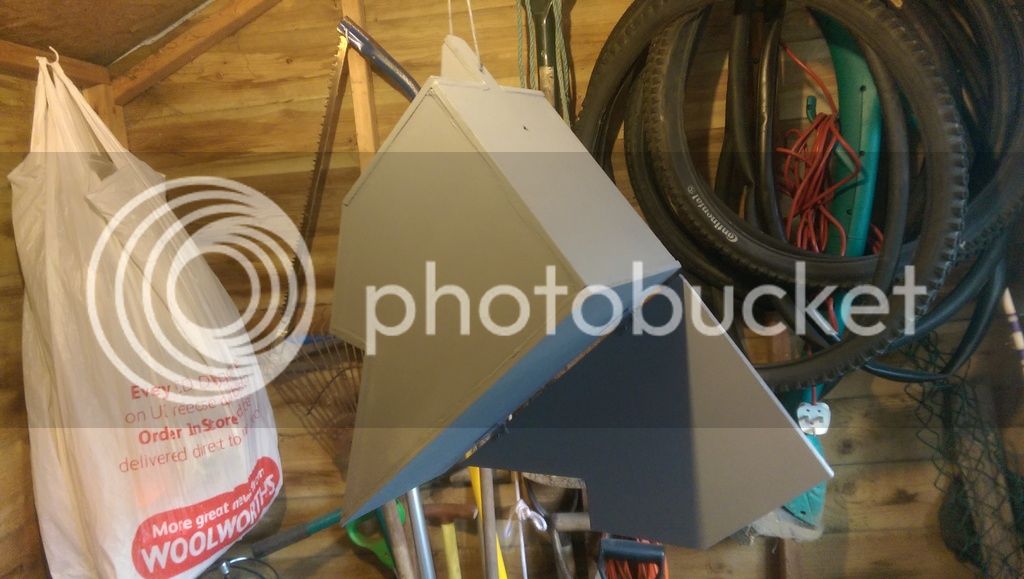
i decided to use 6mm mdf wood for my frame box as it was easier to work with an cost less for a test box ( in case i need to refine the concept from any problems i run into etc)
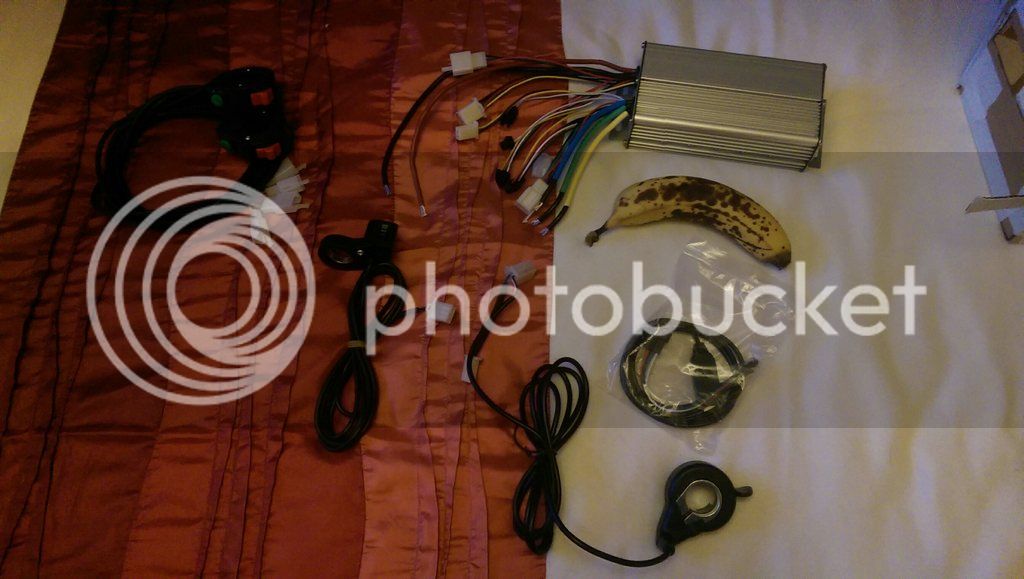
i also got my hands on a 12 fet 4110 infineon from em3ev with a thumb throttle, speed switch an cruise control
then started the template making out of wood as the cardboard template wasn't quite the right size
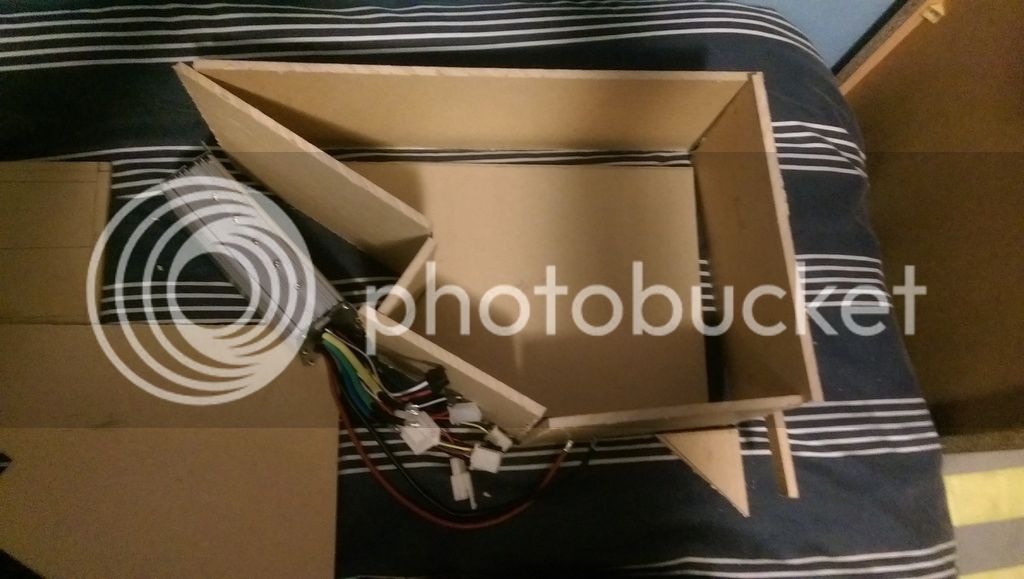
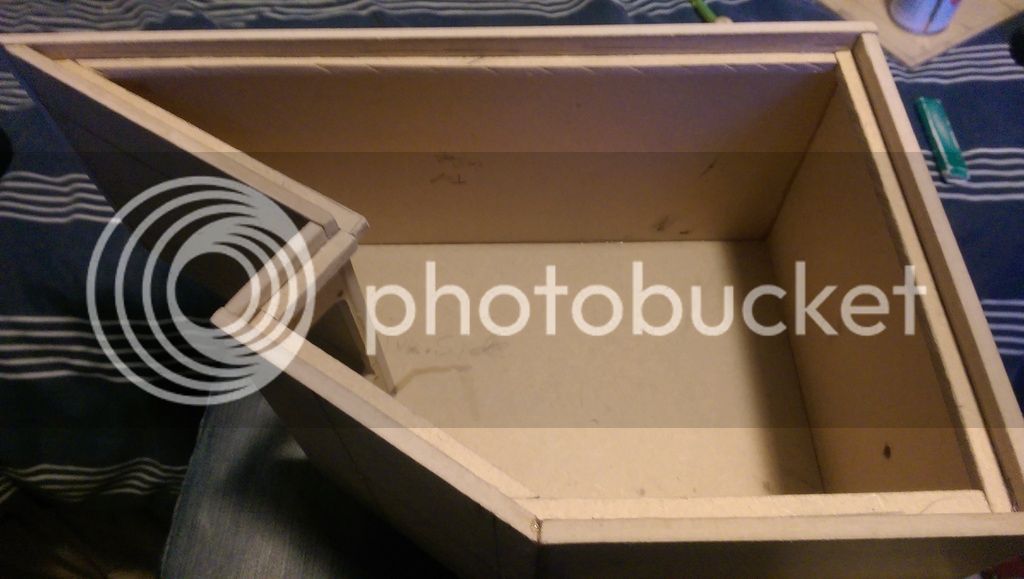
once id cut all the pieces out an got them sanded down to fit
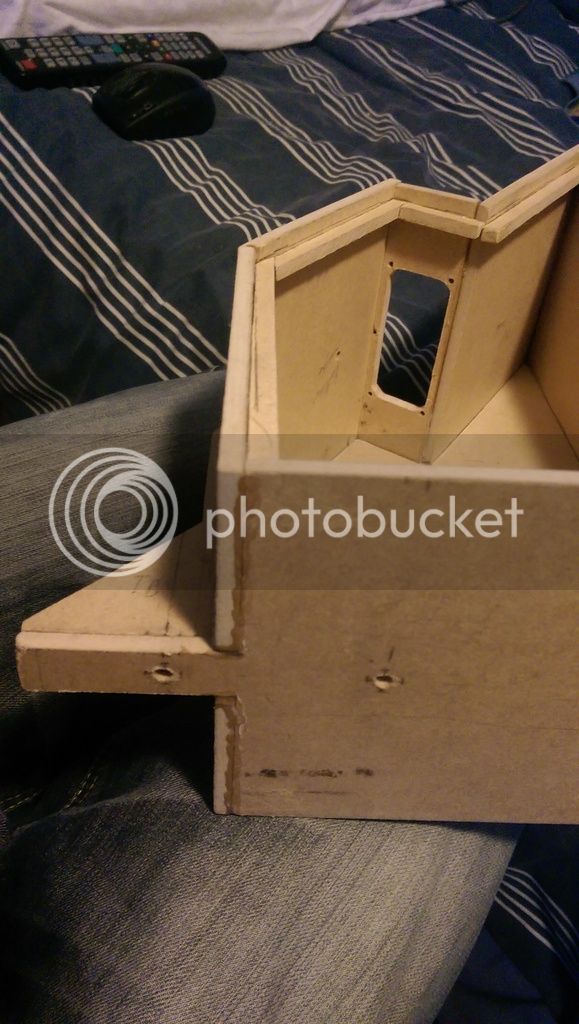
i added a lip just inside the lid to apply my silicon too for a waterproof seal
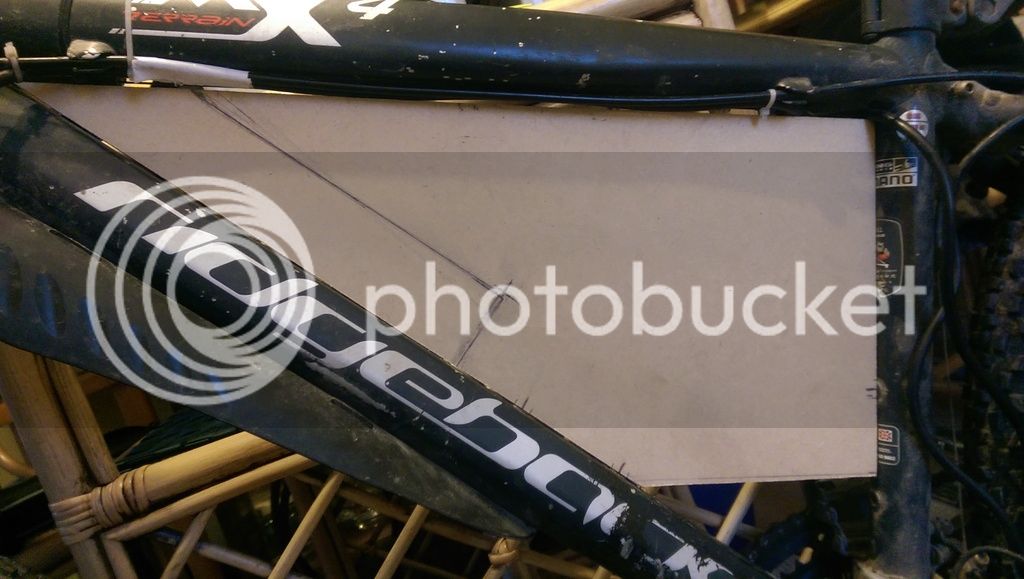
and added the bolt holes that match the bike frames tool bolts
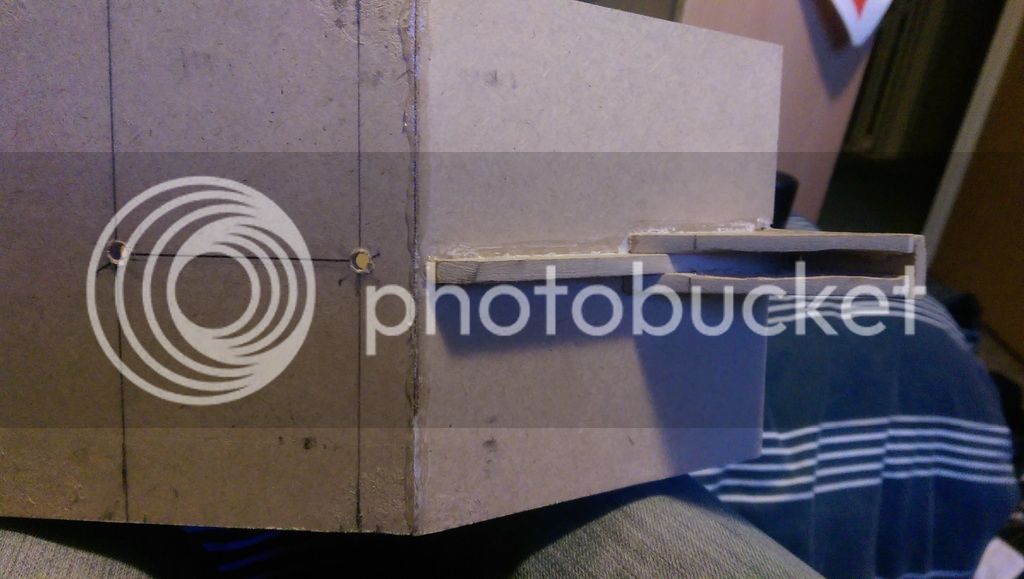
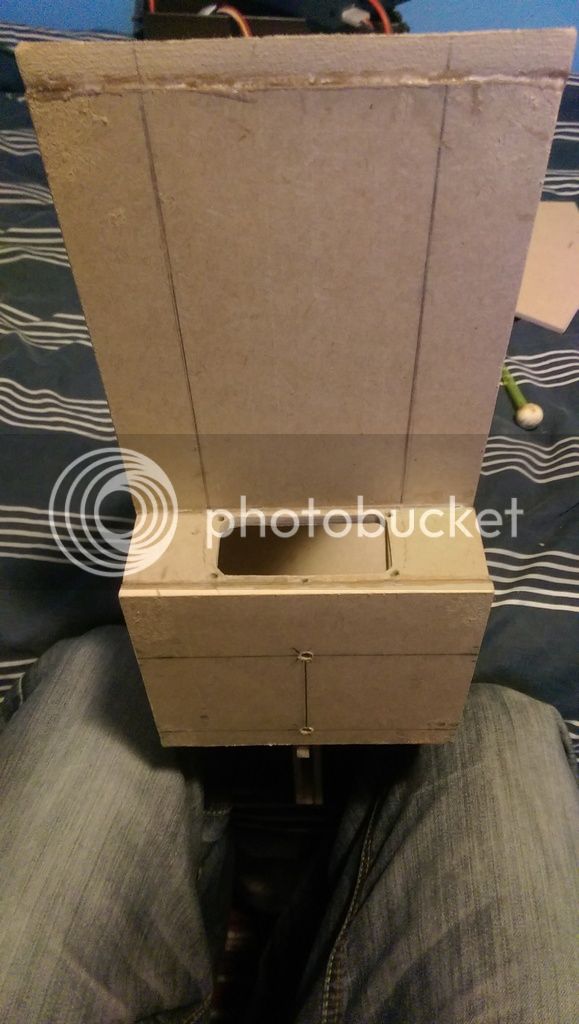
and cut the hole for the controller wires to fit through
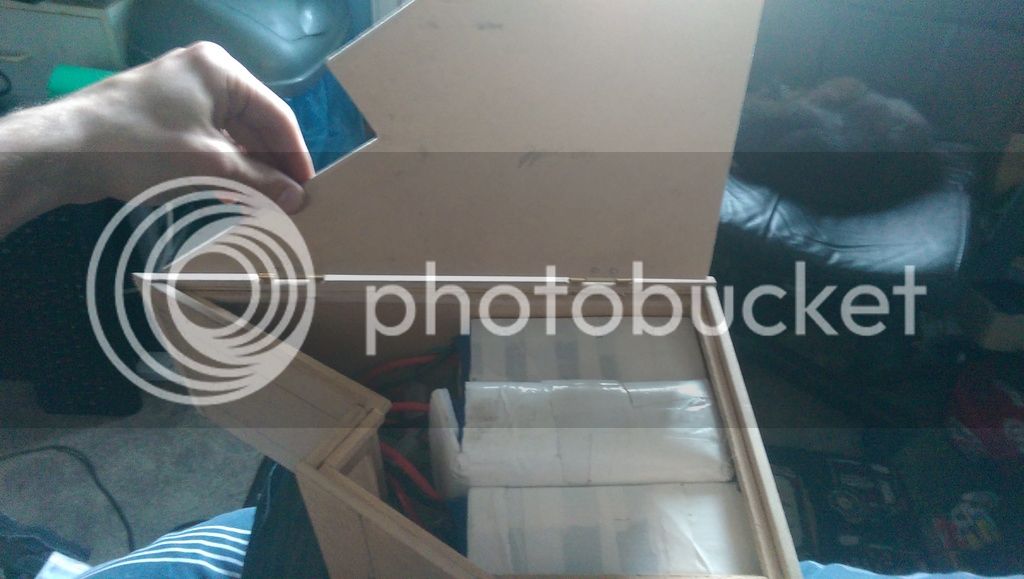
whilst test fitting the batteries i added the hinges for the box's lid
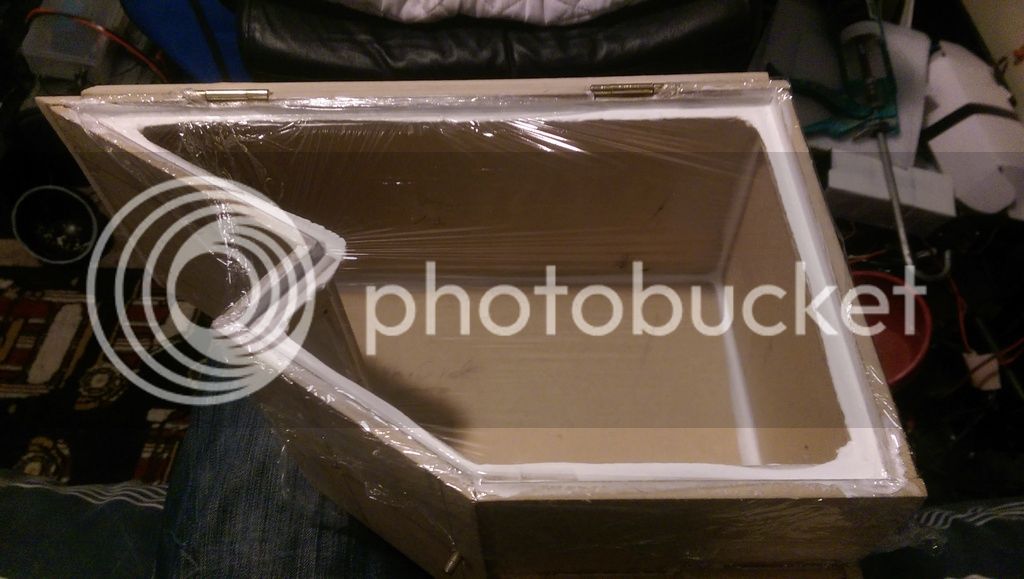
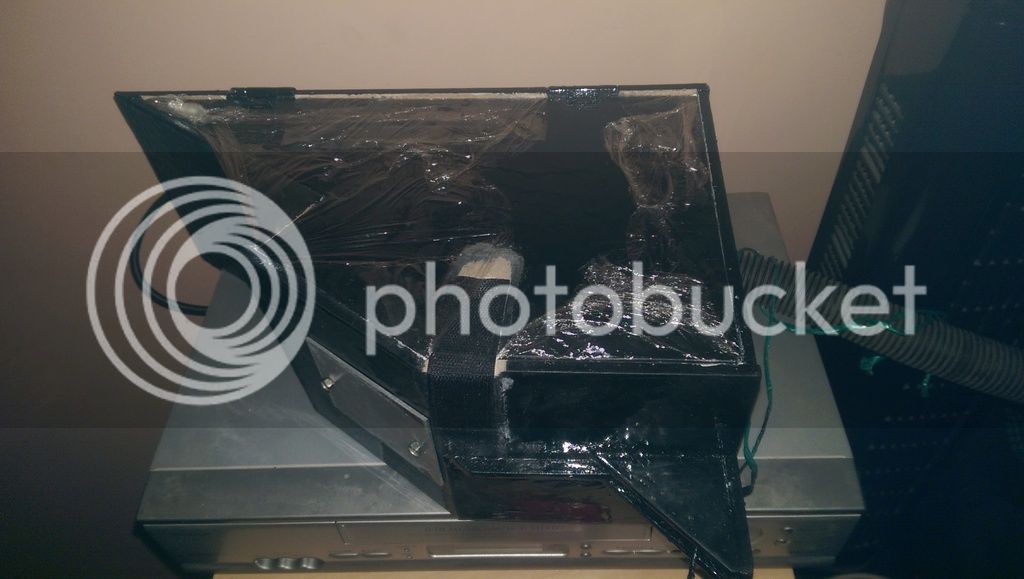
and added the silicon sealant closed the lid with cling film on it so it created this lovely watertight seal
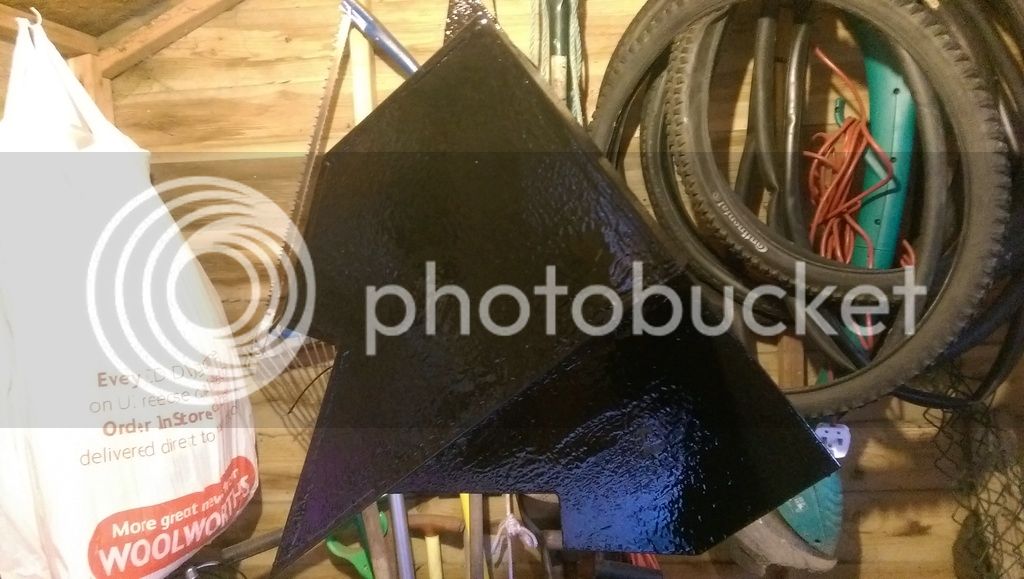
then i spray painted the box with primer an painted it black with some hammerite after working out my spray painting skills weren't that good lol ( lots of streaks but i was rushing to try an get it done within a day )
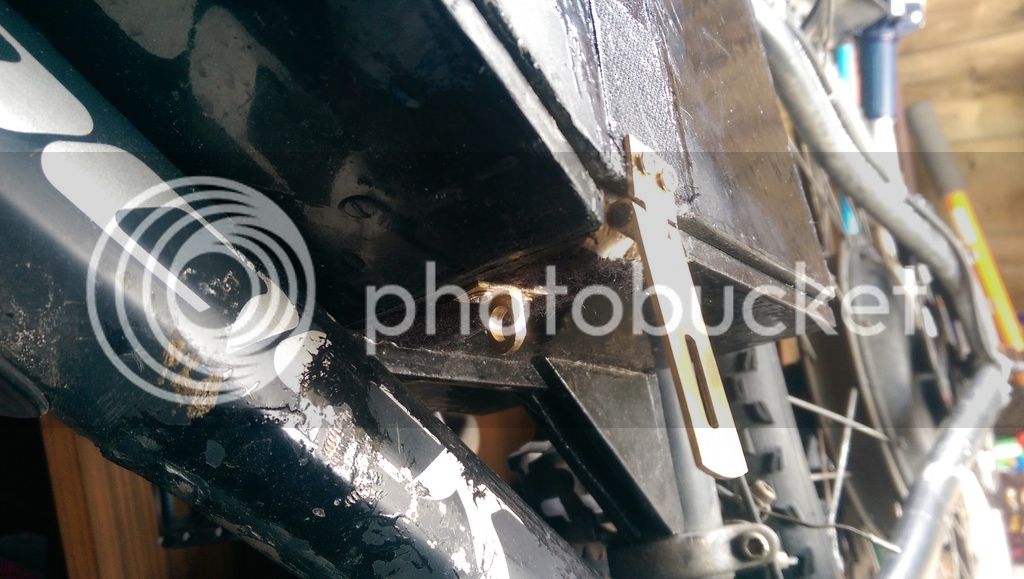
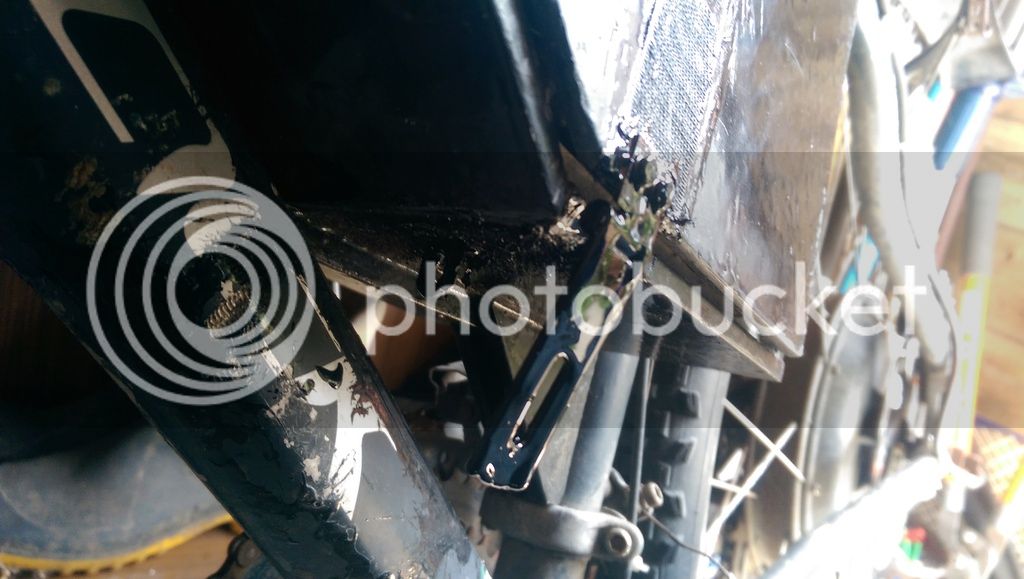
put some velcro on to temporarily hold the lid closed whilst i redid the silicon sealant an added some metal plates to relieve the stress on the screws that hold the box to the frame ( they go on the inside i was making sure id drilled the holes correctly an they'd fit properly in these pictures ) and also added a tube for the wires to enter the box for the motor wires etc
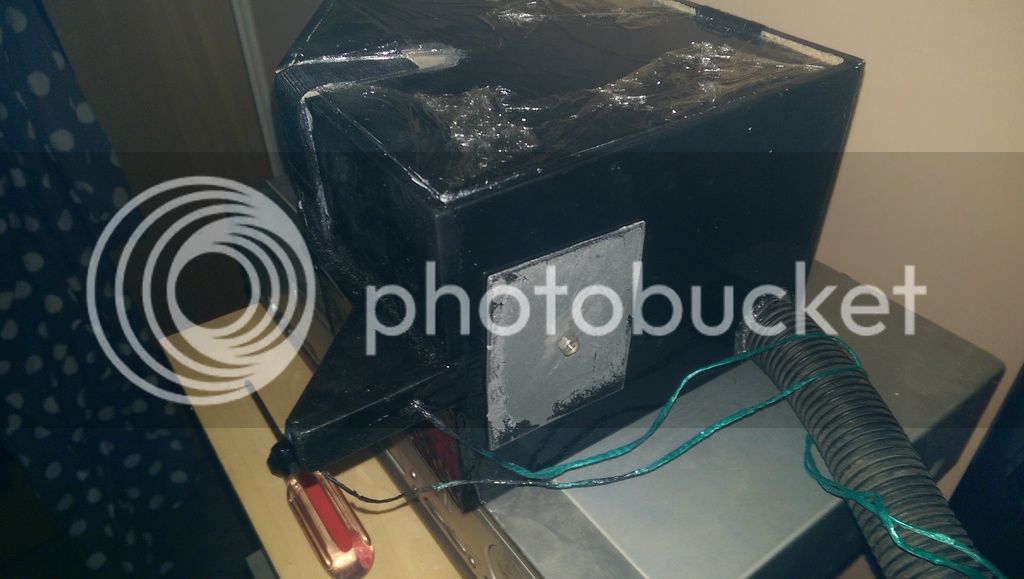
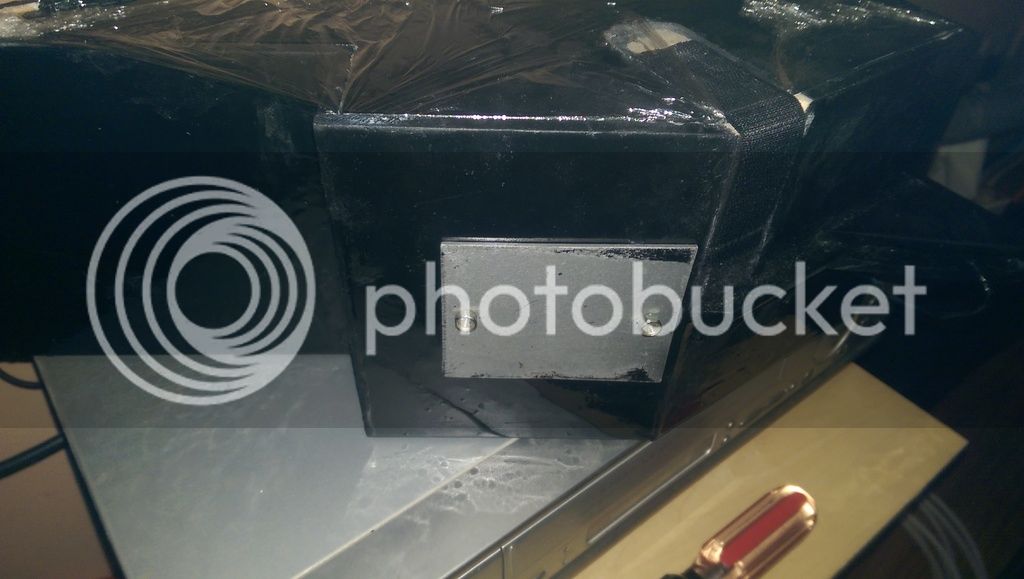
fitted the controller into the box
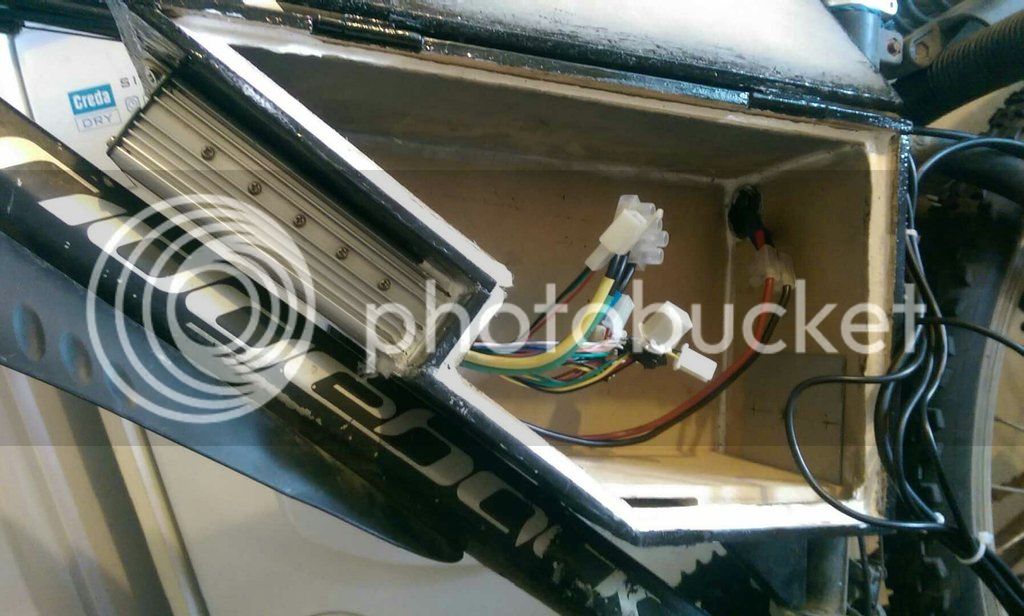
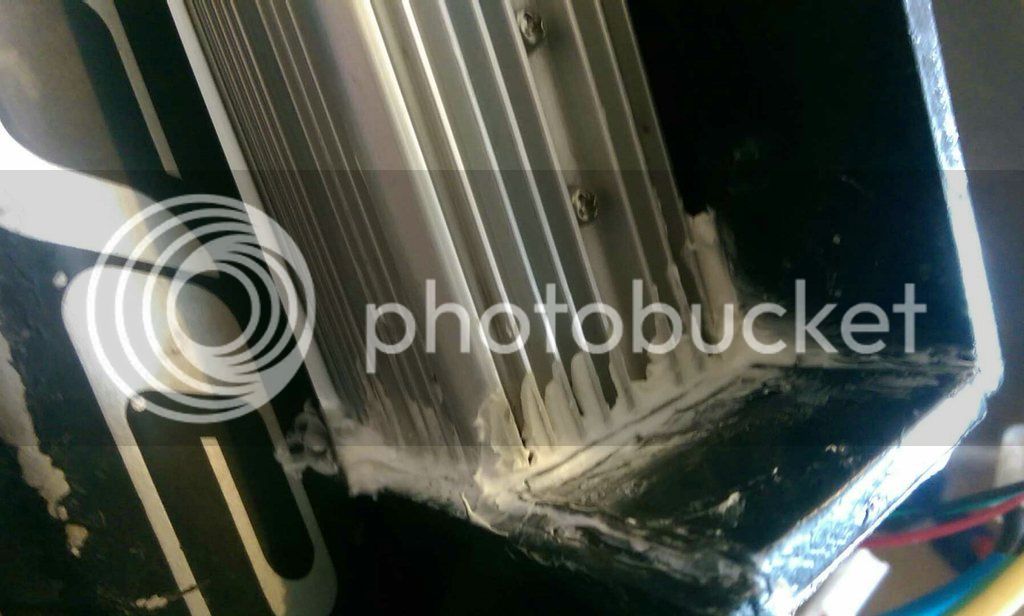
had to silicon the contoller for a proper seal as i snapped 4 screwws trying to get the controller to be flush with the box
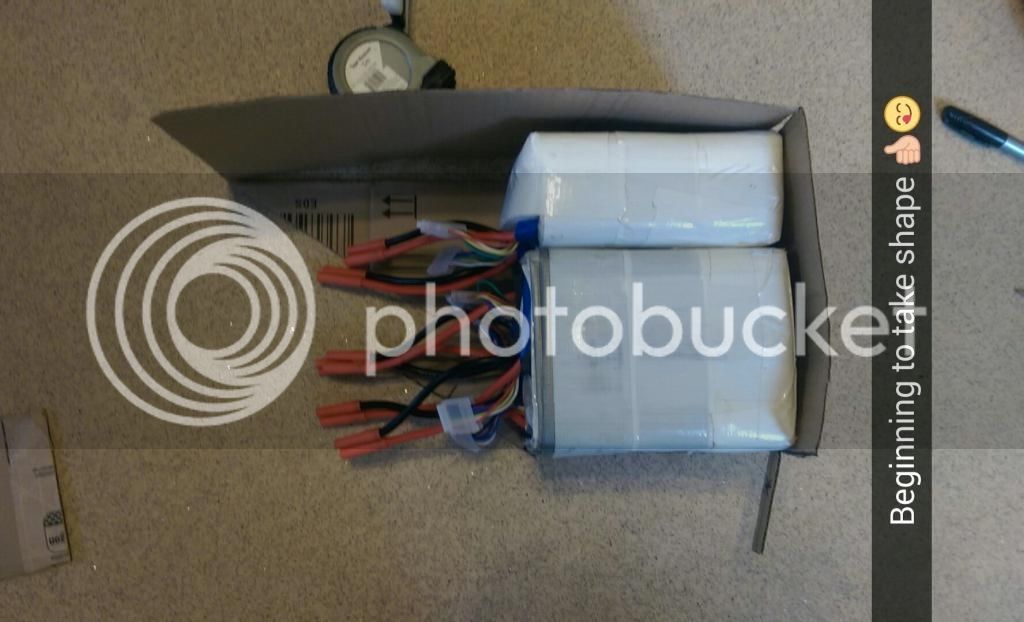
fitted padding to the inside an squeezed the batteries in
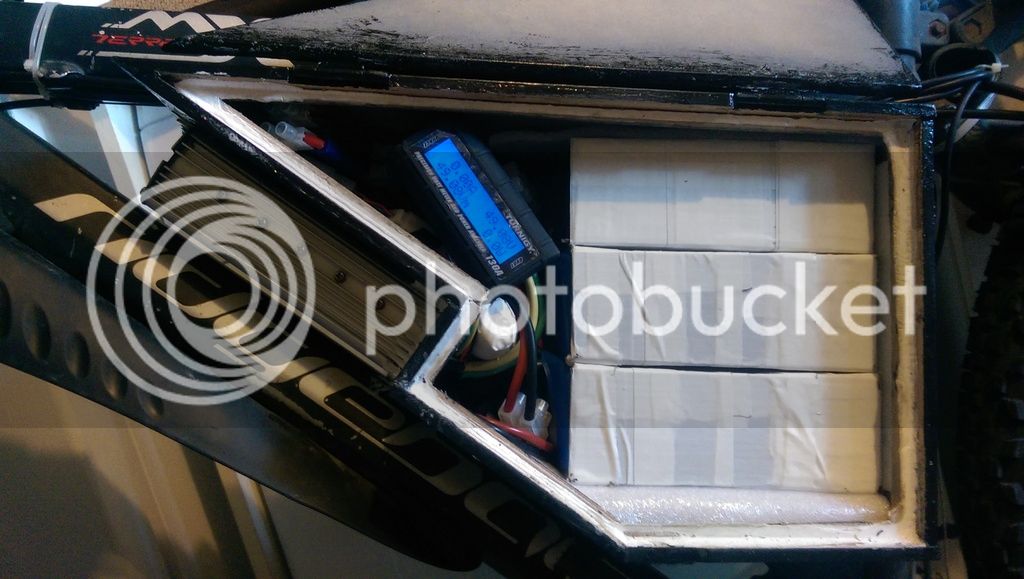
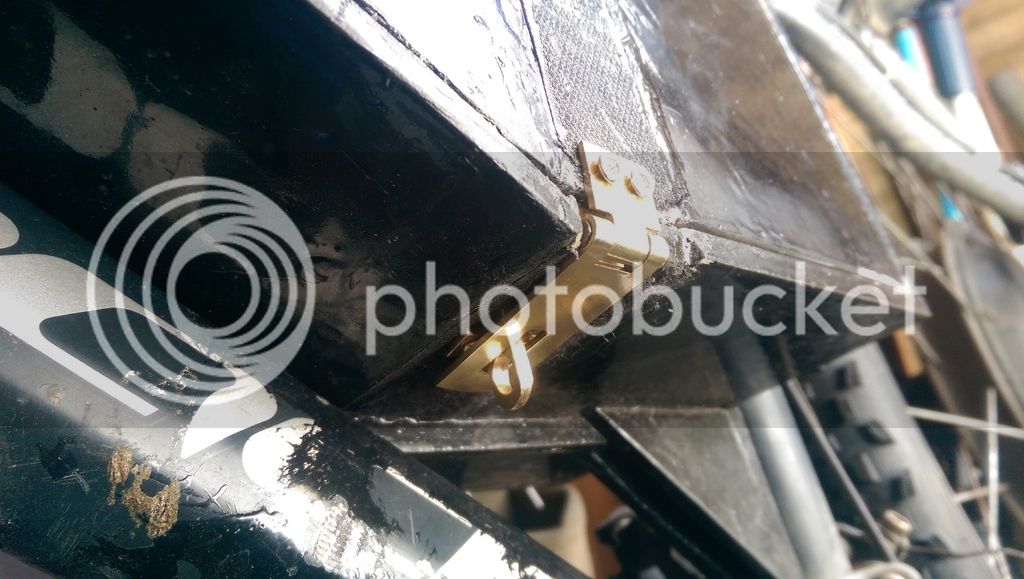
added a latch to securly hold the box lid closed an painted it
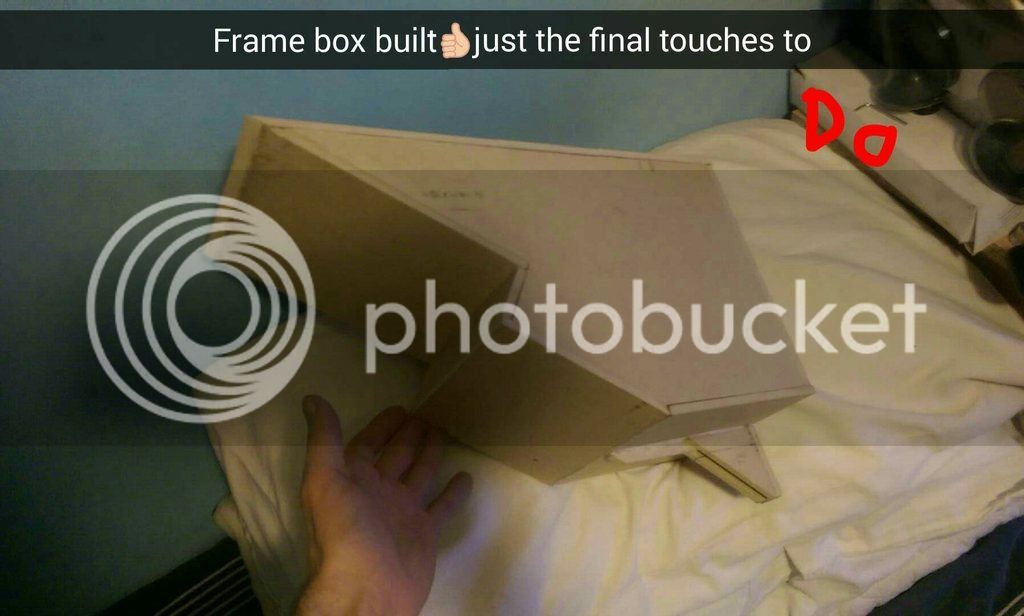
and how my bike looks now with its new frame box
now ill use the bike for a few months to see if i find any problems with the box an adjust them if i do whilst i work on lacing my new 1500w leaf motor into a rim for testing as a commuter
my new 203mm rotors so the caliper misses the hub and also the extra braking force needed to stop quicker ( banana included for scale lol)
i decided to use 6mm mdf wood for my frame box as it was easier to work with an cost less for a test box ( in case i need to refine the concept from any problems i run into etc)
i also got my hands on a 12 fet 4110 infineon from em3ev with a thumb throttle, speed switch an cruise control
then started the template making out of wood as the cardboard template wasn't quite the right size
once id cut all the pieces out an got them sanded down to fit
i added a lip just inside the lid to apply my silicon too for a waterproof seal
and added the bolt holes that match the bike frames tool bolts
and cut the hole for the controller wires to fit through
whilst test fitting the batteries i added the hinges for the box's lid
and added the silicon sealant closed the lid with cling film on it so it created this lovely watertight seal
then i spray painted the box with primer an painted it black with some hammerite after working out my spray painting skills weren't that good lol ( lots of streaks but i was rushing to try an get it done within a day )
put some velcro on to temporarily hold the lid closed whilst i redid the silicon sealant an added some metal plates to relieve the stress on the screws that hold the box to the frame ( they go on the inside i was making sure id drilled the holes correctly an they'd fit properly in these pictures ) and also added a tube for the wires to enter the box for the motor wires etc
fitted the controller into the box
had to silicon the contoller for a proper seal as i snapped 4 screwws trying to get the controller to be flush with the box
fitted padding to the inside an squeezed the batteries in
added a latch to securly hold the box lid closed an painted it
and how my bike looks now with its new frame box
now ill use the bike for a few months to see if i find any problems with the box an adjust them if i do whilst i work on lacing my new 1500w leaf motor into a rim for testing as a commuter
Similar threads
- Replies
- 9
- Views
- 535
- Replies
- 128
- Views
- 4,138
- Replies
- 53
- Views
- 2,252
- Replies
- 25
- Views
- 1,733