I did a little experimenting with the already partly-disassembled LED bulb, as well as a second larger/higher power one that was marked "bad" that didn't light up when screwed into a lamp (all the others do).
First, I disassembled the smaller one the rest of the way, just to see what's in there. Not like I'm going to hurt it much.
")
First up was detaching the LED from the stuff inside, so I could see if the LED could be removed, and also to see if it even worked. I chose to cut the red and black wires to it, leaving just enough to clip test leads to.
View attachment 25
Then I promptly forgot that I was going to test the LED (with the small Sorenson), since I'm easily distracted, though this time I don't remember by what. I got the vise-grips out, and twisted the base away from the heatsink/LED module, and it popped right out, leaving some brittle but flexible silicone potting behind, and exposing part of the internal PCB.

Interestingly, I was able to push the whole silicone plug, PCB and all, right out the end of the plastic cylinder base with my thumb.

Breaking off the silicone was fairly easy, done by hand, but I slipped and broke this inductor off. I'ts marked, so I may be able to find one on another bit of electronics to replace it.

Hopefully I will, because a meter check finds that the fuse is blown:

It is likely something else caused it to blow, but I won't know till I rpelace the inductor, and hook it up to a load and power it on.
Anyway, hte PCB isn't necessary to use the LED module, but it might make it easier, since it's essentially an SMPS and will probably work on much less than 110VAC, and probably on DC, like my bike's traction battery pack. (like my CFL taillight does)
So...on to the interesting part: testing the LED itself. I assumed that 3-4V should be needed for each "segment" of the LED, of which there are 3 series rows of what seem like 15 or 16 dies in parallel. Ought to take maybe 9-12V at an unknown current level for full brightness.
At first testing, the LED will emit a bit of light in a dark room at only 6V, but the camera can't pick it up.

I have to go to 7V to get camera-readable light out of it

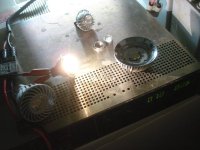
The Sorenson is limited to 100mA current at this point, just so I don't blow anything by accidentally spiking the LED with power. It might not be a regular lamp anymore, but it certainly has possibilities for CrazyBike2 lighting. :lol: This is a pic of it at about 7V or so, with the room lighting on (15W fluorescent)

Upping to 7.5V gets a LOT brighter:

but compared to the room lighting it is still barely lit

On to 8V and up, about a volt increase each pic, having to increase to 200mA in the third pic to get the voltage to keep going up:


By the fourth pic, at about 11V, 200mA or so, it ws so bright the camera had afterimages (which did eventually fade, but I was afraid they might be permanent. I think that ther eis still a bit of shadow in spots I pointed the camera at the LED in, when I point it at a blue section of sky.
)

The LED is epoxied to the heatsink, so I risk destroying it trying to remove it. I'll probably just leave it on there and use it as one piece, in whatever I end up putting it in.
The last bit of testing I did was to push the voltage and current up, watchign each carefully, until there was a balance that was around 11V at 600mA or so. Far too bright to look at even at a distance. Gets toasty hot (can't put finger on actula LED unit, though theatsink was still just getting warm).
I also disassembled the "bad" large bulb, which has an even more powerful LED. It turns out to have about 10 series sets of what seem to be 10 dies, but might be more--they're so small I have a hard time seeing them, and you cant' tell the difference between their edges when they are lit up at all.
Popping off the lens assembly was easy, but I pushed too hard at the wrong moment and cracked an edge off. Most of the "reflector" is actually just the cone of plastic, all clear, using the same reflective properties that make fiber optics work--different densities of material with different optical properties, so light reflects within the denser material, letting a lot less of it out the "sides" than reflecting forward.
View attachment 11
THe white "basket" that holds the lens also secures the LED to the heatsink, as unlike the previoius one, isn't epoxied down.

This one has nothing but the pressure of that basket holding it on, and white regular heatsink paste (the stuff that alwasy dries out, usually quickly), helping it contact the heatsink. No polishing on heatsink, either--its actually painted this dull gray like the outside, which probably does not help get heat away from the LED. Perhaps that is why the bulb died--the LED pulled more current than it should because it was too hot, and overloaded the PCB.

The two screws also hold down the base plug, so after cutting the LED supply wires, it was easy to remove.

I dug into the brittle but squishy silicone, carefully, and excavated as far as I could without risk to components. I still couldn't push the PCB out like I did with the previous one.


So I had to cut the shell off the potted PCB.
 View attachment 4
Then I was able to remove the potting silicone, pretty easily:

The fuse, far right in this pic, is intact. But the inductor on the top right is damaged from my cutting the case open.
 View attachment 2
Not much damage, just one light scrape thru it's heatshrink, but I must've cut a wire in it becaues it reads open.

The LED chip itself, well, that's pretty thin, metallc substrate with ceramic coating, I think, then the LEDs on top under a silicone covering and phosphors. Chip area about the isze of my pinky nail, unit about the size of my thumb's fingerprint.

I didn't take pics of the ligthing experiments, but it takes about 30V to light up at all, and at 42V or so it draws about 500mA, and is far too bright to look at, and gets pretty warm. I am sur eI could push it further, but that was enough to let me know it's very usable.
I'm considering putting one of those modules into my taillight, in place of the CFL. Probably use the second one as a brake light in there. I dunno how many lumens each puts out, as I haven't run across my light meter in quite a while.