Custom_CHRoMo_CRuiSER

Hey KiM, thought I'd reply here about the batteries.

As you are aiming for 18s, I reckon we can take balance wires from each cell up to a D-sub 25 or similar. Then the male end of the D-sub can split two ways - take cells 1 to 9 off to one 10 pin (9s) JST plug, and cells 10 to 18 go off to another. Shouldn't be any need to balance anything in parallel with these packs since all of the cells are permanently paralleled.

Like my race bike, you can just bulk charge most of the time at 75 V. But when it's time to balance, do a bulk charge up to 95% and then balance charge half the pack at a time since it only needs it once a month I reckon. You can attach the balance charge leads to the pins for cell 1+ and cell 9- since the currents for balancing are well below the 3 amps these plugs are rated for. Likewise for cells 10+ and 18-.

Finding a good weatherproof on-board-diagnostic serial plug is tough, but you can get covers for D-subs, and as long as they are kept out of the way they should be good for a couple hundred 'penetrations' ;)
 
Sounds like a good plan CHRiS :) I use db25 connector on the old cruisers 12s setup, been a few that have copied the idea recently I see lol..what I was trying to do away with for time being due to $$ was having to buy more psu to charge at 72 volt. If I can use the current charging setup i.e. dual meanwels and hyperion to charge via balance taps .. I guess a couple of clone 36 volt meanwelsaren't to expensive though...

KiM
 
hey kim,

Im not sure how your discharge leads will be configured with Chris's new assembled packs (have not read yet).....but simply splitting the pack into 2 9s lots ie with two db25 connectors would work with the existing hardware you have. Dont even have to change the charger side of the wiring, just the cells from 10 to 12 dont connect to anything on the bike side of the plug. Though charging would require you to charge one half of the pack, disconnect from one db25 to the other then charge the other half. This was how I was going to do 24S. Would get you by till you could afford a bulk charging method and also for the occasional balance.

:wink:
 
rodgah said:
hey kim,

Im not sure how your discharge leads will be configured with Chris's new assembled packs (have not read yet).....but simply splitting the pack into 2 9s lots ie with two db25 connectors would work with the existing hardware you have. Dont even have to change the charger side of the wiring, just the cells from 10 to 12 dont connect to anything on the bike side of the plug. Though charging would require you to charge one half of the pack, disconnect from one db25 to the other then charge the other half. This was how I was going to do 24S. Would get you by till you could afford a bulk charging method and also for the occasional balance.

:wink:

G'day RoDGeR long time no see!! I thought the same regarding charging, but instead of the
DB25 i think i will try to use a pair of smaller size connectors, hrmmz like the old VGA monitor
connectors on video cards for example, ill have a looksee at Altronics etc for something with
10 pins or so.. but yeah, funds are nil right now everything hit at once plus i have some medical
expenses i need to pay out for ultimately it will be bulk charge all the time quick connect of the moddified
GGoodrum Battery medic to check balnce if needed ill whack it on the hyperion...have
you checked out CHRiS's boards? they are THE SHiT mate, individual lipo cells used to
make packs, so much neater no mass of wires, neater than the buss bar setup i have used
(and you copied LOL) smaller size and lighter! and freakin VERY VERY reasonably priced!!!
anywayz, im VERY excited about this new build, it hopefully will GO as good as i think she will look... You still logging into msn mate? i havent for ages if your back online regularly i would
like to catch upi up for a catch one morning? still on the mines?

KiM
 
"and freakin VERY VERY reasonably priced!!! "

Only cause I'm selling them to you at cost ;) But yeah, add 25% to them and you'd be putting food on my table :)
 
AussieJester said:
use a pair of smaller size connectors

yeah though the vga style would be a pain to solder being 3 rows, there is a db15 in 2 rows of pins(which i see Chris has used). I been trying to keep up with the latest, but no internet, and trying to settle into new house, minor reno's etc etc keep missing stuff. I have been hanging out for a video of the rewound ca120 spin up. Chris's packs look great, atleast we know the quality of the cells going into them is above normal chinese crap.

On msn like normal now, home tomorrow, then work till next week.

:mrgreen:
 
You can get pretty compact breakout boards for D-subs, even ones with three rows of pins. Winford Engineering make them, but they aren't cheap (but think about how mad you would go trying to solder them yourself). http://www.winfordeng.com/products/cat_brk.php

Oh I do a QC check on the individual cells - puffed (Y/N). If N check voltage (3.8 to 3.9 V? Good!). And amazingly that's 95% of the QC you don't get with 6s packs :? .
 
jonescg said:
You can get pretty compact breakout boards for D-subs, even ones with three rows of pins. Winford Engineering make them, but they aren't cheap (but think about how mad you would go trying to solder them yourself). http://www.winfordeng.com/products/cat_brk.php

Oh I do a QC check on the individual cells - puffed (Y/N). If N check voltage (3.8 to 3.9 V? Good!). And amazingly that's 95% of the QC you don't get with 6s packs :? .

The tiny or slim break out boards look the go although TBH, i had little issue
soldering the balance taps to the DB25 connectors, once soldered and heat
shrinked i smother all connectors in liquid tape, made for
a solid unit...did take a lil time though... that said LoL, have you any of these boards
CHRiS? if so, will buy a couple if you have spares?

KiM
 
No, I haven't got any of these but I will be considering the DB26-HD (or DA26, according to formal nomenclature) slim boards for my 21s sub-packs. From memory you can run up to 16 gauge wire to the screw terminals and the pins are rated for 2 A continuous. More than enough for a balance charge from an already bulk charged pack.
 
As I've said before, 24 pin Centronics plugs all the way - the wider flat spring type contacts are so much better at connecting than DB type pins. I used to run DB25s way back on my first build but you need to wiggle them a bit and use force and it's not ideal when you're plugging and unplugging all the time.

DVI monitor type plugs are another option if you want something more compact and has enough pins for 18S
 
Hyena said:
As I've said before, 24 pin Centronics plugs all the way - the wider flat spring type contacts are so much better at connecting than DB type pins. I used to run DB25s way back on my first build but you need to wiggle them a bit and use force and it's not ideal when you're plugging and unplugging all the time.

DVI monitor type plugs are another option if you want something more compact and has enough pins for 18S

Winford Engineering does a Centronics 50 pin breakout board, but they would probably do a 24 pin plug if you asked them nicely, and wanted a 100 or more. I guess ideally you wouldn't be using the plugs all that often anyway, just for the odd balance and diagnostics.
 
24 Turnigy LiPo cells arrived at my door this morning KiM :D I just have to wait for the remaining 8 to show up and we can get started :wink:
 
jonescg said:
24 Turnigy LiPo cells arrived at my door this morning KiM :D I just have to wait for the remaining 8 to show up and we can get started :wink:

And now thankz to CHRiS they have ALL arrived at my garage! To my surprise and delight
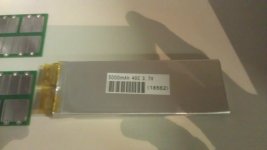
CHRiS dropped by Saturday with all the cells boards and copper bar needed to assemble
a 66v 15ah pack for the new bike!

View attachment 1

IMAG0530.jpg

40C Turnigy LiPO cells along with a couple of CHRiS's boards and enough copper bar
to get me the pack to power the bike! HUGE thanks to CHRiS for the cost
pricing helps me out alot with the limited funds i have to throw at this
bike right now...

I have also fixed Jay up for the two 3in x 24in rims still to sort ThudSTeR
for a 'care package' that i believe is on route to me, along with a 24 fet Infineon controller
ill grab from Cell_MaN... Dead broke right now and i need to buy some aluminium before i can
get any more done on the frame construction unfortunately...

I will though have some more work done on the battery pack in coming weeks, CHRiS
and myself will build the pack up over a few bourbons in a few weeks time, he has a few
"issues" with his new (to him) eastern states purchased
CRX Honda, so it can be re-licensed here in the West, best of luck with getting that sorted
buddy...

Anyone interested in custom packs constructed from 40c Turnigy cells and above pictured boards
should get in touch with CHRiS and/or check the following thread for more details on the
configurartion and pricing of packs Assembled Hi-Power LiPo battery packs

Ciao for now peeps...

KiM
 
Thanks man :D You are welcome. Hope to have the oil-burner on the road soon... if it doesn't send me broke in the process :lol:
 
Soz for the loooong delay between posts chaps, my lil lady had a shoulder operation 3 weeks ago
followed by two weeks off work, second week in i said to her on a Thursday night over few drinks :roll: lets give this
rainy weather the ass for a week and frock off to Bali!?@#$?!@ so..come Monday when midnight hit
we were on our way to Bali for 5 days!! gotta love the interwebs, booked everything online in 10 minutes printed the ticket
off and saved near 400 bucks on what the travel agent quoted us HAHA...So...i layed back
for 5 days drinking copious amounts of Magic Mushrooms inbetween Bintangs and swims
aaaah life is goooood guys! but now i am back and so motivated to get this bike
happening before summer hits, winter is closing riding weather is coming!

As always money is the issue and having blown $AU467 dollars to gotto Bali on the spur of the moment
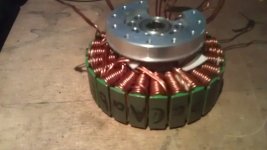
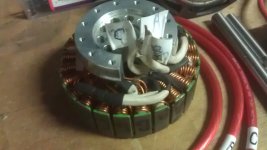
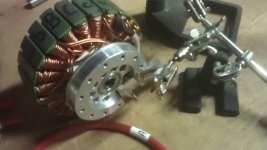
im still without a controller BUT i have got something to show...The Turnigy CA120
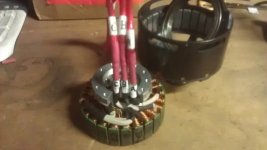
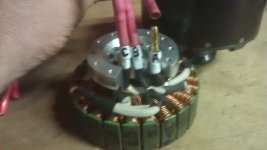
i picked up for 100 bucks of my good buddy Timma (Paul) has finally been rewound!

View attachment 2

Its twin wire 16ga Thud? 6 turns will have 120degree spaced hall sensors, powered with 40c Turnigy
72v 15ah custom jonescg pack!

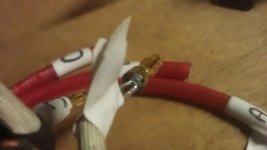
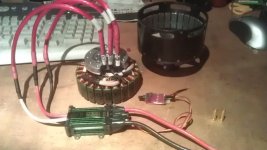
I have to terminate this motor yet, this will be a wye termination, shall complete this after this post and attempt to crank
the motor over firstly, with a Castle Controller, i have a CC120 in the cupboard collecting dust, never
been used was a replacement for the blown CC110 i first used waaaay back on the blue cruiser!

View attachment 1

IMAG0595.jpg

I am quietly confident i have followed the diagram i grabbed on rewinding these motors, damn hard
to get so much wire in such a little space oh the hands oooooh the hands haha.. If i can get the motor
spinning on the CC120 ill then add halls and coat the motor with motor winding spray
to seal it good...

Kelly controllers, i was think the KEB72100,24V-72V,450A,10KW, expensive and even more so i think i need the ultra high speed 100,000 ERPM
upgrade but require confirmation on this by one of the gurus Todd? LFP? etc? anyone? LoL I will also
if this controller is acceptable pick up the Compact Assembly (KEB/KBL/PM ) Will take away most of the wiring head aches i seem to have everytime i
attempt to wire up a controller and seeing i need a contactor this time round due to the 72v
setup, 120 bucks is a sum im happy to pay... That said will take a good month to put away the $$'s
for this as i also need to fix up Thud for the gearbox before anything more electrical happens, that and
i owe the lil lady a couple hundred dollars i borrowed in Bali, its the SHRoooMs they is addictive
Luke knows whatz im talkin' boutz teehehe :: wink :: Not to mention the 100% genuine fake clothing
sunnies and watches i just cant resist LoL...oh and the Bintags many many many bintangs.

Hope to have some more on the success, or not, of the motor come days end or first thing tomorrow...

back soon folks..

KiM

p.s CHRiS, how you getting on with that ::cough:: "oil burner" of yours? you polluting
thing you sheesh, bloody shameful mate HAHAA :p :p :p :p
 
Tuesday morning mate :D Hopefully it will sail over the pits no worries. I just got the new bushes put in the trailing arms and the temperature gauge sending unit has been installed. New leads for each plug and she's running as good as the day I bought it.

Actually this weekend (when I'm not getting new tyres fitted to the C-REX) I will start work on my 20s3p 5800 mAh pack. I am going to try my G10/FR4 idea for protecting the balance wires from the terminations. I reckon it should work well and look really neat. I'll run them all through a DB25 or something.

On the wire front, I have a stack of 18 gauge wire which would be perfect for balancing leads since you can still put a few amps through them without too much trouble. The other wire I have is 24 gauge, and it's just a bit too small IMHO. Wouldn't take up as much room, but not so hot for balancing currents.

Let's aim for next weekend eh?
 
Sounds good CHRiS, i have AFL grand final and Bathurst to watch this weekend AND amongst that build yet
another gate ... chook pens fences/gates and pot plant trolleys has been taking up the weekends
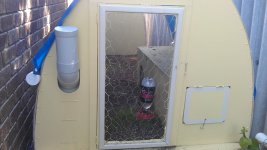
before Bali, the chooks are laying us three nice eggs a day now so we is chuffed..heres a pic of
the chicken coup Karan and I built in two afternoons few weeks back, following weekend we decided to let
them roam in the small garden area also so another fence was needed, out come the wood work tools again LoL

IMAG0545 - Copy.jpg

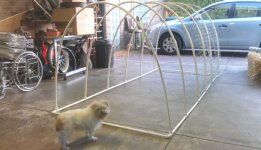
Good ole PVC to the rescue, basic frame to fit the odd shaped non rectangular area where the
pen was to be situated...Wrapped the entire thing in chicken wire so nothing
gets under and in...

IMAG0557.jpg

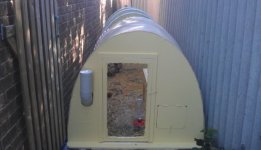
Some ply wood ends a door and hatch to collect the eggs

View attachment 9

IMAG0599.jpg

The lady is a lil girl at heart, she loves her chickens and named the coup
the 'Chookee Palace' so i whipped out the router and made a lil plaque
to hang above the coup HAHA...

IMAG0600.jpg

some paint a trim on the door completed the job!

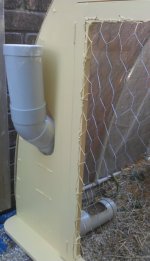
I wanted to be able to pile enough feed in the coup to last a weekend when we are away
so knocked up this 'auto' feeder from 110cm pvc tubing

IMAG0559.jpg

IMAG0552.jpg

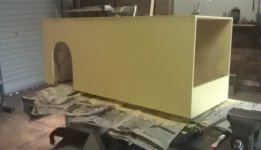
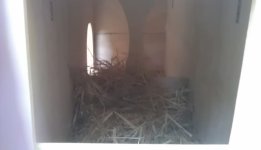
The chooks or 'the girls' as Karan calls them needed a place to lay and roost at night
so i whacked up a meter and a half long box that has area for nesting at one
end at a roost at the other, they snuggle in their at night and pop out eggs during the day LoL

IMAG0562.jpg

And of course the sandy area in front of the coup wouldn't do so a few sand stone pavers
so i wouldn't get bogged when i go to feed, water and collect eggs..

IMAG0569.jpg

The cleaning of the pen ISNT my job i made this perfectly clear before agreeing to chooks LMAO... Since
these pics half a dozen bags of wood chips have been spread on the floor....

We have shade cloth permantly fastened to the roof over half the pen however its winter here
now so to stop rain in half of the coup and over the box i got some pvc tube few end caps and a tarp, filled
the pvc with water and sewed the pvc pipe to each end of the tarp, the weight
holds it down and also allows it to be quickly and easily rolled up and put away in summer when not needed.

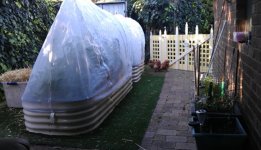
I have a raised bed veggie garden out back where the pen is, just outside the workshop door
we thought the chooks should be able to roam around in this area also, since the raised
beds have covers the plants are safe, thankfully as these frockers eat anything green :-|
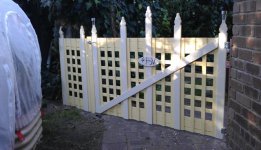
to keep them in this area though we needed a fence so i got some lattice and pickets and knocked this
up complete with a little 'brand' the brand used on Karans fathers farm to be precise "4Jv"

IMAG0573.jpg

IMAG0567.jpg

Chooks now get to roam over the entire block but we do keep them in this area every second or third
day to give the rest of the garden a break, they have done a fantastic job clearing leaves and bugs
from the rest of the property i must say LoL OH, and of course, heres 3 of the 4 'girls'

IMAG0576.jpg

Not sure exactly the breed i mix of Rode Island Reds we presume...nice chooks about 4 months old
and the most inquisitive friendly frockers, they want in to everything, no fear of humans
whatsoever, they sit on my lap for a pat haha...

So i have been busy other than just holidaying in Bali haha next is a nice size Aquaponics
setup i have been dreaming about doing for years! we iz turning into rite hippies with veggie
gardens chooks and worm farms, nothing like fresh veggies and fresh eggs though
only 57 more dozen eggs to cover the cost of the coupe and fence haha

Soz haven't finished the motor wiring yet fussing over how to route wiring, think im on top of it
no more 'interruptions' and i might have it done by time workshop 'bar opens' at 4.30pm today LoL

KiM
 
You've just confirmed what I've been saying for years - you're into cocks :mrgreen:
Good to hear you've managed to squeeze in yet another holiday.
Now leave the chook eggs and get cracking (pardon the pun!) on the ebike build!
Given I've got no frame to mount mine to yet you'll have those 3" fatties rolling before I do
 
subscribed
 
Hyena said:
you're into cocks
:lol: he sure is.

cmon mate get this rewind a going.....I have been waiting for a long time to see a documented comparison of a 80-100 hv160 vs ca120 low kv high V. Regarding the contactor....I dont think you 'NEED' a contactor, and you know I am always down on the keep it simple stupid philosophy and would much prefer a big red isolator than a bunch of fiddly little wires turning on my bike( im going to use the same contactor on 24s....lets see how long it lasts without precharge :lol: ).

The motor looks excellent anyway mate, its a pitty you have to epoxy the end turns at all, they look sooo good thru the can.

Cheers
 
Hyena said:
You've just confirmed what I've been saying for years - you're into cocks :mrgreen:

HAHA Jay Jay Jay... they are Chickens buddy not Roosters... :p

Hyena said:
Good to hear you've managed to squeeze in yet another holiday.

Indeed :wink: it's so cheap hard to find a reason not to when its winter
here, pissing rain and 30+C with 80+% humidity up in Bali its only 3 hour 40 minutes flight from the West
if that ain't enough buck fifty beers and legal SHRooMS definitely tip the scales LoL

Hyena said:
Now leave the chook eggs and get cracking (pardon the pun!) on the ebike build!
Given I've got no frame to mount mine to yet you'll have those 3" fatties rolling before I do

still many months away im afraid, just dont have the money to make it happen quickly that said
all future pays will be devoted to the build ;)


rodgah said:
cmon mate get this rewind a going.....I have been waiting for a long time to see a documented comparison of a 80-100 hv160 vs ca120 low kv high V. Regarding the contactor....I dont think you 'NEED' a contactor, and you know I am always down on the keep it simple stupid philosophy and would much prefer a big red isolator than a bunch of fiddly little wires turning on my bike( im going to use the same contactor on 24s....lets see how long it lasts without precharge :lol: ).

The motor looks excellent anyway mate, its a pitty you have to epoxy the end turns at all, they look sooo good thru the can.

Cheers

I won't be using a HV160 buddy soz, i dont have a working one Danny Mayes blew it on a ride months ago along with the
Turnigy 80-100 actually on inspection the Turnigy shorted and....chainreaction thang
I only have the HV120 that ill use to see if i can spin this CA120 up all going well i'll move
to the Kelly mentioned above hoping the overkill will give me a lil more reliability than
i had with the modded 12Fet Infinion Jay and I blew easily running the 80-100. In regards
to the contactor, i wont to use one, Jonesy gave me a very nice two position key switch
first position will precharge the second power the bike...see how it goes anyway you
know me Rodger, i cant put batteries in a torch correctly let along wire the controllers
up correctly haha thanks to your persistence on MSN i managed to get the last
setup running beautifully....speaking of soz if i have missed you on msn with the new
"living arrangements" i have lots more to keep me occupied or should i say the lil lady finds
me lots of things to keep me occupied while shes out earning the big bucks LMAO...

Anywayz fellas, couple of the boiz just rocked in with eskys ready to settle in
to watch the AFL Grand Final...

KiM
 
Always good to see a non-Victorian team win the grand final ;)

That keyswitch kim - it's only good for running a relay coil which does the heavy lifting. I wouldn't run the pack voltage through it if I were you. It might be good for 5-10 A max.

Rodney and I had the same problem - it would have meant an auxiliary battery to run the contactor and precharge relay, and then you gotta keep that charged and all that stuff. Hard to justify on an e-bike but if you got the room for a lil' 12 V SLA or LiFePO4 battery then you could make it very nice.
 
Back
Top