New Enduro/clone build

ZeroEm said:
Would not worry to much unless you ride in water.

Well that’s the thing on some of the Enduro trails and ATV trails there are definitely spots with mud. I’m normally able to go around the mud but some spots you have no choice so that’s why I’m trying to seal the motor. I much prefer to ride on dry ground but all the cool trails are going to have mud, especially in the winter it never dries

That pic was taken before I opened the motor and sealed it. Should’ve seen my backpack that day lol
 

Attachments

  • F3BA99CC-14F2-4EF7-A770-847D2A2F7A23.jpeg
    F3BA99CC-14F2-4EF7-A770-847D2A2F7A23.jpeg
    617.4 KB · Views: 1,746
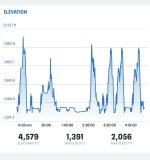
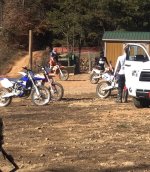
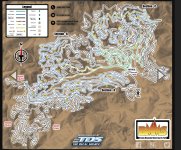
:) Took the bike to a Motorsport park in the mountains yesterday. Did some massive hill climbs, the 6T winding perform very well. Just got to watch that up spring when hitting rocks. Rode 26 miles and charged once for about 1 1/2 hours at 8 amps.

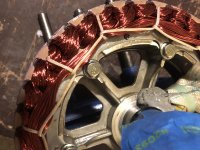
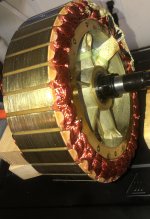
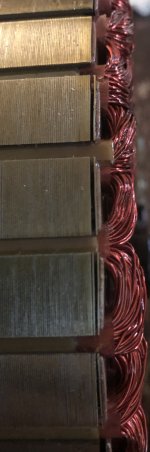
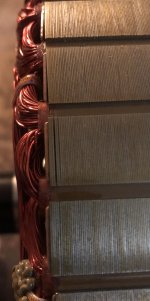
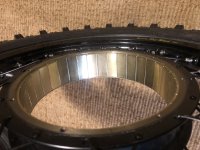
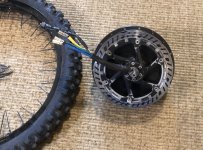
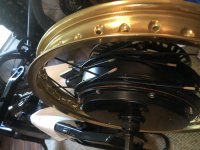
Although I believe a mid drive motor to be superior off-road these slow wind hub motors do an awesome job if anyone is considering. Especially the 6T winding, I think even the 5T works in most situation but not extreme hill climbs. stick with the 6T if you’re trying to build something for mainly off-road.

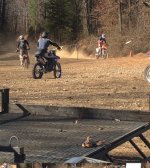
Toward the end of my ride as my battery was dying I turned down the power as much as I could to conserve range and was able to actually get up the Mountain at 80 dc amps and 350 max phase. I could never do that with a 5T winding. Prior to that I had the setting set at, 100dc amp 450phase-max Rated at 250amps, with the mid throttle current at 100a. I did hit the motocross track for a short while and I turned the power up to 150dc amps and 500 phase and 300a on the mid throttle current :shock: definitely had more acceleration than the big 450 two strokes “on the track”. Coming out of the turns/berms I can get up to speed quicker than the Petro bikes. But then slam on the brakes before the big jumps :lol: I hit small jumps but not motocross doubles on this build, its not safe.

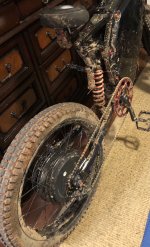
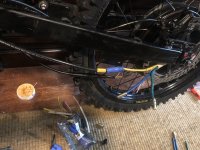
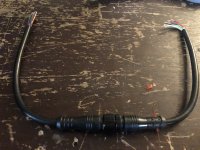
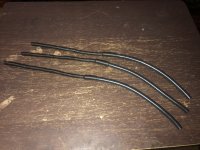
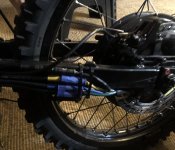
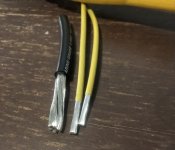
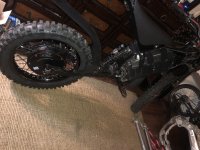
I bent my handlebars really bad yesterday dropping the bike off a ledge straight onto the left handlebar grip. Ordered a new one the exact same 60mm risers. I don’t know how the bar did not snap because the bike fell from about chest height of a ledge straight onto the left handlebar grip :shock: I wasn’t riding the bike I was walking it down a super steep descent and I had to drop it so I didn’t lose my footing. Rather break the bike than me lol

And unfortunately someone got airlifted from that motorsport park yesterday, I heard they broke their neck as they fell off the Enduro trail down the side of a mountain. Pretty sad to see knowing that persons life will be forever changed.

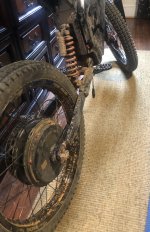
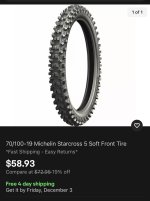
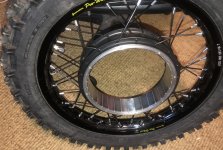
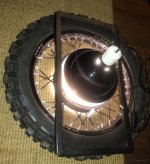
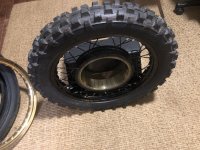
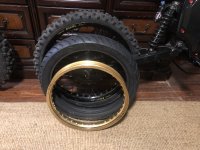
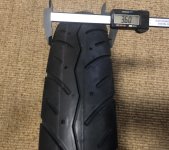
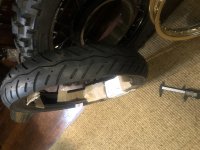
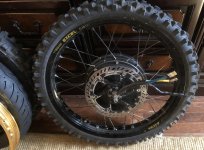
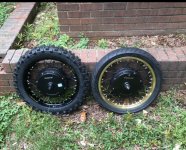
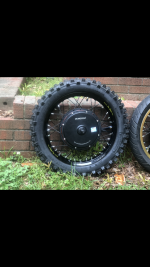
Also ordered some better tires for Enduro trails. I have no traction with these Shinkos although I love these tires they’re just not meant for hard Enduro.
 

Attachments

  • 279583F9-674A-47AC-BB84-6737F8EF9941.jpeg
    279583F9-674A-47AC-BB84-6737F8EF9941.jpeg
    186.7 KB · Views: 1,710
  • 244FFEF4-B817-4183-9AF4-ED0E45502824.jpeg
    244FFEF4-B817-4183-9AF4-ED0E45502824.jpeg
    537.3 KB · Views: 1,708
  • 6F15F7B4-FA3C-4E75-89E9-0F12FCB9FB96.jpeg
    6F15F7B4-FA3C-4E75-89E9-0F12FCB9FB96.jpeg
    572 KB · Views: 1,709
  • 7FFE4E70-DE40-4090-AB96-85DA13052405.jpeg
    7FFE4E70-DE40-4090-AB96-85DA13052405.jpeg
    540 KB · Views: 1,713
  • 08D811FB-0333-4B51-9C90-A67A07E9A6A8.jpeg
    08D811FB-0333-4B51-9C90-A67A07E9A6A8.jpeg
    737.9 KB · Views: 1,715
  • D0133139-ACAF-45CA-BC0C-297624CBF3A5.jpeg
    D0133139-ACAF-45CA-BC0C-297624CBF3A5.jpeg
    3 MB · Views: 1,716
  • 9FB4EE8E-C365-40C1-968B-832B2141270E.jpeg
    9FB4EE8E-C365-40C1-968B-832B2141270E.jpeg
    1.4 MB · Views: 1,715
  • E6FD330C-0629-4815-A59B-7A0AE657B9E0.jpeg
    E6FD330C-0629-4815-A59B-7A0AE657B9E0.jpeg
    438.2 KB · Views: 1,714
  • 5A30BB83-48D0-4623-B98E-5EEB33302299.jpeg
    5A30BB83-48D0-4623-B98E-5EEB33302299.jpeg
    615.2 KB · Views: 1,713
  • 7458E3CC-9C30-427B-BDB5-97645E7CA4AD.jpeg
    7458E3CC-9C30-427B-BDB5-97645E7CA4AD.jpeg
    217.7 KB · Views: 1,709
Nice build! I recently purchased the same frame from the same source (used paypal) and got their 5T 205 V3 kit with 19" moto wheels. Not much off-road action for me as I'm in NYC but one day ill have to explore a little for sure. I was thinking of ordering their moto seat too but heard it was so so. I've been eyeing the Vector/Eleek moto seat which I heard is great (also has a rear rack option) and wonder if it fits out frame.

I'm waiting for the kit that comes with Sab 72100 and plan to order the UPP D034 72V 40ah 100amp continuous. I'm not a speed demon at all but hope that I get decent speed and torque with my set up. You mentioned before that the Sab 7280 didnt seem like enough.
 
So new updates and changes to the bike. Purchased a new QS205 6T v3TI and laced in a 16” rim. Did this for a few reasons but primarily to have better hillclimbing ability with better torque output from the smaller wheel diameter. The new combo is also about 10 pounds lighter compared to the 19 inch set up. The rear tire is an “actual rear tire” so I was able to fit a wider tire with the 16 inch rim for better traction. 90/100 16” has a nice thick side wall for Enduro riding. I will keep the 19 inch upfront for a better rollover resistance, so 19” front 16” rear.

Still have the other Motor and will be installing a street tire on that motor so I can switch between dirt and street with the two motors. that being said I’m making a quick connect disconnect for my phase wires and hall sensors on the swingarm to allow switching between the different tire motor set up.

I’m in the process now of waterproofing the new motor by painting the inside with enamel. Also upgrading the bearings and axle seals. Installed 2 vents on each side cover with a threaded bolt that can be manually removed to allow the water to drain out of the motor. I will post more pictures when I’m finished.

I’ve also taken the bottom bracket out of the bike and just installed motorcycle pegs, I made a mounting bracket out of steel but connected to the frame and not to the swingarm. The weight distribution is way better with the pegs being on the frame. Now when I push the pegs down the front suspension and rear suspension evenly compress compared to before when I had the pegs mounted in the bottom bracket location on the swingarm.

Also installed a front fender and rear fender but I’m still working on the rear. I’ll post more pictures once I have the new motor put back together and installed on the bike with all the new upgrades. The bike handles and looks very different more of a dirtbike now than a electric bicycle. The new motor tire combo performs very well, much more acceleration compared to before. I’ve tested it about of 50 miles but now it’s taken apart to be waterproofed. Stay tuned :thumb:
 

Attachments

  • 9048254F-B007-4265-B67D-EE21B596EAE4.jpeg
    9048254F-B007-4265-B67D-EE21B596EAE4.jpeg
    566.2 KB · Views: 1,537
  • 6C0EB22C-B771-470D-A8CB-2ABB2BE3496A.jpeg
    6C0EB22C-B771-470D-A8CB-2ABB2BE3496A.jpeg
    364.6 KB · Views: 1,537
  • E73607D4-B471-4BED-B125-84E45FB67573.jpeg
    E73607D4-B471-4BED-B125-84E45FB67573.jpeg
    376.3 KB · Views: 1,535
  • A81B973F-7DA7-4539-B262-8E60DEBEEC94.jpeg
    A81B973F-7DA7-4539-B262-8E60DEBEEC94.jpeg
    257.8 KB · Views: 1,536
  • 6649B8EE-C88C-4719-81E7-7AB43EC46269.jpeg
    6649B8EE-C88C-4719-81E7-7AB43EC46269.jpeg
    486.4 KB · Views: 1,535
  • A92FBD4C-2852-4D5C-9646-BA2F2123325C.jpeg
    A92FBD4C-2852-4D5C-9646-BA2F2123325C.jpeg
    2.4 MB · Views: 1,535
  • 74C094FA-4EE8-40F1-BF1E-4F11F761CEAD.jpeg
    74C094FA-4EE8-40F1-BF1E-4F11F761CEAD.jpeg
    2.9 MB · Views: 1,536
  • 88E4376C-3026-4F6F-A54C-7786FE12C06E.jpeg
    88E4376C-3026-4F6F-A54C-7786FE12C06E.jpeg
    2 MB · Views: 1,536
  • 36CDA819-DE42-4C9D-9483-E6143BCF376F.jpeg
    36CDA819-DE42-4C9D-9483-E6143BCF376F.jpeg
    2.6 MB · Views: 1,535
  • F50FCECB-FB6F-4386-8526-8F1CB61648C1.jpeg
    F50FCECB-FB6F-4386-8526-8F1CB61648C1.jpeg
    3.6 MB · Views: 1,534
  • BBCCA4A0-422F-4D8C-BF13-0E98A975F210.jpeg
    BBCCA4A0-422F-4D8C-BF13-0E98A975F210.jpeg
    2.9 MB · Views: 1,535
  • 2DBF3E31-A017-4C5A-AF61-A5E6D893BCAA.jpeg
    2DBF3E31-A017-4C5A-AF61-A5E6D893BCAA.jpeg
    363.5 KB · Views: 1,535
You are doing some nice work with this bike but i feel like you will get better performance and handling with a mid drive setup on dirt bike tracks! Love the updates
 
xylene23nyc said:
Nice build! I recently purchased the same frame from the same source (used paypal) and got their 5T 205 V3 kit with 19" moto wheels. Not much off-road action for me as I'm in NYC but one day ill have to explore a little for sure. I was thinking of ordering their moto seat too but heard it was so so. I've been eyeing the Vector/Eleek moto seat which I heard is great (also has a rear rack option) and wonder if it fits out frame.

I'm waiting for the kit that comes with Sab 72100 and plan to order the UPP D034 72V 40ah 100amp continuous. I'm not a speed demon at all but hope that I get decent speed and torque with my set up. You mentioned before that the Sab 7280 didnt seem like enough.

I purchase through her on PayPal as well she’s so easy to work with. Originally got her contact off Amazon and now just order parts through PayPal.

Yeah the seat is not all that great, You can rework the seat by adding some gel or cushion. Also installing some spacers on the top two bolts which angles the seat down more flat. I used some bearings as spacers on the top two bolts.

Yeah the 5T should be good for the NYC, :thumb:
unless you get the 3T and plan on going 70mph lol
The 6T is extremely fun with acceleration but you’re only gonna get about 40 mph anything below fully charged at 72v, so the 5T should be perfect for the city. Around 50mph with flux weakening.

skeetab5780 said:
You are doing some nice work with this bike but i feel like you will get better performance and handling with a mid drive setup on dirt bike tracks! Love the updates

My next off-road build would be a mid drive, looking to convert a dirtbike. But that’s a ways down the road, have a couple of other smaller projects before that.

As for performance off Road this bike is actually quicker than full size dirt bikes. Just have to watch for those hard impacts on the rear wheel with the heavy hub motor, unsprung weight. Really besides that I’m able to get through stuff quicker and more efficient that’s why I switched the bike over primarily for a dirtbike because of how great it handles. Forgot to mention in the update also upgraded the rear suspension with a 750 pound spring and believe it’s 265 mm eye to eye Shock. So that helped a lot with the heavy QS205. also serviced the DMN front Fork and added some high-performance lube, helped wonders. From the factory they don’t put much grease on the oil seal or dust seal which binds causing friction. I would like to add a stiffer spring but need to take it out and measure. I don’t bomb too hard on the front suspension because it’s a cheap Chinese fork lol. I find myself riding more technical than dirt bikes in certain sections of trail riding because they can definitely take more. Also the main thing that held me back from a mid drive is there loud. really enjoy the silence of the hub motor but don’t get me wrong I would like a nice powerful mid drive build as well :thumb: :thumb: :thumb:
 
So I got the side plate covers enameled, also the sides of the stator and will finish painting the laminations tomorrow when it’s bright and sunny 8) I was able to not get any overspray on the laminations so they will be sprayed with a very thin even layer x2.

Still need to do some final cleaning on the magnets and steel ring before painting and prepping with tape and paper. Posted a picture below of the clear enamel product. Sprayon EL 600
 

Attachments

  • 39C4CCB8-CEE5-4A14-96FF-3015C30075D2.jpeg
    39C4CCB8-CEE5-4A14-96FF-3015C30075D2.jpeg
    3.2 MB · Views: 1,519
  • 2C8C0701-52BD-4184-8189-89BB28982853.jpeg
    2C8C0701-52BD-4184-8189-89BB28982853.jpeg
    2.9 MB · Views: 1,518
  • D8CE39C0-3322-4ACF-9AD2-12B6BE40B47B.jpeg
    D8CE39C0-3322-4ACF-9AD2-12B6BE40B47B.jpeg
    3 MB · Views: 1,518
  • C5E94DFC-A2CA-413F-BC4C-32F43274683C.jpeg
    C5E94DFC-A2CA-413F-BC4C-32F43274683C.jpeg
    1.8 MB · Views: 1,519
  • 2A6A2FC0-525F-4994-BB41-624858D90212.jpeg
    2A6A2FC0-525F-4994-BB41-624858D90212.jpeg
    1.4 MB · Views: 1,519
  • 97B16591-8AE4-4EB9-8ABE-F8F55E370AF3.jpeg
    97B16591-8AE4-4EB9-8ABE-F8F55E370AF3.jpeg
    2.2 MB · Views: 1,519
  • F89C90C6-11CB-43EF-B968-7D23C46BF4FB.jpeg
    F89C90C6-11CB-43EF-B968-7D23C46BF4FB.jpeg
    1.4 MB · Views: 1,519
At 22s volts,230dc,550ph amps the 6t motor wrapped in a 18" rim with 10psi pressure(need a rim lock) in the shinko is a hub based woods weapon if you have good well setup suspension :D

https://youtu.be/4o8egkQptnk
 
Eastwood said:
Then the issue with my motor, water got inside the hub motor and rusted everything. I was able to give it a couple of acid baths and got rid of all the rust, reassembled and everything is working again :thumb:

Very nice bike mate, looks proper fun. I have a question, you got your first qs205 in Oct 01 2021 and developed that much rust by Nov 15 2O21? What issues were you experiencing? Just controller cutout? Anything else. I ask because I'm having issues as well, wondering maybe it could be rust inside motor.

Eastwood said:
Purchased a new QS205 6T v3TI

Do you just hate that new cable colour? Or is it just me? Look like a lawn mower cable lol.
 
Audisport09 said:
Very nice bike mate, looks proper fun. I have a question, you got your first qs205 in Oct 01 2021 and developed that much rust by Nov 15 2O21? What issues were you experiencing? Just controller cutout? Anything else. I ask because I'm having issues as well, wondering maybe it could be rust inside motor.

Yeah crazy right, the motor rusted very quickly from being new. Also had to clean it a second time recently because it was completely rusted again lol. It takes hours upon hours to get all the rust off and completely clean, not fun! so I’ve learned my lesson now, will always varnish hub motors when I first get them new. Also note I was riding in extremely wet conditions, enduro riding, trail riding through the woods.

So the first issue was an over current error that I was getting through my Controller. The second issue was a really loud screeching sound from a standstill. The rust was so built up it was creating a screeching and friction between the magnets and stator lamination.

Audisport09 said:
Do you just hate that new cable colour? Or is it just me? Look like a lawn mower cable lol.

Lol yeah I wonder why they went to the orange color? I’m upgrading the phase wires to 6AWG with black heat shrink. So the lawnmower cable will be eliminated :lol:
 
Eastwood said:
So new updates and changes to the bike. Purchased a new QS205 6T v3TI and laced in a 16” rim. Did this for a few reasons but primarily to have better hillclimbing ability with better torque output from the smaller wheel diameter. The new combo is also about 10 pounds lighter compared to the 19 inch set up. The rear tire is an “actual rear tire” so I was able to fit a wider tire with the 16 inch rim for better traction. 90/100 16” has a nice thick side wall for Enduro riding. I will keep the 19 inch upfront for a better rollover resistance, so 19” front 16” rear.

Still have the other Motor and will be installing a street tire on that motor so I can switch between dirt and street with the two motors. that being said I’m making a quick connect disconnect for my phase wires and hall sensors on the swingarm to allow switching between the different tire motor set up.

I’m in the process now of waterproofing the new motor by painting the inside with enamel. Also upgrading the bearings and axle seals. Installed 2 vents on each side cover with a threaded bolt that can be manually removed to allow the water to drain out of the motor. I will post more pictures when I’m finished.

I’ve also taken the bottom bracket out of the bike and just installed motorcycle pegs, I made a mounting bracket out of steel but connected to the frame and not to the swingarm. The weight distribution is way better with the pegs being on the frame. Now when I push the pegs down the front suspension and rear suspension evenly compress compared to before when I had the pegs mounted in the bottom bracket location on the swingarm.

Also installed a front fender and rear fender but I’m still working on the rear. I’ll post more pictures once I have the new motor put back together and installed on the bike with all the new upgrades. The bike handles and looks very different more of a dirtbike now than a electric bicycle. The new motor tire combo performs very well, much more acceleration compared to before. I’ve tested it about of 50 miles but now it’s taken apart to be waterproofed. Stay tuned :thumb:

Do you have a link/info on where to source something similar (16" rim and 6t)? Great build!
 
Got the stator enameled and baked. Cooked it at an average of 170°F for 3hour, got up to 200°F at one point. Baked the stator on top of a mini oven not inside. Used a cardboard box to sit over the top of the motor to insulate the heat. It’s kind of strange trying to keep the motor hot when all I ever do is try to keep the motor cool :lol:
Used a powerful exhaust/in-line motor blower to get rid of any harmful fumes.
Applied 4 very thin layers of enamel to the actual lamination. The sides were painted with thicker coats as it’s not as important because nothing comes close to contact.
That being said I will go back and add Scotch-Weld DP420, Epoxy Adhesive between a couple of the lamination that are separated. The varnish doesn’t penetrate the larger gaps of the lamination and I don’t want water seeping in creating rust. Kind of sucks, thought I was done with the stator but after examining under bright lights I could see a couple of bare metal spots between the separation of the laminations.

Sanded down the magnets with 1000 grit sandpaper and effort to remove any high spots and clean up the surface. The magnet/rotor is extremely smooth finished now and took a quite a bit of cleaning to get all the dust and grit out of the cracks of the magnets from sanding. Didn’t sand through the nickel layer, just smoothed everything out. Which is an effort to allow for the enamel to not be scraped under rotation of the motor. Will apply Scotch-Weld DP420, Epoxy Adhesive in the crack between the magnet and steel ring to prevent water getting around and under the magnets.


Next up is to paint/enamel the magnets and steel ring. I will bake the magnets/rotor at around 150°F MAX. Will use a heat lamp that has some UVA for curing. Have to be careful not to bake magnets too high of a temperature or it will affect the magnetic force. Before enamel will apply Scotch-Weld DP420, Epoxy Adhesive around the outer edge of the magnets to prevent water entering.

Hopefully this information is helpful anyone out there. It takes a lot of work to waterproof these motors but it’ll be well worth it :thumb:
I’ve repaired 3 rusted hub motors and hopefully I never have to do that again lol it’s a lot more work getting rid of the rust compared to enameling and waterproofing.
 

Attachments

  • BD0B29BF-0035-49AA-99A8-6D348D622DD7.png
    BD0B29BF-0035-49AA-99A8-6D348D622DD7.png
    7.9 MB · Views: 1,429
  • 84BA1A1F-8E1F-468D-AED1-C543830124A7.jpeg
    84BA1A1F-8E1F-468D-AED1-C543830124A7.jpeg
    3.1 MB · Views: 1,430
  • CBDA6589-C66B-4033-8503-F55FCE0DFD3F.jpeg
    CBDA6589-C66B-4033-8503-F55FCE0DFD3F.jpeg
    1.3 MB · Views: 1,430
  • 00E4C532-93F9-4D29-AC2E-AB3760762804.jpeg
    00E4C532-93F9-4D29-AC2E-AB3760762804.jpeg
    1.8 MB · Views: 1,429
  • A7D7065B-139D-410E-AF04-E7E35D750174.jpeg
    A7D7065B-139D-410E-AF04-E7E35D750174.jpeg
    1.9 MB · Views: 1,429
  • 9EAAD183-EDCD-437B-9C52-82726D7A808D.jpeg
    9EAAD183-EDCD-437B-9C52-82726D7A808D.jpeg
    2 MB · Views: 1,430
  • 7C5BB8CF-C577-4B64-AA0D-9B7F96A1C031.jpeg
    7C5BB8CF-C577-4B64-AA0D-9B7F96A1C031.jpeg
    1.6 MB · Views: 1,430
  • 05DCDADD-56B1-4B57-A329-ABDC0A335BC2.jpeg
    05DCDADD-56B1-4B57-A329-ABDC0A335BC2.jpeg
    2.3 MB · Views: 1,430
  • D2BB6897-109D-43FD-B1F3-785357D1AD1D.jpeg
    D2BB6897-109D-43FD-B1F3-785357D1AD1D.jpeg
    2.7 MB · Views: 1,428
LCLabs said:
Do you have a link/info on where to source something similar (16" rim and 6t)? Great build!

Custom ordered the 6T from QS motors directly from AliExpress. They typically only have 3T, 5T in stock so you’ll have to custom order the 6T. I’ll give you a link but this is for the 5T, send them a message once you place the order and ask for a 6T, just tell them you don’t mind waiting for them to build the motor, make sure you tell them not to send a 5T. So ask for “6T QS205 V3TI”
https://a.aliexpress.com/_mtJShgw

For the 16” rim pro wheel, got it off eBay but there out of stock everywhere for the 16 inch rim.
Edit: just found you one :thumb:
I just ordered one as well because this will be going on my second motor.
https://www.prowheelracing.com/yamaha-play-bike-rear-rim-1-60-x-16-gold/

For the spokes I ordered from a source from China, 10 gauge spokes. Typically use namebrand spokes but when you cross over to motorcycle spokes it’s all Chinese stuff for a custom length.
Spoke contact, +86 13401536906 - this is her WhatsApp number she’s very easy to work with and you can pay through PayPal.
The spoke length for the QS205 with this particular 16 inch rim is 92mm. I ordered 90mm but they could be slightly longer so 92mm will be perfect :thumb:
 
Eastwood said:
So I’ve been working on the drop outs as this has been quite the tedious part.
There was a 2.5 mm gap between the axle and the torque arms/frame. Made some 2.5mm steel spacers, after hours of sanding and filing. The axle is extremely tight now! There is zero wiggle :D

I’ll post more pictures later of the drop outs with the spacers once it’s fully installed.

Also for anyone that’s following along, these updates are in real time.

Ah, chinese quality :D but nice build man! 👍
 
it’s been slow crawl, but getting there slowly but surely with the water proofing/rust proof.
Used Scott Weld 420 epoxy adhesive to fill in the cracks between the laminations.
I’ll post the after pictures with the epoxy and then below the before so you can see the difference. There was no way I was leaving those gaps after putting this many hours into rust proofing this motor.

Will allow the Epoxy to dry and then will lightly scuff the stator/varnish and add a couple more layers of varnish. I went a bit too thin on the layers before. There’s actually a little bit of bare metal in between random lamination where the varnish did not penetrate. I will be sure to spray the last couple of layers a little bit thicker to allow for full coverage. If I get any runs in the varnish I will sand down with 1000 grit.

Contacted the manufacturer of this varnish and they said to lightly scuff the varnish with 220 grit when the varnish is already cured when applying extra coats. You should be good to apply layers on top of each other as long as there’s no more than 24 hours-ish. Anything past that I would lightly scuffed with 220 grit. They also instructed me to use denatured alcohol to clean off any dust. I was not about to use acetone on top of the varnish and will be very cautious with the denatured alcohol. I don’t need to sand that much, just light scuff so there shouldn’t be that much dust.

Was also able to apply the epoxy between the magnets and steel ring so no water can get under the magnets to create rust. I’ll post pictures below.
 

Attachments

  • 7F88BD38-1836-4755-BDDB-125CC14A482B.jpeg
    7F88BD38-1836-4755-BDDB-125CC14A482B.jpeg
    2.9 MB · Views: 1,383
  • C10DE063-6BAD-4D4A-A756-A42F323F529A.jpeg
    C10DE063-6BAD-4D4A-A756-A42F323F529A.jpeg
    3.4 MB · Views: 1,383
  • 49AD360F-0631-4573-898E-8E7E311D5DD8.jpeg
    49AD360F-0631-4573-898E-8E7E311D5DD8.jpeg
    3.2 MB · Views: 1,381
  • 4FF0528B-77C1-4476-8DB6-85F90B1199C0.jpeg
    4FF0528B-77C1-4476-8DB6-85F90B1199C0.jpeg
    1.9 MB · Views: 1,381
  • 81B50C8A-521B-4FD8-8A55-79D87941034E.jpeg
    81B50C8A-521B-4FD8-8A55-79D87941034E.jpeg
    2.9 MB · Views: 1,380
  • 4FBEFE23-630F-4F0F-9701-38BBC09C5F3B.jpeg
    4FBEFE23-630F-4F0F-9701-38BBC09C5F3B.jpeg
    2.2 MB · Views: 1,380
  • E719EA63-E929-4D49-A522-05C8DE019C7B.jpeg
    E719EA63-E929-4D49-A522-05C8DE019C7B.jpeg
    2.3 MB · Views: 1,380
  • E97F775A-BEC5-497B-B385-1DA818669978.jpeg
    E97F775A-BEC5-497B-B385-1DA818669978.jpeg
    2.7 MB · Views: 1,382
  • DB33160B-E3A6-4863-B1C1-58D1B59AEE21.jpeg
    DB33160B-E3A6-4863-B1C1-58D1B59AEE21.jpeg
    1.8 MB · Views: 1,382
  • 6DF6CF1F-C095-4126-97C8-0EACD9394DFD.jpeg
    6DF6CF1F-C095-4126-97C8-0EACD9394DFD.jpeg
    2.3 MB · Views: 1,382
  • 26E2E913-2388-4FA0-B435-D61486F71A28.jpeg
    26E2E913-2388-4FA0-B435-D61486F71A28.jpeg
    907.7 KB · Views: 1,382
  • E5A8B3C4-D4F5-406C-8FCB-2E6F19A2862D.jpeg
    E5A8B3C4-D4F5-406C-8FCB-2E6F19A2862D.jpeg
    1.3 MB · Views: 1,383
Curing the epoxy with heat and UVA
Keeping the temperature below 130°F not Celsius that would be too hot for the magnets.
Using a reptile heat lamp that provides UVA radiation
Once this is done curing, will clean the magnets one more time with denatured alcohol and begin varnishing. Will cure the varnish with the same method, heat lamp.
Hopefully this is helpful for anyone else out there that doesn’t have a oven. Don’t use your oven that you cook with, very dangerous!
 

Attachments

  • 5F943EB9-83BA-4F82-9DF9-CA742793BFDB.jpeg
    5F943EB9-83BA-4F82-9DF9-CA742793BFDB.jpeg
    2.7 MB · Views: 1,366
So I’m in the process of making a quick connect for my phase wires and hall sensor wires. We’ll be able to switch between two different QS205 V3. One motor for the street the other motor for off road. The new motor 6T has A Enduro tires for off-road only. Then the older motor 5.5T well have a street tire for road use only. Will also re-lace the old motor that’s for the street to have a 16 inch rim the same as the off-road version. Like the 16” wheel diameter much better than the 19 inch rim for this bike. Full size dirtbike prefer for the traditional 21” front 18” rear. That combo weighs about 20 pounds more than my current set up 19” front 16” rear. Plus the torque advantage of the smaller wheel diameter for hillclimbing or just acceleration in general.

Still need to silicone the wires to waterproof and also heat shrink. Post pictures below but still in the process. Used M8 bullet connectors. The phase wires coming from the controller to the connector are 6 AWG. Hopefully that will help heat sink a little bit of the heat buildup from the high current. Still contemplating of upgrading the phase wires through the axle but it’s not a must but it surely wouldn’t hurt. Honestly don’t feel like messing with it :lol:
I typically don’t overheat if I kept the DC amps at 120 for Enduro. The motor definitely never overheats riding Street.
 

Attachments

  • 49037B1A-B387-4A05-859E-7F8D6459B7E3.jpeg
    49037B1A-B387-4A05-859E-7F8D6459B7E3.jpeg
    2.3 MB · Views: 1,340
  • C35F59D4-AACB-4168-8BC9-A9D2776655EE.jpeg
    C35F59D4-AACB-4168-8BC9-A9D2776655EE.jpeg
    3.6 MB · Views: 1,340
  • D12EC1B1-174C-44BA-94A1-A51B9ECA7DBB.jpeg
    D12EC1B1-174C-44BA-94A1-A51B9ECA7DBB.jpeg
    1.9 MB · Views: 1,341
  • D85372B8-FA2C-4E8D-898A-61709FA98D47.jpeg
    D85372B8-FA2C-4E8D-898A-61709FA98D47.jpeg
    2.2 MB · Views: 1,341
  • AF618402-CCC3-4B5C-9252-680ECEBC8BA6.jpeg
    AF618402-CCC3-4B5C-9252-680ECEBC8BA6.jpeg
    2.7 MB · Views: 1,341
  • 8CE0DEDC-A4DF-450B-9A5D-E3BEC815244D.jpeg
    8CE0DEDC-A4DF-450B-9A5D-E3BEC815244D.jpeg
    2.6 MB · Views: 1,339
  • B83E3EE1-5374-4EF4-9A03-E97DC07300CE.jpeg
    B83E3EE1-5374-4EF4-9A03-E97DC07300CE.jpeg
    3.6 MB · Views: 1,339
  • 5A22BE32-09DE-4133-8D5D-586FBFE8CEEF.jpeg
    5A22BE32-09DE-4133-8D5D-586FBFE8CEEF.jpeg
    2.3 MB · Views: 1,339
  • D662BAF9-BF1C-48C5-A0F0-826377753592.jpeg
    D662BAF9-BF1C-48C5-A0F0-826377753592.jpeg
    3.5 MB · Views: 1,340
Here’s a couple hole shot videos, had the DC amps at 150 the battery can handle 200amps for short burst but haven’t tested it yet. Typically don’t go over 150a. Trying not to beat my cheap batteries to death lol Phase amps was at 450.
Also this is the new motor with the 16 inch rim. This was before I disassembled the motor for varnishing. You can hear the knobby tires getting tore up on the asphalt lol they might chunk if I went to 200 A that’s why I got the street tire set up it the works :thumb:

https://youtube.com/shorts/YiVQHncTpRA

[youtube]YiVQHncTpRA[/youtube]

https://youtube.com/shorts/oDLMKu5hdIQ

[youtube]oDLMKu5hdIQ[/youtube]
 
Still working on waterproofing the new hub motor and also upgraded the phase wires going into the hub motor. Was able to fit 6AWG wire through the bore of the axle by removing the silicone coating and using heat shrink to give it a thinner profile. The goal is less heat with the thicker phase wires at the same power settings.

For the varnishing, this has been quite the task and learning experience. I really recommend for anyone out there trying to do this to use DP420 epoxy and fill any and all gaps before varnishing. This thin varnish/clearcoat has no ability to fill cracks so all this needs to be addressed before painting/varnishing.

Included some pictures of my new rim and tire combo that will be going on my original QS205 that’s laced in the 19” excel rim. So both QS205’s Will have 16 inch rims. One for street, the other for hard off-road/Enduro. Also made some quick connections for my phase wires and hall sensors on the swingarm. This will allow to swap motors quickly and efficiently without unbolting the phase wires to the controller.

We’ll post more pictures and updates soon. Hopefully will have the old QS205 v3 laced in the 16 inch rim with the street tire this week, waiting on the spokes. This bike build is almost complete! Riding this bike last summer highlighted any of the issues that needed to be changed.
 

Attachments

  • F88A632F-577F-4833-A7F1-B88A123FAC5D.jpeg
    F88A632F-577F-4833-A7F1-B88A123FAC5D.jpeg
    3.5 MB · Views: 1,236
  • 877A4625-3C37-47D3-8EC8-D63048B6F7C2.jpeg
    877A4625-3C37-47D3-8EC8-D63048B6F7C2.jpeg
    3.2 MB · Views: 1,236
  • 72F4ECB2-EAF8-480B-9C09-4D917EE0501B.jpeg
    72F4ECB2-EAF8-480B-9C09-4D917EE0501B.jpeg
    2.8 MB · Views: 1,236
  • E6755F39-9344-469B-B544-FA4DB675A136.png
    E6755F39-9344-469B-B544-FA4DB675A136.png
    7.6 MB · Views: 1,236
  • 3BFA50D1-B8F8-41AE-8F54-8C6FFF0CB298.jpeg
    3BFA50D1-B8F8-41AE-8F54-8C6FFF0CB298.jpeg
    2.7 MB · Views: 1,236
  • 62447FAD-4BB9-450A-BFEB-C4F53465D153.jpeg
    62447FAD-4BB9-450A-BFEB-C4F53465D153.jpeg
    3.1 MB · Views: 1,237
  • 23A56EA9-235E-4932-B252-6C5C5254DBE2.jpeg
    23A56EA9-235E-4932-B252-6C5C5254DBE2.jpeg
    3.4 MB · Views: 1,237
  • E1D9BE6B-8D97-46FC-9B06-604101C6A66F.jpeg
    E1D9BE6B-8D97-46FC-9B06-604101C6A66F.jpeg
    3.6 MB · Views: 1,237
  • 3B392E44-67A0-433B-909A-E422312F83F3.jpeg
    3B392E44-67A0-433B-909A-E422312F83F3.jpeg
    3.8 MB · Views: 1,236
  • A33B2550-7161-4950-A342-D74F7DC12202.jpeg
    A33B2550-7161-4950-A342-D74F7DC12202.jpeg
    1.8 MB · Views: 1,236
  • 9ABC5E6E-8623-4ABE-9D46-74B81192DE6A.jpeg
    9ABC5E6E-8623-4ABE-9D46-74B81192DE6A.jpeg
    2.5 MB · Views: 1,236
  • BD80E999-3D06-414E-AAA6-8E86A05B239F.jpeg
    BD80E999-3D06-414E-AAA6-8E86A05B239F.jpeg
    2.1 MB · Views: 1,236
  • A272772E-BAA9-48DA-A348-4838336F0E85.jpeg
    A272772E-BAA9-48DA-A348-4838336F0E85.jpeg
    1 MB · Views: 1,236
  • B474000D-4923-4F8E-AF6C-35CD8EE22CE8.jpeg
    B474000D-4923-4F8E-AF6C-35CD8EE22CE8.jpeg
    1.6 MB · Views: 1,236
  • EAD118AE-187A-4BF3-8004-CDF96465AD65.jpeg
    EAD118AE-187A-4BF3-8004-CDF96465AD65.jpeg
    2.9 MB · Views: 1,236
  • 18B99E15-3B45-4AED-A7AF-3396CE029AB1.jpeg
    18B99E15-3B45-4AED-A7AF-3396CE029AB1.jpeg
    2.7 MB · Views: 1,236
  • F510744A-7271-4444-8FC4-89AD88AF8364.jpeg
    F510744A-7271-4444-8FC4-89AD88AF8364.jpeg
    2.9 MB · Views: 1,236
  • FF178F4A-50EA-4ED7-A46C-9BF693021E29.jpeg
    FF178F4A-50EA-4ED7-A46C-9BF693021E29.jpeg
    3 MB · Views: 1,236
  • 385A053D-2D46-4F21-8790-4AECC96E2C25.jpeg
    385A053D-2D46-4F21-8790-4AECC96E2C25.jpeg
    2 MB · Views: 1,236
Just received my spokes this morning :D
Will clean the spoke threads first, then apply some spoke prep. Should have this built today. Will post pictures later once I have the wheel built.
So this is for the older QS205 v3 that’s laced in the 19 inch rim, will be getting the gold 16 inch pro wheel. The new motor QS205 V3ti is already laced in the 16 inch that’s the one I’m still varnishing.


EDIT:
Updating this post with pictures below
 

Attachments

  • EB4C56A5-8953-4B4A-85AF-E22EEDEA9512.jpeg
    EB4C56A5-8953-4B4A-85AF-E22EEDEA9512.jpeg
    4.5 MB · Views: 1,209
  • 8A3E56B5-77AF-4B58-8C8F-9BD1FB75CCA8.jpeg
    8A3E56B5-77AF-4B58-8C8F-9BD1FB75CCA8.jpeg
    4 MB · Views: 1,209
  • C2936041-CA23-4F87-9B5E-D3139ABDB578.jpeg
    C2936041-CA23-4F87-9B5E-D3139ABDB578.jpeg
    3.1 MB · Views: 1,209
  • F9F498A3-228A-41CD-8703-AC1FAFD1BC6E.jpeg
    F9F498A3-228A-41CD-8703-AC1FAFD1BC6E.jpeg
    3 MB · Views: 1,209
  • FF08D717-E0B9-48B0-8BCF-44335F96F6F0.jpeg
    FF08D717-E0B9-48B0-8BCF-44335F96F6F0.jpeg
    3.1 MB · Views: 1,209
  • E102724D-C0A7-4BB3-8A1A-A0831ABA5194.jpeg
    E102724D-C0A7-4BB3-8A1A-A0831ABA5194.jpeg
    2.5 MB · Views: 1,208
  • 5B9D7B21-AB02-42E6-A66B-AC0DF74C56E8.jpeg
    5B9D7B21-AB02-42E6-A66B-AC0DF74C56E8.jpeg
    6.9 MB · Views: 1,209
  • 6DCB75D3-746E-4FD4-914C-7C96F0B4DF41.jpeg
    6DCB75D3-746E-4FD4-914C-7C96F0B4DF41.jpeg
    4.4 MB · Views: 1,209
  • CEBE19BC-965B-4B98-8408-F1ADA781D90D.jpeg
    CEBE19BC-965B-4B98-8408-F1ADA781D90D.jpeg
    2.2 MB · Views: 1,209
  • 40A3B7A5-2E5D-4B29-A74E-BC632A8F9A80.jpeg
    40A3B7A5-2E5D-4B29-A74E-BC632A8F9A80.jpeg
    2.2 MB · Views: 1,206
  • 60960D97-E37F-40C7-8A2F-E4EC9C68D080.jpeg
    60960D97-E37F-40C7-8A2F-E4EC9C68D080.jpeg
    3.3 MB · Views: 1,196
  • C093AFB5-DD77-4D38-B082-1F724A4ADA8B.jpeg
    C093AFB5-DD77-4D38-B082-1F724A4ADA8B.jpeg
    2.9 MB · Views: 1,196
Got the wheel built and did some testing 8)
Rides real smooth compared to my off-road set up. The acceleration increased a good bit :thumb:
I’ll post some acceleration times with the app.
Looked for over a month to get a black rim but settled for the gold. Looks nice to add another color to the black and red theme.

Plan to build a second front wheel with a street tire. It’ll be nice having two wheel sets for this bike, street and off-road. Trying to source a gold front hub to match the back wheel but the front rim will remain black 19” excel. As you can see in the pictures I have the street tire on the rear and the off-road tire in the front, for now.

Also in the pictures you can see I no longer have pedals on the bike. Made a simple mount for the pegs that bolts to the frame.
 

Attachments

  • FE437DA5-42F8-4648-85B8-82BCE66ABEAF.jpeg
    FE437DA5-42F8-4648-85B8-82BCE66ABEAF.jpeg
    2.2 MB · Views: 1,203
  • 86BEDC52-8A50-42A1-BEB6-352BD5802A21.jpeg
    86BEDC52-8A50-42A1-BEB6-352BD5802A21.jpeg
    2.8 MB · Views: 1,195
  • 60743DC9-3B40-46D3-AD9E-02F77280B67D.jpeg
    60743DC9-3B40-46D3-AD9E-02F77280B67D.jpeg
    3.6 MB · Views: 1,196
  • C9C97AA9-60B8-48BA-8947-FD0EFC41C847.jpeg
    C9C97AA9-60B8-48BA-8947-FD0EFC41C847.jpeg
    1.1 MB · Views: 1,195
  • 65D1F502-323E-4DFD-B439-E5F9029B0671.jpeg
    65D1F502-323E-4DFD-B439-E5F9029B0671.jpeg
    1.4 MB · Views: 1,203
  • A554CCC2-1B95-4620-8AC0-7BC0AABE1EA6.jpeg
    A554CCC2-1B95-4620-8AC0-7BC0AABE1EA6.jpeg
    425.9 KB · Views: 1,202
Finally boys! My new QS205 V3TI 6T is finished and put back together. So the hub motor is completely varnished, upgraded to 6AWG phase wire through the axle, upgraded the bearings and seals. Just did a test ride it pulls hard, definitely pulls harder than the other motor/gold rim that’s a 5.5T. So now there’s a quick connection on both motors so I can switch conveniently from off-road to street.
 

Attachments

  • 964C50D9-B7F8-476D-8620-EF919FC2482A.jpeg
    964C50D9-B7F8-476D-8620-EF919FC2482A.jpeg
    3.5 MB · Views: 1,102
  • A1D8FBF4-2B11-41C5-A71F-7A1B6514AB46.jpeg
    A1D8FBF4-2B11-41C5-A71F-7A1B6514AB46.jpeg
    361.1 KB · Views: 1,102
  • 6E30F3D7-2563-492A-815A-00E1704942E7.png
    6E30F3D7-2563-492A-815A-00E1704942E7.png
    5.8 MB · Views: 1,102
1. Brake Caliper - rear - did you have any problems with the offset? extra shims needed?

2. Rear wheel spoke torque - how much torque did the spokes need? 40 inch lb? how did you torque them? finger tight or actual torque wrench?

3. what is the diameter of the 16 inch wheel with the tire mounted?

FYI short spokes on the 16 looks quite motorbikish, nice.
 
gobi said:
1. Brake Caliper - rear - did you have any problems with the offset? extra shims needed?

2. Rear wheel spoke torque - how much torque did the spokes need? 40 inch lb? how did you torque them? finger tight or actual torque wrench?

3. what is the diameter of the 16 inch wheel with the tire mounted?

FYI spokes on the 16 looks quite motorbikish, nice.

1. Yes used 2mm shim
https://www.ebay.com/itm/271445914757?mkcid=16&mkevt=1&mkrid=711-127632-2357-0&ssspo=y7Kp8zT3Tzq&sssrc=2349624&ssuid=PXA6_yhNSFi&var=&widget_ver=artemis&media=COPY

2. Well with building hub motor wheels you can’t fit a true spoke wrench so tighten the spokes with a regular bicycle spoke wrench. A tight Wheel is a healthy wheel :thumb:

3. The knobby tire setup is almost 24” outside diameter
Then the street tire set up is around 23”

Yeah loving the look of the short spokes paired in the 16” rim. Prefer this size rim much more than my initial set up with a 19 inch rear wheel. Plus you can fit a wider tire on the smaller the rim because the swingarm is tapered wider toward the axle.
 
I have been eyeing spoke torque wrenches, they are $$$, see if I macgiver my beam in-lb torque wrench to torque the spoke, I plan on taking them up to 35 in lb,

Thanks for the measurements, that helps.

I will go with 17 for this one as I bought a Michelin street tire already for it :)
 
Back
Top