
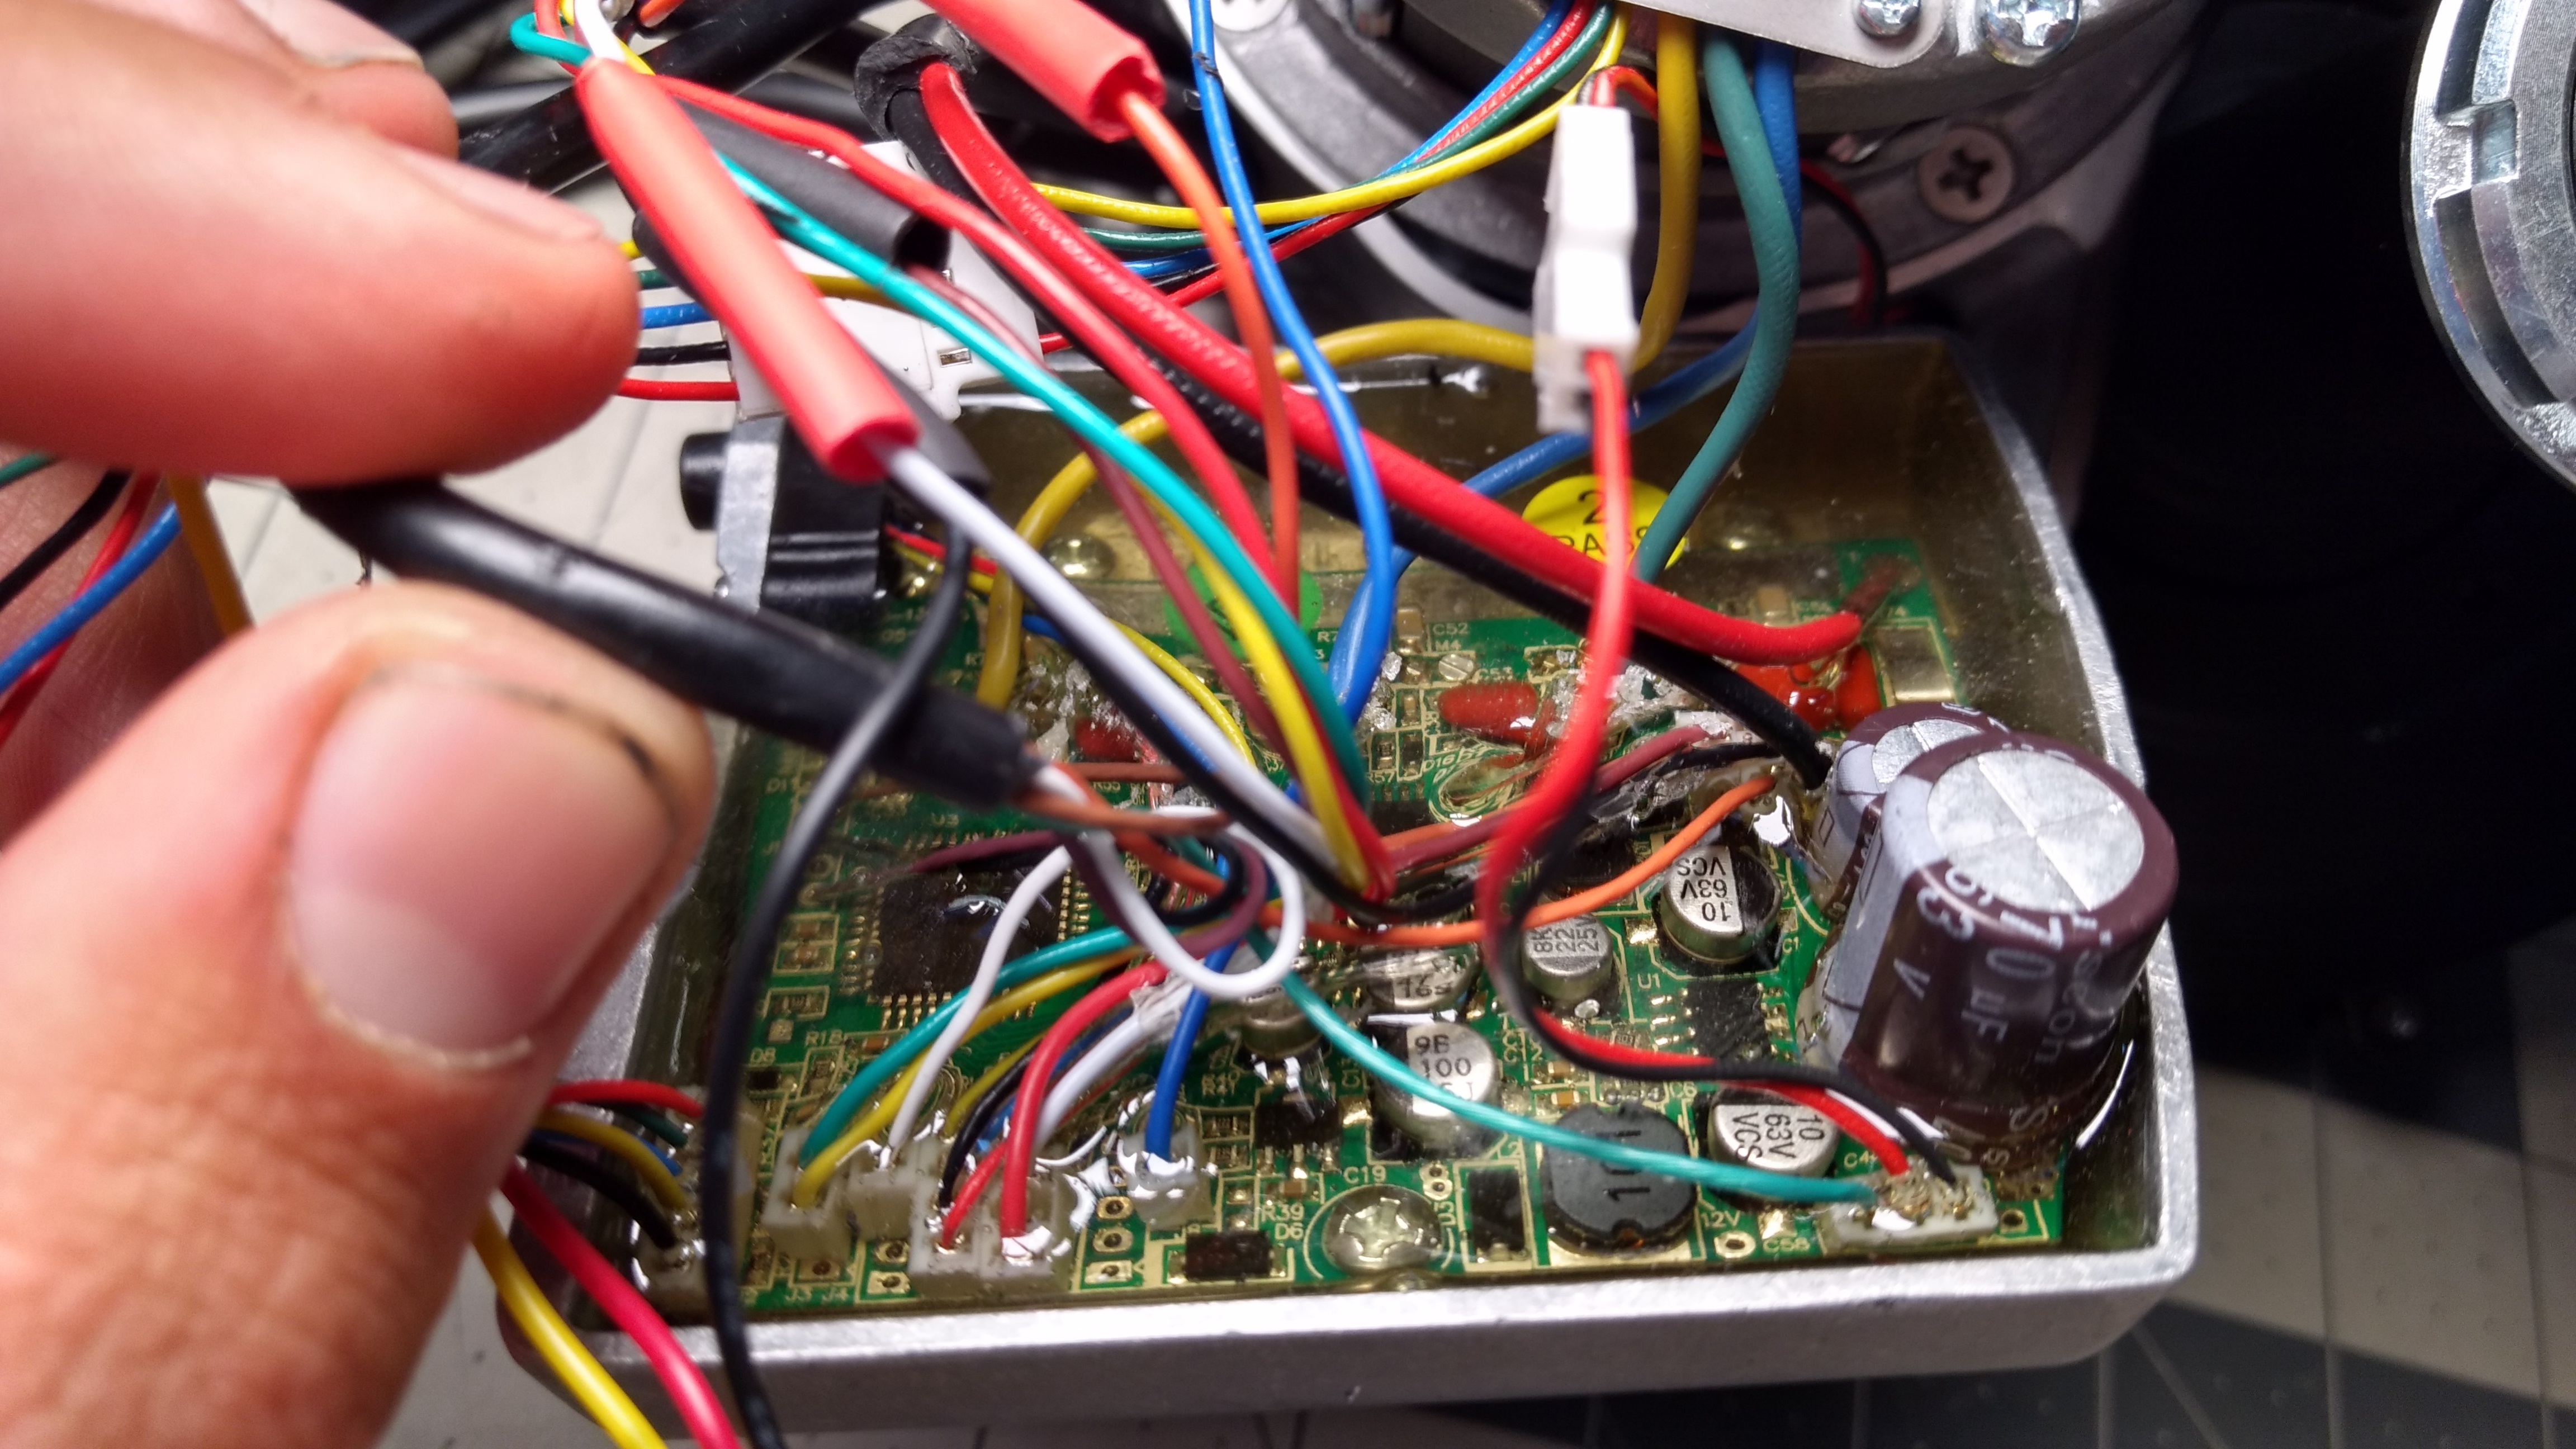
mctubster said:Re the first issue ... it sounds like the wiring loom you have - has different colours ... I would double check with Electrify, but I suspect they are having that harness custom made so the wiki is not correct. It sounds like orange was one of your data lines going to the screen. You should be able to trace what the colour of the throttle wire is by finding what colour wire from the loom goes to the THR solder pad in the image below
That's what I thought as well (and it looks like that's the case) but the weird part is that when I tested the plug going out of the controller, all of the colors and pins match as per this photo:
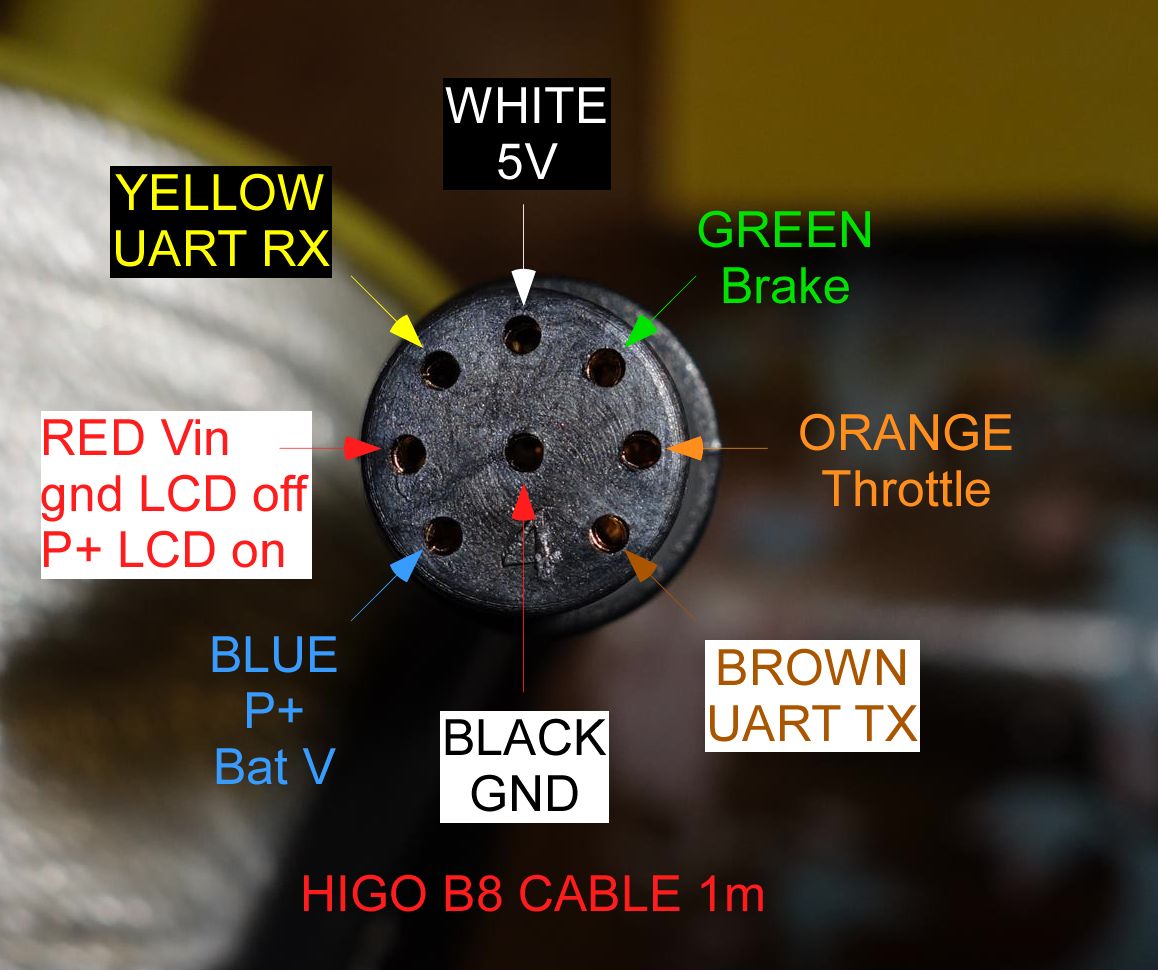
Here's a photo of my controller. It looks to me as though blue and red are throttle and 5v, respectively.
I sent a message to Electrify and won't mess around too much until I get a response.
-edit-
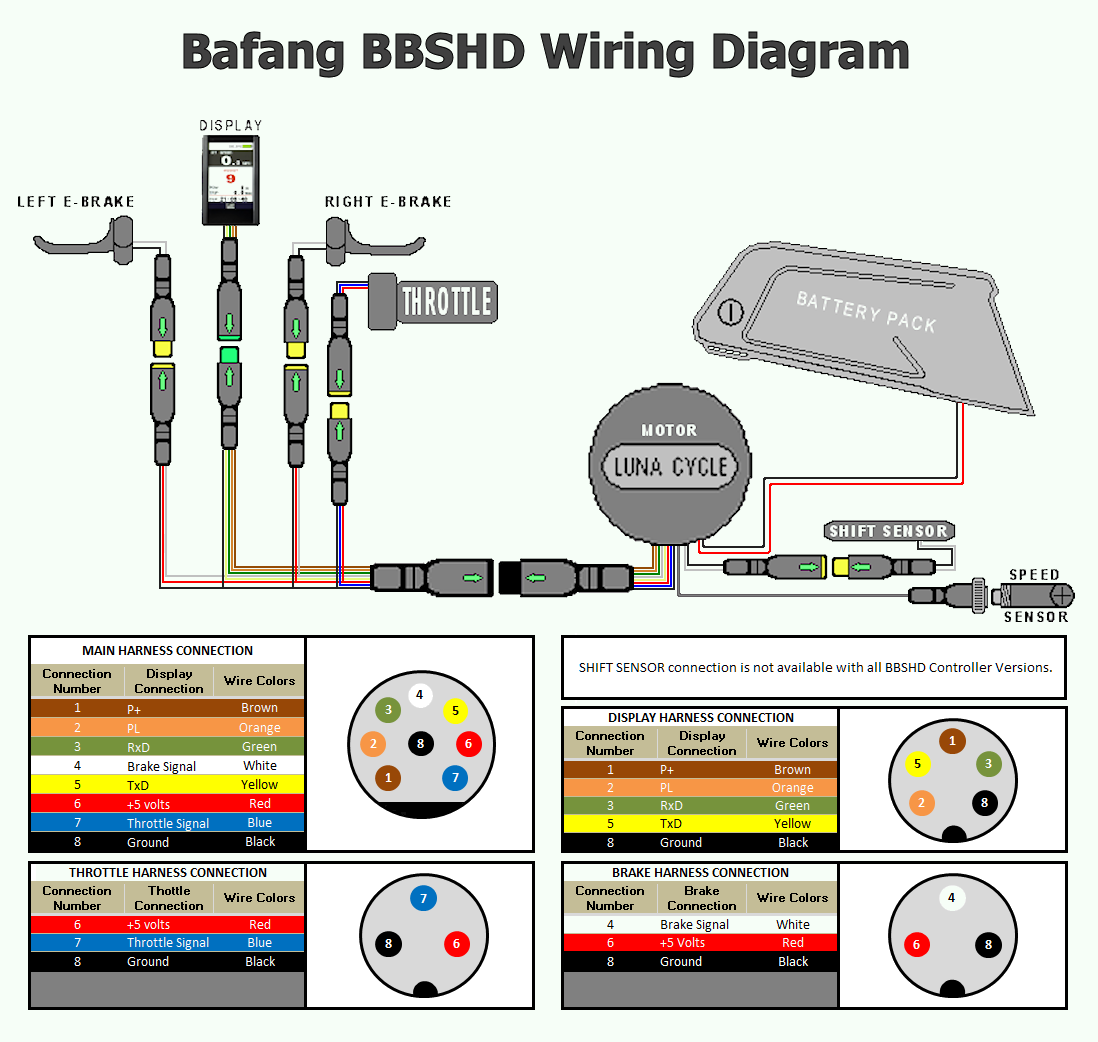
I think I remember reading that EBC uses a Bafang wiring harness scheme, on which the blue and red are throttle and 5v! The color/pinout scheme is the same, but the colors are mapped differently. (as far as I can tell) Does anybody know what the PL pin is?
Ref:
mctubster said:Re the second issue. No idea what is going on. Really hope you haven't damaged anything by connecting the temp sensor output to the display data line in parallel. Someone else hopefully has seen your issue before.
Good luck
Thanks. I hope I haven't permanently damaged anything either. It'd be nice if I could figure out if it's the LCD or the controller that's having the issues before having to replace either.


![ATTACH]](/sphere/proxy.php?image=http%3A%2F%2F%5BATTACH+type%3D%22full%22+alt%3D%22F1962AEC-7648-4B21-82B6-080B1D4D1209.jpeg%22%5D255428._xfImport%5B%2FATTACH%5D&hash=f4d84023638fea20ae9f473470cd0685)

")