TSDZ2 EBike wireless standard (like Specialized Turbo Levo) - OpenSource

I am being slowly working on the firmware due to very small time available, still, I now have everything in place to move on and I hope soon to have a first fully working version. What is working now:

1. EEPROM saving for read and write the configurations
2. UART communications
3. ANT+ LEV profile

Next I will start making the communications with the TSDZ2 motor controller and once that is done, the system will be fully working although with fixed default configurations. Next step would be to add Bluetooth communications to some mobile app that would be able to change the configurations.

Current state:
image.png
 
A commercially available remote control that might be usable for adjusting the assist level of the TSDZ2 LEV profile:
https://www.o-synce-shop.de/shop/en/accessories/remotes/110/lev-multiremote

also a bluetooth/ANT+ version:
https://www.o-synce-shop.de/shop/en/accessories/remotes/108/multiremote?c=150
 
Hello,
after reading only about this project for several weeks i bought the bluetooth module and installed visual studio code and the extensions to my vm windows on my mac.
The wiki shows the install on a linux ubuntu and i doubt There are many users who run this os or are willing to install such just to programm this board. My question. Is it possible to continue with windows and is there a workaround to install openocd/GDB/ ARM C/C... and the other tools to a nonlinux machine and if so can someone tell me how? Otherwise i have no use for this board and will sell it on ebay or so. Thanks in advance
 
Peacepirate said:
My question. Is it possible to continue with windows and is there a workaround to install openocd/GDB/ ARM C/C... and the other tools to a nonlinux machine and if so can someone tell me how?
There are no written documentation as you see. You can search on Google for other similar projects and make it working on this, then, document for the next ones like you.

Anyway, I think is a matter of preference because luckly, I am pretty sure, all this tools are working on that 3 OS and probably even on others like Raspberry PI OS (well, this is Linux but some prefer to use RPI box for development).
 
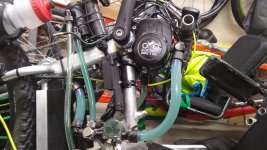
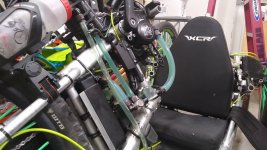
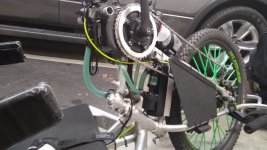
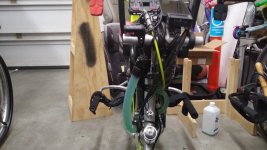
Comparing a Specialized EBike with TSDZ2 EBike


On last days, me and my wife, we were far from home, on holidays. We had planned two full days riding our ebikes with TSDZ2. On first day my ebike TSDZ2 did fail and I had to rent an ebike and I had the luck to be able to have a nice Specialized EBike that I was happy to compare with TSDZ2 EBike:
Advantages:
- more silent motor: a clear advantage on this Specialized EBike is the more silent motor, clearly TSDZ2 is noisier and I think it is due to using metal gears instead of belts.
- pair with my GPS unit / EBike wireless standard: this Specialized EBike could pair / connect wireless with my GPS Garmin that I use to travel and where I had the tracks / courses of my planned route

Disadvantages:
- limited assist levels, speed limit of 25 km/s and lack of customization: this EBike had only 3 different assist levels and I wanted to ride form 80 kms, on a flat surface. I decided to ride with assist level 1 to save battery and I found it was to much, I wanted to pedal harder because of fitness purposes and also to save the battery for that 80 kms. I found assist level 1 was to much and my effort was to little for what I wanted... and I could not go fast because it hit the 25 km/h limit.
My wife always use a bit more battery than me and she endup with 25% of battery SOC on his TSDZ2 EBike and I had to pedal the last 5 kms with this Specialized EBike, simple because I could not save battery, because the assist levels are not customized like on our OpenSource firmware for TSDZ2.
- incorrect battery SOC: the battery range on the display was not correct because the motor did stop at 8% SOC and I had to pedal the last 5 kms. That 8% SOC should be enough for that last 5 kms.
- heavier: because I always have to lift with my hand the EBikes to put on the car support, I also had to do this 4 times with this Specialized EBike and I found it heavier, even with my EBike with rear panniers and some tools inside.

Experiencing EBike wireless standard with the Specialized EBike

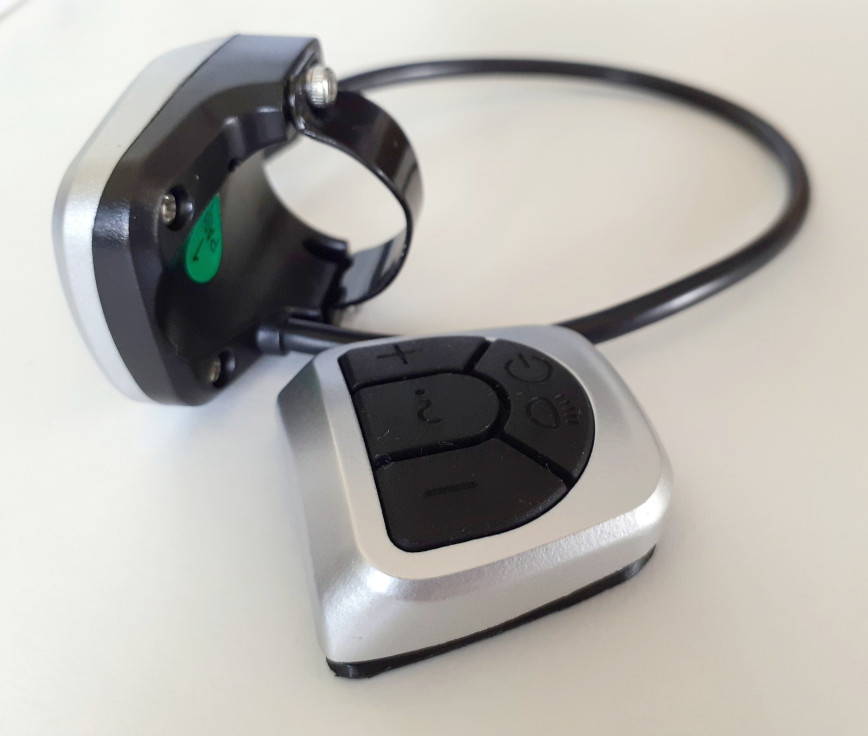
While I was riding I realized that this Specialized EBike is turned on in the battery and not on the display, like if the display is not really needed and quickly I figured out this model could implement the EBike wireless standard. See that I am in the middle of developing the same EBike wireless standard for TSDZ2.

I had my Garmin GPS unit on the handle bard already because I had our route planned and we were following it. I just had to go to wireless sensors configuration and click on discover new sensors and I got this ones from the Specialized EBike:


Note that the heart rate sensor is the one from my watch:


Then automatically the following main screens were added:


EBike main screen to control assist level, see battery status and light status:


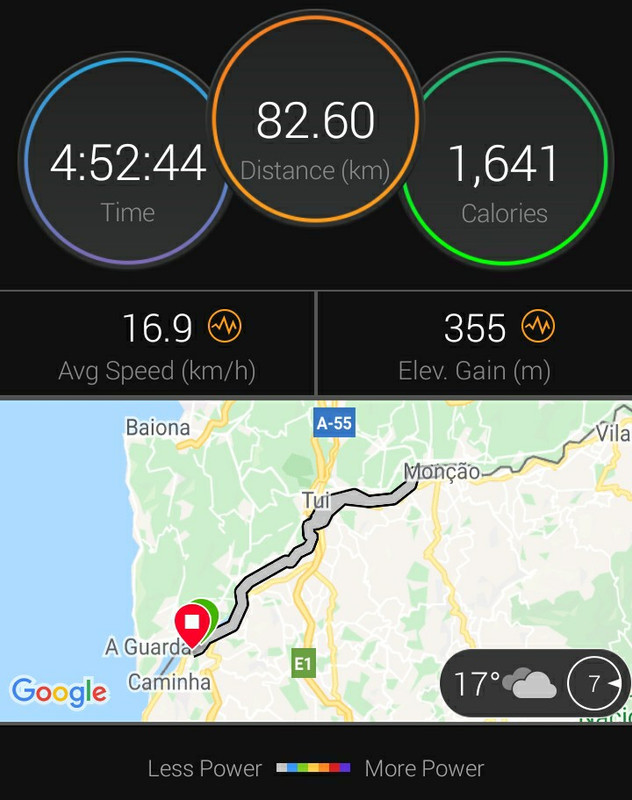
At the end of our ride, on the Garmin app, we can see graphs of fitness and cycling metrics but also the pedal human power, speed and cadence were recorded:


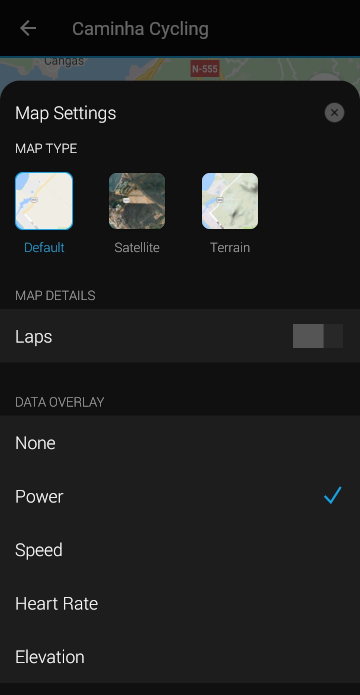
And interesting is that there is a map showing the route but with color gradients that we can select for some variables and the pedal human power was available:


Hi all

Thanks for sharing this very interesting project. I'm particulary interested in the remote for the Garmin edge. Do you think the firmware will also work with the NRF52810 MCU? It want to make a custom remote, and the NRF52810 package is easier to solder than the NRF52840 MCU that you used in the project.

Many thanks

Simon
 
simper said:
Hi all

Thanks for sharing this very interesting project. I'm particulary interested in the remote for the Garmin edge. Do you think the firmware will also work with the NRF52810 MCU? It want to make a custom remote, and the NRF52810 package is easier to solder than the NRF52840 MCU that you used in the project.

Many thanks

Simon
You will need to figure out by yourself. I think is very interesting getting people developing and doing this wireless sensors / actuators for cycling! Good luck.
 
casainho said:
Nice. I will try to find a video tutorial on FreeCAD Surface function.

The VLCD5 keypad has already arrived from china :thumb: .
I've started with a simple spacer that fits to the upper part of the pad. The resolution of my 3D printer is on it's limit here. :shock:

I wonder, what is the best way for the housing. I think, the simplest way is to keep the upper part, add a fixing for the VLCD5-switch-PCB to my spacer and design an extra part for the BT-Board/Button Cell and handlebar fixing. You'll need long thin screws for assembly then.

regards
stancecoke

Spacer VLCD5.JPG
 
stancecoke said:
The VLCD5 keypad has already arrived from china :thumb: .
I've started with a simple spacer that fits to the upper part of the pad. The resolution of my 3D printer is on it's limit here. :shock:

I wonder, what is the best way for the housing. I think, the simplest way is to keep the upper part, add a fixing for the VLCD5-switch-PCB to my spacer and design an extra part for the BT-Board/Button Cell and handlebar fixing. You'll need long thin screws for assembly then.
Yes, things are coming fast from China! :) -- now you need to buy the wireless board, or would you not like to test the final result and keep it for you?

I agree with your idea of the design. Screws, I can get them at local shop. I am ready to print and test!!

And the remote keypad I have with me, the battery cell is going very well. Every 2 or 3 days I measure the cell voltage and test - it always works, never fails.
 
casainho said:
simper said:
Hi all

Thanks for sharing this very interesting project. I'm particulary interested in the remote for the Garmin edge. Do you think the firmware will also work with the NRF52810 MCU? It want to make a custom remote, and the NRF52810 package is easier to solder than the NRF52840 MCU that you used in the project.

Many thanks

Simon
You will need to figure out by yourself. I think is very interesting getting people developing and doing this wireless sensors / actuators for cycling! Good luck.

Thanks for the reply. I will certainly try it myself! I will share my experiences on this forum when i'm done :wink:
 
stancecoke said:
I've started with a simple spacer that fits to the upper part of the pad. The resolution of my 3D printer is on it's limit here. :shock:
I have time to print tomorrow and I think my 3D printer is better - send me the files and I will post the pictures.
 
This is a copy of a reply to an email I received asking about the displays and firmware available for the TSDZ2.
I thought I would share my opinion on the different versions of firmware and the different displays

Hi Lee,

There are four different displays with three different firmware programs available for the TSDZ2. The 860C display only works with V1 but is by far the best display. The 850C display works with V1 and V19 but you can’t read it in the sun. The LCD3 display works with V19 and V20 and is a good display that works in the sun, but has to be disassembled to flash. The VLCD5 is a very limited display that works with the stock firmware and V20. But to change settings or view different information with V20 is very difficult. But the display doesn’t need to be flashed, only the motors need to be flashed and it’s easy and very quick to flash with different settings and works well with V20.

Version 1 is very refined but very complex and difficult to set up and to get working correctly. It does have the potential to be very good at some point down the road, but at this time lacks low RPM power and starting power. It also doesn't work well with a coaster brake, when you stop pedaling it stops but has a high rate of resistance when you pull back to brake, you have to move the pedals back forward 1 inch then pull back again and the resistance stops so you can brake.
It is the only version at this time that works on the 860C which is the best display.

Version 20 is very good, but it could use a few refinements. I believe this is the very best software for any setup.
I hope at some point someone will get version 20 to work with the 860C.

Version 19 is an older version that some people still like, but will never be improved, it does not work with coaster brake motors.

If you could take the good parts of version 1 and version 20 and get them to work on an 860C that would be the very best scenario.

Later,
Jeff

Elinx said:
jeff.page.rides said:
.... displays and firmware available for the TSDZ2.

There are four different displays with three different firmware programs available for the TSDZ2. ......
..
If you could take the good parts of version 1 and version 20 and get them to work on an 860C that would be the very best scenario.
There is a forgotten version of the OSF based on v0.20b1, but with some additions that are also inside v1.0.
That is the OSF BTversion of mspider65, that works with bluetooth and Android display.

I haven't been following the wireless forum, I didn't know that some code from V20 was being used. That's good to hear, I thought it was all code from V1. Can this version be flashed and used on the 860C without using any wireless devices? I have two hand cycles one has tried the VLC5 & the LCD3, both with V20, the other one has tried the LCD3, and 860C with V20 and V1. My wife's bike has a 850C and has tried V19 threw V1. We have used the displays and firmware versions in the last several months. It's a lot of work consistently changing systems but it's the only way to compare them accurately. Thanks to electrifybike.com for flashing them each time, and my wife and family for being my hands. As a weak handcyclest I notice things easier than others. And the TSDZ2 is 18" in front of my face, so can hear small changes and can touch the TSDZ2 anytime easily.
Top
6302 posts … 253
 
casainho said:
send me the files and I will post the pictures.

I've improved the design a little, but my 3d Printer doesn't work actually, I'm waiting for a spare part.
I've forked your repo and added the FreeCAD model and the exported stl-file:
https://github.com/stancecoke/ebike_wireless_remote/tree/master/3d_design

https://github.com/stancecoke/ebike_wireless_remote/blob/master/3d_design/VLCD5.stl

regards
stancecoke

advanced spacer VLCD5.JPG
 
TSDZ2 Fluid Cooling

I’ve been working with this all summer. With several different leaks, different pumps, different tubing, different fluid routing, different fluids, and other difficulties. I finally have a fluid made to fill-up brushless Motors and it is working the way I wanted to from the start with no leaks. I can ride at 700 - 850 Watts all day long and the motor never gets more than 10-20 degrees warmer than the outside air. With all the same steps, but with only fluid in the left side of the case, and no external addons will keep the motor at 30 to 50 degrees warmer than the outside air at 700-850 watts. So that means you can ride at high watts at 100 degrees outside and note worry about overheating. I use a led temp display attached to the bottom of the 860C. It has 2 probes and both temps show, one I leave out in the air on the front of the bike the other one is in the oil in the motor. This also allows you to use a throttle and still have a temperature sensor. It’s cooler, quieter and it’s smoother, but unfortunately like everything I had to learn it all the hard way.

When the riding season is over in about 60 days I will be doing a step by step how-to, with directions and pictures so those that want to tackle this should be able to do it without all the mistakes I had to go through. I’ve attached a couple of photos, so you can see what I’ve done. I also added a new 42 tooth chainring from https://www.eco-ebike.com/collections/drivetrain-pedals/products/42t-chain-ring-for-tsdz2-narrow-wide-10mm-offset-110-bcd-solid-e-bike That works great and costs less than the other brand.

I’m trying to decide if I want to go through the effort to offer a kit with all the parts and fluid needed for both types, internal only and external cooling. There was a lot of trial and error finding the right fittings, the right type of hose, the right fluid the right pump, and everything else. To get all the right parts I had to go through several different suppliers, no one-stop-shop here. It’s a lot of work, but If I decide to do this they will be offered through,
www.electrifybike.com and possibly www.eco-ebike.com
 

Attachments

  • TSDZ2 Water Cooling_01.jpg
    TSDZ2 Water Cooling_01.jpg
    108.1 KB · Views: 697
  • TSDZ2 Water Cooling_02.jpg
    TSDZ2 Water Cooling_02.jpg
    104.3 KB · Views: 697
  • TSDZ2 Water Cooling_03.jpg
    TSDZ2 Water Cooling_03.jpg
    83.2 KB · Views: 697
  • TSDZ2 Water Cooling_04.jpg
    TSDZ2 Water Cooling_04.jpg
    83.8 KB · Views: 697
vass said:
niceee,
I think for mtb the internal one would be cool :mrgreen: the external would brake fast
Just some questions?
The oil is inside the motor or the left side is the cover and were the controller (if it is dunno how you did the magic of not killing the electronics :) )... [i guess its in the motor
Did you have thermal pads also to help better heat transfer (if the oil is internaly on the motor i guess it makes sense to pass heat to external case)
This is off topic. Please discuss on appropriate thread, maybe on New "TSDZ2 Torque Sensor Central Motor".
 
stancecoke said:
I've improved the design a little, but my 3d Printer doesn't work actually, I'm waiting for a spare part.
I've forked your repo and added the FreeCAD model and the exported stl-file:
https://github.com/stancecoke/ebike_wireless_remote/tree/master/3d_design

https://github.com/stancecoke/ebike_wireless_remote/blob/master/3d_design/VLCD5.stl
I printed and I am very happy with the result - good job!!
I looked at the design file, it has operations that I am not aware of but that gives me the opportunity to learn - thank you!!

Now you can move forward as the part you did design is almost perfect (seems just a very little smaller in the X and Y axis) but I think it is perfect for this phase.
And my 3D printer is a Chinese one: Creality CR-10S PRO, which I think is now a regular technology, so, I think almost everyone will be able to 3D print with the cheap 3D printers.

I received 2 remotes for VLCD5 and this ones have a metal part instead the regular in plastic...

20200928-122643-2.jpg


20200928-123008-2.jpg
 
vass said:
niceee,
I think for mtb the internal one would be cool :mrgreen: the external would brake fast
Just some questions?
The oil is inside the motor or the left side is the cover and were the controller (if it is dunno how you did the magic of not killing the electronics :) )... [i guess its in the motor
Did you have thermal pads also to help better heat transfer (if the oil is internaly on the motor i guess it makes sense to pass heat to external case)

Regards,
Vass

jeff.page.rides said:
TSDZ2 Fluid Cooling

Yes it fills the complete left side of the case with the motor & controller. This fluid is made for this purpose. I tried most of the other cooling ideas list on the forums, they help but not enough to ride at high watts in warm temps. I am asking the TSDZ2 too do way more then it was designed too do. The reason I just keep trying to improve it is, the small size and the torque sensor. My handcycle with 3 batteries weighs 100 pounds and my backpack and I weigh 200 pounds so is moving 300 pounds. Then my arms are not strong at all. So I think it's great what can be done with the TSDZ2 with firmware and cooling.
 
casainho said:
I printed and I am very happy with the result ... And my 3D printer is a Chinese one: Creality CR-10S PRO

Great, nice to hear! I have a Geeetech A10 printer with the Marlin firmware. It's not very reliable, I had several problems with burned stepper drivers and even burned traces on the PCB. :shock: But it was cheap :wink:
The result depends on the slicer and extruder settings, too. I use a flow rate of 120% in the extruder settings to improve the adhesion of the first layer on the bed. Maybe this is the reason, why your parts are slightly smaller than mine...

regards
stancecoke
 
stancecoke said:
The result depends on the slicer and extruder settings, too. I use a flow rate of 120% in the extruder settings to improve the adhesion of the first layer on the bed. Maybe this is the reason, why your parts are slightly smaller than mine...
I am using Cura, standard settings.

It is not clear for me: will you continue the design or will you stop here?
 
casainho said:
I am using Cura, standard settings.
I'm using Repetier-Host with Slic3r. Repetier Host has implemented the cura engine, too, perhaps I'll give it at try.

casainho said:
will you continue the design or will you stop here?
I'll make a suggestion for the lower part, but it will take some time.

regards
stancecoke
 
casainho said:
will you continue the design or will you stop here?
I'll make a suggestion for the lower part, but it will take some time.
[/quote]
No problem.
I will keep trying the prof of concept I have here for the remote, to see for how long the battery last.

And my priority is to work on the EBike wireless firmware.
 
stancecoke said:
Repetier Host has implemented the cura engine, too, perhaps I'll give it at try.

The spare part for my printer arrived today, so I've tested the cura engine. The result is really nice :thumb:

regards
stancecoke

spacer VLCD5 with cura engine.JPG
 
stancecoke said:
stancecoke said:
Repetier Host has implemented the cura engine, too, perhaps I'll give it at try.
The spare part for my printer arrived today, so I've tested the cura engine. The result is really nice :thumb:
Yes, really nice print!! Black PLA would be better ;)
 
Back
Top