You are using an out of date browser. It may not display this or other websites correctly.
You should upgrade or use an alternative browser.
You should upgrade or use an alternative browser.
4motus / cromotor DH bike build
- Thread starter crea2k
- Start date
kudos
10 kW
It's been a week and no update! Hope it's all going well, you're probably just busy I'm sure......
Edit: Have you figured out how many 6S 5Ah LiPo bricks you can squeeze in there yet?
Kudos
Edit: Have you figured out how many 6S 5Ah LiPo bricks you can squeeze in there yet?
Kudos
I have been making some battery parallel leads, but that's about it. I took the front wheel to the bike shop and they told me they couldn't true it as their stand is only for the cheapo 9mm hubs, so having to get an adaptor shipped in from the USA so I can put it on their stand. I think if I took it to a shop in the peak district they would have the gear to do it, but here they just seem to sell budget bikes that if you ever took them up a mountain would fall to bits lol.
MAGICPIE3FOCUSPOWER
10 kW
You mean you have 20mm axle right?
Well I have a 9mm QR truing stand, but I have just use the 9mm QR axle to fastened the 20mm hub for truing the 20mm hub wheel.
So it quite easy no need for expensive 20mm truing stands or 20mm adpaters 8)
Well I have a 9mm QR truing stand, but I have just use the 9mm QR axle to fastened the 20mm hub for truing the 20mm hub wheel.
So it quite easy no need for expensive 20mm truing stands or 20mm adpaters 8)
skeetab5780
1 MW
Tench said:I trued my 20mm front wheel in the forks, it also ensures perfect centralising.
I just recently did this also with great success, its probably the best spinning wheel I own now too.
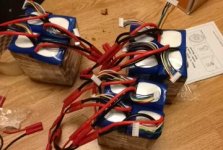
Its not that I cant do it myself in the forks, as its not a hard process with the zip ties, I just dont have the patience to sit there and do it thats all lol. I dont think the guy tried it with a regular qr through it, but I managed to get some adaptors off ebay for like $8 from USA, so can get them to do it then when they arrive. The balance leads have arrived now, so I can start soldering those together to make the spagetti wiring loom. Iv been doing the big power cables for the battery packs, they are just a bit slow going as they are so big and I get soldering paste all over the place.
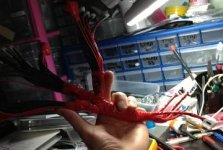
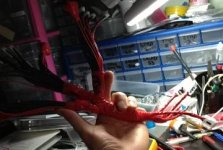
Tonight I have been building this lovely spiders nest, I finally gave up on the large cabling for the battery packs, as the finished product was just crap and never pushed together properly, I think the solder gets into the connectors or something, so iv just gone and bought a load of ready made ones, as its waaaaay less of a headache and im less likely to have the bike to go up in flames. The balance leads are rather confusing as the lead colours don't match the diagram, so im just attempting to do it by the pin number instead.
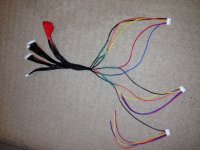

By the way the red blob is just the spare two connectors wrapped in electrical tape, I was going to just cut them off, but then didnt fancy any of the wires shorting together if I heatshrunk it, so just wrapped it up to stop the pins touching anything like a bolt head and shorting out.
ridethelightning
1 MW
- Joined
- Jul 21, 2013
- Messages
- 2,010
currently in Borneo right now.
when i come back i gonna bring a bunch of locAL moto stuff with me and start a 4motus build . this looks so awesome.
my cromotor is already waiting for me at home!
when i come back i gonna bring a bunch of locAL moto stuff with me and start a 4motus build . this looks so awesome.
my cromotor is already waiting for me at home!
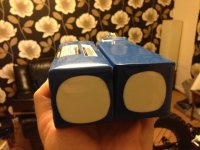
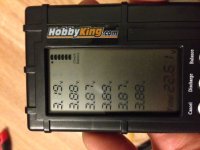
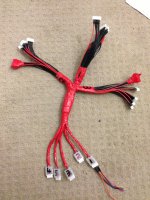
After hearing that the controller could well be on the way soon, iv been busy finishing the loom for the battery balance charging. Its all heatshrink wrapped, then wrapped in electrical tape too, just to be double sure and to try and make it a bit tougher. Iv also got some hobbyking plug saver things on the end of the plugs too, to make them a bit stronger, so I don't go pulling the wires out of the plugs if I need to remove them from the BMS, I also got a few packs to go on the batteries too. I have cut a female plug off and have plugged it into the loom, I just need a male 6s plug now to plug into the other end, so I can go over it and double check the connections with the multimeter before I go plugging it into any batteries, as its been done in two sittings, both of them late at night, and I noticed tonight that the last wire from the first night was in the wrong place, so I made sure I went over everything well first this time, but I will test the continuity with the multimeter on each cable as per the diagram for a third time before I plug it in. Iv also used a marker pen to write on the plug savers so I know what port on the BMS they need to be going into, as 5 is different to the others, so don't want to mix then up, iv also written on the bundles of 6s connectors so I know which bank of packs it plugs into as the wiring for each of the banks is different too.

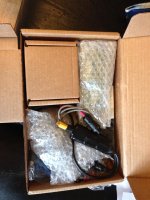
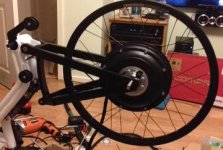
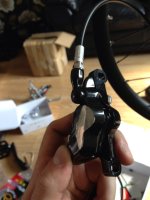
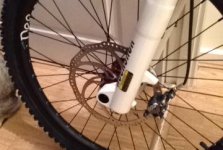
Quick update.....the front wheel is away getting sorted at the wheel builders as I crossed the spokes wrong apparently, he is also balancing it for me. I put the front brake calipers and lever on today, ready for the wheel coming back. I put the white industries freewheel on and noticed it doesn't seat all the way down so the brake disk on the other side catches the frame, so I'm going to have 5mm milled off the motor freewheel mounting boss so it sits closer to the wheel. The controller is finally in the UK and just needs to clear customs, once that's wired up I can get the rear wheel balanced then as it doesn't spin that great by itself.
Ok so on with the learning curve.......the White Industries freewheel fits, but pokes out too far, so I cant get the brake disk on the other side as it catches on the frame, so I came up with a solution, I took the motor to bits, removed the freewheel mounting boss and took it to an engineering company, they charged £10 and gave me it back an hour later with 5mm machined off the top, so now it fits perfectly.
This is how it looked before
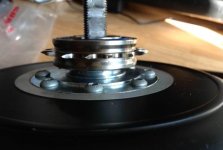
and after
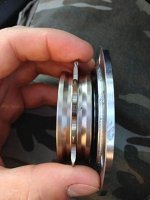
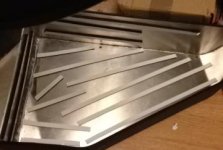
This is what the inside of a brand new cromotor looks like
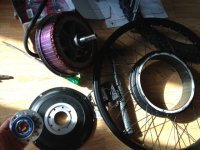
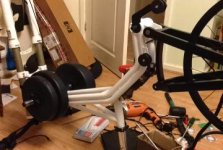
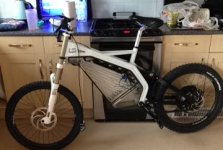
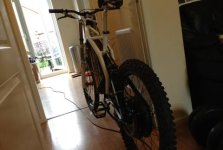
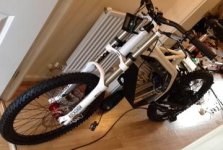
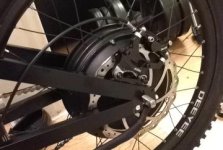
The problem solving continues........so.....the Avid rear calliper is too wide to fit in just about any position, no matter what disk spacing I use, its either too close to the frame, or too close to the motor cover, so iv given in and got a second 203mm disk for the back too, and also a couple of different calliper mounts, so it pushes the calliper out past where the motor cover is, this should give it plenty of space then as the motor cover should be out of the way. The front wheel is currently at the builders still getting sorted out, so for now I have a 14kg dumbbell sat on the front forks to keep the bike level, as the motor weighs so much that the bike wont sit on the seat / bars as the motor wants to wheelie the bike all the time lol, should be better once the batteries are in as it will be more balanced then.
I ended up having to grind quite a bit of metal off the back of the caliper to make it sit straight, as even with the 203mm disk the bottom of the caliper still caught on the motor cover.
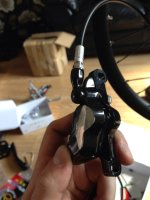
This is how it looked before

and after

This is what the inside of a brand new cromotor looks like

The problem solving continues........so.....the Avid rear calliper is too wide to fit in just about any position, no matter what disk spacing I use, its either too close to the frame, or too close to the motor cover, so iv given in and got a second 203mm disk for the back too, and also a couple of different calliper mounts, so it pushes the calliper out past where the motor cover is, this should give it plenty of space then as the motor cover should be out of the way. The front wheel is currently at the builders still getting sorted out, so for now I have a 14kg dumbbell sat on the front forks to keep the bike level, as the motor weighs so much that the bike wont sit on the seat / bars as the motor wants to wheelie the bike all the time lol, should be better once the batteries are in as it will be more balanced then.
I ended up having to grind quite a bit of metal off the back of the caliper to make it sit straight, as even with the 203mm disk the bottom of the caliper still caught on the motor cover.

Ohbse
10 kW
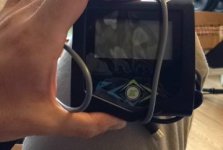
Could you post a photo of your charging inductor that Adaptto supplied?
Looks like you have a lot more caps than I do... unless that's just a quirk of the photo. 30a or 70a rated coil?
Nice to see things progressing
Looks like you have a lot more caps than I do... unless that's just a quirk of the photo. 30a or 70a rated coil?
Nice to see things progressing
ridethelightning
1 MW
- Joined
- Jul 21, 2013
- Messages
- 2,010
great to see the controller finally arrived!
itl definately be worth the wait.
itl definately be worth the wait.
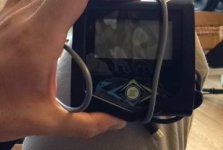
So the Domino throttle and microswitch have a strange quirk when used with the Adaptto Max-E . What happens is when you twist the throttle, the microswitch clicks and then you turn the throttle which is a potentiometer. The problem is the way the microswitch works for regen / ebrake.......when there is zero throttle the throttle sits on the microswitch and presses it, this turns the switch off........so the brake / regen is off, when you twist the throttle, the microswitch clicks and competes the circtuit, activating the ebrake, so the controller thinks what the hell is going on here and you get a !THR! error on the screen. Its only when I took the throttle to bits and manually turned the potentiometer and held down the switch I realised what was going on.....so this gives you two options, you can either disconnect the microswitch, and loose regen / ebrake, unless you rig up another way or doing it, or do what I am doing and swapping it for a double throw switch. This switch has three terminals, so click the switch and one terminal is live, release the switch and the other pole is live, so im just going to wire up to the pole that is live only when pressed, so the regen will only activate when the throttle is not on.
I found the following one, that is basically the same design :
http://www.ebay.co.uk/itm/181208899482?_trksid=p2059210.m2749.l2649&ssPageName=STRK%3AMEBIDX%3AIT
CHERRY - DC3C-A1LB - MICROSWITCH, SPDT, SHORT LEVER
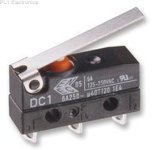
I just need to remove the lever from the tip and it should be good to go, as it looks identical to the one in there. I even noticed there is another pole on the switch in there, but its had the contact cut off it at the factory presumably, I put a multimeter on it, and unfortunately the middle pole isn't live, so they must use the same chassis for various switches, as this one only seems to be a single throw switch.
It should just be a matter of soldering in the new switch and then the regen will activate once the throttle reaches zero, I liked this throttle because of that, as it means you don't have to manually turn it on
I found the following one, that is basically the same design :
http://www.ebay.co.uk/itm/181208899482?_trksid=p2059210.m2749.l2649&ssPageName=STRK%3AMEBIDX%3AIT
CHERRY - DC3C-A1LB - MICROSWITCH, SPDT, SHORT LEVER

I just need to remove the lever from the tip and it should be good to go, as it looks identical to the one in there. I even noticed there is another pole on the switch in there, but its had the contact cut off it at the factory presumably, I put a multimeter on it, and unfortunately the middle pole isn't live, so they must use the same chassis for various switches, as this one only seems to be a single throw switch.
It should just be a matter of soldering in the new switch and then the regen will activate once the throttle reaches zero, I liked this throttle because of that, as it means you don't have to manually turn it on
ridethelightning
1 MW
- Joined
- Jul 21, 2013
- Messages
- 2,010
interesting about the micro switch.
i believe its purpose is a safety to stop the throttle from working incase of a water leak short or something when at wrest.
interesting you chose to run the regen through the switch.
i personally would have it on a thumb throttle on the other hand grip, to take full advantage of the varyable regen feature, which is really awesome.
btw. perhaps a dumb question, but is the frame built for a 1,1/8" steerer ?
im currently hunting for some moto forks that would fit the frame here in malaysia, although i got very put off when i tried to lift one. the alloy ones may be a little lighter...
im hoping to use a rear moto shock too, but they seem to be hard to get in the preferred 220mm length for this frame. the shortest iv found so far is 250mm.
iv so far found good rims and tyres here though. have fallen in love with some maxxis diamonds, 90/70. had not seen them in australia before.
great to see this come together so nicely, will be great to see some vide or action shots to come
Oh I see, I didnt realise it was for that, I thought it was for regen, it does work for regen, but the problem is that im having is once I go back to zero on the throttle and the regen kicks in the throttle then wont work again until the wheel has come to a stop, its as though regen comes in and then wont turn off until the bike stops.
The thing is id only ever use variable regen when in the Peak District coming down large hills, round here is totally flat so if you take the power off you come to a stop anyway as there is nothing to roll down.
I think they are, iv got Rok Shox Boxers on the front, so whatever they are.
I have a 3" across Halo Contra on the back and a Halo Choir Boy up the front, it hasn't arrived yet, so I have some cheap thing on there at the moment for testing purposes.
to me the 4motus looks like one of the best frames for fast ebikes with a very nice battery space and a good rear damper position (should be good for the big unsprung motor mass).
i hope the finishing process works well for you so you can ride soon and tell us how the bike feels
i hope the finishing process works well for you so you can ride soon and tell us how the bike feels
Similar threads
- Replies
- 82
- Views
- 15,006
- Replies
- 298
- Views
- 74,270
- Replies
- 79
- Views
- 20,632


